
Introduction
Plaster delamination “bubbles” are areas where the top plaster coat has lost adhesion to the substrate and forms a raised blister that can pop or tear back. This usually means moisture, weak bonding, or movement has separated layers; check the surface and product instructions to confirm causes before you act. In many cases you can cut back and reattach small blisters without ripping out whole walls, but you need to judge adhesion, underlying damage, and whether hidden moisture or structural issues exist.
Immediate signs to look for are a hollow sound when tapped, visible cracking at edges, and staining that suggests water; hidden risks include mold, continued moisture intrusion, or corroded lath that will force a larger repair. There can be regulatory or disclosure implications for major delamination on rental or sale properties, so if you’re unsure about safety, moisture origin, or legal obligations check local rules or consult a pro.
Key takeaways
- Identify bubbling plaster early: moisture, movement, or material incompatibility threaten substrate.
- Assess severity before tear-out: cutback decisions minimize damage and preserve structure.
- Safety first: shut off moisture sources and wear PPE during inspection.
- Document conditions and regulatory obligations: may affect permits, reporting, or heritage status.
- Prepare for potential long-term fixes: patches may be temporary versus permanent.
- Use non-tear-out methods when safe: flattened bubbles, reattach, and backfill with care.
Table of Contents
- Introduction
- Key takeaways
- What Plaster Delamination “Bubbles” Are and Why They Matter
- Common Causes — Moisture Pathways, Movement, and Materials Incompatibility
- Assessing Severity and “Cutback” Decisions
- Tools, Materials and Safety Precautions for Non-Tear-Out Repairs
- Step-by-Step Method to Reattach Bubbles with Minimal Tear-Out
- Short-Term Patches Vs Permanent Solutions — Risks and Expectations
- Heritage, Regulatory and Documentation Requirements
- Troubleshooting, Common DIY Mistakes and Cost‑effective Small Repairs
- Conclusion
- FAQ
What Plaster Delamination “Bubbles” Are and Why They Matter
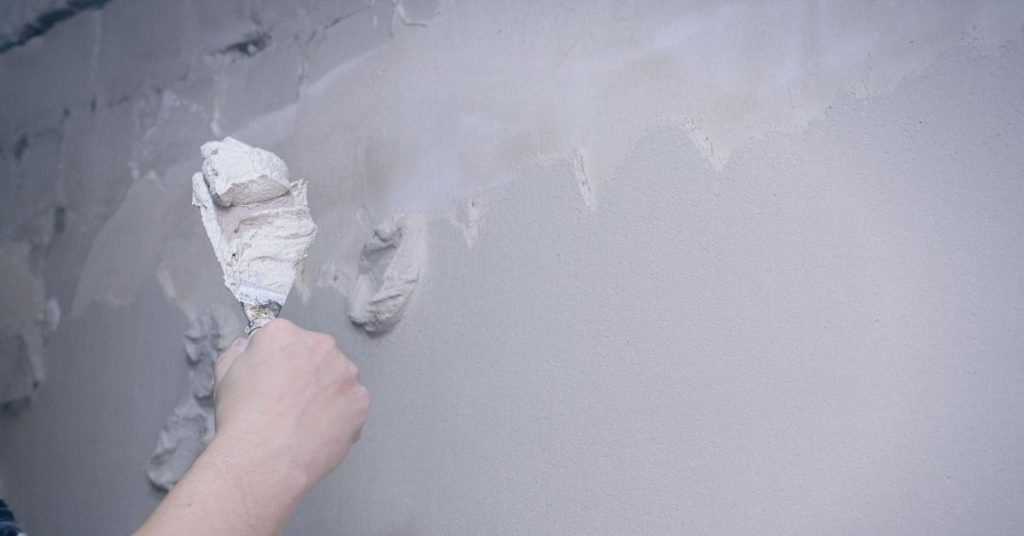
Delamination or “bubbling” happens when a discrete layer of plaster lifts from its backing; visually these appear as soft, rounded blisters or raised areas often forming at corners, edges, or over damp patches and are distinct from hairline cracks or surface efflorescence. They can be caused where the bonding coat lost adhesion or the substrate failed rather than a simple surface defect.
This matters beyond cosmetics because a lifted plaster layer often signals moisture ingress, adhesive failure, or substrate compromise that can hide mold, rot, or weakened framing behind the finish. Before patching, check moisture and substrate condition (refer to meter readings, manufacturer instructions, or material data sheets) because simply skimming over bubbles usually leads to re-failure and can mask structural issues that need correcting first.
Visual symptoms to spot early
Plaster delamination, often seen as ‘bubbles’, starts with subtle signs. Inspect your walls closely for:
Blisters: Small, raised areas that look like blisters on the wall’s surface.
Flaking: Tiny pieces of plaster coming off, usually around edges or corners.
Perform simple tap tests to check for hollow-sounding areas. Use a wooden spoon or similar object to gently tap the wall. A dull thud indicates delamination.
Types of delamination (moisture, adhesive, mechanical)
Delamination can occur due to different reasons. Understanding the cause helps in choosing the right repair method:
Moisture-driven: Bubbles often appear over damp patches or near leaks. They may have a musty smell and could indicate mold growth.
Adhesive failure: Delamination occurs when plaster loses its bond with the substrate (wall surface). This can happen due to poor preparation, incompatible materials, or age-related deterioration.
Mechanical damage: Impact or vibration can cause delamination. This is common in high-traffic areas or near vibrating machinery.
Common Causes — Moisture Pathways, Movement, and Materials Incompatibility
Water can get into plaster from many routes: roof or plumbing leaks, rising or penetrating damp from foundations, and condensation where vapor barriers or cavity ventilation are inadequate; track likely pathways and how vapor moves through cavities to where plaster is failing. Structural movement—settlement, wall flex, or timber shrinkage—adds cyclical stress that breaks adhesive bonds and opens delamination zones.
Past repairs and material mismatches compound problems: incompatible skim coats, non-breathable sealers, or modern repair mortars on historic lath can trap moisture or stress layers. Use visual signs, moisture measurements, and any prior reports to map cause and then select fixes that address the moisture path, allow compatible vapor movement, and accommodate expected movement rather than only treating the surface.
Moisture sources and migration pathways
Water finding its way into your walls is the root cause of most plaster delamination issues. Here’s how it happens:
Roof leaks can seep down through ceilings, while plumbing faults may drip or burst, soaking wall cavities. Condensation forms when warm, moist air meets cold surfaces, like in uninsulated exterior walls.
Ground dampness, or rising/penetrating damp, can also be a culprit. Water travels up through porous materials, driven by capillary action, and finds its way into plaster. Vapor barriers and wall cavities can trap this moisture, exacerbating the problem.
Structural movement, impact and vibration
Movement in your home’s structure can stress plaster, leading to delamination. Settlement over time, timber movement due to changes in humidity, or repeated vibrations from heavy machinery or traffic can all cause issues:
Settlement occurs as a house ages and its foundations shift. This can cause cracks in plaster that allow moisture ingress.
Timber framing may move with changes in humidity, putting pressure on attached plaster. Repeated vibrations, like those from heavy traffic or machinery, can also cause microscopic cracks that let moisture in and weaken the bond between plaster and substrate.
Material interactions and previous repairs
Using incompatible materials for repairs can trap moisture and accelerate delamination. Here are some common pitfalls:
- Cement-based patches on original lime plaster: Cement is waterproof, trapping moisture in the porous lime plaster beneath, leading to decay.
- Synthetic-based patches: These can break down over time, losing their flexibility and allowing cracks to form as the substrate moves.
- Moisture-retardant barriers: If not installed correctly or used with incompatible materials, they can trap moisture instead of preventing it from entering.
- Aging substrates: Lath, plywood, and gypsum board degrade over time. Old materials may absorb more moisture, weakening their bond with the plaster.
- Incompatible skim coats: Applying modern, fast-setting skim coats over old, slow-curing plaster can cause stress as they set at different rates.
Assessing Severity and “Cutback” Decisions
Deciding whether to cut back or reattach starts with evidence: map the area, test for moisture, probe to see if the plaster lifts easily, and inspect the backing (lath, board, or masonry) for rot or loss of fasteners. The extent of delamination, substrate integrity, and whether the moisture source is controlled determine if you can conserve the plaster or need selective removal.
Follow a protocol of non-invasive moisture checks, small probe tests, and stepwise mapping rather than using a fixed depth rule; remove only what’s loose and work back to sound edges, containing dust and debris. Record readings and photos, and if tests show persistent dampness or compromised backing, stop and reassess—repair strategy should be driven by those diagnostics, not guesswork.
When minimal cutback or re-bonding is appropriate
If you’re lucky, your plaster delamination might be small and isolated. Here’s when you can try to reattach without major tear-out.
Inspect for: Dry substrate, sound peripheral key (edges), and small, isolated delaminated zones.
Safe tests: Gently probe the area with a flathead screwdriver. If it doesn’t detach easily, you might be able to reattach. Use a moisture meter to ensure the area is dry.
When to cut back or remove to sound material
Sometimes, full cutback is necessary due to extensive damage. Consider your material choices before deciding the extent.
- Extensive hollowness: If more than 50% of the area is delaminated, consider full cutback. Check for hollow sounds when tapped.
- Ongoing moisture: If moisture readings are high or you see signs of dampness, efflorescence, or rot, cut back to sound material and address the moisture source first.
- Multiple layers failing: If several layers are delaminating, it’s safer to remove all damaged material.
- Manufacturer guidance: Check if your plaster has specific recommendations for repair. Some plasters may not reattach well after extensive delamination.
- Avoid: Don’t try to reattach over weak or compromised substrate. This can lead to further damage and failure.
Tools, Materials and Safety Precautions for Non-Tear-Out Repairs
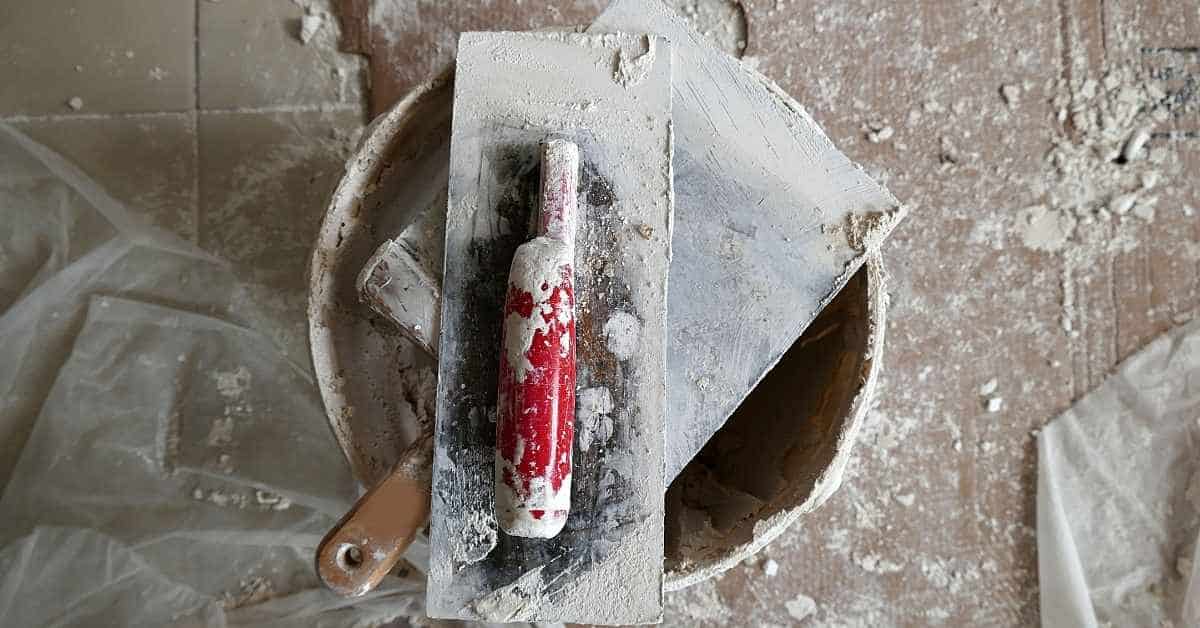
Bring a concise kit: putty knives, scrapers, cold chisels for small cutbacks, a hammer, rubber mallet, moisture meter, straightedge, level, tape measure, utility knife, and small brushes for cleaning; store tools safely and keep blades covered between uses. Have containment supplies (plastic sheeting, tape) to control dust and protect adjacent finishes during targeted work.
Choose repair materials compatible with your substrate—consult product labels or data sheets for plaster-compatible adhesives, lime- or gypsum-based patch mortars, and bond coats that match the original plaster’s permeability and stiffness. Wear appropriate PPE for dust and chemical exposure, ensure ventilation, test adhesion on a small area, and verify substrate condition (dampness, lead paint, occupancy limits) before proceeding or calling a pro.
Tools and consumables checklist
Before you start any repair work, ensure you have all the necessary tools and materials at hand. This will save you time and prevent potential mistakes.
- Scraper: To remove loose material. Choose one with a sharp edge for better control.
- Injection gun: For applying bonding agents into cracks or voids. Ensure it’s clean and in good working order.
- Brushes: Various sizes for applying bond coats, skim coats, and sealers. Synthetic bristles work best with most materials.
- Small mixer: To mix bonding agents and mortars. A drill-mounted mixer is ideal for better control and speed.
- Putty knives (various sizes): For spreading and smoothing repair mortars. Stainless steel is durable and won’t rust.
- Scrapers (various sizes): To remove loose material and create sound edges for repairs. A sharp edge ensures clean cuts.
- Trowels (various sizes): For applying and spreading repair mortars. Choose ones with a comfortable handle for better control.
- Bonding agents: Compatible with your substrate (lath, gypsum board, concrete, brick). Follow manufacturer’s instructions for mixing and application.
- Repair mortars: Match the composition of your existing plaster. Lime-putty, gypsum-based, or Portland cement-based mortars are common choices.
Quick rule: Always cross-check product instructions to ensure compatibility with your substrate and existing finishes.
Safety, dust control and hazardous-material checks
Proper safety measures and material checks are crucial to prevent health risks and ensure a successful repair.
- Dust mask: Essential for protecting against plaster and concrete dust. Choose one rated N95 or higher for better protection.
- Goggles: To protect your eyes from debris and dust. Safety glasses are not sufficient.
- Protective clothing: Long sleeves, gloves, and long pants to prevent skin contact with caustic materials and dust.
- Lead paint test kit: Before disturbing old finishes, test for lead using a certified test kit. Lead is hazardous and requires professional abatement if present.
- Moisture meter: To check for dampness in the substrate before applying repairs. This helps prevent re-delamination due to excess moisture.
- Electrical safety: Turn off power at the main panel before working near electrical outlets or switches to prevent electrocution.
- Ladder safety: Use a sturdy ladder with non-slip feet. Keep it level and secure while working at heights.
- Ventilation: Ensure proper ventilation in the work area to prevent the buildup of harmful fumes from caustic or cementitious products.
Quick rule: Always prioritize safety over speed. The wrong material or inadequate protection can lead to serious health issues and repair failures.
Step-by-Step Method to Reattach Bubbles with Minimal Tear-Out
Start with diagnosis: map bubbles, determine likely moisture origin and backing type, and document areas so you can prioritize repairs where the substrate is sound and moisture is controlled. Isolate the work, protect adjacent finishes, and remove only loose plaster until you reach a firm edge—avoid widening the cut without testing the underlying condition.
Use compatible consolidants and bonding mortars selected for the original plaster type and environment, apply a consolidant to weak layers, and create a low-profile mechanical key (mesh or veneer key) where needed before finishing with a matching finish coat. Allow proper cure under controlled humidity, perform a tactile adhesion check, photograph the repair, and follow up with moisture remediation steps to reduce risk of recurrence.
Step-by-Step Process
Follow these practical steps to reattach plaster bubbles with minimal tear-out, ensuring a secure bond and preserving as much sound material as possible.
- Preparation: Put on safety gear (dust mask, goggles), cover adjacent areas, and set up proper ventilation. Safety first, keep dust to a minimum.
- Diagnose the area: Identify bubble origin, map affected zones, and assess plaster type/backing coat. Refer back to your initial diagnostic steps if needed.
- Main work: Remove only loose material using a scraper or chisel, then clean the surface with an appropriate etchant/primer to promote bonding.
- Re-bonding: Choose a breathable, compatible bonding agent (masonry primer, plasterbone consolidant) and apply as directed. Consider using low-profile mesh or veneer plaster keys for added support.
- Consolidation & Finishing: Apply consolidant to weak layers, use graded repair mortars to blend seams, re-lathe/feather-edge the repair, and apply a suitable finish coat. Monitor curing conditions closely.
- Final Checks: Perform tactile/visual tests to verify bond strength, document with photos, and provide maintenance guidance. If unsure, consult a professional.
Preparation and Substrate Diagnosis
Before starting repairs, prepare the area and diagnose the substrate to ensure minimal tear-out and optimal bonding.
Allow the plaster to dry completely before proceeding. Use a moisture meter if unsure. Moisture is your enemy here, so be patient.
Remove any loose material using a scraper or chisel, being careful not to damage surrounding areas. Probing the edge with a flathead screwdriver can help establish where bonding is sound and needs no removal.
Clean the surface with an appropriate etchant/primer to promote bonding. This step is crucial for a strong re-bond.
Re-Bonding Techniques
Use non-destructive re-bonding options to reattach bubbles without full-depth removal. Choose the method that best suits your situation.
Adhesive injections are ideal for small voids and cracks. Use a syringe or injection tool to apply the adhesive directly into the gap, ensuring it reaches both sides of the delamination.
For larger areas, consider using surface-applied bonding slurries or pinning. Apply these materials evenly across the surface with a trowel or brush, following manufacturer guidelines for application and curing times.
Mechanical keys, like low-profile mesh or veneer plaster keys, can provide additional support. Embed these into the bonding agent while it’s still wet to create a stronger mechanical bond.
Finishing, Feathering and Monitoring
Once re-bonded, finish the repair by skimming, texture-matching, and monitoring for recurrence to prevent future issues.
Use a trowel or hawk to apply a thin layer of finish plaster, feathering the edges to blend with surrounding areas. Match the texture as closely as possible to ensure a seamless look.
Monitor the repair over the following weeks and months. Keep an eye out for any signs of recurring delamination, such as new bubbles or cracks. If you notice anything unusual, address it promptly to prevent further damage.
Manage curing conditions carefully, maintaining appropriate humidity levels and protecting the repair from excessive heat or cold. This will help ensure a strong, durable bond.
Short-Term Patches Vs Permanent Solutions — Risks and Expectations
Short-term cosmetic patches can level surfaces and temporarily improve appearance or adhesion, but they don’t address root causes like leaks, trapped moisture, or failing backing and therefore have limited useful life. Understand that a cosmetic skim or surface primer is a stopgap; if moisture or substrate issues persist you should expect reappearance of bubbles.
Decide based on evidence: visible moisture, ongoing efflorescence, or repeated failures mean you should move from temporary repair to full remediation that documents moisture control and substrate correction. If unsure, check product data sheets and consider a professional diagnostic before investing in what will only be a temporary fix.
When a quick patch is acceptable
A short-term patch can be an acceptable solution in certain situations. It’s best used when:
Dampness is not present or has been fully addressed.
The affected area is small and isolated, with no signs of spreading delamination.
You plan to follow up with a permanent repair within a reasonable timeframe (e.g., within the next year).
When only a permanent, evidence-backed repair will do
A temporary patch won’t cut it in these scenarios. You’ll need to address the root cause for a lasting solution:
Persistent dampness or rising damp.
Multiple affected areas or large-scale delamination.
Insurance requirements, heritage compliance, or other external factors demand a thorough repair.
Heritage, Regulatory and Documentation Requirements
If the property is listed, in a conservation area, or covered by local preservation covenants you must determine regulatory obligations and consult the appropriate heritage officer or planning authority before starting repairs. Matching original materials and textures can be required for authenticity and long-term compatibility, so establish acceptable substitutes only after checking conservation guidance or product data sheets.
Document everything: pre-work condition photos, material analysis, scope and methods, and post-work records that include product data sheets and as-built notes for future owners or audits. When in doubt about permits, reversible techniques, or appropriate conservation approaches, contact the responsible authority or a conservation specialist to avoid inadvertent non-compliance.
Material selection and conservation best practice
The right materials can preserve your property’s heritage and prevent future issues. Here are key considerations:
- Lime-based plasters: Use for historic work, as they’re breathable and compatible with old materials. Look for products with high lime content (e.g., NHL 3.5 or NHL 5). Avoid gypsum-based plasters which can cause cracking.
- Matching texture: Replicate the original finish using tools like hawks, trowels, or sponges. Practice on scrap pieces first to get it right.
- Original binders: If possible, use binders similar to those in the existing plaster (e.g., lime putty, natural hydraulic lime). Avoid modern cements which can stain and weaken bonds.
- Pigments: Match original colors using natural or synthetic pigments. Test on small areas first to ensure compatibility.
- Avoid: Using modern plasters with high cement content, as they can cause efflorescence (white stains) and weak bonds.
Reporting, evidence and handover documentation
Thorough documentation supports compliance, warranties, and future owners. Here’s what to record:
Before/after photos: Take high-quality images of the area before and after work. Include wide shots and close-ups.
Moisture readings: Document initial moisture levels using a moisture meter. Retest post-repair to ensure no trapped moisture remains.
Product data sheets: Collect datasheets for all materials used, including plasters, adhesives, and primers. These support warranties and future maintenance.
Simple written notes: Keep a log of work done, dates, and any issues encountered. This helps future owners and supports insurance claims if needed.
Troubleshooting, Common DIY Mistakes and Cost‑effective Small Repairs
Start troubleshooting by confirming the root cause—moisture, movement, or incompatible materials—using moisture checks and substrate inspection before attempting repairs; treating symptoms without this step is the most common reason repairs fail. For small delaminations, efficient options include spot-bonding, compatible skim patches, or mesh-reinforced repairs that keep costs down while addressing adhesion.
Avoid frequent DIY errors: don’t apply plaster to damp surfaces, use incompatible bonding agents, or skip proper curing and adhesion tests—consult product labels and perform a tack test. If moisture readings remain elevated or delamination recurs, record your findings with photos and escalate to a professional assessment rather than repeating temporary fixes.
Frequent pitfalls to avoid
Here are some common mistakes that lead to recurring plaster delamination issues. Avoid these for a durable, long-lasting finish.
- Repainting over wet or loose plaster: This traps moisture and prevents proper adhesion. Always ensure the surface is dry and sound before painting.
- Using incompatible cementitious fillers: Incompatible materials can cause delamination. Stick to compatible, high-quality fillers for best results.
- Insufficient drying time: Rushing the process leads to trapped moisture and weak bonds. Allow adequate drying time between steps.
- Ignoring substrate movement: Cracks or movement in the underlying surface can cause delamination. Address these issues before applying plaster.
Avoiding these pitfalls will help you achieve a strong, lasting bond with your plaster.
Low-cost fixes and when they make sense
When dealing with minor delamination issues, there are several budget-friendly tactics you can employ. However, it’s crucial to know when these fixes are enough and when professional intervention is necessary.
For small bubbles or areas of delamination, local re-bonding techniques like injection or trowel application of adhesive can be effective. These methods allow you to target the problem area directly without extensive tear-out (refer to our earlier section on Re-bonding techniques).
Feathered skims with compatible patching plaster and fiber-reinforced mesh repairs can also help strengthen weak areas. Additionally, applying low-cost primers or sealers can improve adhesion and moisture resistance.
However, saving costs at the expense of quality is false economy. If delamination is extensive, if there are signs of structural damage, or if you’re unsure about the cause, it’s best to engage a professional. They have the expertise and tools to assess and address these issues effectively (see our section on When only a permanent, evidence-backed repair will do).
Conclusion
Handle delamination with care now to protect safety, prevent further damage, and keep the look. Small, controlled repairs will be more durable if you address moisture and movement at the source and avoid rushing through steps.
Check and proceed in plain steps: assess how severe the bubble is and whether cutback is appropriate, verify moisture and movement risks, gather the right non-tear-out tools and materials, test a quiet patch in a hidden corner, clean and dry the area, mark your limits, reattach with proper compound and backing, and let it cure with patience while monitoring for new signs of trouble.
Avoid common mistakes like skipping moisture checks, rushing the reattachment, or forcing a patch over unstable backing. Follow basic safety rules: wear eye protection and a mask, work in a well ventilated area, seal and protect surrounding surfaces, and pause if you detect excessive movement or ongoing leaks. Always test a small area first and never push a repair beyond its capacity to stay bonded and dry.
If you see persistent moisture, structural movement, or if the material is historic and under regulatory oversight, bring in a professional. When in doubt, err on the side of staged, reversible work rather than hard-to-reverse fixes. Stay deliberate, stay safe, and you’ll protect both the wall and the asset it’s part of. You’ve got this.
FAQ
What causes bubbling plaster on older walls and how can I identify the culprit quickly?
Bubbles usually come from moisture, movement, or old plaster that doesn’t bond well to a backing sheet. Look for damp patches, continuous sweating, or cracking that runs behind the bubble. If you can, check for soft edges around the bubble and any loose backing paper or lath.
What immediate indicators signal hidden risks I should not ignore?
Active moisture, mold, or stains around the bubble means more trouble below the surface. If the area feels soft, spongy, or powdery when pressed, stop and reassess. Don’t push the bubble back in place if you’re unsure what’s behind it.
How should I approach repairs on listed or heritage properties without triggering red flags?
Check with the property owner, conservation officer, or the building’s manager about approved methods. Use manufacturer instructions and any local heritage guidance on materials and patching limits. If rules aren’t clear, document what you plan to do and keep a record of inspections and chosen materials.
How does repair strategy affect property value and asset management?
Repair choices should balance preservation with risk. Reattaching bubbles with minimal tear-out can help keep character, but failing to address root causes can lead to bigger, more costly issues later. Keep notes on what was done and why for future maintenance planning.