
Introduction
Paint can be removed from tile flooring using a careful, step-by-step DIY method.
The guide explains how to diagnose the paint type and select safe methods so you avoid damaging the tile, while outlining practical approaches you can apply at home.
You’ll learn practical steps, from gentle solvent options to scrubbing techniques, plus tips and rules of thumb to prevent staining in the future.
Key takeaways
- Identify paint type and tile before choosing removal method and solvents.
- Test cleaners on inconspicuous area to avoid damage or staining.
- Start with nonchemical methods like warm water, detergent, and gentle scraping.
- Use solvents sparingly on a small patch; stop if damage appears.
- Clean grout and textured areas with a brush to lift embedded paint.
- Rinse and dry thoroughly; reseal porous tiles after removal where needed.
Table of Contents
- Introduction
- Key takeaways
- Quick diagnosis: Identify paint type and tile material
- Tools and materials checklist
- Preparation and safety steps
- Gentle, nonchemical removal methods (first-line)
- Chemical and solvent methods (targeted use)
- Removing paint from grout lines and textured surfaces
- Special cases: oil-based paint, multiple layers, and solvent-sensitive tiles
- Post-removal cleaning and restoration
- Conclusion
- FAQ
Quick diagnosis: Identify paint type and tile material
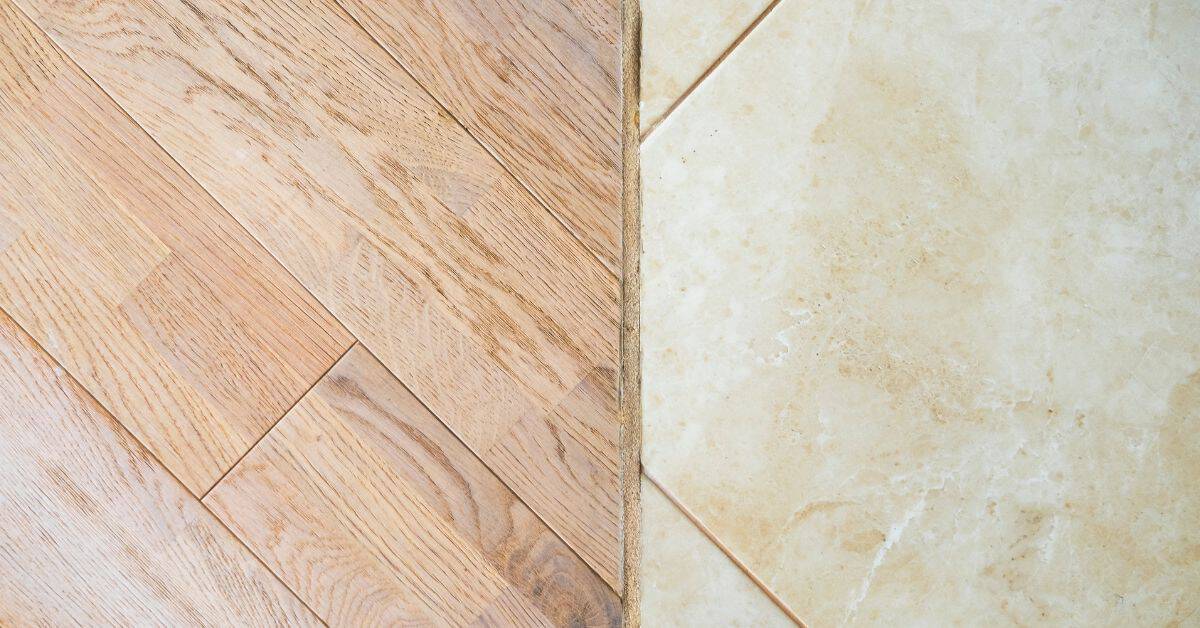
In plain terms, you can tell latex from oil-based paint and enamel by how it reacts when you rub, wipe, or scratch a small spot, and by the finish and odor you see. For tiles, note the substrate look and feel: ceramic or porcelain glaze, quarry tile, natural stone, or vinyl. Use simple tests and visual clues to pick a removal method that won’t wreck the surface.
Knowing the paint type and tile substrate helps you pick safe solvents and methods and avoids damaging the surface. It also keeps you out of trouble when it comes time to disposal and cleanup, since rules vary by place. If you’re unsure, check the label or datasheet and follow local guidelines for household hazardous waste.
How to test paint type safely
To figure out if the paint on your tile is water-based (latex) or oil-based, you can do a few simple tests. First up, grab some rubbing alcohol and dab it onto an inconspicuous area of the painted surface. If the paint softens or lifts off easily, it’s likely latex. Oil-based paints won’t budge as much.
Another quick test is to use water. Pour a bit on the tile and let it sit for about 5 minutes. If the paint starts to lift with the water, it’s probably latex. Oil-based paint will stay put even when wet.
If you’re unsure after these tests, try scraping off a small amount of paint gently with your fingernail or a plastic scraper. Latex should come off easily without damaging the tile surface. If it’s oil-based, it’ll be tougher to remove and might leave marks on the tile if you scrape too hard.
Matching removal method to tile type
The right way to remove paint depends a lot on what kind of tile you have. For ceramic and porcelain tiles, most commercial paint removers work well without damaging the surface. Just make sure to test in an inconspicuous area first.
For natural stone or quarry tiles, be extra careful. These porous surfaces can get etched by harsh chemicals, so it’s best to use a mild solution like baking soda and water mixed into a paste. Scrub gently with a soft-bristled brush and rinse thoroughly.
Vinyl tiles are usually pretty tough but still need gentle care when removing paint. Use a commercial cleaner designed for vinyl or a mixture of dish soap and warm water to avoid damaging the surface. Avoid anything abrasive that might scratch the finish.
Tools and materials checklist
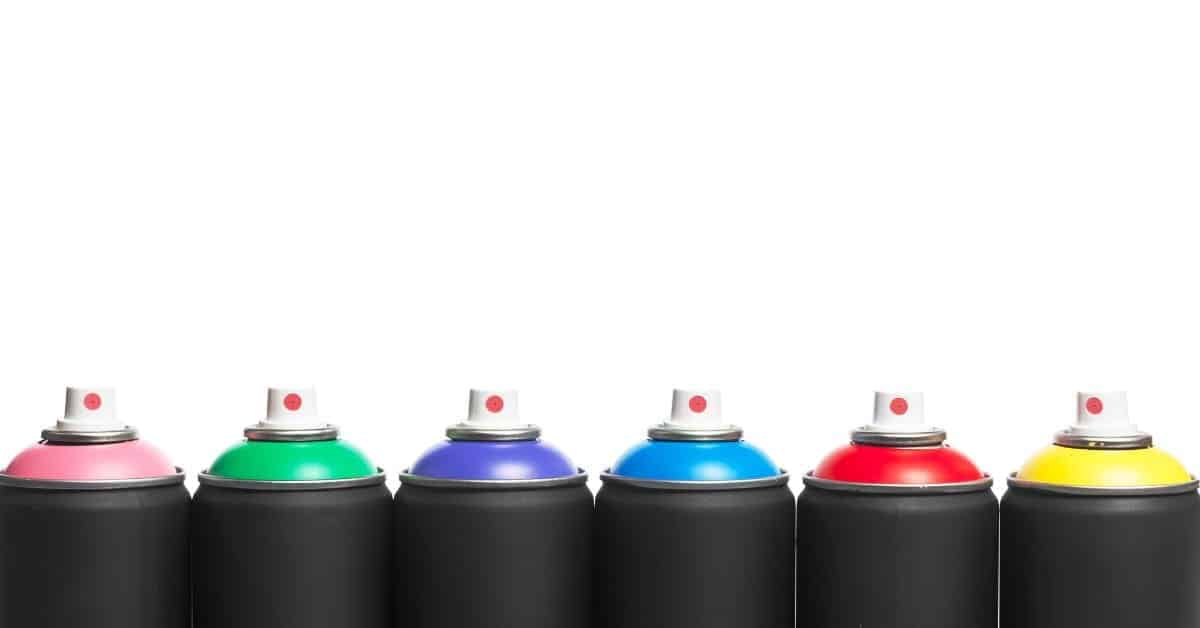
This section is a practical checklist of tools and cleaning products you’ll actually use for prep and cleanup. Gather gentle scrapers, plastic putty knives, citrus removers, rubbing alcohol, acetone, a heat gun at a safe distance, microfiber cloths, and standard PPE. Ventilate well and wear proper PPE; use commercial strippers when the coating is stubborn or the label calls for it.
Using the right tools and cleaners makes cleanup easier and safer for a DIY job. This matters because improper scrapers or solvents can gouge concrete or leave residues. If you aren’t sure about a product’s safety, check the label or datasheet and follow ventilation and PPE guidance.
Recommended household items and substitutes
Use this list to check what you have at home before heading out for supplies.
- White vinegar: Great for light paint stains. Pour it on the stain, let sit a few minutes, then scrub with a soft brush.
- Baking soda: Mix with water to form a paste and apply to stubborn stains. Scrub gently before rinsing.
- Rubbing alcohol: Works well for fresh paint spills. Dab it on the stain and wipe clean immediately.
- Dish soap: Use as a mild cleaner when vinegar or baking soda isn’t enough. Mix with water and scrub gently.
- Plastic putty knife: Ideal for scraping off dried paint without damaging tile surface.
- Citrus-based cleaner: Effective on oil-based paints, but avoid harsh chemicals that can damage tiles.
- Aceite acetone: For tough stains, use sparingly as it’s very strong and may harm certain types of tile.
- Microfiber cloths: Use for final cleaning to prevent scratching the tile surface.
Quick rule: Always test a small area first with any cleaner before applying widely.
When to call a pro and what to tell them
This list helps you decide when professional help is needed for paint removal on tile floors.
- Larger areas: If the painted area covers more than 10 square feet, consider hiring a pro.
- Multiple layers of paint: More than two layers can be tricky to remove without damaging tiles.
- Porous stone tiles: Oil-based paints on porous materials like limestone or travertine require professional care.
- Hard-to-reach spots: High ceilings, corners, and under furniture are best left for pros with the right tools.
- Special finishes: Tiles with glossy or textured surfaces may need a pro to avoid damage during removal.
- Toxic paints: Lead-based or other toxic paints should only be handled by certified professionals.
- No progress after DIY attempts: If you’ve tried several methods and still see no results, it’s time to call in the pros.
- Time constraints: If you have a tight deadline for finishing the job, professional help can save time.
Quick rule: Always provide detailed information about paint type, tile material, and affected area when hiring a pro.
Preparation and safety steps
Start with a clear plan before you begin removing anything. Ventilate the area well, test a small inconspicuous spot first, and protect the grout and nearby surfaces. Put on gloves and eye protection to keep dust and shards from injuring you.
These steps help you spot problems early and prevent new damage as you work. Check the label or datasheet for any specific PPE, ventilation instructions, or testing guidance, and follow what it says.
How to protect grout, fixtures, and nearby surfaces
Covering your bases is key. Start by masking off any areas you don’t want paint or stripper touching with painter’s tape and plastic sheeting. For the grout lines, use a thin strip of tape to keep it clean.
Fixtures like toilet seats, sink faucets, and towel racks should be wrapped in plastic and taped down tight. This prevents any stray chips from landing on them and causing damage or staining.
Don’t forget the walls and baseboards near your tile floor. Use drop cloths to catch drips and protect against overspray. If you’re working with a large area, consider setting up temporary barriers like cardboard boxes to shield other parts of the room from paint chips and stripper splatter.
Take care when removing tape after work is done—do it slowly to avoid tearing grout lines or leaving residue behind.
Environmental and disposal considerations
After the job, proper cleanup is crucial. Paint chips should be bagged up and thrown away in regular trash if they’re dry. Wet paint or chemical residues need to go into a sealed container for household hazardous waste pickup.
Used rags from solvent-based strippers can ignite spontaneously, so store them in water until you can dispose of them safely at a designated facility.
To minimize environmental impact, follow local guidelines on disposal. Check with your city or county’s recycling center to find out about special drop-off days for hazardous materials.
Simple containment during the job helps too—use plastic sheeting and tarps to catch drips and spills as they happen, reducing mess and cleanup time later.
Gentle, nonchemical removal methods (first-line)
Start with gentle, nonchemical options. Use soft plastic scrapers, nylon scrub pads, and warm soapy water with some elbow grease. If it still sticks, step up gradually with steam or warm microfiber, and avoid harsh methods that can damage the surface.
This approach keeps damage risk low and gives you control over the clean. It also helps you judge what will work before you commit to stronger methods. Test on a hidden area first and adjust pressure and motion based on what you see.
Removing fresh/wet paint
When dealing with wet paint, act fast. Start by blotting the excess paint with a clean cloth to prevent it from spreading further. Avoid rubbing or scrubbing as this can push the paint deeper into the tile’s pores.
Next, mix some dish soap and warm water in a bucket. Dip a soft sponge into the solution and gently wipe the affected area. For tougher spots, you might need to use rubbing alcohol instead of soapy water. Apply it with a clean cloth and let it sit for a minute before wiping away.
Remember, patience is key here. Don’t rush or apply too much pressure as this can damage your tile surface. If the paint doesn’t come off easily, repeat the process but don’t overdo it to avoid scratching the tiles.
Scraping and steaming techniques for dried paint
To scrape dried paint, use a soft plastic scraper at a low angle—about 45 degrees. This helps prevent gouging the tile surface. Apply gentle pressure while moving the scraper in short strokes parallel to the grout lines.
A handheld steam cleaner can be very effective for removing stubborn dried paint without damaging your tiles. Fill it with water and set it to a low heat setting. Aim the nozzle at the painted area, holding it about an inch away from the tile surface. The steam will soften the paint, making it easier to lift off.
Once softened, use a soft cloth or sponge to wipe away the loosened paint. Be careful not to overheat your tiles; if you see any discoloration or warping, stop immediately and switch back to cold water rinsing.
Chemical and solvent methods (targeted use)
This section covers when to use solvents like rubbing alcohol, acetone, mineral spirits, and paint stripper on tile. It explains how to apply, how long to dwell, how to dilute, and how to neutralize for different tile types. Always start with a small test patch first.
The right solvent saves time but can harm natural stone or vinyl if you misuse it. Check the product label or datasheet for exact steps and safety notes, and follow local rules for disposal of hazmat. Using solvents properly matters for finish, odor, and future cleaning.
Using rubbing alcohol and acetone safely
When tackling small paint spots on tile, start with a cloth soaked in rubbing alcohol or acetone. Dab the spot gently, avoiding harsh scrubbing that could damage your tiles. For natural stone and vinyl, test a small area first to ensure no discoloration or damage occurs.
Rubbing alcohol is milder but works well on fresh paint. Acetone cuts through tougher dried-on paint but can be more aggressive. After applying the solvent, rinse with water immediately to prevent over-soaking your tile surface. Make sure you have good ventilation when using these solvents indoors.
Remember, some tiles like marble or travertine are sensitive to harsh chemicals. If unsure about your tile type, check the manufacturer’s recommendations before proceeding.
Choosing and using commercial paint strippers
Commercial paint strippers come in water-based and solvent-based varieties. Water-based strippers are generally safer for tile but might not tackle tough, dried-on paints as effectively. Solvent-based strippers work faster but can be harsher on certain materials.
Always read the label carefully to ensure compatibility with your specific type of tile flooring. Follow application instructions closely and wear protective gear like gloves and a mask when applying.
After stripping, neutralize any remaining residue by rinsing thoroughly with water or using a mild detergent solution. This step is crucial for preventing damage to your tiles from leftover chemicals.
Removing paint from grout lines and textured surfaces
Removing paint from grout lines and textured surfaces takes careful, targeted cleaning. Use soft-bristled brushes for gentle scrubbing, grout picks for tight joints, and poultices to draw out stains. For small spots, apply solvent with cotton swabs and recondition the grout if staining occurs.
Doing it right saves time and avoids damaging the tile or grout. Check product labels and manufacturer instructions for safe use and disposal; follow local household hazardous waste rules.
Poultice method for stubborn stains
To tackle tough paint stains on grout, a poultice is your best bet. Mix one part baking soda with three parts water to form a paste that’s thick enough to stick but not so stiff it won’t spread.
Apply the mixture over the stained area and cover it with plastic wrap. Let it sit for 24 hours to draw out the paint. Afterward, gently scrape off the dried poultice using a grout pick or soft-bristled brush. Rinse thoroughly and dry completely before deciding if another application is needed.
Be careful not to leave the poultice on too long; this can weaken your grout lines. If you see any damage, address it right away by filling in with fresh grout of a matching color.
Repairing and recoloring grout after removal
Once the paint is gone, take care to clean up any residue left behind. Use warm water mixed with a mild detergent to wash the area thoroughly.
After cleaning, let the grout dry completely before checking for color consistency. If you notice areas that are lighter or darker than others, consider recoloring them using a matching grout stain or sealant.
To apply, follow manufacturer instructions carefully and test on an inconspicuous area first to ensure it matches your existing grout perfectly. This step is crucial for maintaining the aesthetic of your tile flooring.
Special cases: oil-based paint, multiple layers, and solvent-sensitive tiles
Special cases cover how to tackle oil-based paints, several dried layers, and solvent-sensitive tiles like marble. You’ll want safer remove-and-clean methods and know when to escalate to stronger options. Always check product labels and manufacturer instructions for what will not damage surfaces.
This matters because some surfaces are easy to mar and some finishes resist removal. Using the wrong method can worsen stains or strip texture. For disposal, check local household hazardous waste rules and never dump leftovers down drains or into soil. If unsure, consult the label or datasheet for safe steps and alternatives.
Techniques specifically for oil-based paint
Oil-based paints are tough and require a bit more muscle than water-based ones. Start with commercial-grade strippers designed for oils, like methylene chloride or dichloromethane products. These work faster but need careful handling.
Apply the stripper generously and let it sit longer—up to an hour if needed—to break down the paint fully. Scrub gently with a soft brush to avoid damaging the tile surface. Rinse thoroughly, then neutralize any residual chemicals using baking soda or vinegar solution before rinsing again.
Ventilation is key when dealing with oil-based paints and their strippers. Open windows wide, use fans, and wear protective gear like gloves, goggles, and a mask to keep yourself safe from fumes and skin contact.
What to do for porous or delicate tiles (marble, unglazed stone)
For tiles that are sensitive like marble or natural stone, go easy on the harsh chemicals. Stick with milder options and poultices made specifically for these surfaces.
Avoid scraping hard as it can scratch or chip delicate materials. Instead, use a soft cloth to apply a professional-grade poultice designed for porous stones. Let it sit overnight to absorb the paint before rinsing off gently.
Always test any method on an inconspicuous area first to make sure there’s no damage. If you’re unsure or if the paint is stubborn, consider hiring a pro who specializes in these materials and can use specialized techniques without risking your tiles.
Post-removal cleaning and restoration
After you remove the materials, rinse to lift residues from cleaners and surface grime, then neutralize cleaners as directed. Deep-clean the tiles and grout to restore their look, and decide if resealing is needed. Let the surfaces dry and cure, and follow the product label for the expected drying time.
This matters because leftover residues can dull shine, interfere with grout performance, or wreck a sealant job. Doing it right saves you from staining, patchy patches, or having to redo work later. Rely on manufacturer instructions for cleaners and sealers, and check local rules or guidance if you’re unsure.
Removing residue and restoring finish
After you’ve got the paint off, give your tiles a good rinse with clean water to wash away any leftover residues. Make sure to get into all those nooks and crannies where grout meets tile.
Next up, use a pH-neutral cleaner to make sure everything is squeaky clean without leaving behind any harsh chemicals that could damage the finish later on. You can find these at most hardware stores or home centers.
If your tiles have a glossy surface and you want them to shine like new again, consider buffing them with a soft cloth or a polishing pad designed for tile. For glazed tiles, you might also think about resealing the surface to protect it from future stains and wear.
Spot repair if tile surface is damaged
If your tiles have any chips or scratches after paint removal, you’ll want to address those right away. Small imperfections can be filled with a color-matched epoxy filler that dries hard and smooth.
To match the color of your existing tiles, take a sample piece to the store for an exact shade match. If you’re working on a large area or if the damage is significant, it might be better to replace the damaged tile entirely rather than trying to patch it up.
For minor scratches, sometimes just buffing with a fine-grit sandpaper and then applying a clear sealant can do wonders for restoring the surface. Just make sure you test any repair method on an inconspicuous area first to ensure it blends well.
Conclusion
Finish with confidence by sticking to the proven order: diagnose first, pick the right method, and respect the tile and grout. Safety protects you, and careful steps protect your floor from costly mistakes.
First, confirm the paint type and tile material, then gather the tools and materials, prep the area, and test a small, inconspicuous spot. Start with gentle, nonchemical methods, proceed to targeted solvent use only if needed, and work grout lines and textured areas carefully. Clean and inspect as you go, and document what worked for future touch-ups.
Common mistakes to avoid: rushing or scrubbing hard and scratching the tile, using harsh chemicals or throwing solvent strategies at the first sign of trouble, and skipping a small-area test or failing to protect surrounding finishes. Follow basic safety rules: wear eye protection and gloves, ventilate, and avoid mixing chemicals. If a method risks damage, stop and reassess.
If oil-based paint is stubborn, the area is large, grout is deeply stained, or the tile is solvent-sensitive, it’s wise to call a professional rather than push on. Stay practical, stay safe, and you’ll have a clean, durable floor you can be proud of. You’ve got this.
FAQ
What should I do first before scrubbing up paint off tile?
Clear the area and protect nearby surfaces. Test in a small spot to check how the tile reacts to the cleaner you plan to use. If the paint won’t budge, don’t push hard—bad cleaners can scratch tile or grout.
Which cleaner is best for latex paint on tile?
Start with mild dish soap and warm water. If that doesn’t work, try a small amount of acetone or a specialized paint remover labeled safe for ceramic tile. Never mix cleaners; use one product at a time and ventilate the area well.
Can I use a scraper or wire brush to remove paint?
A plastic scraper is usually safe for tile and grout. Avoid metal tools that can scratch the glaze. If paint sticks stubbornly, stop and switch to a gentler solvent or seek advice for your tile type.
What should I do if the paint stain returns after cleaning?
Reassess the paint type and the cleaner used. Reapply with a fresh approach—sometimes a second pass with a different solvent works. If stubborn stains persist, consider professional help to avoid damage.