
Introduction
Mixing bagged concrete for consistency means controlling the water, timing the rest, and knowing when and how to re-mix so the mix stays workable and strong. Start with the bag instructions and add only as much water as needed to reach the workable slump you want, checking product label or manufacturer guidance for any limits. Use a wheelbarrow or mixer, a shovel or paddle, and a simple container for measured water so you can repeat the same ratio across batches.
Let the mixed concrete rest briefly if it firms up a touch, but don’t let it sit long enough to harden — check the bag for recommended working time and environmental effects. If you need to re-mix, add small amounts of water while remixing and avoid overwatering; when unsure, stop and check the product instructions or ask a pro. Keep tools clean, mix consistent batches, and work in manageable portions so you’re not fighting material that’s past its useful time.
Key takeaways
- Proper water control for bagged mixes: measure by weight per guidelines, avoid overwatering.
- Rest time between mixing and application helps hydration and workability, plan batches accordingly.
- Re-mixing: gentle fold-in methods only if instructed, avoid extended or aggressive agitation.
- Use proper tools: mixing drill with paddle, measured buckets, screed board, and safety gear.
- Work within a workable window; plan re-temper if it begins stiffening or setting.
- Safety and cost-saving: protect skin, ventilation, and follow local codes to avoid mistakes.
Table of Contents
- Introduction
- Key takeaways
- Why Consistency Matters for Strength and Finish
- Tools and Materials Checklist
- Water Control — Measuring and Adding Water
- Mixing Methods and Batch Consistency
- Rest Time, Set Window, and Workability Window
- Re-Mix Rules and Safe Re-Tempering Practices
- Troubleshooting Common Problems and Remedies
- Safety, Planning, and Cost-Saving Strategies for Projects
- Conclusion
- FAQ
Why Consistency Matters for Strength and Finish
Uniform mixing controls how evenly cement, water, and aggregates interact during the first hours of hydration, which directly affects early strength gain, long-term durability, and the quality of the surface finish.
When batches vary you get weak spots, higher porosity, dusty or chalky surfaces, and uneven curing from segregated materials or trapped air; check the bag label or product data sheet for any manufacturer guidance on mix and placement timing before proceeding.
Structural performance and longevity
A uniform mix ensures consistent strength across your concrete pour. Inconsistencies can lead to weak spots, compromising the structure’s integrity.
Cement, water, and aggregates must be evenly dispersed for optimal early strength development. This means accurate water measurement and proper mixing duration are crucial.
Check product strength claims on the bag to ensure your mix meets required standards. A consistent mix helps maintain long-term durability by minimizing cracking risks due to weak spots.
Workability and finish quality
A consistent mix allows for better workability, making it easier to trowel and finish. Inconsistencies can result in chalky or dusty surfaces, uneven curing, and trapped air pockets.
Uniform color and texture indicate a well-mixed batch. Avoid dry pockets by ensuring proper mixing duration and order of ingredient addition.
For a smoother finish, adjust your mix design by adding more water (within the recommended range) or using a plasticizer additive. However, be mindful not to exceed the target slump range to maintain strength.
Tools and Materials Checklist
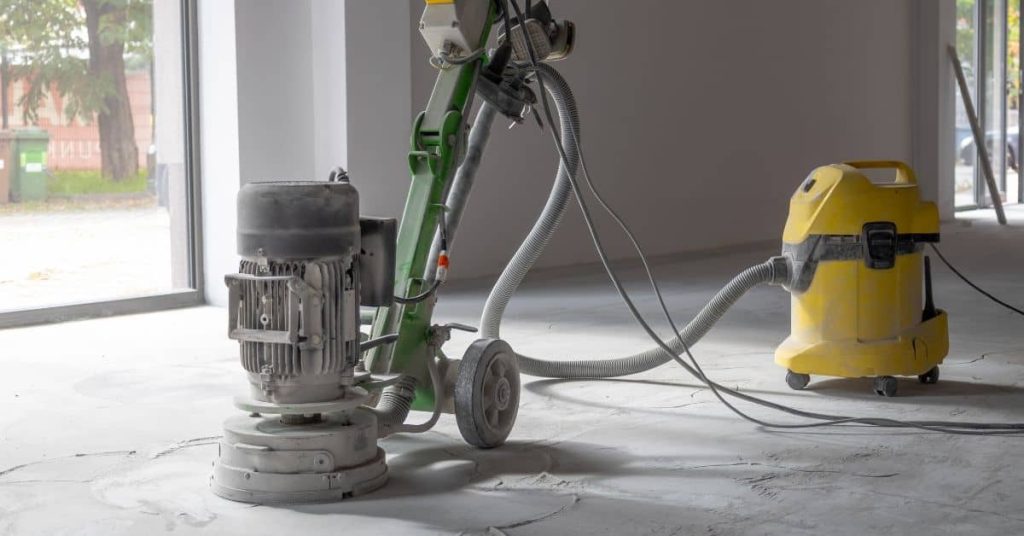
A reliable kit includes a sturdy mixing container or wheelbarrow, a drill with a paddle or a firm hand trowel, calibrated measuring cups or a scale, screed, float, finishing trowel, and a broom for texture work; pick durable, easy-to-clean tools that match the job size.
Choose the right bag type for exposure and setting needs (refer to the product label or tech sheet), use clean potable water only, and measure water by weight or a graduated container to reduce batch-to-batch variance while keeping PPE and proper storage on hand.
Mixing equipment and PPE
Before you start mixing, make sure you have the right gear to keep your work efficient and safe.
- Mixing container or wheelbarrow: Essential for holding and transporting your mix. A sturdy, 6-cubic-foot wheelbarrow is ideal for most jobs.
- Drill with paddle or hand trowel: For mixing. A drill with a mixing paddle speeds up the process, but a hand trowel works fine too.
- Measuring cups or scale: Crucial for accurate water-to-concrete ratios. Use a calibrated measuring cup or scale to avoid over- or under-watering your mix.
- Screed/wire comb: Helps level and smooth your concrete surface after pouring.
- Float and trowel: For finishing. A float removes excess water and smooths the surface, while a trowel gives it a final polish.
- Broom for finish: To create a non-slip texture on driveways or walkways.
- Gloves: Protect your hands from concrete dust and chemicals. Choose durable, flexible gloves that allow you to handle materials easily.
- Eye protection: Essential for protecting your eyes from debris and splashes. Wear safety glasses or goggles with side shields.
- Dust mask: Reduces inhalation of concrete dust, which can be harmful. Use a NIOSH-rated N95 mask for best protection.
Quick rule: Always use mechanical mixers for large batches to save time and energy.
Choosing the right bagged concrete
Selecting the right type of bagged concrete is crucial for a successful project. Here’s what to look for:
- Type I/II (General Purpose): Suitable for most residential projects like sidewalks, patios, and driveways. Type II has added air-entraining agents for improved freeze-thaw resistance.
- Fast-setting: Ideal when you need to pour and finish quickly, or when working in hot weather. Be aware that it sets faster than standard mixes, so work time is reduced.
- Polymer-modified: Offers improved durability, increased strength, and better resistance to chemicals and abrasion. Great for heavy-duty applications like garage floors or commercial spaces.
- High-strength: Provides superior compressive strength. Use when you need extra durability, such as for foundations or structural elements.
- Label instructions: Always read and follow the manufacturer’s recommended uses, additives, and mixing ratios to ensure optimal performance.
Quick rule: Choose a concrete type that matches your project’s needs and local climate conditions.
Measuring tools and water setup
Accurate measurement of water is key to consistent, high-quality concrete. Here’s how to set up your measuring tools and water supply:
- Clean, potable water: Use fresh, clean water from a reliable source. Avoid using saltwater or recycled water as they can affect the concrete’s strength.
- Avoid additives: Unless specified by the manufacturer, do not add any chemicals or admixtures to your water. They can negatively impact the concrete’s performance.
- Volume vs. weight measurement: Measure water by volume using a calibrated measuring cup for small batches. For larger quantities, use a scale and measure by weight for more accurate results.
- Water-to-concrete ratio: Standard ratios range from 4 to 6 gallons of water per 80-pound bag of concrete. Adjust based on the manufacturer’s recommendations and job site conditions.
- Partial pours: For large batches, mix and pour in smaller portions to maintain consistency and workability throughout the project.
- Water supply for larger jobs: Consider using a water pump or hose with a adjustable nozzle to ensure a steady, controlled water flow on bigger projects.
Quick rule: Always measure your water accurately to maintain consistent concrete quality and workability.
Water Control — Measuring and Adding Water
Measure water precisely using a scale (weight) or a calibrated volume container, and decide which method to use based on the accuracy you need and what the bag instructions recommend.
Add water in small increments, mixing fully between additions and testing workability each time; record each measurement and any adjustments so you can reproduce the same result across multiple bags and different weather conditions.
Measure consistently, follow the bag
First off, listen to what the concrete bag tells you. Manufacturers provide water-to-cement ratios for a reason. Stick to it.
Choose one method – weight or volume – and stay with it. Consistency is key here. If you switch methods mid-project, you’re asking for trouble.
For weight-based measurement, use a kitchen scale. Tare (zero) the scale before adding water to avoid misreads. For volume, use a calibrated pitcher or graduated container. Again, tare it first.
Adding water in increments and testing
Water’s not like paint – you can’t just pour it all in at once. Add it gradually, in small, repeatable increments.
Start with 10-15% of your total planned water. Mix well. Then test for consistency. Here’s a simple test: grab a handful, squeeze it like you would a stress ball. It should hold its shape but crumble when you drop it. Too wet? You’ve added too much.
Record every adjustment. This way, if you need to mix another batch, you’ve got a roadmap to follow.
Environmental effects on water needs
Mother Nature’s a wildcard in concrete mixing. Heat, wind, and humidity can all change how much water you need.
Hot weather? You’ll need more water to keep the mix workable. Windy conditions? Less water – you don’t want your mix drying out too fast. Humidity’s a tricky one. In high humidity, you might need less water. But if it’s really humid and hot? You’re back to needing more.
Keep an eye on the weather. Adjust your water accordingly. It’s like Goldilocks – not too much, not too little, just right.
Mixing Methods and Batch Consistency
Select the mixing method that fits batch size and site logistics: hand mixing for tiny repairs, wheelbarrow for small slabs, and a powered mixer for larger volumes—each needs slightly different sequencing for consistent results.
Prep the area, dry-mix materials to distribute cement and fines, add measured water in stages, and mix to uniform color and texture; keep a quick checklist for timing and ratios so batches match from one bag to the next.
Hand and wheelbarrow mixing technique
For small batches, hand mixing is quick and easy. Start by pouring the dry concrete mix into a wheelbarrow or large tub. Then, slowly add water, bit by bit, while stirring with a shovel or hoe.
Mix gently but thoroughly to avoid clumps. Keep your eye out for any dry pockets. If you find some, break them up and mix again.
For wheelbarrow mixing, tip the barrow slightly to one side as you mix. This helps distribute the water evenly across the concrete. Remember, less is more with water – it’s easier to add than to take away.
Using a mechanical mixer effectively
For larger batches, a powered mixer saves time and energy. First, pour the dry mix into the mixer’s drum. Then, add water slowly while mixing at low speed.
Mix for about 2-3 minutes, then stop and check for any unmixed areas. If you find some, continue mixing until it’s all incorporated. Be careful not to over-mix – this can cause the concrete to lose its workability.
After each use, clean the mixer thoroughly to prevent contamination with old concrete. And always follow the manufacturer’s guidelines for load limits and mixing speeds.
Reproducible batch routine
For larger projects, maintaining consistency between batches is crucial. Start by measuring your water carefully – a little too much or too little can make a big difference in strength and finish.
Follow the same order of operations each time: dry mix first, then add water slowly while mixing at a consistent speed. Mix for the same duration every time – around 2-3 minutes is usually sufficient.
Keep a log of your batches, noting down the water-to-powder ratio, mixing time, and any adjustments made. This will help you maintain uniformity and troubleshoot any issues that arise. And remember, it’s always better to mix too little than too much – you can always add more, but taking away is tough.

Rest Time, Set Window, and Workability Window
Rest time is when mixed concrete sits before placement, the workability window is when it can be placed and finished, and the set window is when it begins to harden—plan actions so mixing, placing, and finishing occur inside those windows.
Environmental factors and concrete type change those windows; monitor plasticity cues like loss of sheen or increased stiffness, stagger pours to match crew capacity, and consult manufacturer guidance if timing looks tight.
Initial set versus usable working time
The initial set is when concrete starts to stiffen. That’s not the end of your workable time, though.
Check your product’s guidance for exact times. But generally, you’ve got about 1-2 hours after initial set to place and finish your mix before it becomes too hard.
Pro tip: Start your timer when you add water. That’s when the clock starts ticking on your usable working time.
Monitoring slump and surface readiness
The slump test is a simple way to check workability. Stick a cone in your mix, fill it with concrete, then lift it out. The ‘slump’ – how much the pile collapses – tells you if your mix is still good.
For finishing, look for surface tackiness. When it’s no longer sticky to touch, that’s a sign your window’s closing fast.
Also, watch for rapid stiffening. If your mix goes from smooth to lumpy quickly, it’s time to finish up.
Environmental and admixture impacts
Hotter conditions speed up setting. In high heat, your rest time could be as little as 30 minutes. Cooler temps slow it down – you might have up to 4 hours.
Humidity also plays a role. Drier air can cause faster evaporation and quicker setting.
Admixtures like accelerators or retarders change your rest time too. Accelerators speed things up, while retarders slow them down. Always follow the admixture’s guidelines for specific times.
Re-Mix Rules and Safe Re-Tempering Practices
Only re-temper or re-mix within the allowable window described by the product guidance and for small, controlled adjustments; avoid adding cement or large amounts of water beyond the manufacturer’s recommendations.
When you must re-temper, add measured water in tiny increments, mix thoroughly to uniform consistency, perform a workability test, and log additions; discard any batch that shows segregation, excessive slurry, or signs of initial set.
When re-mixing is acceptable
Re-mixing a batch of bagged concrete can help restore workability, but it’s not always the best option. Follow these guidelines to know when it’s acceptable:
Within the same batch window: Re-mix only if you’re working with the same batch within its usable working time.
Small adjustments: Re-mixing is okay for minor tweaks in workability. But remember, adding too much water can weaken your concrete.
No extra cement or water: Stick to manufacturer guidelines. Don’t add extra cement or water beyond what’s recommended.
How to re-mix without degrading strength
Re-mixing can help restore workability, but it’s crucial to do it right. Here are some steps to follow:
Mechanical re-agitation: Use your mixer to re-agitate the concrete. This helps redistribute any settled materials and restores workability.
Minimal extra water: If you must add water, do so sparingly. A little goes a long way. Remember, adding too much water can weaken your concrete.
Avoid repeated re-tempering: Re-tempering too many times can lead to segregation and weakened strength. Keep it to a minimum.
When to discard a batch
Sometimes, it’s best to throw out a batch of concrete rather than trying to rework it. Here are some signs to look for:
Excessive stiffening: If your concrete has stiffened too much and won’t mix properly, it’s time to discard.
Partial set: If the concrete has started to set before you can use it, throw it out. Trying to rework it will only lead to a weak final product.
Separation: If you see signs of separation – like lumps or slurry – discard the batch. It won’t mix properly and your final result will be compromised.
Troubleshooting Common Problems and Remedies
Diagnose issues quickly with simple checks: feel and sight the slump-like behavior, color and texture, time from mix to pour, and ambient conditions—these cues point to too wet, too dry, segregation, or rapid set.
Apply targeted fixes (documenting them): drain or add dry mix to correct too-wet batches, add small measured water and remix if too dry, slow remixing and add fines for segregation, and consult product instructions for retarder use on rapid set problems.
Fixing overly wet or soupy mixes
If your concrete mix is too wet, it’s like trying to work with soup. Here’s how to fix it:
Short batches: If you’ve just started mixing, stop the machine and let the excess water drain out.
Add measured dry material: If possible, add more dry mix (cement, sand, or gravel) in small increments. Keep the ratio of ingredients consistent.
If the mix is too far gone, it’s best to restart the batch. Discard the soupy mix and start fresh with a new batch.
Remedying dry, crumbly mixes
A dry concrete mix is hard to work with and weakens the final product. Here’s how to fix it:
Mist gently: Lightly mist the surface of the mix with water using a spray bottle or hose with a fine nozzle.
Add small amounts of water: If misting isn’t enough, add water in small increments (like 1/8 cup at a time) while mixing. Be careful not to over-water.
After adding water, remix thoroughly to ensure even distribution. Remember, a little water goes a long way.
Dealing with segregation, bleeding, and rapid setting
These issues can weaken your concrete. Here’s how to identify and fix them:
Segregation and bleeding: These happen when the mix isn’t uniform or settles unevenly. Causes include overmixing, incorrect proportions, or contamination. To fix:
- Mix slower and layer ingredients.
- Add fines (small particles) to help bind the mix.
- Check your ratios and remove any contaminants.
Rapid setting: This happens when concrete sets too quickly. Causes include high temperatures, low humidity, or incorrect proportions. To fix:
- Use set retarders to slow down the process.
- Adjust your mix proportions to balance cement and water content.
- Keep concrete cool and moist during mixing and placement.
Safety, Planning, and Cost-Saving Strategies for Projects
Protect yourself with appropriate PPE for dry and wet concrete, keep bags dry and rotated in storage, and follow SDS guidance for handling and spill response.
Plan batch sizes to match placement rate to reduce waste, mix only what you can finish within the open window, reuse clean water for minor touch-ups where acceptable, and log yields so future mixes are more accurate and economical.
Safety and Handling Precautions
Working with dry cement and fresh concrete requires careful attention to safety. First, protect your skin from contact by wearing gloves and long sleeves. Use a dust mask or respirator to avoid inhaling harmful dust particles.
Protect your eyes with goggles to prevent irritation. Ensure proper ventilation in the work area to minimize dust accumulation. If you spill cement, clean it up promptly to prevent slips and chemical exposure.
Understand that cement dust can cause skin and eye irritation, and prolonged exposure may lead to more serious health issues. Keep a first-aid kit nearby for immediate treatment of minor injuries or irritations.
Batch Planning and Minimizing Waste
To minimize waste, plan your batches carefully. Calculate the required yield based on your project’s needs. Choose bag sizes that match your requirements to avoid over or under-ordering.
Mix only what you can finish within the open-time. Set up a precise mixing sequence to avoid over or under-mixing. If you’re using helpers, coordinate their work with the mixing schedule to reduce leftover material.
Consider staging your work to match your mixer’s capacity. This way, you can mix and pour continuously without leaving concrete to set prematurely in the mixer.
Cost-Saving and Efficiency Tips
To save money, buy only what you’ll use. Check bulk purchasing options for larger projects or frequent users. Renting a mixer that fits your needs can also reduce costs by minimizing waste.
Maintain consistent batch sizes to maximize efficiency and minimize rework. Keep your tools clean and in good working order to extend their lifespan and reduce maintenance costs.
Consider using partial bags for small projects or touch-ups, if compatible with your project’s requirements. Reusing clean water for minor touch-ups can also help reduce waste and save money.
Conclusion
Consistency in your mix is the foundation of a strong, smooth finish and a safe project. It keeps concrete from cracking, minimizes patching, and reduces costly rework on the job. Stay disciplined about water control, rest times, and re-tempering so your pours hold up and look right.
Just follow this practical flow: verify you have the right bag mix, tools, and water plan; measure and add water carefully in small increments; mix in clear, repeatable batches; respect rest time and the set window; monitor workability and finish within the workability window; apply re-temper rules only when allowed and safe; run a small test patch first if you’re unsure; and plan for a clean, safe pour with a clear finish path.
Common mistakes to avoid are adding too much water, skipping rest time, or re-tempering in ways the bag spec doesn’t permit; never mix or pour without PPE and a clear work area; don’t guess on water or mix times—check a small test batch first and keep notes; if the project is large, or you’re unsure about forms, load, or a critical structural pour, call in a pro. Stay deliberate, safety-first, and you’ll hit your target with fewer headaches and lower cost in the long run.
FAQ
How can I control water when mixing bagged concrete?
Follow the bag’s label and manufacturer instructions for water. Add water in small amounts and mix until the concrete looks uniform and cohesive, then stop. If you’re unsure, check the product instructions or local guidelines before proceeding.
What about resting time between mixing and application?
Light resting can help with consistency, but don’t let it sit too long. Follow the bag’s stated rest window and use the mix within that time, or you’ll lose workability.
How do I re-mix or re-temper if the mix stiffens or separates?
If it stiffens, add a little water and mix thoroughly in small increments. Don’t over-wet or over-work the batch; re-mix in small portions and apply within the recommended window.
What common issues should I troubleshoot for better consistency?
Check that you’re using the right bag for the job, keep water additions controlled, and mix in a consistent method. If problems persist, consult the bag’s instructions, product label, or local guidance for steps to correct the mix.