
Introduction
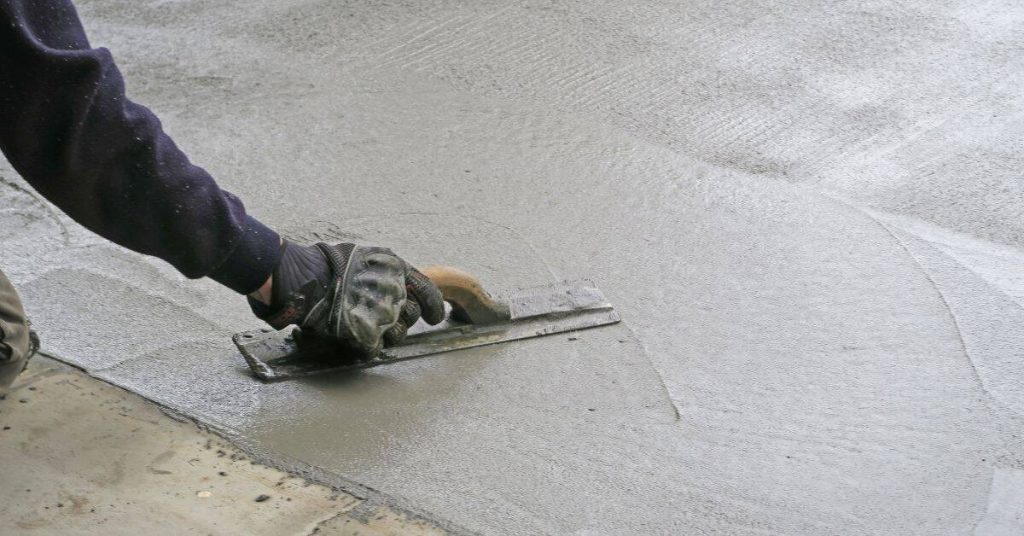
Evaporation rate for fresh concrete is how fast water leaves the surface and it controls how the concrete sets and gains strength. In plain jobsite terms, wind and sun speed that drying, while cool, still air slows it; check product labels and local rules for any specific limits you must follow. A fast evaporation rate can cause plastic shrinkage cracks and weak surface paste, so protecting the slab while it’s finishing is as important as mixing and placing it right.
On windy, sunny days you’ll want practical protections: windbreaks, shading, misting, and timely curing coverings or curing compounds, chosen per the manufacturer’s directions and local guidance. I’ll walk you through what to look for and how to use each method so your surface stays durable and crack-free without guessing the wrong product or technique.
Key takeaways
- Understand evaporation rate basics for fresh concrete; it’s driven by moisture loss.
- Wind accelerates surface evaporation; shield with windbreaks and proper coverings.
- Sun exposure dries surfaces quickly; use opaque covers to limit heat gain.
- Wet, membrane, or covering strategies: keep surface moisture without ponding; follow manufacturer guidance.
- Plan on-site protection around weather changes; have materials ready before pour.
- Safety: avoid slick, wet surfaces; monitor wind and sun to prevent cracking.
Table of Contents
- Introduction
- Key takeaways
- What Evaporation Rate Is and Why It Matters for Fresh Concrete
- Primary Environmental Drivers: Wind, Sun, Temperature, and Humidity
- How to Estimate and Measure Evaporation Rate on Site
- Relevant Standards and Specifications to Consult
- Surface Protection Methods: Wet, Membrane, and Coverings
- Practical on-Site Strategies to Mitigate Wind and Sun Effects
- Common Mistakes, Risks, and Safety Considerations
- Planning, Costs, and Seasonal Adjustments
- Conclusion
- FAQ
What Evaporation Rate Is and Why It Matters for Fresh Concrete
Evaporation rate is the speed at which moisture leaves the concrete surface, typically expressed as a depth of water loss per unit area over time; check product data sheets or local guidance if you need a formal unit. In plain terms, it tells you how fast the surface dries compared with how fast the concrete can hydrate.
When surface moisture is pulled away faster than cement hydration proceeds, the paste can’t develop strength and the surface becomes vulnerable to plastic shrinkage cracking and defects like dusting, crazing, or scaling. Evaporation rate interacts with concrete temperature, mix design, and finishing timing—so watch those variables and the finish crew’s schedule to avoid early-stage performance problems.
Evaporation vs. Bleeding and Setting
Evaporation at the surface of fresh concrete is different from internal bleeding water.
Bleeding is when excess water rises to the surface due to gravity, while evaporation is moisture loss due to environmental factors. Timing matters here – if evaporation happens too fast before finishing and sealing, it can lead to plastic shrinkage cracks.
Concrete sets best when there’s a balance between bleeding and evaporation. Too much or too little of either can cause issues. So, keep an eye on the surface as it starts to set.
How Evaporation Influences Long-Term Durability
Early moisture loss affects concrete’s strength development. Rapid drying can lead to a weak surface layer, making it more prone to scaling and damage over time.
Proper curing helps maintain early-stage moisture, allowing for better strength gain and improved durability. It also enhances the concrete’s resistance to freeze-thaw cycles, which is crucial in colder regions.
In simple terms, rapid evaporation can weaken your concrete and make it less durable in the long run. So, protecting fresh concrete from excessive drying is a smart investment for longevity.
Primary Environmental Drivers: Wind, Sun, Temperature, and Humidity
Each of the four drivers affects evaporation differently: wind physically carries moisture away from the surface, sun (solar radiation) supplies energy that raises surface temperature, air temperature changes vapor pressure and kinetics, and relative humidity controls the vapor-pressure gradient. Together they set the net moisture-loss rate at the surface, so monitor them as a combined picture rather than in isolation.
On hot, sunny, windy days evaporation spikes and the curing window narrows; cooler, overcast conditions slow loss and lengthen workability. Track air and surface temperature, RH, wind speed, and solar exposure with simple field meters and use those readings to decide on scheduling, windbreaks, misting, shade placement, or membrane/cover strategies to protect the surface.
Wind: mechanisms and site behaviors to watch for
Wind plays a significant role in accelerating evaporation from fresh concrete. Here’s how:
Airflow carries away moisture that evaporates from the surface, creating a vacuum effect that speeds up further evaporation.
Wind can create localized high-evaporation zones around corners or edges of slabs where airflow is concentrated. Keep an eye out for these areas, as they may dry out faster and be at higher risk of cracking.
Sun and solar radiation: surface heating effects
Direct sunlight raises the surface temperature of fresh concrete, increasing vapor pressure and evaporation rate. Here’s why:
The sun’s radiant energy heats up the concrete’s surface, causing moisture within to turn into vapor and escape more quickly.
Orientation and time of day matter too. South-facing surfaces in the Northern Hemisphere receive the most sunlight and heat up fastest. Midday sun is also hottest, so evaporation peaks around noon.
Temperature and relative humidity interplay
Both air temperature and relative humidity (RH) influence evaporation rate from fresh concrete. Here’s how they work together:
Higher air temperatures increase the vapor pressure gradient between the concrete surface and the surrounding air, driving more moisture out.
Lower RH also increases this gradient, as there’s less moisture in the air to begin with. So, high temperature combined with low RH creates ideal conditions for rapid evaporation.
Monitor both temperature and RH on-site to get a better understanding of your concrete’s evaporation risk.
How to Estimate and Measure Evaporation Rate on Site
Start with basic site measurements: ambient temperature, relative humidity, wind speed, and surface temperature, and note placement time relative to peak sun or wind; if you aren’t sure which thresholds to use, consult manufacturer instructions or local specs. For a quick proxy, use a shallow pan or damp cloth test to observe water loss over a set interval and compare conditions between jobs.
Watch visual cues—rapid loss of sheen, color change, surface crusting, or dusty paste—as immediate indicators of high evaporation. If conditions are repeatedly risky, or the pour is critical, escalate to formal testing or consult a professional; keep a log of readings and results so you can match protection actions to measured risk.
Step-by-Step Process
The following steps guide you through estimating and measuring evaporation rate on site, ensuring you’re equipped to protect your fresh concrete.
- Preparation: Gather necessary tools (thermometer, hygrometer, anemometer, shallow pan, water, notebook).
- Safety first: Ensure the area is safe for work and follow proper PPE guidelines.
- Measure ambient temperature and relative humidity using a calibrated thermometer and hygrometer.
- Record wind speed with a handheld anemometer. Note down the time of measurement.
- Set up your evaporation proxy: Fill a shallow pan with water, mark its level, and record initial readings.
- Monitor the pan’s water loss over a specified period (e.g., 2 hours).
- Calculate water loss rate using initial and final readings. Compare it to established risk thresholds.
- Document all measurements, calculations, and observations in your notebook for future reference.
Quick visual and tactile checkpoints
Use this checklist to assess surface drying quickly and easily on site. It’s best used after initial measurements or when checking progress.
- Sheen absence: A lack of sheen indicates rapid water loss from the surface.
- Rapid color change: Fresh concrete turning dark gray faster than usual suggests high evaporation.
- Plastic shrinkage cracks: These thin, deep cracks form when surface moisture evaporates too quickly.
- Surface crust formation: A hard crust forming too early can hinder proper curing and strength development.
- Towel test: Lightly touch the surface with a damp towel. If it dries rapidly, evaporation is high.
- Fingerprint test: Leave a fingerprint on the surface. If it fades quickly, evaporation is intense.
- Solar reflection: Check for excessive glare or reflection from the sun hitting the concrete surface.
- Wind-induced ripples: Observe any visible ripples or waves caused by wind action on the surface.
Quick rule: If you notice multiple signs of high evaporation, take immediate action to protect your concrete.
Instruments and on-site measurements to use
Using calibrated instruments ensures accurate readings. Here’s what you need:
Anemometer: Measure wind speed in mph or m/s. Ensure it’s calibrated regularly for accuracy.
Thermometer/Hygrometer: Record temperature (°F/°C) and relative humidity (%). Use a combination tool for convenience, but ensure both functions are accurate.
Shallow pan: A simple, flat-bottomed pan is all you need to set up your evaporation proxy. Ensure it’s clean and dry before use.
Relevant Standards and Specifications to Consult
Key organizations that provide curing guidance and test methods include ACI, AASHTO, ASTM, and USACE; each issues documents covering curing practice, test methods, and project specs—verify the applicable editions and check the manufacturer’s or agency web pages for the current versions. For building projects, also check code references (IBC/IFC) and any owner or project-specific specifications that may dictate curing methods or testing requirements.
Map the standards to your workflow: curing guides and performance criteria, test methods for moisture and temperature, and contract specifications that control what’s acceptable on your project. Before pouring, confirm which standards govern your job, note any local amendments, and reference the correct documents in your DIY plan or permit paperwork.
What to look for in ACI guidance (e.g., ACI 308, ACI 318)
The American Concrete Institute (ACI) offers crucial curing guidance. Check their latest editions like ACI 308 and ACI 318.
ACI provides both prescriptive and performance-based curing criteria. Prescriptive methods tell you exactly what to do, while performance-based methods let you choose your own method as long as it meets certain standards.
Temperature and duration are key in ACI’s guidance. They vary based on concrete type and environmental conditions. Always check the latest edition for accurate information.
AASHTO, ASTM, and agency specs: materials and test methods
Material choices greatly impact your concrete’s performance. AASHTO and ASTM provide standards for curing materials and tests.
- Curing compounds: Look for ASTM D41 or D495 ratings. They protect against moisture loss and early-age cracking. Avoid low-quality compounds that stain or don’t adhere well.
- Membranes: Check AASHTO M287 or ASTM D6381 for quality. They control water loss but can trap moisture if not permeable to vapor.
- Test methods: Use ASTM C597 for moisture content, C1064 for temperature, and C39 for strength testing. Shrinkage tests like ASTM C1581 help prevent cracking.
- State DOT or owner specs: Some agencies have specific requirements. Always check project-specific documents or contact the agency directly.
- USACE templates: If applicable, follow USACE EM 385-1-1 for concrete construction and curing guidance.
Surface Protection Methods: Wet, Membrane, and Coverings
The three main protection families are moist curing (wet coverings), membrane-forming curing compounds, and impervious covers; all aim to retain surface moisture, control evaporation, and guard the slab during early curing. Choose based on site water availability, weather exposure, and whether you need hands-off protection or active moisture maintenance.
Moist curing uses water-retaining materials and periodic rewetting; membrane compounds form a film that reduces loss; impervious covers (plastic, blankets) block evaporation and solar gain. Follow product labels or data sheets for application guidance, anchor covers against wind, and watch for signs like blistering or uneven drying so you can troubleshoot and adjust methods on the fly.
Moist curing techniques (burlap, saturated covers)
Wet coverings are your best bet for keeping concrete’s surface moist. This helps maintain a consistent hydration process and prevents early-age cracking.
Application: Apply wet burlap or other saturated covers immediately after finishing the pour. Ensure they’re evenly distributed and in full contact with the surface.
Maintenance: Keep them consistently wet by re-wetting every 2-4 hours, depending on weather conditions. Monitor for any dry spots that could lead to moisture loss.
Membrane-forming curing compounds and liquid treatments
Curing compounds create a protective membrane on the concrete surface, reducing water evaporation. They’re great for simple maintenance and when water’s scarce.
Application: Apply as soon as the bleed water disappears (usually 4-8 hours after pouring). Follow manufacturer instructions for drying times and re-applications. Ensure full coverage to prevent moisture loss through uncovered areas.
Compatibility: Check with your sealer or finish provider to ensure compatibility, as some compounds can interfere with adhesion or curing processes.
Impervious sheeting and temporary roofing
Plastic sheets, coated fabrics, or tents provide excellent sun and wind protection. They’re ideal for outdoor pours in harsh conditions.
Application: Place the coverings immediately after finishing the pour. Ensure they’re securely anchored to prevent displacement by wind or rain. Seal edges with tape or weights to keep moisture in.
Avoid ponding: Make sure water can’t collect and pond under the covering, as this can cause surface damage or delamination.
Practical on-Site Strategies to Mitigate Wind and Sun Effects
Plan pours for cooler, lower-wind windows when possible and have contingency plans for shifts in conditions; check weather forecasts and be ready to delay if forecasted wind or solar exposure will drive high evaporation. Simple shade—from canopies, reflective tarps, or portable structures—reduces direct solar gain without impeding placement access when positioned properly.
Use windbreaks or screens to cut surface airflow and temporary misting or fogging to lower evaporation rates, but control application so you don’t wash the surface paste; consult product instructions for acceptable water application methods. Coordinate finishing timing with protection steps, monitor surface dryness during and after placement, and adjust protection levels based on quick checks and on-site decision cues.
Scheduling and sequencing pours for lower-risk windows
Timing is key to minimizing evaporation. Pour during cooler hours when wind speeds are low.
Ideal times: Early morning or late evening, depending on your location’s weather patterns.
Stage finishing crews to follow immediately after pouring. They should be ready to apply rapid protection as soon as the concrete is finished.
Shading, windbreaks, and temporary enclosures
Protect your pour from sun and wind with these low-cost solutions:
Shade: Use temporary canopies or reflective tarps. Place them strategically to minimize direct sunlight without hindering access.
Windbreaks: Modular barriers, screens, or even stacked materials can reduce surface evaporation. Ensure they don’t block equipment operation or worker comfort.
Temporary enclosures: For large projects, consider temporary structures. They provide full protection but require careful planning and additional resources.
Common Mistakes, Risks, and Safety Considerations
Frequent errors include delaying protection after placement, choosing the wrong product for the conditions, or overwatering the surface; these mistakes push the slab into higher risk of early-age cracking and surface defects. Apply cures and coverings at the right time—refer to manufacturer guidance or standards when in doubt—to avoid making the problem worse.
When using chemical curing compounds or erecting enclosures, follow safety protocols: use appropriate PPE, ensure ventilation for solvent-based products, and secure covers to prevent collapse in wind. If protection fails, act quickly—re-wet within safe limits if allowed, consider re-application of compatible curing treatments, and document conditions and corrective steps so you can make informed follow-up decisions.
Typical application errors and their outcomes
To ensure your concrete’s longevity, avoid these common mistakes during the curing process.
- Delayed protection: Waiting too long to apply cure products or wet covers allows rapid evaporation. This can lead to early-age cracking and reduced final strength.
- Premature removal of wet covers: Taking off burlap, plastic sheets, or other moisture-retaining covers too soon causes the surface to dry out quickly, resulting in dusting and laitance.
- Inadequate coverage with cure products: Skimping on membrane-forming compounds or liquid treatments leaves areas unprotected, leading to inconsistent curing and potential defects.
- Incorrect application rate of cure products: Using too much or too little can result in improper curing, causing surface defects like early-age cracking or reduced final strength.
Each mistake can compromise your concrete’s durability. Stay vigilant during the critical curing period to avoid these pitfalls.
Safety and compatibility when using curing compounds or heaters
Handling chemical curing agents, sealants, and temporary heaters requires careful attention to safety protocols. Always consult the product’s Safety Data Sheet (SDS) and your project’s safety plan.
Personal Protective Equipment (PPE): Wear appropriate gloves, safety glasses, and protective clothing when applying chemical cure products or working around temporary heaters.
Ventilation is crucial when using chemical sprays. Ensure the area is well-ventilated to prevent the buildup of harmful fumes. For temporary heaters, follow electrical safety guidelines, including proper grounding and regular inspections for damage or wear.
Be aware of potential ignition risks around solvents or flammable products. Keep open flames and sparks away from these materials, and have a spill response plan in place to minimize hazards.
Planning, Costs, and Seasonal Adjustments
Build a curing plan that balances protection and budget by matching method performance to project risk: low-cost plastic sheeting or re-wetting may suit low-exposure jobs, while membrane compounds or specialized blankets fit high-exposure or critical pours—check product data sheets for coverage rates. Account for labor, re-application needs, and potential multi-day protection when estimating materials and costs.
Adjust methods seasonally: hot, dry, windy conditions usually require more aggressive moisture-control and more frequent checks; cold conditions may need insulation or slower curing approaches. Create a simple log and decision tree for method selection, timing, and monitoring so you can scale protection up or down and document what was used and why for future reference.
Budgeting and lifecycle cost perspective
When planning your concrete curing, consider both initial costs and long-term durability savings. Here’s a quick comparison:
Low-cost methods, like plastic sheeting or wet burlap, can be budget-friendly but may require more labor and frequent reapplication.
Higher-performance options, such as curing compounds or insulation sleeves, often have higher upfront costs but provide longer-lasting protection and reduced labor. They can save you money in the long run by preventing cracks and reducing maintenance needs.
Remember, investing a bit more initially can pay off with better concrete performance and lower lifecycle costs.
Seasonal and extreme-weather adaptations
Weather conditions impact evaporation rates and curing duration. Here’s how to adapt your plan:
Hot/dry seasons: Increase shading with temporary structures or windbreaks, apply protection early (within first 24 hours), and consider using membrane-forming compounds or breathable blankets for extended protection.
Cold conditions: Protect from freezing temperatures by using insulated covers, heaters, or curing blankets. Extend curing duration as needed to ensure proper hydration. Always check relevant standards like ACI 306 for temperature limits and adjustments.
In variable seasons, monitor weather forecasts and adjust your plan accordingly. It’s better to err on the side of extra protection than risk damage from unexpected weather changes.
Conclusion
Protecting the surface now means lasting strength, good appearance, and fewer callbacks. Stay mindful of wind, sun, and heat, and keep the surface wet or covered as needed to control evaporation during curing.
Before you proceed, check the current wind and sun exposure, rough-visualize the evaporation risk, estimate rate with on-site cues, choose a protection method, test a small patch, and log how long you hold surface protection. Keep the plan simple: work in a controlled sequence, monitor through the day, and reapply or adjust as conditions change.
Common mistakes are skipping protection when wind or heat spikes, leaving coverings off too long and drying the surface, and not testing a small patch first or adhering to the relevant standards. Safety rules are plain: never work alone near fresh concrete without a clear plan, monitor temperatures and humidity, stay alert for overheating or wind gusts, and follow the surface-protection method you choose. If in doubt, stop and verify with a pro or the project specs before moving forward.
If the job size or conditions push the limits of what you can safely manage, call in a pro for proper surface protection and curing follow-through. Stay deliberate, test small, and push forward with confidence.
FAQ
1. What is evaporation rate for fresh concrete and why does wind matter?
Evaporation rate is how fast water leaves the surface of the concrete. Wind pulls moisture away quickly, which can dry the surface faster than the interior can hydrate, leading to roughness or cracking if not controlled.
2. How does sun exposure affect curing and surface finish?
Direct sun heats the surface and accelerates evaporation. That can create a hot, dry top layer while the underneath is still curing, making it harder to keep a smooth finish and increasing the risk of surface imperfections.
3. What practical methods and materials protect the surface from evaporation?
Use proper curing methods like wet coverings, curing blankets, or surface membranes that seal in moisture. Keep the chosen method in place for the recommended time and follow the manufacturer’s instructions for application and removal.
4. How long should curing ideally last, and what should I check if I’m unsure?
Follow the project implications and product guidance for curing duration, but in general plan for maintenance of surface protection during the early curing period. If in doubt, check the product label or the manufacturer’s instructions and local rules for duration ranges and reapplication.