
Introduction
Paint correction is the process of removing surface defects to restore a vehicle’s glossy clear coat.
You’ll learn how to assess paint condition, decide between DIY and pro approaches, and perform a safe, practical sequence of steps. The guide walks through prepping the surface, choosing products, and applying common techniques with realistic tips you can apply at home or with a pro.
Key takeaways
- Paint correction restores swirl-free finish by removing clear coat defects safely.
- Professional process includes inspection, polishing with compounds, and protective sealant or glaze.
- DIY involves careful washing, masking, and choosing correct pads and compounds.
- DIY vs pro: cost saved vs risk of damage, time, and uneven results.
- Budget includes tools, replacement clear coats, pads, polishes, and potential repaint.
- Improper technique causes holograms or deeper scratches; stop and reassess immediately.
Table of Contents
- Introduction
- Key takeaways
- Paint correction explained — what it is and why it matters
- Professional paint correction process (step-by-step)
- DIY paint correction: tools, steps, and prep
- DIY vs professional — pros and cons comparison
- Cost breakdown and hidden expenses
- Longevity, quality, and warranty differences
- Common DIY mistakes and how to avoid/fix them
- Choosing the right option for your car and skill level
- Conclusion
- FAQ
Paint correction explained — what it is and why it matters
Paint correction is a multi-step process, not a single product. In plain terms, it’s about removing defects such as swirl marks, light scratches, and oxidation to restore depth and gloss, while keeping the factory clearcoat intact and aligned with the OEM finish. The goal is to improve how the paint looks and feels when you run your finger over it.
A typical workflow runs from a thorough wash and decontamination to assess defects, then compounding or polishing, and finally a careful inspection. After correction, protect the shine with wax, sealant, or a ceramic coating—your choice affects how long it lasts and how easy it is to maintain. DIY-friendly sometimes, but beware of over-polishing, different paint systems, and the tools and safety steps you need; check the product labels and local rules for disposal and safety.
Technical basics of paint defects
Swirl marks are the most common defect, caused by improper washing techniques or using a dirty towel. These circular patterns can be frustrating to look at and feel rough to the touch.
Holograms appear as rainbow-like patches on your car’s surface due to clear coat thinning from repeated polishing without proper protection. Etching is another issue, often caused by acid rain or bird droppings that eat away at the paint layer.
Clear coat scratches are deeper and more noticeable than swirl marks. They can be caused by anything sharp coming into contact with your car’s surface, like tree branches or gravel kicked up from tires while driving.
To prevent these issues, it’s crucial to use proper washing techniques and protect your car after each correction session with a sealant or wax.
What paint correction does to your car’s finish
Paint correction is all about leveling out the clear coat and removing defects like swirl marks, holograms, and scratches. This process restores a smooth surface that enhances the depth and gloss of your car’s paint.
The goal isn’t just to make it look shiny; it’s to bring back the original clarity and vibrancy of the color. Proper correction can also help in hiding minor imperfections, making your car look brand new again.
However, it’s important not to over-polish. Overworking the clear coat can lead to thinning and further damage. Each type of paint reacts differently, so knowing when to stop is key.
After correction, applying a sealant or wax will protect your car’s finish from future damage and keep it looking great for longer.

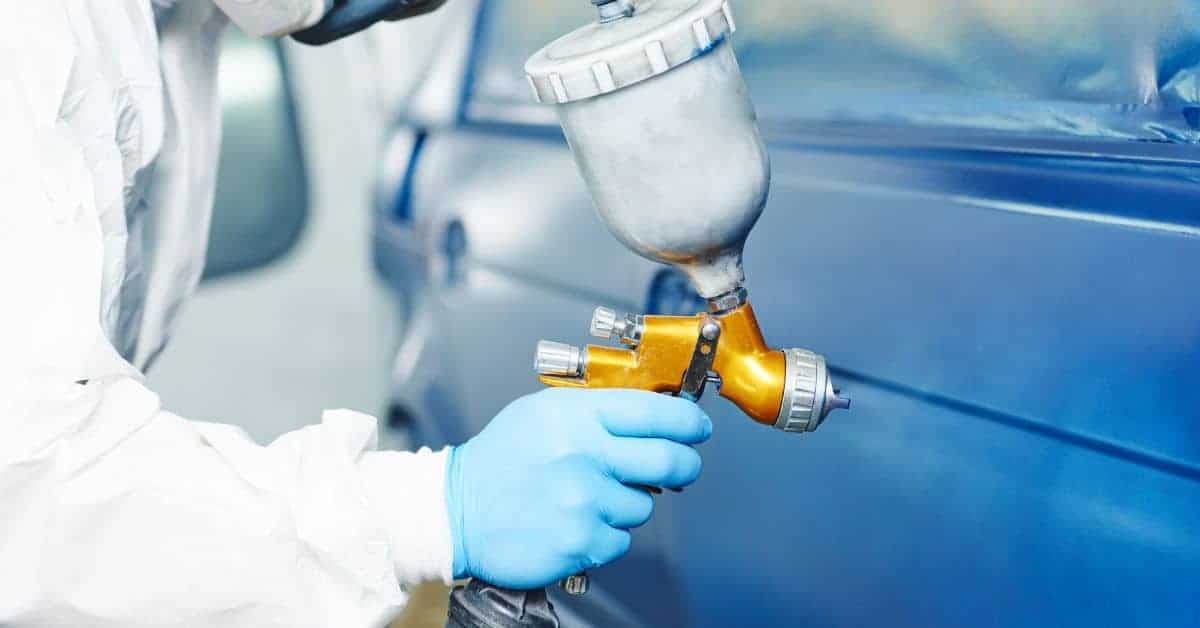
Professional paint correction process (step-by-step)
Professional paint correction starts with a thorough inspection, defect mapping, and goal setting for the finish you want. The process uses a controlled environment with proper lighting, masking, and safety to protect trim and plastics. It proceeds in stages, from initial wash and decontamination to paint correction passes and a final check.
Following a planned workflow keeps results predictable and minimizes risk of damage. You’ll see how each pass, inspection, and optional glaze or sealant fits into the timeline, so you know what to expect and what to ask for. This approach relies on experience and quality checks to verify gloss, remove holograms, and confirm the finish with a final beading or water test before sign-off.
Step-by-Step Process
This sequence guides you through the professional paint correction process, ensuring a thorough and safe approach.
- Set up your workspace: Clear space, lay down drop cloths, and ensure proper lighting. Confirm no dust or debris is present.
- Inspect and document defects: Use dry and wet lights to map swirls, scratches, and oxidation. Check paint thickness with a meter for accuracy.
- Decontaminate the surface: Wash thoroughly, then use clay bars if needed. Confirm no contaminants remain on the surface.
- Select tools and materials: Choose appropriate pads (foam/microfiber) and compounds/polishes based on paint condition. Test a small area first to ensure compatibility.
- Start with cutting compound: Apply and buff out major defects, checking for progress after each pass. Confirm no visible scratches or swirls remain.
- Moving to refining polish: Switch to finer pads and polishes to refine the surface further. Inspect under critical lighting to verify hologram removal.
- Final inspection and touch-ups: Use a gloss meter or visual benchmarks to check consistency. Address any remaining issues before sealing.
- Apply sealant or ceramic topcoat: Follow manufacturer instructions for application, curing time, and final water beading test. Confirm proper adhesion and protection.
Inspection and paint measurement
This checklist helps you thoroughly inspect the paint condition before starting any correction work.
- Wet lighting: Use to reveal defects like swirls, scratches. Confirm no major issues are missed.
- Dry lighting: Highlights oxidation and minor imperfections. Check for consistency across surfaces.
- Paint thickness meter: Measure paint depth accurately. Ensure you have enough material to work with without damaging the substrate.
- Defect mapping: Document all issues found, including location and severity. Helps in planning correction stages.
Quick rule: Always inspect under both wet and dry lighting conditions for a comprehensive view of paint defects.
Multistage Compounding and Polishing
The professional process involves three main stages: cutting compound, refining polish, and finishing. Each stage uses specific pads and polishes to achieve the desired result.
Start with a coarse pad and cutting compound to remove major defects like deep scratches or swirls. Gradually move to finer pads and polishes as you refine the surface, ensuring no visible marks remain after each pass.
The choice of polish depends on the paint condition and previous stages’ results. Always test new materials in an inconspicuous area first to avoid damage.
Final Cleaning, Protection, and Warranties
The final steps ensure your paint is clean, protected, and ready for long-term use. Proper decontamination and application of sealants or ceramic topcoats are crucial.
Clean the surface thoroughly with a microfiber towel to remove any remaining residue. Apply the chosen protection product according to manufacturer instructions, including curing time and final inspection.
Warranties offered by professionals typically cover defects in workmanship for a set period, usually ranging from 6 months to a year. Ensure you understand what is covered before signing off on the service.
DIY paint correction: tools, steps, and prep
DIY paint correction starts with a thorough wash, safe decontamination, and a panel-by-panel inspection using good lighting and a depth gauge so you understand the defects you’re dealing with before any compound touches the surface. You’ll map a practical workflow from wash to final polish and choose tools, backing plates, and pads based on the paint type and your experience, while keeping in mind when to escalate to a pro for stubborn issues. Emphasis is on preparation, patience, and a steady, methodical pace rather than rushing to a quick, risky fix.
Plan includes a tools and products checklist, masking and ventilation, and a realistic sequence from testing a spot to moving through heavier to lighter compounds, with clear criteria for stopping if heat or edge damage appears. The goal is to prevent heat build-up, pad contamination, and damage to trim, glass, and soft-plastic edges, and to document progress so you don’t overshoot the correction or create new defects. Realistic timing comes from your pace, the paint’s condition, and the steps completed, with explicit stop conditions that warrant pausing or calling in a professional and a clear path to protection with sealant, wax, or DIY ceramic once the surface is clear.
Tools and materials checklist
Before you start, review this list to ensure you have everything needed for a smooth paint correction process.
- Dual-action polisher: Choose one based on your experience level. Ensure it’s in good working condition; check the label/datasheet for any specific maintenance instructions.
Skipping this can lead to uneven results or damage. - Pads and compounds: Get a variety of grits, from coarse to fine. Check compatibility with your polisher and ensure they’re not expired.
Omitting these steps may result in ineffective correction or surface damage. - Microfiber towels: Use high-quality ones for buffing. Confirm they are clean and free of lint.
Poor quality can leave streaks or swirl marks. - Clay bar kit: Includes lubricant, clay bar, and applicator pad. Check the label/datasheet for proper use instructions.
Skip this at your peril; it’s crucial for removing bonded contaminants. - Paint depth gauge: Essential for measuring defect depths accurately. Ensure you know how to read it correctly.
Misuse can lead to over-polishing or missing deeper issues.
Quick rule: Always double-check your tools and materials before starting to avoid mid-process interruptions.
Step-by-step DIY procedure
This sequence will guide you through the paint correction process from start to finish, ensuring a thorough and effective result.
- Wash: Start with a two-bucket wash using a quality shampoo. Rinse thoroughly.
Why: Removes loose dirt and contaminants that could scratch your paint during correction.
Sign it’s right: No visible dirt or grime on the surface. - Decontaminate: Use a clay bar to remove bonded contaminants like brake dust and tree sap.
Why: Prepares the surface for effective polishing by removing stubborn residues.
Sign it’s right: Surface feels smooth and free of grit. - Measure: Inspect paint depth with a gauge to determine correction level needed.
Why: Helps you decide which compounds to use based on defect severity.
Sign it’s right: Defects are clearly identified without guesswork. - Test spot: Apply compound to an inconspicuous area first to check results and adjust technique as needed.
Why: Prevents over-polishing or damaging the paint unnecessarily.
Sign it’s right: Surface looks better with no visible defects. - Compound: Start with a heavy cut compound, then progress to lighter grits for finer detail work.
Why: Removes deeper swirls and scratches gradually without over-aggressing the surface.
Sign it’s right: Paint is smooth but not too shiny or dull. - Refine: Use fine polish and finishing pads to achieve a high-gloss finish.
Why: Polishes out any remaining imperfections for a mirror-like shine.
Sign it’s right: Surface looks flawless with no visible defects. - Clean: Wipe down the car with IPA (isopropyl alcohol) to remove any residue and verify clarity.
Why: Ensures there are no contaminants left on the surface that could dull the finish.
Sign it’s right: Surface is clear, free of streaks or haze. - Protect: Apply a sealant, wax, or DIY ceramic coating to protect your work.
Why: Keeps your paint looking great and extends its life by providing an extra layer of protection.
Sign it’s right: Coating adheres well and provides a durable finish.
Safety and ventilation precautions
Proper safety measures are crucial to protect yourself and the car’s paint during correction. Wear gloves, eye protection, and a mask to avoid chemical exposure.
Working in shaded areas or well-ventilated spaces is essential to manage heat buildup.
Avoid direct sunlight while working as it can cause overheating of tools and materials, leading to uneven results or damage. Take regular breaks to prevent fatigue and maintain focus on the task at hand.
Ensure all chemicals are stored properly after use according to local hazardous waste rules to avoid environmental harm.
DIY vs professional — pros and cons comparison
DIY vs professional: weigh cost, finish quality, time investment, and risk of damage side by side. DIY can cut upfront costs but may take longer and risk uneven results or damage if you cut corners. Pros usually deliver more consistent finishes and longer-term durability, with faster timelines but higher upfront and ongoing costs.
For DIY readers, match your project to your owner type: hobbyist, weekend warrior homeowner, property manager, or high-end finish seeker, and use the decision to decide when a pro is worth it. This matters because you’ll trade time, risk, and quality for simplicity or guarantees, and it helps you avoid costly missteps on complex substrates or safety issues. Keep risk awareness front and center and lean pro when the job involves safety, warranties, or challenging materials.
Pros and cons of DIY paint correction
DIY paint correction offers a hands-on approach that can be rewarding but comes with its own set of challenges.
Pros
- Lower upfront costs compared to hiring professionals.
- Opportunity to learn new skills and techniques.
- Greater control over the process and final outcome.
- Saves money on labor if you do it right.
Cons
- Higher risk of mistakes leading to uneven results or damage.
- Requires significant time investment for prep, correction, and finishing.
- Learning curve can be steep with many steps to master.
- Potential for longer project duration due to trial-and-error process.
If you’re okay with a learning curve and willing to invest the time, DIY paint correction can save money and give you control over your car’s finish.
Pros and cons of professional paint correction
Hiring professionals for paint correction ensures a high-quality finish but comes with higher costs and scheduling needs.
Pros
- Guaranteed superior finish with uniform results.
- Includes warranties on the work, providing peace of mind.
- Faster turnaround time compared to DIY efforts.
- Lower risk of mistakes or damage due to professional expertise.
Cons
- Higher upfront costs for labor and materials.
- Scheduling can be tight, requiring coordination with professionals.
- No control over the process once handed off to pros.
- Potential delays if additional work is needed beyond initial estimate.
If you seek a flawless finish quickly and are willing to pay for professional expertise, hiring a pro is your best bet.
Cost breakdown and hidden expenses
This section breaks down all the money you’ll actually spend on paint correction, from DIY kits and consumables to protective coatings and transport fees. You’ll see how pads, backing plates, and extra polishing steps sneak in, plus the big difference between doing it yourself and hiring a pro, with example totals that vary by sedan or SUV. No numbers here—check the label, datasheet, or local prices for exact figures.
Think of cost in clear buckets: DIY tools, consumables, coatings, pads and accessories, and any travel or shop fees. Time matters too: hours spent DIY vs. service duration, and the risk of rework or repaint if you go off track. This helps you budget realistically and decide whether to tackle it yourself or hire a pro, with a simple base formula: base kit plus expected pads/abrasives plus coating(s) plus transport plus contingencies.
One-time vs recurring costs
The initial cost of a DIY paint correction kit can seem like the biggest expense, but it’s just the beginning. Once you have your tools and materials, you’ll need to factor in ongoing expenses for protective coatings and maintenance.
Ceramic sealants or waxes are essential for maintaining your car’s finish after paint correction. These products can range from cost varies to cost varies per application, depending on the quality and coverage area. You’ll likely need to reapply these every 6 months to a year.
In addition to coatings, you might also incur costs for additional polishing steps if your car’s finish degrades over time or gets damaged. This could mean buying more compound and pads, which adds up quickly. For example, replacement pads can cost anywhere from cost varies to cost varies each, depending on the type.
Overall, while DIY paint correction saves money upfront, it requires a commitment to ongoing maintenance to keep your car’s finish looking its best.
When DIY becomes more expensive than pro
Mistakes in the paint correction process can lead to significant additional costs. If you damage the clear coat or scratch through it, you’ll need to start over with new materials and potentially even repaint sections of your car.
Wasted products are another hidden cost. Buying compound, pads, and other supplies only to find out they don’t work for your specific paint issues can quickly add up. Professional services often have a better understanding of the right tools and techniques from the start, reducing waste.
If you’re not confident in your skills or lack experience with paint correction, it might be more cost-effective to hire a professional. Professionals typically offer warranties on their work, which means if something goes wrong, they’ll fix it at no extra charge. This peace of mind can save you money and stress in the long run.
Consider the time investment as well. DIY paint correction is labor-intensive, and mistakes take more time to correct than to prevent. If your time is valuable or you’re short on patience, professional services might be a better option despite higher upfront costs.
Longevity, quality, and warranty differences
Quality of correction directly drives how long the finish stays protected and how consistently it looks over time. When edges are dust-free, gloss is uniform, and defects are properly removed, the coating tends to wear evenly rather than peel or cloud in patches. DIY coatings that skip meticulous prep often show faster degradation and more noticeable aging than professional-grade applications that use thorough surface cleaning and multi-step curing, even if both claim to protect.
That matters because warranties reflect what actually gets protected and who handles the fixes. Professional services typically cover durability claims and defect remediation, while DIY products usually come with limited assurances or exclusions and may require registration or specific conditions to stay valid. Look for transferability, clear claim processes, and required service intervals, and set expectations around maintenance, washing cadence, and environmental exposure so you aren’t surprised when results shift or a claim needs action.
How correction affects topcoat and coating lifespan
A properly corrected surface improves the bonding and performance of sealants or ceramic coatings. When you remove imperfections like swirls, scratches, and oxidation, you create a smooth base for your new protective layer to adhere to. This means that when you apply a high-quality wax or ceramic coating after correction, it will form a stronger bond with the car’s paint.
The smoother surface also allows the topcoat to spread evenly without pooling in low spots or drying unevenly. This uniform application ensures better coverage and protection against environmental damage like UV rays, acid rain, and bird droppings. A well-corrected finish will last longer because it resists these elements more effectively.
Proper correction also reduces the risk of future issues such as water spots or swirl marks from improper washing techniques. By maintaining this high level of care through regular polishing and cleaning, you can extend the life of your topcoat significantly. Remember to check the label for recommended maintenance schedules specific to the products you use.
Warranty and service guarantees explained
Professional paint correction services often come with warranties that cover issues like durability claims and defect remediation. These warranties typically outline conditions for proper surface preparation, application environment, and regular maintenance to keep the finish looking great over time.
In contrast, DIY kits rarely offer meaningful warranties due to the variability in user skill levels and adherence to best practices. Most DIY products come with limited or no warranty at all, which means you’re on your own if something goes wrong during application or later down the line.
When evaluating a professional service’s warranty, look for clear terms regarding coverage duration, transferability, and claim processes. Also consider whether regular maintenance visits are required to keep the warranty valid. This ensures that you understand what is covered and how to maintain your investment properly.
To set realistic expectations about longevity based on your chosen path—DIY or professional—you need to weigh factors like initial cost versus long-term value, ease of application, and potential for rework if mistakes are made. Always read the fine print and ask questions before committing to any service or product.
Common DIY mistakes and how to avoid/fix them
Common DIY mistakes show up fast: picking the wrong pad or polish for the job, using too much or too little pressure, and skipping proper surface prep. These missteps flatten clarity, increase haze, and waste your time chasing the same defects. When you spot them, switch to the right pad for the task, choose the appropriate cutting or finishing compound, and pause to test on a small panel before committing to the full wheel.
Why it matters is simple: proper prep, pad/compound pairing, and controlled technique save your effort and protect the finish. A solid plan—inspecting the surface, testing a panel area, and confirming you’ve removed swirl or scratch without introducing new defects—lets you work with confidence. If you keep fighting heat buildup, uneven pressure, or you still see persistent marring, holograms, or buffer trails, stop and seek professional help, and document what you tried for the pro consult.
Visual checkpoints to know you’re doing it correctly
Use these visual cues as you work through each step of paint correction.
- Uniform haze removal: Check that the swirl marks are evenly disappearing. If they linger, your polish might be too light or your pressure too low.
- Gloss consistency: Ensure all areas have a consistent shine level. Uneven gloss indicates inconsistent technique or product application.
- No burn marks: Inspect for any darkened spots from overheating the paint. Burn marks can ruin your finish and require professional repair.
- No swirl increase: Make sure you’re not creating new scratches with each pass. If swirls worsen, reduce pressure or switch to a lighter polish.
Quick rule: Regularly step back and visually assess your work for uniformity and quality.
Quick troubleshooting guide
If you encounter issues like polish residue, high spots, or holograms, take immediate action to fix them:
For polish residue, use a clay bar and detail spray to remove any leftover compound. If it persists, consider using a dedicated cleaner.
To address high spots, switch to a foam pad with lower aggressiveness or reduce your machine speed. High spots can be fixed but may require more polish than expected.
If you see holograms, stop immediately and re-evaluate your technique. Adjust the pressure, use a finer polish, or consult a professional if necessary to avoid further damage.
Choosing the right option for your car and skill level
Choosing the right option for your car and skill level means weighing vehicle value, current paint condition, your experience, budget, and long‑term goals. If the car is a higher‑value or daily driver, consider involving a pro sooner rather than later, with a simple decision switch to guide you. Use quick at‑a‑glance tests for swirls, oxidation, and clear‑coat wear to gauge what level of correction you’re facing and what’s realistic.
This matters because it keeps you from wasting time and money on a plan that won’t last. It helps you decide between DIY, pro, or a hybrid approach before you start, and outlines when a project becomes too time‑consuming or risky to finish yourself. Always check the product label or datasheet for guidance and follow local rules for waste disposal instead of dumping anything improper.
When to choose DIY
If you’re working with a lower-value vehicle, looking for a budget-friendly option, or just want to learn the ropes of paint correction, going the DIY route is often your best bet. This approach lets you save money and get hands-on experience.
Start by assessing the condition of your car’s paint. If it has minor swirl marks, light oxidation, or other surface imperfections that aren’t too deep, DIY correction can work wonders. Just make sure to prep properly—cleaning, masking off areas not meant for polishing—and use the right tools and products.
DIY is also great if you’re willing to invest time in learning and perfecting your technique. It’s a bit like building a house: start with a solid foundation of knowledge and practice regularly. Over time, you’ll see better results and save money on professional services.
When to hire a professional or use a hybrid approach
If your car is high-value, has significant damage like deep scratches or rust, or if you’re aiming for a showroom-quality finish, it’s time to consider hiring a pro. Professionals have the expertise and tools to tackle tough jobs efficiently and effectively.
For those who want to balance cost and quality, a hybrid approach can be ideal. Start by doing your own prep work—cleaning, masking off areas—and then take your car to a professional for the actual correction process. This way, you save on labor costs while still getting top-notch results.
A hybrid option also works well if you’re short on time but want to maintain your car’s appearance. Professionals can handle the intensive work quickly and leave you with a beautiful finish that lasts longer than DIY efforts alone.

Conclusion
Paint correction pays off in safety, durability, and a showroom finish. If you respect the process, you protect your investment and avoid costly mistakes.
Start by testing a small, inconspicuous area, decide whether DIY is right for this car or if a pro is wiser, gather clean, appropriate tools, wash and decontaminate the surface, work in a clean, shaded area, and proceed with the gentlest, most controlled passes you can manage—monitor heat and keep the pad and polish clean as you go, then seal or wax after you finish.
Common mistakes to avoid include skipping a panel test or using the wrong pad or compound, applying too much pressure or taking too few passes, and overheating the paint or polishing through edges or trim. Always mask edges and trim, work at low speed, and wipe the area frequently to check your progress; safety comes first, and mistakes here are costly.
If you encounter deep scratches, clearcoat failure, or color sanding is needed, it makes sense to call a professional rather than risk permanent damage. When in doubt, trust your judgment and prioritize a safe, controlled approach—your car will look great and stay protected if you proceed with a clear plan and cautious steps.
FAQ
What is paint correction?
Paint correction is fixing clear coat imperfections. It uses careful sanding and polishing to remove scratches and swirl marks. The goal is a smooth, glossy finish that looks new again.
What’s the difference between DIY and pro paint correction?
DIY is cheaper and works for minor spots. Pros have stronger tools, better compounds, and experience with tough blemishes. They can guarantee a consistent finish on all panels.
Is paint correction the same as a wax or sealant?
No. Paint correction removes defects from the clear coat. Wax or sealant adds protection and shine after the correction. You still need proper prep and curing for best results.