

Introduction
The journey to a greener home starts with eco-friendly paint, but how long does the process take? This guide walks you through each step of your DIY project, from surface preparation to application and drying, ensuring you allocate sufficient time for each task.
Understanding the timeline helps you plan efficiently, avoid rushing, and achieve professional-looking results that last. Let’s dive into the eco-friendly paint timeline and duration guide.
The Eco-Friendly Paint Timeline: Step-by-Step Duration Guide
Preparation is key to a successful eco-paint job. Allocate around 1-3 days for surface preparation, depending on the size and condition of your project area.
- Day 1: Cleaning and repairing surfaces (1-2 hours)
- Day 2: Sanding and priming (2-4 hours)
- Day 3: Protecting floors and nearby surfaces, mixing paint (1 hour)
Once your surface is prepped, it’s time to apply the eco-friendly paint. Allow around 6-8 hours for application, including drying time between coats.
- First coat: Application and initial drying (2-3 hours)
- Second coat: Drying and final touch-ups (3-5 hours)
The curing process is crucial for durable results. Follow the manufacturer’s guidelines, which typically recommend 1-7 days of cure time before gentle use and up to 28 days for full cure.
Key takeaways
Proper surface preparation takes time but ensures better adhesion and a smoother finish. Allocate enough time for each step in your eco-paint timeline to achieve lasting results.
- Choose low-VOC or zero-VOC paints to reduce indoor emissions, improving health.
- Test a hidden area first and document color and finish before full coat.
- Prepare surfaces thoroughly: clean, dry, and sand glossy areas for better adhesion.
- Use a quality brush or roller suitable for waterborne finishes and smooth edges.
- Ventilate workspaces well and follow manufacturer cure times without rushing the project.
- Consider exterior primers and sealants for durable outdoor eco-paints and milder weathering.
Table of Contents
- Introduction
- Key takeaways
- Why Choose Eco-Friendly Paints
- Types of Eco-Friendly Paints and How to Choose
- Surface Preparation: The Foundation for Good Results
- Tools and Materials Checklist for DIY Eco Paint Jobs
- Application Techniques for Professional-Looking Finishes
- Drying, Curing, and Achieving Durable Results
- Pro Tips, Common Mistakes, and Troubleshooting
- Cost Considerations and Eco-Friendly Alternatives
- Conclusion
- FAQ
Why Choose Eco-Friendly Paints
Choosing low-VOC or zero-VOC paints cuts down on emissions and odor, making indoor spaces more comfortable during and after painting. Read the label to verify claims: look for certifications like NPP, EPA Safer Choice, Greenguard, or Green Seal.
Indoor air quality improves when you pick these paints, with fewer irritants during application and less off-gassing over time. Consider water-based versus solvent-based, balancing ease of ventilation with durability and coverage. Always check the product label or datasheet for specifics and follow local disposal rules for household hazardous waste.
Environmental impact vs. traditional paints
Eco-friendly paints, like low-VOC and zero-VOC options, significantly reduce the environmental footprint compared to conventional paints. These paints minimize air pollution by lowering volatile organic compound (VOC) emissions during application and drying. VOCs are harmful chemicals that contribute to smog formation and can linger in the atmosphere for extended periods.
Moreover, eco-friendly paints decrease water pollution because they don’t contain heavy metals or other toxic substances commonly found in traditional paint formulations. This means less risk of contaminating local water sources during production, application, or disposal phases. Additionally, these paints reduce landfill waste and lower overall carbon emissions throughout their lifecycle.
When choosing between eco-friendly and conventional paints, look for certifications like NPP, EPA Safer Choice, Greenguard, and Green Seal to ensure the paint meets strict environmental standards. These labels verify that the product is genuinely low in harmful chemicals and safer for both people and the planet.
Health and indoor air quality benefits
Eco-friendly paints offer significant health advantages by reducing off-gassing, which can cause irritation, headaches, and other short-term symptoms. These paints are formulated to minimize the release of harmful VOCs during application and drying, leading to better indoor air quality.
For individuals with allergies or respiratory issues, eco-friendly paints provide a safer environment by lowering exposure to irritants that can trigger asthma attacks or exacerbate conditions like eczema. This is especially important in homes where children, the elderly, or those with compromised immune systems reside.
To ensure safety after painting, follow recommended re-occupancy times provided on product labels. These guidelines help prevent inhaling lingering VOCs and allow for proper ventilation before moving back into freshly painted areas. By choosing eco-friendly paints, you not only improve your home’s air quality but also create a healthier living space that can reduce the need for ongoing maintenance or repainting cycles.

Types of Eco-Friendly Paints and How to Choose
Eco paints come in several main types: low or zero-VOC latex, natural clay, milk paint, plant-oil based finishes, and limewash. Interior walls and cabinetry often use latex or limewash; natural clay and milk paints are popular for walls and furniture in gentle looks. Each type has practical trade-offs in odor, drying time, prep needs, durability, and washability for DIY projects.
Think about the room, substrate, ventilation, and how you want it to wear, then test patches or small boards before committing. Check the label for compatibility with your surface, priming needs, and moisture conditions, and beware that not all eco paints behave the same. This matters because appearance and durability guide how you finish kitchens, bathrooms, and high-traffic areas, and it helps you avoid common myths about eco options.
Overview of paint chemistries and finishes
The type of binder used in eco-friendly paints—like low/zero-VOC latex, natural clay, milk, or plant-oil based—determines its performance. For instance, low/zero-VOC latex offers good durability and easy application but might have a slight odor during drying.
Pigments give the paint its color and opacity. Natural pigments in eco paints are often less intense than synthetic ones, so you may need to apply more coats for full coverage. Finishes like matte, eggshell, or satin affect how washable and durable your paint is.
A matte finish looks great but isn’t very washable. Satin finishes offer better durability and are easier to clean. Eggshell falls in between, giving you a nice sheen with decent washability. Choose the right finish based on where it’s going—kitchens and bathrooms need more durable options than bedrooms or living rooms.
Choosing by room, surface, and budget
Kitchens and bathrooms require tougher paints due to moisture and frequent cleaning. Low/zero-VOC latex or plant-oil based options work well here for their durability and washability. For kids’ rooms, you might opt for milk paint for its soft look and non-toxic nature.
Exterior use demands more robust solutions like natural clay paints that can handle weather better than indoor types. These are often pricier but worth it if you want a long-lasting finish without harmful chemicals.
Budget-wise, eco-friendly paints vary widely. Low/zero-VOC latex is typically the most affordable and still offers good performance for interior use. Milk paint or plant-oil based options can be more expensive but might fit your aesthetic needs better. Always test small areas first to ensure you like both look and feel.
Surface Preparation: The Foundation for Good Results
Surface preparation is the foundation for good results. Clean thoroughly, repair cracks and loose patches, then abrade glossy areas to create a mechanical key, and apply a compatible primer. Keep the surface dry and dust-free, and look for visual checkpoints like feathered edges and even porosity.
This matters because proper prep controls adhesion, longevity, and the final look. If you skip steps, you risk premature failure like peeling or uneven absorption, especially on porous or reactive substrates. Always check the product label or datasheet for instructions, and follow local disposal rules and any dryness or cure cues.
Cleaning, degreasing, and rust/old paint removal
Start by cleaning the surface thoroughly. Use a mild detergent or a specialized degreaser for tough jobs to remove dirt, grease, and oil. Rinse well with water and let it dry completely before moving on.
If you find old paint peeling off, scrape it away using a scraper or wire brush. For rust spots, use a wire brush or sandpaper to remove loose particles. If the rust is deep, apply a rust converter to stabilize it before painting.
For stubborn areas like heavy grease or oil stains, chemical strippers can be effective but handle them with care as they’re strong stuff. Always wear protective gear and follow instructions carefully.
Remember, a clean surface means better paint adhesion and longevity. Take your time here to avoid issues down the road.
Repairing, sanding, and smoothing surfaces
Inspect for cracks, holes, or loose concrete. Use a compatible repair mortar to fill these areas. Feather the edges so they blend seamlessly with the existing surface.
Sanding is crucial for creating a mechanical key on glossy or smooth surfaces. Aim for 120-220 grit sandpaper depending on how rough you need it. Sand lightly and remove all dust before proceeding.
Smooth out any imperfections to ensure an even base. This step helps the paint adhere evenly, preventing future issues like bubbling or cracking. A smooth surface also looks better once painted.
A uniform substrate is key for a professional finish. Take your time here and you’ll save yourself headaches later on.
When and how to use primers and eco-friendly sealants
Select the right primer for your project. For porous surfaces, a bonding primer helps the paint stick better. On wood or metal with rust issues, go for a shellac-based primer.
Eco-friendly options are available too. Look for acrylic primers that offer good coverage and adhesion without harmful chemicals. They’re great for sealing porous areas to prevent uneven absorption of your eco-friendly topcoat.
Sealants can protect surfaces from moisture or UV damage, especially in high-traffic areas. Choose an eco-friendly sealant compatible with your paint system to maintain the integrity of both layers.
Using primers and sealants correctly ensures a longer-lasting finish that looks great too. Don’t skip this step—it’s worth it!
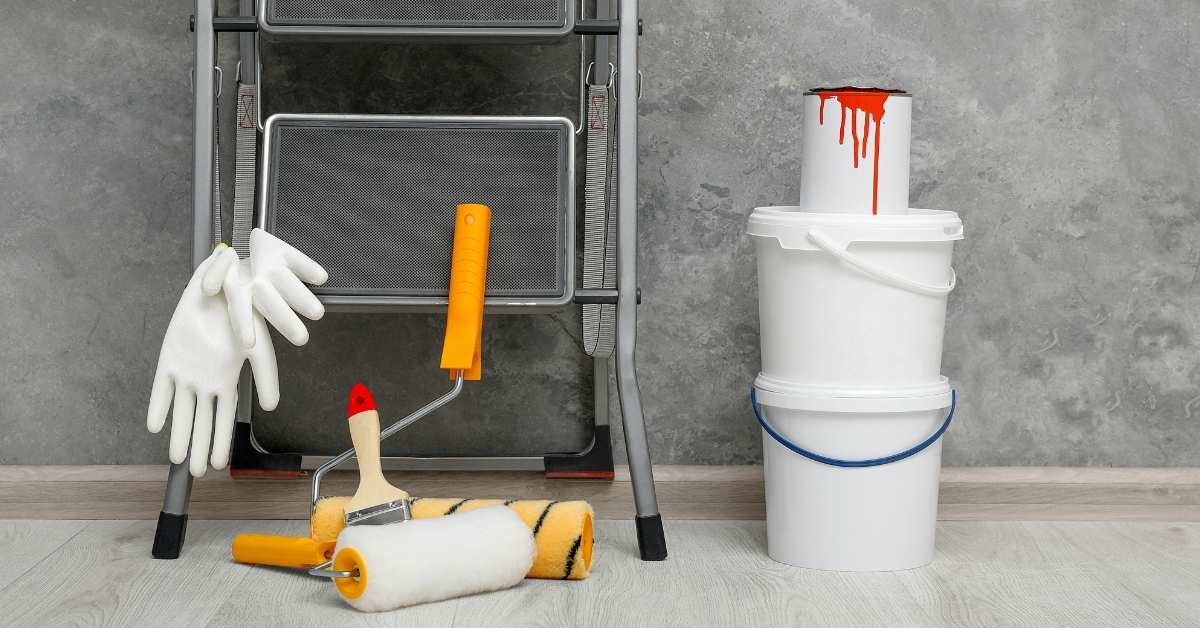
Tools and Materials Checklist for DIY Eco Paint Jobs
This section lays out a practical checklist of brushes, rollers, sprayers, masking tape, drop cloths, respirators, and eco-friendly auxiliary products, with guidance on when each tool is essential for low-VOC or water-based paints and how to choose between synthetic and natural bristles based on paint type and cleanup, while balancing tool quality against cost to avoid over-spending on disposables. You’ll find simple rules of thumb about tool performance, compatibility with latex or waterborne formulas, and the idea that higher-quality tools reduce shedding and improve coverage enough to justify a longer life, especially when you plan to reuse or refinish surfaces.
Why it matters to a DIY homeowner is that the right tools save time, waste, and frustration, and they make eco paints perform closer to their promises, so you can finish a job cleaner and with less mess. Use this as a reality check for prep, application, and cleanup: read labels for material compatibility, verify respirator fit and filter recommendations, choose reusable or recyclable options where possible, and follow local disposal guidance for eco products; and remember that smart budgeting often means renting specialty gear or mixing purchases with reuse and maintenance to extend tool life.
Selecting brushes, rollers, and sprayers
Before you start your eco-friendly paint job, make sure you have the right tools for the task.
- Nap length: Choose based on surface texture; smooth surfaces need shorter naps, rougher ones longer. Confirm by testing a small area.
- Synthetic bristles: For water-based paints, synthetic bristles resist wear and tear better than natural fibers. Check compatibility with paint type.
- Natural bristles: Use for oil-based paints; they hold more paint but can shed if not cleaned properly. Confirm by rinsing after use.
- Sprayer rental: For smooth, even coats on large areas, consider renting a sprayer. Check availability and setup instructions before starting.
Quick rule: Always test your tools on a small area first to ensure compatibility with the paint type.
Protective gear and eco-conscious consumables
Before you begin painting, make sure you have all necessary protective equipment and sustainable materials on hand.
- Masks: Use respirators rated for paint fumes; check fit with a simple seal test. Skipping can lead to inhalation risks.
- Gloves: Wear nitrile gloves to protect hands from chemicals; confirm by testing flexibility and comfort. Missing this step can cause skin irritation.
- Dust masks: Use for sanding or scraping old paint; check fit with a simple breath test. Not wearing can lead to dust inhalation.
- Masking tape: Choose low-tack options that won’t damage surfaces; confirm by testing adhesion and removal on a small area. Using high-tack tape may leave residue.
Quick rule: Always opt for reusable or recyclable materials to minimize waste during your project.
Application Techniques for Professional-Looking Finishes
Four primary methods—brush, roller, cutting-in, and spray—each have their place with eco-friendly paints. Use them where they shine and know their limits on bare concrete, painted surfaces, and primed substrates. Plan the workflow: surface prep, prime if needed, cut-in edges first, then roll the large areas, and watch for dry times to avoid lap marks.
Understanding wet edges and feathering helps you keep a seamless finish on large panels and reduce brush or spray marks. It also matters for tool choice and spray settings with low-VOC formulas, plus checks like surface moisture and temperature to prevent problems. This heads-off adhesion issues and makes cleanup and re-coat decisions easier.
Brushing and rolling best practices
To get a smooth, professional finish with eco-friendly paints, start by choosing the right brush. Opt for synthetic brushes over natural bristles as they are better suited to water-based paints without compromising on quality.
When brushing, load your paint evenly across the brush’s width and apply it in long, even strokes. Avoid overloading the brush which can lead to drips or sags. For rolling, use a roller with a nap that matches the surface texture—shorter naps for smooth surfaces like painted walls, longer ones for rough textures.
Between coats, restore the texture of the paint by feathering out any edges and maintaining a wet edge across large areas to prevent lap marks. This means applying subsequent coats while the previous coat is still slightly tacky but not fully dry. Use a damp cloth or sponge to smooth out roller marks before they set.
Remember, patience is key when working with eco paints. They tend to dry slower than conventional paints, giving you more time to work and correct mistakes without compromising on quality.
Spray application basics and settings
For a flawless finish using spray equipment, start by setting up your workspace properly. Ensure good ventilation and cover all areas not being painted to protect from overspray.
Adjust the pressure and nozzle size according to the paint viscosity. For eco-friendly paints, aim for lower pressures around 20-30 psi with a fan width of about 8 inches. This helps reduce waste and ensures even coverage without over-spraying delicate areas.
Masking is crucial when spraying near edges or trim work. Use painter’s tape to protect these areas, but be careful not to apply too much pressure as it can leave marks on the surface. Also, keep a steady distance of about 12-18 inches from the wall for optimal coverage.
Regularly clean your spray equipment after each use with eco-friendly cleaning solutions to maintain its performance and longevity. This will help you avoid clogs and ensure consistent paint flow throughout your project.
Drying, Curing, and Achieving Durable Results
Touch-dry means the surface feels dry to the touch, while fully cured means the film has reached its durable, finished state. They matter for durability and project timeline, especially with eco-friendly paints that can be touch-dry enough to handle yet still curing inside. Drying is influenced by ambient temperature, relative humidity, ventilation, substrate condition, film thickness, and how you apply the product.
To speed cure safely, use controlled heat and steady, clean airflow while avoiding dust; check the label or datasheet for guidance and stay within what the product allows. Track tack-free time, initial cure, and full cure with simple checks and a hygrometer/thermometer to monitor conditions, and delay if conditions drift out of range. Run a quick durability check after cure with a light abrasion test and brief moisture/UV exposure considerations, but avoid shortcuts that compromise eco credentials or film performance.
Dry time expectations and troubleshooting
Eco-friendly paints typically have a longer dry time than conventional paints, but they offer better durability once fully cured. A common mistake is rushing the process by recoating too soon or applying excessive heat to speed up drying.
For most eco-friendly paints, you can expect touch-dry times ranging from 2-4 hours under ideal conditions. However, full curing can take anywhere from a few days to several weeks depending on factors like temperature and humidity. If your paint feels tacky or starts to bubble after application, it’s likely due to high moisture levels or poor ventilation.
To troubleshoot these issues, ensure proper air circulation by opening windows or using exhaust fans without blowing dust onto the wet paint surface. Avoid using space heaters or hair dryers as they can damage the film integrity and compromise VOC standards set for eco paints.
When to recoat and final finishing touches
The timing of your second coat is crucial in achieving a smooth, durable finish. Wait until the first coat is completely dry but still slightly tacky before applying another layer. This usually takes about 24 hours under normal conditions.
If you need to sand between coats for a smoother surface, do so gently with fine-grit sandpaper and wipe down the area thoroughly afterward. Be cautious not to over-sand as this can thin out the paint film and expose bare substrate areas.
Once your final coat is applied and fully cured, it’s time to add back any trim or hardware that was removed during prep work. Use painter’s tape around edges to protect them from accidental marks when handling tools or fixtures.
Pro Tips, Common Mistakes, and Troubleshooting
Pro tips and fixes start with a solid prep routine, clean and patch the slab, and verify the surface is ready for eco-friendly paints. Watch for moisture and choose primers that suit both the concrete and the paint you’re using, so you don’t fight adhesion later. When you’re aiming for even color and good coverage, pre-mix pigments, test on small areas, and apply several thin coats with back-rolling or cross-hatching to reduce lap marks. Be mindful of sheen choices and how porosity or sealing affects the finish, and follow product guidelines for thinning if needed to avoid a gloopy or milky look.
This matters because DIY mistakes show up fast: poor prep, wrong sheen for the space, or over-thinning that robs durability. The practical payoff is a smoother finish that lasts, with color that holds true across high-traffic areas. Use small trials to dial in technique, tools, and drying times, and tailor your method to interior versus exterior conditions. If you see signs of trouble like edge peeling, color inconsistencies, or moisture-related issues, address them with light abrasion, targeted touch-ups, and proper curing guidance, always checking the label or datasheet for the safe, approved steps.
Coverage Optimization and Color-Matching Hacks
To get the best coverage with eco-friendly paints, start by using a tinted primer. This helps you achieve the desired color in fewer topcoats, saving time and materials. Make sure to test your paint on small patches before committing to large areas.
When applying multiple thin coats, ensure each coat is dry before moving on to the next. Use back-rolling or cross-hatching techniques to avoid lap marks and achieve a smooth finish. This method also helps in getting an accurate color match across the surface.
If you notice slight variations in color between patches, it’s often due to inconsistencies in application technique or environmental factors like humidity. To fix this, lightly sand any rough spots before applying another thin coat of paint. This will help blend the colors and create a uniform look.
Fixes for Drips, Streaks, and Uneven Sheen
Drips and streaks are common issues that can occur during painting. To fix these problems, start by lightly sanding the affected areas to smooth out any rough spots or ridges left behind.
Once sanded, use a clean brush or roller to blend in additional paint over the drips and streaks. Work quickly but carefully to avoid creating new issues. If you notice uneven sheen across different sections of your project, it’s important to address this early on.
To correct uneven sheen, consider applying an additional coat of paint with a slightly higher sheen level in problem areas. This can help even out the finish and create a more consistent look overall. Remember, patience is key when fixing these issues; rushing through corrections often leads to further problems.
Cost Considerations and Eco-Friendly Alternatives
Upfront costs for eco paints include the purchase price and application labor, while you’ll pay for maintenance or recoats over the long run. Look at cost per square foot, how many coats are required, and waste for options like milk paint, clay coatings, or repurposed finishes.
Know when to splurge vs save by focusing on durability, washability, and tint stability. Budgeting tips and vetting suppliers for certifications help you get low-tox options without wasting material or money.
Budgeting your project and cost-saving strategies
When it comes to eco-friendly paints, budgeting is key. Start by setting a clear budget that includes not just the paint but also tools like brushes, rollers, and protective gear. One way to save money without compromising quality is through proper preparation—clean surfaces mean less paint wasted.
You can test out different colors with sample sizes before committing to larger quantities. This helps avoid costly mistakes down the line. Also, consider renting high-end application equipment if you don’t need them long-term; it’s often cheaper than buying new tools.
Lastly, look for bulk discounts and buy in large quantities when possible. This can significantly reduce your per-unit cost. Just make sure to store extra paint properly so it doesn’t go bad before use.
Sustainable primers, sealers, and finish options
Choosing the right primer is crucial for any painting project. Opt for low-VOC or zero-VOC primers to minimize environmental impact while still providing good coverage and adhesion. These products are often just as effective as their conventional counterparts.
For sealing and finishing, consider natural options like beeswax or linseed oil instead of synthetic sealants. They offer a protective layer without the harmful chemicals found in traditional finishes. However, be aware that these may require more frequent maintenance to keep up appearance.
When deciding between natural and synthetic products, weigh factors such as durability, ease of application, and long-term cost savings. Natural options might have higher upfront costs but could save you money over time due to reduced need for repainting or recoating.

Conclusion
Eco-friendly paints pay off in safer air quality, better durability, and a cleaner finish when you treat the job like a real trade task. Focus on solid prep, proper selection, and patient application, and you’ll see lasting results that stand up to daily use.
Start by choosing the right eco-friendly paint for your surface, verify it meets your project needs, then prep thoroughly: clean, repair, sand, and prime as needed; protect floors and nearby surfaces; mix and stir until uniform. Apply in thin, even coats, keep a steady hand, and maintain the correct temperature and ventilation while you work; allow adequate drying and curing time between steps and test a small area first to confirm adhesion and finish.
Common mistakes to avoid are skipping surface prep, choosing the wrong type of paint for the substrate, and rushing coats or insufficient ventilation. Safety rules to follow: wear a mask and eye protection when sanding or opening new cans, use gloves, and never glaze over a dirty or damp surface. If the project is large, on an exterior wall, or involves old or suspect lead paint, or you’re unsure about humidity and curing conditions, call a professional rather than pushing on. Stay disciplined, and you’ll finish with a durable, even look you can be proud of.
FAQ
Is eco friendly paint really as good as regular paint?
Yes, it can be. It often has lower odor and fewer volatile chemicals. You may need a bit more coats for strong coverage in some cases.
What should I look for on the label?
Check the VOC level. Look for low or zero VOC claims. Also check for durability and washability specs for high traffic areas.
Will eco paints hide imperfections as well as standard paints?
You may notice a difference on very stained or dark surfaces. Use a high quality primer designed for eco paints. Otherwise you’ll see more effort needed to get a solid finish.
Are there any bad practices I should avoid?
Avoid using water thin products in hot sun or on bare wood. Don’t skip ventilation and eye protection. Follow the can’s instructions for cleanup with the right solvents or water.