

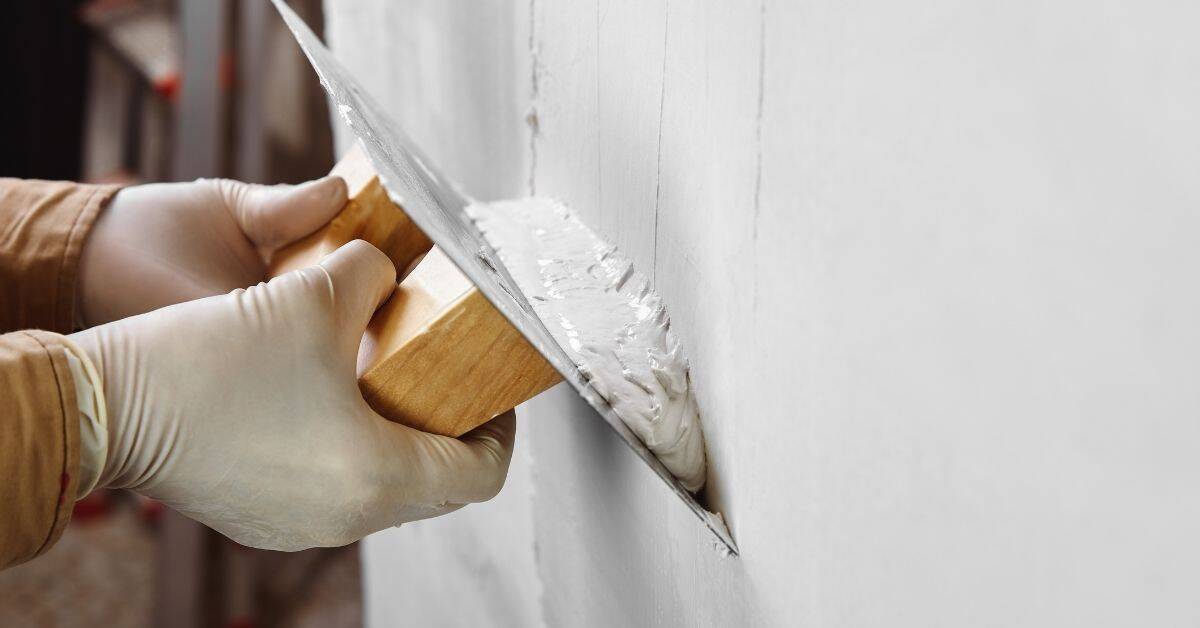
Introduction
Brown Coat Leveling means using straightedges and simple rods to bring wall coatings to a flat, level surface.
This article explains what to look for when checking flatness, and walks you through practical steps, tips, and general rules of thumb for achieving smoother walls.
The guide focuses on practical, no-fuss techniques you can adapt on typical interior projects, helping you plan, measure, and verify your results as you go.
Key takeaways
- Plan behind-wall survey, moisture control, and substrate cure before browning process.
- Calibrate straightedges and rods on a level, rigid work surface.
- Maintain consistent slurry thickness to prevent tool-induced high and low spots.
- Check tolerances with long straightedges and manual plumb checks at intervals.
- Record transfer lines clearly and verify with a second measurement.
- Allow for cure time variations and avoid traffic during setting.
Table of Contents
- Introduction
- Key takeaways
- Why brown coat leveling matters for wall flatness and finish quality
- Planning and site assessment before you brown coat
- Tools, materials, and safe setup for straightedges and rods
- Measuring and transferring level — methods and best practices
- Applying the brown coat with straightedges and rods — step-by-step
- Common problems, troubleshooting, and corrections
- Quality checks, visual checkpoints, and final tolerances
- Cost, time estimates, and avoiding common mistakes
- Conclusion
- FAQ
Why brown coat leveling matters for wall flatness and finish quality
Brown coat leveling is the step where you establish a stable, uniform base that the finish coat can rely on for adhesion and visual accuracy. It defines the foundation that determines how flat the walls appear once paint, tile, or wallpaper go on, and it helps control crack tendency by keeping the substrate consistent in thickness and texture. Understanding how substrate prep, mix consistency, and controlled thickness interact is essential to predict and manage deviations before they become visible features.
Using straightedges and rods is not just a ritual; it’s a method that helps you spot high and low points early and keep the surface within your tolerance window as it dries. Hand troweling, skim coats, or laser-guided checks may be appropriate in certain situations, but they require clear indicators and skilled judgment. Throughout the brown coat, you should perform spot checks, rod pulls, and documentation of high/low areas, while avoiding overworking, uneven trowel pressure, or premature loading which can lock in imperfections.
Structural vs. Cosmetic Flatness
The brown coat leveling process aims for two types of flatness: structural and cosmetic.
Structural flatness ensures your walls are sound, stable, and resistant to cracks. It’s about strength, not perfection. Acceptable variances here can be up to 1/8″ over a 6′ span.
Cosmetic flatness, on the other hand, is all about appearance. It’s what you see when you look at your walls. Here, variances should be minimal – no more than 1/32″ over a 4′ span.
How Brown Coat Impacts Downstream Trades
Poor leveling in the brown coat stage can cause headaches for other trades. Trim and cabinetry might not fit right, leading to costly adjustments.
Tile installers may struggle with lippage – when tiles aren’t flush with each other due to uneven surfaces. This can lead to cracked grout or even tile failure.
Painters will see every imperfection in the wall. High/low spots and seams become visible, ruining an otherwise smooth finish. Getting the brown coat right first time saves you money and time in the long run.
Planning and site assessment before you brown coat
This pre-work checklist centers on defining the objective, scope, and constraints so you don’t miss critical details later. Start by establishing success criteria for flatness and the tools you’ll rely on, then plan to document measurements for reproducibility. Clarify the required lengths of straightedges and rods and assign targets for initial planarity before laying down any material.
Next assess site conditions and accessibility to prevent workflow bottlenecks. Check weather, drainage, and vibration risks, and ensure space for equipment, material storage, and safe crew movement. Verify access for scaffolding or ladders and confirm any permits or inspections are in place before you begin.
Inspecting substrate and identifying irregularities
Before you start, inspect the existing wall surface thoroughly. You’re looking for any issues that could affect your brown coat leveling.
Loose lath or mesh: Tap the walls with a hammer. If it sounds hollow or pieces come off, you’ve got loose material. Mark these areas and repair before proceeding.
Old plaster or coatings: Check for flaking, peeling, or crumbling. Remove any unstable material to prevent it from mixing into your brown coat.
Moisture issues: Look for water stains, mold, or dampness. If present, identify and fix the source before applying the brown coat. Moisture can cause serious problems later on.
Local codes, permits, and utility considerations
Before you start grinding, chasing, or drilling into walls, check local building codes. You don’t want to violate any regulations.
Concealed utilities: Hire a professional to locate and mark any electrical, plumbing, or other utility lines behind the walls. Drilling into these can cause serious damage or injury.
Permits: Check if you need any permits for your work. Some areas require them for certain types of construction activities.
Always err on the side of caution. If you’re unsure, consult with a local professional or building inspector.
Accessibility and staging plan
Plan your workspace carefully to minimize rework and protect finished areas.
Scaffolding: If you’re working on high walls, you’ll need scaffolding. Set it up in a way that allows easy access to the entire work area while keeping it stable and secure.
Material staging: Store your materials close to the work area but not so close that they get in the way or are at risk of damage. Keep them organized for quick access when needed.
Access routes: Plan safe routes for your crew and equipment to move around the job site. This helps prevent accidents and keeps the work area tidy.
Tools, materials, and safe setup for straightedges and rods
Essential tools should be defined by quality features such as straightedges that stay true over their length, rigid and edge-sharp surfaces, and non-slip handles, plus screed rods, levels (bubble or laser), mason’s line, trowels, hawk, and mixing tools. Check rust resistance, edge wear, and handle comfort as you assess each item for the kit. Think through how each tool will perform on long runs and in corners.
For materials, plan on the basic mix or self-leveling compound, water, bonding agents if needed, mud pans, buckets, and a mixing paddle or drill attachment. Estimate kit sizes appropriate for the typical wall run you expect, and confirm quantities against the plan. Establish a safe setup and workspace layout with a level surface, secure straightedges on stable supports, wedges to prevent roll-away, and clearly designated PPE and clean-up zones.
Choosing straightedges and “rods” (types and lengths)
Straightedges and rods are the backbone of your leveling operation. Here’s what you need to know:
Straightedges: Choose from aluminum, wood, or fiberglass.
- Aluminum: Lightweight, durable, and rigid. Ideal for long runs. Recommended length: 8-12 ft.
- Wood: Cheaper but less durable. Warping can be an issue. Lengths vary; match your wall run.
- Fiberglass: Lightweight, flexible for curves, but less rigid than aluminum. Recommended length: 6-10 ft.
Rods (Screed Bars): Aluminum rods or adjustable screeds are common. Length and rigidity impact performance:
– Longer rods cover more area, reducing leveling time.
– Rigid rods provide a stable surface for the concrete to flow across.
Personal protective equipment and site safety
Safety first! Here’s what you need:
- Respirator or Dust Mask: Protects against concrete dust. Choose a NIOSH-rated mask.
- Eye Protection: Goggles or safety glasses. Impact-resistant, anti-fog coating is useful.
- Gloves: Protect hands from cuts and chemicals. Choose rubber gloves for mixing; leather for heavy lifting.
- Safety Harness: Essential when working on scaffolding or ladders. Rent if needed; around $50/day.
- Steel-Toed Boots: Protects feet from falling objects. Comfortable, waterproof options available.
- Hard Hat: Protects against head injuries. Rent if needed; around $10/day.
Measuring and transferring level — methods and best practices
Begin by establishing a reliable reference frame: pick a fixed origin, mark a continuous baseline, and document floor and wall elevations to reference points using either a laser level or a string level. This frame will guide every subsequent check and transfer of elevations. Maintain a clear record of readings as you progress along the wall.
Compare tools and choose the best method for the situation: use a laser level for quick, long-distance checks and a string line for tight corners or damp environments, keeping calibration and maintenance in mind. When transferring elevations, place grade rods at key points and read them back to the reference line with accuracy. Project screed lines from the reference points to guide the brown coat and recheck as you work to prevent drift.
Establishing straight reference lines and datum points
First, pick two opposite walls as your datum points. These should be the longest, most stable walls in the room.
Snap a chalk line along each wall at the desired height for your brown coat. Use a laser level or string level to ensure it’s straight and consistent.
Now, mark every 4-6 feet along these lines with a pencil. These will be your reference points for setting screed lines later on.
Using a straightedge with a rod to check flatness
Take your straightedge and place it across the room, resting one end on a reference point. Insert a grade rod into the other end.
Check for any hollows or high spots by looking along the straightedge. If you see light between the wall and the straightedge, that’s a high spot. If the straightedge is touching the wall but not the floor, that’s a hollow.
Mark these deviations with a pencil on the wall. This will help you target corrections before applying the brown coat.
Applying the brown coat with straightedges and rods — step-by-step
Prepare the mix with attention to slump and bonding agents if required, then check substrate moisture and adhesion readiness before you start. Ensure the surface is swept and free of contaminants that could trap air or cause bond failures. Keep the plan in mind and verify reference levels before loading the first batch.
Set up screed/rod spacing and align straightedges to the reference lines, then begin applying the coat by loading the mix, placing with straightedges, and pulling across the wall while feathering the edges. Make frequent checks for high and low spots and stagger passes to maintain a uniform moisture and thickness, keeping curing considerations in mind and documenting any deviations for later correction.
Step-by-Step Process
Follow these practical steps to apply the brown coat with straightedges and rods, ensuring a flat wall surface.
- Preparation: Check safety, gather tools (straightedges, rods, trowels), ensure concrete mix is ready. Safety first: Wear appropriate PPE.
- Surface Prep: Inspect substrate, remove any debris, and moisten if needed for better adhesion.
- Set Up Screeds/Rods: Establish reference levels, align straightedges, space rods evenly (every 12-18 inches).
- Load & Place Mix: Load concrete mix onto wall, using straightedges to guide it down. Start from the bottom and work up.
- Pull Brown Coat: Run straightedge along rods, applying even pressure. Pull in smooth, steady motion. Check for high/low spots after each pass.
- Feather Edges: Use a trowel to feather edges where brown coat meets existing walls or floor. Pro Tip: Work quickly before concrete sets.
- Final Checks & Cleanup: Inspect wall for hollows, chatter, or ridges. Make repairs if needed. Clean tools and site.
- Cure & Maintain: Keep brown coat moist (cover with plastic sheeting) for initial cure. Monitor progress daily.
Placing and securing screed rods or guides
Screed rods help maintain consistent wall thickness. Here’s how to place and secure them:
Space rods evenly, about 12-18 inches apart. Tip: More spacing may be needed for wider walls.
Shim or float rods to achieve target thickness. Use temporary guides (e.g., 2x4s) for initial setup, then replace with permanent guides like metal screed rods.
Secure rods temporarily using nails, screws, or clamps. Ensure they’re level and plumb before proceeding.
Pulling and striking the brown coat
The pulling motion is crucial for a flat wall. Here’s how to do it right:
Start at the bottom, running straightedge along rods in an upward motion. Apply even pressure across the entire length of the straightedge.
Maintain a steady pace and smooth motion. Pro Tip: Don’t rush; work with the concrete’s consistency.
After each pass, check for high/low spots or ridges. Make adjustments as needed before moving on to the next pass.
Common problems, troubleshooting, and corrections
Common issues include waves, lippage, hollows, and cracking, which you should recognize both visually and by feel as you run a straightedge over the surface. Each problem has a root cause, such as substrate irregularities, improper screed technique, tool marks, or curing variations, and understanding these helps you target fixes without guesswork. Early detection matters because small corrections done promptly save material and time later.
For practical corrections, re-screed patches, grind high spots, feather edges, or compact targeted areas as needed. Use a measured approach to rework rather than redoing large areas, and document readings to guide subsequent passes. Keep safety and surface integrity in mind while you plan localized fixes around openings, corners, and transitions to maintain overall planarity.
Detecting and correcting high and low spots
Use a long straightedge to find deviations on your brown coat walls. Press it firmly against the surface, moving it up and down.
For high spots, you might see light between the wall and the edge. Scrape off excess mortar with a trowel or rescreed if necessary.
For low spots, add more mortar to bring the level up, then smooth it out with your trowel.
Remember, it’s better to fix these issues now than later when they’ll be harder and more expensive to repair.
Preventing and repairing cracks or debonding
Cracks or debonding can happen due to improper curing, moisture issues, or inadequate bonding. To prevent this:
– Keep the surface consistently moist during curing.
– Ensure good contact between the brown coat and the substrate.
If cracks appear, repair immediately. Clean out the crack, apply a bond-promoting primer, then fill with fresh mortar, pressing it firmly into place. Smooth it flush with the surface.
For debonding, you might need to remove and replace the affected area. Prevention is always cheaper and easier than repair!
Quality checks, visual checkpoints, and final tolerances
Define measurable acceptance criteria for flatness and levelness, such as tolerances that translate into a pass/fail decision when checked with a long straightedge or laser level. These targets should be practical and aligned with the finish coat requirements, so discuss and confirm them with the crew before starting work. Use the same reference points to maintain consistency across checks.
During application, conduct visual checks for even thickness, uniform sheen, and absence of trowel marks, using a staggered grid approach to catch localized deviations. Before finishing coats, perform a comprehensive verification with straightedges and rods at all grid points and document results for sign-off. Ensure a dust-free surface, proper moisture, and repaired high spots as part of the final readiness checklist.
Visual checkpoints and feel tests
Conduct these simple, non-intrusive checks after applying the brown coat to catch any subtle issues not visible under normal lighting.
- Check for shadows: Use a bright work light at different angles to reveal any high or low spots.
- Feel with your hands: Run your hands over the surface to detect any abrupt changes in level.
- Inspect edges and corners: Check for proper thickness and levelness at these critical areas.
- Look for trowel marks: Ensure a smooth, consistent sheen across the entire surface.
- Check transitions: Make sure there are no abrupt changes between sections.
- Inspect for aggregates: Ensure no loose aggregates remain on the surface.
- Verify moisture level: Check that the surface is not too wet or dry before finishing coats.
- Check for dust: Ensure the surface is clean and free of debris.
Quick rule: Regular visual checks help catch issues early, saving time and material in the long run.
Measuring final flatness and documenting results
After initial set but before finishing coats, measure and document the flatness to ensure it meets tolerances and for future reference.
- Use a long straightedge: Place it on the surface at regular intervals (every 4 ft) and check for gaps with a feeler gauge or by eye.
- Check with a laser level: Use it in conjunction with the straightedge to measure precise elevations.
- Document readings: Record all measurements, including location and size of any high/low spots.
- Mark problem areas: Clearly mark any spots that need reworking before they dry out.
- Compare to initial plan: Ensure the surface meets the agreed-upon flatness tolerances.
- Take photos: Document the final flatness with clear, dated photos for future reference or inspection.
Quick rule: Accurate measurement and documentation protect your work and ensure client satisfaction.
Cost, time estimates, and avoiding common mistakes
Identify cost drivers such as materials (cement, sand, reinforcement), tool rental or purchase (straightedges, rods, screed, mixers), and labor time by task. Keep a running tally of what you expect to spend on each category as you plan, and verify item prices from supplier data sheets or quotes before purchasing. Use these checks to refine your budget and avoid surprises.
In terms of time, outline tasks like prep, leveling, curing, and verification passes, and document a realistic range of hours per room or wall area while considering height variations and substrate quirks. Recognize variability factors such as room size, access, and substrate quality that will affect timing. Finally, list common mistakes to avoid, such as inadequate substrate prep, poor straightedge/rod technique, ignoring cure times, drift from target plumb/level, and choosing unsuitable mix ratios, so you can plan contingencies and reduce the chance of rework.
Material and tool cost drivers
The cost of materials and tools can vary greatly depending on your location. Here are some key factors to consider.
- Cement: Type I or II is standard, but specialty types may be needed for specific jobs. Tip: Check local prices as they can fluctuate significantly.
- Sand: Clean, sharp sand is ideal. Mined or river sand may require additional screening. Tip: Consider buying in bulk to save on per-bag costs.
- Reinforcement: Fiber mesh or rebar depends on your needs. Tip: Renting a rebar bender can save you money.
- Formwork: Plywood or metal forms, rent or buy based on project size. Tip: Consider using recycled materials to cut costs.
- Straightedges: Aluminum or steel, 8′ to 12′ lengths. Renting is often cheaper than buying. Tip: Ensure they’re straight and true before use.
- Rods: Screed rods or guides, typically aluminum or fiberglass. Tip: Consider renting a rod alignment tool for precise placement.
- Screed: 2′ to 4′ long, used with straightedges. Tip: Ensure it’s level and in good condition before use.
- Mixer: Electric or gas-powered, 1/2 HP to 5 HP. Renting is usually cheaper than buying. Tip: Choose a mixer with a large enough drum for your project needs.
Top installer mistakes and how to avoid them
Even experienced installers make mistakes. Here are some common ones and how to avoid them.
- Poor datum: Incorrect or inconsistent reference points lead to errors. Solution: Establish multiple, accurate datum points before starting.
- Inadequate substrate prep: Uneven or dirty surfaces cause issues later on. Solution: Thoroughly clean and level the surface before applying the brown coat.
- Incorrect screed spacing: Too close or too far apart can lead to inconsistencies. Solution: Maintain consistent spacing based on your straightedge length.
- Ignoring cure times: Rushing the curing process causes weak spots. Solution: Follow manufacturer guidelines and allow adequate curing time.
- Drift from target plumb/level: Inconsistencies lead to rework. Solution: Regularly check and adjust your levels throughout the job.
Preventing mistakes requires careful planning, attention to detail, and patience during the curing process.

Conclusion
Getting the brown coat right isn’t optional. Flat, stable walls protect your finish and long-term durability, and safe, deliberate work now saves costly fixes later.
Start by confirming the job site is clean, dry, and dry enough to hold straightedges and rods; verify corners and studs are reasonably plumb; assemble and test your straightedges and rods in a small, low‑risk area, set your reference highs and lows, mix the material to the right consistency, and then work in logical sections, transferring level consistently and checking as you go before you cure. Keep edges clean, wipe off any excess, and record the results so you know when you’ve hit your target tolerances.
Common mistakes to avoid include rushing the process, skipping cure time, or forcing material to hide gaps instead of letting it cure true; never skimp on PPE or safe setup, and don’t rely on a single measurement—verify with multiple checks and keep rods and straightedges protected from damage. Stay methodical, test in a small area first, and stop if something looks wrong rather than pushing through.
If walls show severe bow, persistent high spots, or you’re unsure about plumbness and reference points, consider bringing in a professional rather than pushing on; otherwise, stay disciplined, follow the steps you’ve learned, and you’ll finish with walls that are safer, straighter, and ready for the next coat with confidence.
FAQ
What tools do I need to start?
Grab a straightedge long enough to span a wall section and a level. Have a rod or two you can slide along the wall, plus a pencil to mark bad spots. Keep a clean work area so dust and debris don’t hide high spots.
How do I find high and low spots with these tools?
Place the straightedge on the wall and slide the rod under it. If you can slide the rod easily at some points but not others, those are your high and low spots. Mark them and work from the worst areas first.
What are common mistakes to avoid?
Don’t rush the process or skip cleaning the surface. Don’t bend or twist the straightedge and don’t ignore corners or edges. Bad spots hide under fresh mud if you don’t check regularly.
When should I recheck after making adjustments?
Recheck after you set a section and again after the mud dries enough to take another pass. Do a quick pass with the straightedge and rod to confirm it’s flat before moving on to the next area.