
Introduction
Dust free plaster cuts are clean cuts made on plaster with methods that minimize airborne dust. The goal is to reduce mess and protect air quality while you cut. Use proper tools, dust control techniques, and follow safety guidelines.
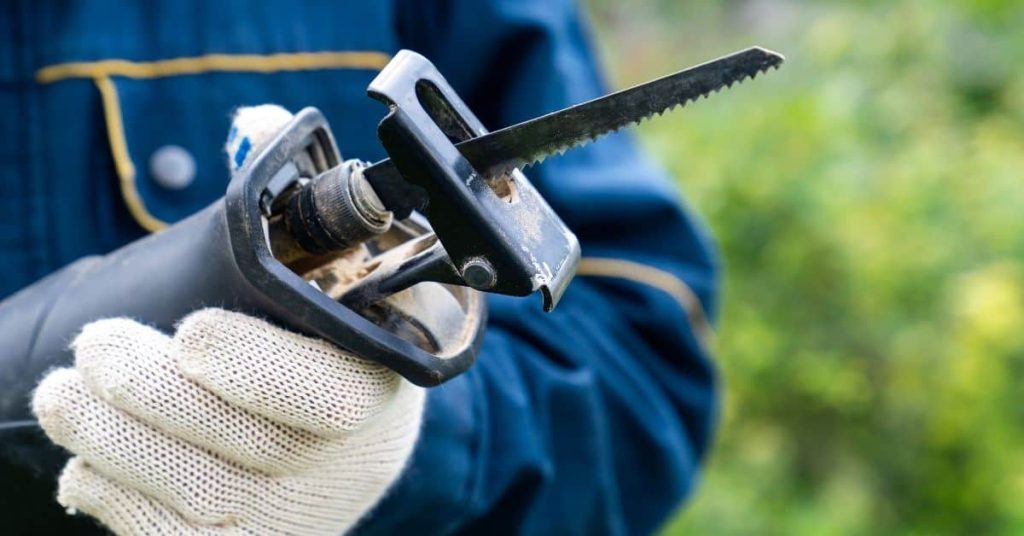
Dust appears when plaster is cut dry, or when tools throw fine particles into the air. Test dust control by checking how much dust remains in the area and by using a vacuum attachment to see if it captures most of the particles. Fixes include using a dust collection system, wet cutting, or cutting in short passes and sealing joints; always check tool instructions and local rules for safe practice.
Key takeaways
- Understanding dust-free cuts relies on dust-control tools and correct blade selection.
- Inspect cuts for gaps, chipping, or movement before finishing repairs.
- Always wear eye protection, respirator, and cover surfaces to prevent dust.
- Test cuts on scrap or inconspicuous area to validate dust containment.
- For small to medium fixes, stage repairs with gradual material addition.
- Verify repair by gentle probing and rechecking alignment after cure.
Table of Contents
- Introduction
- Key takeaways
- What Is a Dust Free Plaster Cut?
- Common Causes of Dust Free Plaster Cuts
- How to Inspect and Classify the Cut
- DIY Diagnostic Tools and Materials Checklist
- Step-by-Step Fixes for Dust Free Plaster Cuts (Small to Medium)
- Fixes for Large or Movement-Prone Cuts
- Preventive Measures and Best Practices
- Tests to Confirm a Successful Repair
- Conclusion
- FAQ
What Is a Dust Free Plaster Cut?
A dust free plaster cut is a clean, intentional cut or opening in plaster that minimizes plaster dust and debris, typically created with careful planning and proper tools. It differs from typical cracks, gaps, or uncontrolled sawing by its precision and finish. The term also implies that the surrounding material remains stable and free from powdery dust clouds during and after the cut.
This situation often shows up in specific jobs like new builds, renovations, or when working near skirting boards and architraves. The goal is a neat edge that accepts finishing products without crumbling or excessive dust, rather than an unskilled or sloppy cut.
Typical appearance and behavior
A dust free plaster cut appears as a fine, hairline crack that doesn’t widen over time. It’s usually white, matching the plaster, and barely visible until you run your finger along it.
The ‘dust’ part comes when you touch or disturb the cut. You’ll see a small cloud of fine powder – this is the plaster dust that wasn’t properly sealed during setting.
Movement in the building, like settling or temperature changes, can cause more dust to appear. Humidity can also exacerbate the issue, as moisture can loosen the plaster further.
Why “dust free” is significant for finishes
The lack of dust in a cut might seem minor, but it’s crucial for the longevity and appearance of your finish. Dust acts like tiny grit under your paint or wallpaper, creating an uneven surface.
Adhesion is also affected. Paint won’t stick as well to a dusty surface, leading to peeling or flaking over time. Wallpaper can lift at the edges where it meets a dusty cut.
Long-term durability of repairs is compromised too. Any filler or new plaster applied to seal the cut won’t bond properly with the dusty surface, meaning the repair could fail and the cut reappear.
Common Causes of Dust Free Plaster Cuts
Substrate movement and shrinkage can create tension that makes plaster cuts shed dust or crumble. Poorly fixed boards behind the plaster layer can also move and degrade the cut edge. These factors often set up for loose, dusty edges around the cut line.
Other root causes include compound shrinkage as it dries, and using tools or blades that are not suitable for the material. Incorrect tool use can chatter or gouge, producing dust and an uneven cut that will not seal well with finish coats.
Structural and movement-related causes
The cuts you’re seeing might be due to your home’s structure moving. Here’s why:
Framing isn’t perfect, so it can shift over time. Temperature and humidity changes also make materials expand and contract. Inadequate expansion joints don’t allow for this movement, putting stress on the plasterboard.
Solution: Ensure your framing is solid, use proper expansion joint tape, and consider adding more expansion joints if needed.
Material and installation causes
Choosing the right materials and installing them correctly is crucial. Here are some common issues:
- Plasterboard tapering: Incorrectly tapered edges can lead to weak joints that crack under stress.
- Joint compound choice: Using a low-quality or wrong type of compound can result in weak bonds and cracking.
- Fastener settlement: Screws or nails backing out over time can cause the board to lift, leading to cuts.
- Improper bedding of beads or trims: Not applying enough compound or letting it dry too fast before embedding can lead to weak bonds and cracking.
- Incompatible materials: Using materials that aren’t designed to work together can cause staining, weak bonds, and eventually cuts.
How to Inspect and Classify the Cut
Start with a visual check of the edge: is it sharp and continuous or jagged and powdery? Gently run a finger along the edge to feel for loose dust or crumbling material. Note any gaps or irregularities that stand out when you look closely.
Next, assess depth and width by comparing the edge to adjacent plaster. Look for continuity across the length of the cut and test for movement by applying light pressure near the edge. Classify probable causes based on these observations and plan your repair accordingly.
Step-by-Step Process
This step-by-step guide helps you inspect and classify dust-free plaster cuts effectively, ensuring you understand the severity and probable cause.
- Preparation: Wear safety glasses and gloves. Gather a flashlight, tape measure, and a sharpie for marking.
- Initial Visual Inspection: Look for cracks, gaps, or discoloration. Check if the cut is new or recurring.
- Measure Depth & Width: Use your tape measure to check depth (distance from surface) and width of each cut. Note down measurements.
- Check Continuity: Trace cuts with a sharpie to see if they’re continuous or intermittent. Check multiple rooms if necessary.
- Final Checks & Cleanup: Look for any signs of movement, moisture, or structural issues. Clean up and document your findings.
Quick Field Tests to Perform
These simple tests help determine the cause and severity of dust-free plaster cuts.
Tap Test: Gently tap along the cut with a small hammer. A hollow sound indicates potential voids or delamination.
Flex/Pressure Test: Apply gentle pressure to the plaster on either side of the cut. Movement or cracking could suggest structural issues or poor installation.
Moisture Check: Use a moisture meter (if available) or look for signs of mold, discoloration, or musty smells. Excessive moisture can cause cuts to widen and recur.
When to Call a Professional
While DIY fixes are possible for minor issues, there are thresholds where professional help is necessary.
Recurring Movement: If cuts recur despite repairs, it might indicate underlying structural movement. Document the history and call a pro.
Structural Cracks: Wide cracks (over 3mm) or those running diagonally could suggest serious structural issues. Consult a professional immediately.
Large Gaps: Gaps wider than 2mm may require professional intervention, as they can be signs of significant movement or installation errors.
DIY Diagnostic Tools and Materials Checklist
Keep a basic tap hammer handy for listening to substrate sounds and tapping for hollow spots. A moisture meter helps you check for damp conditions behind the plaster. Have a utility knife and fine sandpaper ready for light trimming and smoothing.
Also gather joint compound, mesh tape, and standard sealants to prepare and bridge the cut. These items are affordable and commonly available for homeowners tackling small repairs without professional help.
Visual checkpoints to document condition
Use this checklist before, during, and after repairs. It helps track progress and communicate with contractors.
- Surface cracks: Check length, width, and pattern (linear, stepped, or random). Skipping this may lead to underestimating damage.
- Crumbles: Gently tap the wall. Note areas that crumble or lose material. Ignoring this could result in further deterioration.
- Mold or mildew: Look for discoloration, musty smell. Overlooking this can lead to health issues and structural damage.
- Moisture stains: Check for water marks, especially around windows, doors, and plumbing. Neglecting this might indicate a hidden leak.
- Wall movement: Measure gaps between walls, ceilings, and floors. Disregarding this could signal structural issues.
- Joint tape: Inspect for lifting, bubbling, or exposed edges. Missing this can cause future repairs to fail.
- Compound application: Check for uneven spreads, missed spots, or excessive buildup. Overlooking this may result in an uneven finish.
- Screw or nail pops: Look for protruding fasteners. Ignoring this can lead to drywall damage and safety hazards.
Quick rule: Regular visual checks help catch issues early, saving time and money in the long run.
Material specs and tolerances to consider
Before starting repairs, check these material specifications to ensure you’re using the right products correctly.
- Joint compound: Check drying time (typically 24 hours). Using a faster-setting compound can save time, but slower ones may be needed for larger repairs.
- Tape type: Choose between paper and fiberglass. Paper tape is cheaper but less durable; fiberglass is stronger but more expensive.
- Sandpaper grit: Start with 120-grit for initial sanding, then use 220-grit for final smoothing. Skipping this step can lead to a rough finish.
- Primer type: Use a stain-blocking primer to prevent tannins from bleeding through. Neglecting this can result in discoloration.
- Sealant type: Choose between latex and silicone. Latex is paintable but less flexible; silicone is more flexible but not paintable.
- Moisture meter: Check for moisture levels (ideally below 15%). Ignoring this can lead to mold growth and compromised repairs.
- Tap hammer weight: Use a standard tap hammer (around 20 oz) for most jobs. Heavier hammers may cause damage if not used carefully.
Quick rule: Always check product labels and follow manufacturer guidelines for best results.

Step-by-Step Fixes for Dust Free Plaster Cuts (Small to Medium)
Begin by cleaning the edge and removing loose material. Undercut the edge slightly to create a stable seat for filler and tape. Apply a bonding agent or primer where recommended by the product label to improve adhesion.
Embed mesh tape over the cut and apply a first coat of joint compound, feathering out beyond the edges. Let it dry, then sand smooth and apply additional coats as needed. Finish with a final light sand and a coat of finishing material suitable for your wall surface.
Step-by-Step Repair Process
This step-by-step guide walks you through the process of fixing dust-free plaster cuts, from preparation to final checks.
- Inspect and prepare the area: Ensure safety by turning off power sources nearby. Remove any loose material with a utility knife or scraper.
- Undercut the cut: Carefully cut into the wall at a 45-degree angle to create a V-shape, preventing further cracking. Check: The undercut should be clean and well-defined.
- Apply bond/primer: Use a paintbrush or roller to apply a thin layer of bonding primer onto the undercut area. This improves adhesion.
- Tape application: Press paper tape firmly into the compound, ensuring no air bubbles are trapped. Overlap joints by at least 2 inches. Check: The tape should lie flat and smooth against the wall.
- Apply first layer of compound: Spread a thin layer of joint compound over the taped area using a wide taping knife (6-10 inches). Let it dry according to manufacturer’s instructions.
- Sand lightly: Once dry, lightly sand the surface with fine-grit sandpaper (120-150 grit) to remove any bumps or ridges. Vacuum and wipe clean.
- Apply second layer of compound: Using a wider taping knife (10-14 inches), apply a second, thicker layer of joint compound, feathering the edges to blend with the surrounding wall. Check: The compound should be smooth and even, with no visible tape or undercuts.
- Final sanding and touch-up: Once dry, lightly sand again and vacuum. Inspect for any missed spots and touch up as needed.
- Final check: Inspect the repair from various angles to ensure it’s smooth, even, and blends well with the surrounding wall.
Preparation and cleaning
Before starting repairs, it’s crucial to prepare the area safely and control dust. Here’s how:
Wear appropriate safety gear: Gloves, goggles, and a dust mask are essential.
Remove loose material: Use a utility knife or scraper to carefully remove any flaking or peeling plaster. Be cautious not to damage the surrounding area.
Control dust: Wet down the area with a damp cloth or spray bottle before starting work. This helps minimize dust and makes cleaning up easier. Apply a thin layer of bonding primer: This primes the surface, improving adhesion for the repair compound.
Filling, taping and finishing technique
Proper tape placement, compound layering, and sanding techniques are key to a successful repair:
Tape placement: Apply paper tape along the undercut, pressing firmly into the wet compound. Ensure no air bubbles are trapped and overlap joints by at least 2 inches.
Compound layering: Apply joint compound in thin layers, allowing each to dry according to manufacturer’s instructions before sanding lightly. This builds up a smooth, even surface.
Feathering technique: When applying the final layer of compound, use a wider taping knife and feather the edges to blend with the surrounding wall, ensuring a seamless finish. Sanding best practices: Use fine-grit sandpaper (120-150 grit) for light sanding. Vacuum and wipe clean between layers to remove dust and ensure smooth application of subsequent layers.
Fixes for Large or Movement-Prone Cuts
For larger cuts, install backing supports or furring that can accept flexible fillers without splitting the plaster. Use a flexible filler or epoxy where appropriate, following the manufacturer’s instructions for cure time and compatibility with plaster. Consider expansion joints or trims to accommodate movement and reduce new cracking.
If the project allows, reinforce with resilient joints designed for movement and ensure proper detailing at edges. Always verify product compatibility and local rules before mixing materials or applying non-traditional fixes.
Temporary vs permanent solutions
When dealing with large or movement-prone cuts, it’s crucial to understand the difference between temporary and permanent fixes. Temporary patches are quick and easy but won’t last long-term. Permanent repairs take more time and effort but provide lasting results.
Temporary Fixes: These are best for minor issues or when you need a quick solution before a permanent repair. They include using flexible fillers, like spackling compound, to fill small gaps or applying adhesive tape to cover cracks.
Permanent Repairs: For larger cuts and those prone to movement, use durable materials like resin/epoxy or backing supports. These require more time for application and curing but provide long-lasting results.
Choose based on the cause of the cut and expected movement. If it’s due to minor settling, a temporary fix might suffice. But if it’s from structural issues or substrate movement, opt for permanent repairs.
When structural remediation is needed
Sometimes, cuts in plaster go beyond surface-level problems. They may indicate underlying structural issues that require professional attention. Here are signs to look out for:
Cracks at Joins or Corners: These could signal substrate movement or settling. If they’re wide or growing, it might be time to call a pro.
Sagging or Bulging Plaster: This indicates a loss of support behind the plaster, likely due to damaged framing or substrate. It’s a job for professionals who can address these issues.
Diagonal Cracks: These often point to structural problems, like foundation settlement or wall movement. They require professional assessment and remediation.
Professionals will typically cut back to the framing, add fixings like screws or anchors, and address substrate movement if necessary. They may also use resilient joints or trims to accommodate future movement.
Preventive Measures and Best Practices
During install, fix boards securely to minimize movement. Choose a compatible compound that works with your plaster and climate conditions. Control joints placed at appropriate intervals help absorb movement and prevent new cuts from forming dust.
Maintain environmental control by avoiding excessive humidity or rapid temperature shifts during curing. Prepare surfaces properly, and follow the product instructions for priming, bonding, and finishing to keep edges dust free over time.
Installation tips for builders and DIYers
Proper installation is key to preventing dust free cuts. Here are some tips:
Screw Spacing: Space your screws 6-8 inches apart along studs. Too close can cause the board to warp, too far can lead to sagging.
Staggered Joints: Stagger joints between adjacent boards by at least 4 inches. This helps distribute stress evenly and prevents cuts from forming at joint lines.
Taping Technique: Use a wide, straight edge trowel to apply compound in three thin coats, allowing each to dry before the next. This ensures a smooth, strong bond between boards.
Allow-for-Movement Detailing: Incorporate expansion joints every 20-30 feet to allow for natural movement of the structure and prevent cuts from forming due to stress.
Environmental controls during curing
The environment plays a crucial role in how your plaster cures. Here’s what you need to control:
Humidity: Maintain humidity levels between 40-60% during curing. Too dry can cause the plaster to shrink and crack, too wet can lead to mold growth.
Temperature: Keep temperatures between 70-85°F (21-29°C). Too cold can slow down curing time and cause cuts, too hot can speed up curing but may also cause excessive shrinking.
Always check the product guidance for exact ranges as these can vary slightly depending on the specific plaster compound used.
Tests to Confirm a Successful Repair
Perform adhesion checks by gently probing repaired areas to ensure the coating is bonded well. Simulate minor movement by applying light pressure along the repaired edge to see if any cracking occurs. Visually inspect the finish after the repair has fully cured for uniformity.
Look for any signs of new dusting, cracking, or edge deterioration. If issues appear, revisit the repair steps and verify the recommended cure times and material compatibility from the product label or manufacturer instructions.
How to perform an adhesion/flex test
After your repair, you need to check if the new plaster has bonded well with the existing surface. Here’s how:
Adhesion Test: Gently press on the repaired area. It should feel solid and not give way.
Flexibility Test: Gently move the joint back and forth. It should flex without cracking or crumbling.
Monitoring timeline and maintenance tips
Regular checks help catch any issues early. Here’s a simple schedule:
Check at 24 hours to ensure the repair is drying properly.
Recheck at 7 days to see if there are any signs of movement or cracking.
Finally, check again at 30 days for full cure.
Maintenance tips: Keep the area clean and dry. If you notice any cracks, address them promptly to prevent recurrence.
Conclusion
Dust free plaster cuts matter because proper fixes protect safety, ensure durability, and keep surfaces looking right without costly callbacks.
If you follow the method, keep the process simple: inspect the cut and classify it, gather the DIY tools and materials, apply the small to medium fixes in clear steps, test each fix in a small area, and cap it with preventive measures to stop recurrence. Start with a dry test, then move to the actual repair in controlled stages, and only proceed when the area behaves as expected.
Common mistakes to avoid include rushing beyond the small fixes when movement or cracking is still present, skipping a proper test before sealing, and ignoring ventilation or PPE. Always work in a well-ventilated space, wear eye protection and a dust mask, and verify a repair on a noncritical spot before committing to the full cut. If a cut is large, highly mobile, or shows ongoing movement, pause and consider a professional assessment to prevent damage or $ losses.
When in doubt, or if the cut keeps moving after repairs, call in a pro. A quick check now can save time and trouble later, and a solid repair will stand up to use and looks right in the room. Stay methodical, test often, and you’ll finish confident and free of surprises.
FAQ
Why might dust still appear after a “dust-free” plaster cut, and what should I check first?
Double-check the tool dust collection setup and the blade condition. Look for loose connections, clogged collection bags, and a dull or damaged blade that isn’t cutting cleanly.
Verify that the cut was done with the right settings for plaster and the dust control system was active during the cut. If dust persists, inspect the cut edges for chipping that can shed dust later.
Always follow the product label and manufacturer instructions for dust control options and replacement parts.
How do environmental conditions affect dust generation and visibility on the job?
Dry, still air can make fine dust hang in the air longer, while high humidity may help some dust settle faster. Cold temperatures can slow dust settling and make it seem dustier during cutting.
Work in a well-ventilated area and use any recommended containment or temporary enclosure to keep dust from spreading. If conditions aren’t ideal, pause or adjust your workflow to reduce airborne dust.
What tools or setup help keep edges clean and minimize dust without compromising the cut?
Use a shop vacuum with a suitable dust collection attachment that matches the saw blade guard. A rigid, well-sealed dust shroud around the cut area helps pull dust away as you cut.
Keep blades sharp and appropriate for plaster, and use a guide or straight edge to minimize wobble that creates additional dust and edge chipping.
When should I call in a pro for large or movement-prone plaster cuts?
If the cut involves structural elements, large spans, or you notice continual movement of the material during cutting, call a pro. Large cuts or sections that may shift with vibration can require specialized equipment and methods.
If dust control isn’t achievable with standard tools or you’re unsure about how to protect surrounding areas, seek professional help to avoid damage and exposure risks.