
Introduction
Painting a perfect finish on ceilings and walls means achieving a smooth, even coat with clean edges and minimal texture or marks. This hands-on task starts with honest prep, proper tool setup, and careful technique to control consistency across surfaces. Take time to assess the surface, remove dust, repair flaws, and practice cutting in before committing to the whole room.
Testing a small area and following the paint label guidance helps you choose the right product and approach. Then you’ll sand lightly, prime where needed, and apply even coats with steady pressure, checking for runs or lap marks as you go. If issues show up, adjust technique or prep steps and recoat after the recommended dry times per manufacturer instructions.
Key takeaways
- Evaluate walls and ceilings for cracks, stains, and texture before painting.
- Choose sheen and paint type based on room use and cleaning needs.
- Prep surfaces with patching, sanding, and priming to minimize later imperfections.
- Mask trims and protect floors with clean drop cloths and painter’s tape.
- Use long, steady strokes and cut-in technique for smooth, even coats.
- Ventilate during painting and wear eye and respiratory protection as needed.
- Test color and finish on a small area before full application.
Table of Contents
- Introduction
- Key takeaways
- Quick Planning and Project Scope
- Tools and Materials Checklist
- Evaluating Wall and Ceiling Condition
- Surface Preparation: Sanding, Patching and Priming
- Masking, Taping and Protecting Trim
- Painting Techniques for Perfect Ceilings and Walls
- Troubleshooting: Causes, Diagnostic Tests and Fixes
- Safety, Cleanup and Maintenance for a Long-Lasting Finish
- Conclusion
- FAQ
Quick Planning and Project Scope
Start by naming the rooms and surfaces you’ll paint, distinguishing ceilings from walls and noting any accent areas or texture differences. Identify surfaces that require special prep or repair, such as cracked plaster or patched drywall, so you can plan the repair work alongside painting. Outline the desired finish and materials, including sheen level, color consistency, primer needs, and any sealer requirements for moisture-prone zones. Consider existing conditions like peeling paint, stains, or moisture risk and how they might affect product choices. Establish a realistic timeline, the number of painters involved, and any shifts or contingencies for delays. Plan test patches in representative spots and decide how you will evaluate hide, sheen, and color before full commitment.
Set decision points and sign-offs up front, including who approves the finish level and color matches, and how you’ll document tested patches for future reference. Think through procurement steps, dry times between coats, and how test results will influence scheduling. Tie the plan to a simple checklist you can reference during the job to keep everyone aligned. Keep the scope flexible enough to accommodate weather or access issues without derailing the project. Finally, write down the agreed expectations so you can verify them during the walkthrough and adjust as needed.
Measure and plan
First, figure out how much area you’re covering. Measure ceilings and walls. Divide by coverage rate on your paint can (usually 10-12 sq ft per gallon). That’s your paint needed.
Plan work sequence: ceilings first, then walls. Less mess that way.
Account for doors, windows, and trim. You’ll need to tape those off or cover them.
Choose finish and color
Sheen matters: flat hides imperfections but isn’t washable; semi-gloss is durable, easy to clean.
Durability: high-traffic areas need tougher finishes. Kitchens, baths – semi-gloss or gloss.
Lighting affects color perception. Test in natural and artificial light before committing.
Washability: if it’s a high-touch area, consider an eggshell or semi-gloss finish for easy cleaning.
Test patches and mockups
Before you dive in, do test patches. Paint small areas to check color, sheen, adhesion, and how it looks under your lighting.
Use different surfaces – walls, ceilings, trim. Make sure they all look good together.
Let them dry fully before evaluating. Lighting can change everything.
Once you’re happy with the test patches, go ahead and paint the whole area. But if something’s not right, fix it now, before you’ve got a big mess on your hands.
Tools and Materials Checklist
List the essential tool categories you’ll rely on: brushes for trim and corners, rollers with appropriate nap by surface, edgers, extension poles, trays and liners, plus masking tools. For ceilings versus walls, specify when to use each tool to protect texture and edges while maintaining a clean line. Include ladders or temporary scaffolding, with guidance on choosing safe setups and planning access to high areas. Explain what makes a tool durable and reliable, such as bristle retention, roller density, and frame stability, and how to balance budget with pro-grade performance. Include masking and prep items like film, tape, drop cloths, putty knives, and sanding blocks to keep surfaces clean.
Cover primers, sealers, stain-blocking options, and any approved paint additives, with quick-reference guidance on which combinations work best for ceilings versus walls. Add PPE requirements and storage tips, plus how to clean or store tools between uses to extend life. Include a note to verify product labels and manufacturer instructions for compatibility and safety before purchasing or applying anything.
Brushes, rollers and extension tools
Before you start painting or applying any finish, make sure your brushes, rollers, and extension tools are in good condition. Use this checklist to ensure you have the right equipment for the job.
- Brush type: Check if it’s a flat (angle), round, or sash brush. Flat for large surfaces, round for edges, sash for trim.
- Brush shape: Ensure bristles are firm and not splayed. Test by running your thumb along the bristles.
- Roller cover: Choose 9″, 12″ or 18″ for different surface areas. Check nap length (3/8″ to 3/4″) for texture: smoother surfaces need less nap.
- Extension pole: Ensure it’s secure and extends smoothly. Test by extending and retracting a few times.
- Scaffolding: Check stability, levelness, and safety features (rails, locks). Always follow manufacturer’s guidelines for safe use.
- Brush handle: Ensure it’s comfortable and secure. Test by holding the brush as you would when painting.
- Roller frame: Check if it’s sturdy and holds the cover securely. Try rolling a piece of paper to test grip.
- Paint condition: Ensure paint is well-mixed, not lumpy or separated. Stir thoroughly before use.
Quick rule: Always match your brush and roller size to the surface area you’re working on. This ensures even coverage and reduces waste.
Paint, primer and additives
Use this checklist before starting your painting project to ensure you have the right products for a smooth finish.
- Primer type: Check if it’s suitable for your surface (interior/exterior, new/damaged).
- Paint sheen: Choose based on room use – flat to semi-gloss for interior walls.
- Paint color: Ensure it matches your desired shade. Test a small area first.
- Mildewcide additive: Add if painting in high moisture areas (bathrooms, kitchens).
- Retarder additive: Use to extend drying time for better coverage and easier application.
- Compatibility: Check paint and primer labels to ensure they’re compatible.
- Paint quality: Check if it’s 100% acrylic or latex for durability and easy cleaning.
- Primer & paint coverage: Estimate needed amount based on surface area. Don’t skimp!
Quick rule: Always prime new, bare surfaces to seal them and improve paint adhesion.
Protective and cleanup supplies
Before you start any concrete work, ensure you have all the necessary protective gear and cleanup supplies. This checklist will help you stay safe and efficient throughout your project.
- Drop Cloths: Check that they are large enough to cover the entire area you’ll be working on. They should be made of durable, water-resistant material to protect your surfaces from concrete spills.
- Mask and Respirator: Ensure both are clean and in good condition before each use. Test the respirator’s seal by closing it over your face and breathing in; if air leaks out, adjust or replace the mask.
- Safety Glasses: Inspect them for any cracks or damage. They should provide full eye protection with side shields.
- Gloves: Check that they are in good condition and fit well. Concrete can cause skin irritation, so ensure your gloves cover your hands and wrists.
- Tape: Use painter’s tape to protect edges and create clean lines. Ensure it’s sticky enough to adhere but not so strong that it pulls off paint when removed.
- Bucket and Screen: A 5-gallon bucket with a screen or mesh lid is ideal for mixing small batches of concrete. Check the bucket’s condition and ensure the screen fits securely.
- Sponges and Solvents: Have plenty of sponges on hand for cleanup, and ensure you have the appropriate solvent (like acetone or denatured alcohol) to clean up any concrete residue.
- Organized Supply Area: Keep your supplies organized in a designated area. This will help maintain efficiency and prevent accidents caused by tripping over scattered tools.
Quick rule: Always prioritize safety first. Ensure all protective gear is in good condition before starting any concrete work, and never skip cleanup steps to avoid expensive rework or health issues.
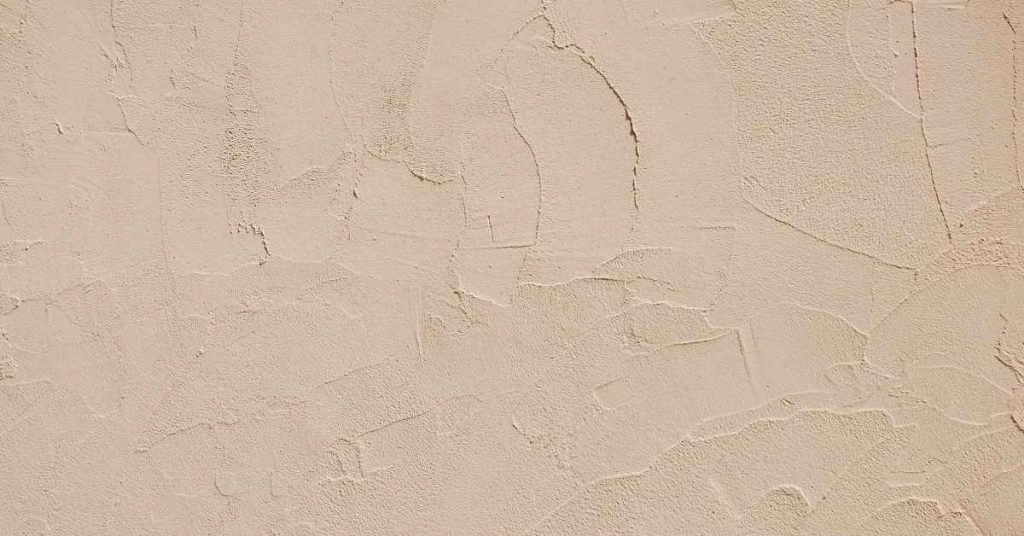
Evaluating Wall and Ceiling Condition
Define typical substrates you may encounter, such as drywall, plaster, concrete, or taped seams, and explain how substrate choice affects adhesion and finish. Emphasize ceilings and textured surfaces where prep and primer choices can significantly impact results. Catalog defects to inspect, including peeling paint, stains from water or smoke, cracking patterns, texture irregularities, and signs of moisture intrusion. Note that moisture or mold can change how surfaces respond to primer and paint, so plan tests accordingly. Provide a logical inspection workflow, starting at trouble zones like ceilings, corners, and behind fixtures, and documenting findings with quick notes and photos.
Offer practical remediation guidance for initial repairs and prep, such as cleaning, mold treatment when present, and deciding whether priming or substrate replacement is needed before painting. Remind readers to observe safety and environmental considerations, including ventilation and PPE, and to involve a professional if there are structural or severe moisture concerns that exceed at-home capabilities.
Common defects and what they mean
Inspect your walls and ceilings for these common defects. Each one tells a story about the condition of your surfaces.
Peeling/flaking paint: Poor prep, old age, or moisture issues could be to blame. It’s time to scrape off the loose bits and find out what’s underneath.
Cracking (alligatoring, settlement cracks): These often indicate movement in the structure or substrate. Check for underlying issues before painting.
Texture issues (popcorn, knockdown, stipple): While not harmful, these may need to be removed or covered with a primer-sealer before painting to ensure an even finish.
Simple diagnostic tests (moisture, adhesion, texture)
Before you start prepping, perform these quick checks to understand your surfaces better.
Moisture testing: Use a moisture meter or tap test to check for excess dampness. If it’s present, find and fix the source before painting.
Adhesion/porosity tests (rub test, simple cross-hatch/adhesion test, tape test): These help determine if your paint will stick. If the paint rubs off easily or peels under the tape, you’ll need to prep more thoroughly.
Texture assessment: Feel and observe your surfaces. Rough textures may require a primer-sealer or additional coats of paint for an even finish.
When to call a pro
Some issues are best left to the professionals. Here’s when to pick up that phone:
Mold or mildew: If you see or smell mold, it’s time to call in an expert. They can assess the damage and ensure safe removal.
Structural movement or plumbing leaks: These could indicate serious underlying issues. A professional can diagnose and address these problems before they cause more damage.
Extensive plaster repair: If your walls have extensive damage, it’s wise to hire a pro. They have the skills and tools to make repairs that will last.
Surface Preparation: Sanding, Patching and Priming
Begin with a thorough cleaning and surface inspection, noting any moisture issues, efflorescence, or grease spots, and identifying cracks or loose texture that need attention. Decide on sanding strategy to suit texture: harsher passes for rough textures and finer work for smooth, then feather edges to avoid gouges; use dust containment to keep the workspace clean. For patching, fill cracks, holes, and gouges with compatible products, cure as directed, and sand flush for a smooth plane. Feather patched areas to blend with surrounding texture so there are no noticeable transitions, and ensure the substrate is flat before priming.
Choose primers that match the surface and intended finish—stain-blocking for smoke or marks, bonding primers for glossy surfaces—and verify compatibility with patch materials. Clean dust off the surface and perform a small adhesion test before priming. Monitor environmental conditions like temperature and humidity, ensure proper ventilation, and plan a tack-cloth wipe before priming to improve adhesion and topcoat performance.
Sanding and feathering edges
Sanding is crucial to create a smooth, uniform surface for painting. The goal is to remove gloss, imperfections, and prepare the substrate for primer.
Grit selection: Start with 120-grit sandpaper for rough textures or glossy surfaces. For smooth surfaces, use 220-grit. Always finish with a fine grit (220+) to avoid visible scratches.
Feathering edges is vital to blend patched areas into the surrounding texture seamlessly. Use a flexible sanding sponge or folded sandpaper, working from coarse to fine grits. Minimize gouges by maintaining consistent pressure and avoiding sharp corners.
Patching holes, joints and skim-coating
Fill holes, gaps, and cracks with a compatible patching compound. For small holes, use spackling paste; for larger areas, opt for joint compound.
Joint repair: Apply compound to joints using a wide putty knife, embedding joint tape as you go. Let it dry, then sand flush with the wall. Skim-coating may be necessary for deep imperfections or textured surfaces. Apply thin layers of compound, allowing each to dry before sanding smooth.
Ensure patched areas are level and blend seamlessly into surrounding texture using light feathering. Sand lightly between coats and after final application to create a uniform surface.
Primer selection and application
Select a primer that matches your surface’s needs: stain-blocking for smoke/marks, bonding primer for glossy or slick surfaces, or PVA primer for new drywall.
Compatibility: Ensure the primer is compatible with your topcoat and patch materials. Check manufacturer guidelines to avoid adhesion issues.
Pre-clean dust from the surface before priming. Apply primer using a roller or brush in even, thin coats. Allow proper drying time between coats and before painting. A test spot can help determine if additional coats are needed.
Masking, Taping and Protecting Trim
Discuss masking materials and how to choose between painter’s tape and specialty edge tapes based on paint type, sheen, and surface texture. Emphasize tape adhesion and the importance of preventing paint bleed while planning removal timing. Prepare surfaces by removing dust, deglossing where needed, and protecting delicate trims, hardware, and glass with appropriate coverings.
Describe masking technique for clean lines, including edge orientation relative to stroke direction and securing tight seals at corners and along trims. Explain protecting adjacent surfaces with drop cloths, plastic sheeting, and securement methods to shield floors, ceilings, fans, outlets, and switches. Cover tape removal strategies to minimize edge tearing and paint skin, including careful angles and timing. Note special scenarios like textured ceilings or moisture-prone areas and when to use primers or sealers if masking may lift surfaces.
Best Taping Approaches and Common Mistakes
Here are some best practices for taping and common mistakes to avoid.
- Tape before painting, not after: Taping after painting can cause paint to peel off with the tape. Always tape first.
- Avoid overlapping edges: Overlapping tape can create lumps that show through your paint job. Use a straight edge for clean lines.
- Tape perpendicular to stroke direction: This helps prevent paint from seeping under the tape and causing bleed.
- Press firmly, but don’t overdo it: Pressing too hard can damage surfaces; not pressing enough can lead to gaps. Use a smooth, firm motion.
- Avoid using caulk for taping: Caulk is meant for filling cracks and gaps, not as an adhesive. Use tape designed for painting.
By following these tips, you’ll avoid common taping mistakes and achieve clean lines in your paint job.
Protecting Floors, Fixtures and Furniture
Before you start painting, it’s crucial to protect your floors, fixtures, and furniture from overspray or drips.
For floors, use drop cloths or poly sheeting. Secure them with staples or clips to prevent slipping. If you’re painting ceilings, consider using weighted drop cloths to keep them in place.
For fixtures and hardware, remove what you can. For items like light switches and outlets, use painter’s tape to create a barrier around them. You can also use plastic bags secured with rubber bands to protect lighting fixtures.
For furniture, cover it with drop cloths or move it out of the room if possible. If you’re painting high ceilings, consider using a painter’s pole with an attached drip catcher to prevent paint from dripping onto your furniture.
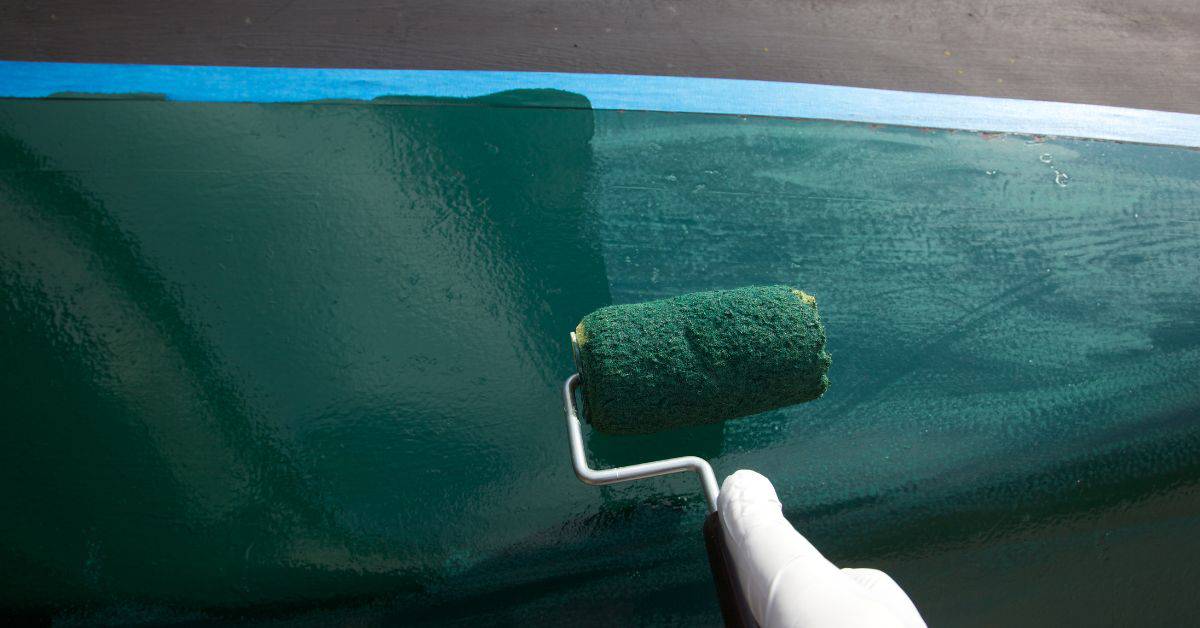
Painting Techniques for Perfect Ceilings and Walls
Outline the typical painting sequence (ceiling first, then walls) and why this reduces cross-flaking and lap marks, including a plan for coat timing. Explain cutting-in techniques for corners and edges, the tools to use, edge control, and how to maintain even depth along transitions with and without tape. Describe wet-edge management and rolling patterns for ceilings (like cross-rolling) and walls (consistent vertical or horizontal strokes) to keep texture uniform and avoid lap lines.
Address paint selection and preparation specifics, such as sheen choice, how temperature and humidity affect application, and when priming is necessary. Discuss patch repairs and conditioning the topcoat to maintain a uniform finish on both surfaces, plus a practical workflow to test patches and adjust as needed. Include quick tips for tricky spots and a simple method to test finish under lighting to catch differences before final coats.
Cutting in and back-rolling
Start by cutting in along edges using a 1.5″ to 2″ angled brush. Hold it at a 45-degree angle for better control.
Edge control is key here. Dip the brush just enough – too much paint will drip, too little won’t cover.
After cutting in, use a roller to back-roll along the edges. This blends the cut-in area with the rolled section, minimizing any line between them.
Load your roller evenly and apply gentle pressure while back-rolling. This helps maintain an even line depth and prevents overworking the paint.
Rolling technique and nap selection
For ceiling, use a ‘W’ or ‘M’ pattern. Start in one corner, roll out three wide stripes, then fill in the middle. Move over slightly and repeat until done.
For walls, use uniform vertical or horizontal strokes. Work in sections, overlapping each pass by about 50% to avoid lap marks.
Choose a roller nap based on your wall texture:
– Smooth walls: 3/8″ to 1/2″ nap
– Textured walls: 3/4″ to 1-1/4″ nap
Ceiling-specific tips and working safely
Paint ceilings first, then walls. This minimizes cross-flaking and lap marks from drips.
Use a drip loop – let paint build up at the end of your roller, then tap it against the can to remove excess before rolling. This reduces drips.
For overhead work, use an extension pole or a 9″ roller with a telescopic handle. Always maintain three points of contact when using ladders or scaffolds – two feet and one hand.
Wear safety glasses to protect from drips and keep a wet cloth nearby for quick clean-ups.
Troubleshooting: Causes, Diagnostic Tests and Fixes
Map common finish problems like peeling, blistering, wrinkling, excessive gloss, drying skips, roller marks, pinholes, and uneven sheen to likely causes such as moisture, prep issues, incompatible primers, or improper technique. Use this to establish a practical diagnostic framework you can apply on site without guesswork.
Outline simple on-site diagnostic tests and checks, including moisture readings, adhesion patches, gloss comparisons, and observations of drying times and environmental conditions. Provide a straightforward decision path from symptoms to likely root causes and immediate remedies. List corrective actions by issue type and keep a sense of safety and timing, with guidance on when to escalate to a professional for stubborn or structural problems.
Visible flaws (lap marks, streaks, flashing)
Lap marks, streaks, and flashing are common finish problems that can make your paint job look unprofessional. These issues often stem from poor technique, uneven sheen, or using the wrong roller.
Poor Technique: Overlapping wet paint can cause lap marks. To fix this, feather the edges of each stroke to blend with the previous one.
Uneven Sheen: Different sheens can create streaks. Ensure you’re using the same sheen throughout. If not, lightly sand and repaint the affected areas.
Wrong Roller: Using a roller with too many or too few nap fibers can cause flashing (uneven paint coverage). Choose a roller suitable for your surface and paint type.
Surface failures (peeling, blistering, efflorescence)
Peeling, blistering, and efflorescence indicate serious issues with your paint job. Here’s how to diagnose and fix these problems.
Adhesion Test: Perform an adhesion test by cutting a small ‘X’ in the affected area and applying painter’s tape. If the paint peels off when you pull the tape, you have poor adhesion.
Moisture Check: Use a moisture meter to check for excess moisture. If present, treat the substrate with a suitable primer or sealant before repainting.
Efflorescence: This is a white, powdery deposit caused by salt deposits from moisture. Remove it using a wire brush and water, then apply a suitable primer to prevent recurrence.
Finish issues (poor sheen uniformity, color shift)
Inconsistencies in sheen and color can detract from your paint job’s overall appearance. Here’s how to identify and fix these issues.
Different Sheens: Using different sheens can create a patchwork effect. Ensure you’re using the same sheen throughout. If not, lightly scuff sand and repaint the affected areas for uniformity.
Application Inconsistencies: Uneven application can cause color shifts. Ensure you’re applying paint evenly with consistent pressure and technique.
Lighting: Different lighting conditions can make it seem like your paint job has a color shift. Check your work in natural light before making any changes.
Safety, Cleanup and Maintenance for a Long-Lasting Finish
Cover personal safety and ventilation with guidance on appropriate PPE such as respirators, goggles, and gloves, plus ensuring adequate room ventilation for the job. Consider the different exposure risks for ceilings versus walls and how to manage them during cleanup. Include safe handling and disposal of paints and solvents, and how to dispose of leftover materials and cans responsibly.
Discuss tool cleaning, storage, and workspace hygiene to extend tool life and keep the site tidy. Outline post-paint cleanup steps like ventilating after use, cleaning brushes and rollers, disposing of rags safely, and wiping down finished surfaces. Finish with maintenance tips, such as routine inspections, touch-up planning, gentle cleaning methods, and guidance on when to recoat or reseal to preserve the finish over time.
Personal protective measures and ventilation
Safety starts with the right gear. Wear a respirator/half-face mask when sanding or dealing with high-VOC paints. Goggles protect your eyes from dust and splashes, while gloves keep chemicals off your skin.
Ventilation is crucial. For low-VOC paints, open windows and use fans to circulate air. For high-VOC paints, consider a HEPA filter or hiring a pro with proper ventilation equipment.
Be mindful of exposure risks. Ceilings pose more risk than walls due to gravity. Take breaks if you feel dizzy or lightheaded. During cleanup, ensure the area is well-ventilated before starting.
Lastly, use safe ladder practices. Inspect your ladder before use, maintain three points of contact, and don’t overreach.
Cleaning brushes, rollers and safe disposal
Clean tools promptly to keep them usable. For water-based paints, rinse with warm water until the runoff is clear. For oil-based paints, use paint thinner or mineral spirits.
Store brushes and rollers in a cool, dry place away from heat sources. Wrap roller covers in plastic to maintain their shape.
Dispose of rags safely. Never leave them in a pile as they can spontaneously combust. Rinse well, let dry, then dispose in regular trash. Solvents should be taken to a hazardous waste facility. Check local rules for paint disposal.
If you can’t reuse or recycle leftover paint, pour it into a sealed plastic bag and put it in the trash. Never pour paint down drains.
Maintenance and touch-up strategies
Inspect your walls and ceilings annually for signs of wear. Touch up nicks, scratches, or scuffs promptly to prevent further damage.
Store touch-up samples in a cool, dry place. Label them with the room name and date for easy reference.
For small stains, use a mild detergent solution and a soft cloth. Blot rather than rub to avoid spreading the stain or damaging the paint. For tougher stains, consider a commercial cleaner designed for your specific paint type.
Re-coat or re-seal every 5-10 years depending on traffic and wear. Regular maintenance extends the life of your paint job and keeps your home looking its best.
Conclusion
Safety first and solid prep are the difference between a good look and a return trip to fix it. If you lock onto a clean plan, work methodically, and respect the materials, you’ll get a durable finish that lasts much longer than a quick pass on a whim.
Start by confirming the scope and budget, gather the tools and materials, test a small area to confirm adhesion and sheen, then do the surface preparation in order—patch and sand where needed, prime the problem spots, mask and protect trim, and finally paint in controlled, even passes with room-by-room checks as you go.
A few traps to avoid: skip patching or sanding, rush coats, or apply too-thin layers that chalk or peel later. Don’t skip ventilation or eye and respiratory protection, don’t work with damaged plaster or signs of water intrusion without stopping to address the underlying issue, and don’t rush when masking—double-check edges and protect adjacent surfaces to prevent costly touch-ups.
If you uncover widespread water damage, mold, active leaks, or structural issues, or stubborn stains won’t prime and seal, call in a professional rather than forcing a DIY fix. Stay patient, follow the steps, and you’ll finish with confidence and a lasting, professional-looking result.
FAQ
What steps ensure walls and ceilings are ready for paint?
Clean the surfaces to remove dust and grime. Fix any obvious damage with appropriate patching and a skim coat if needed, then sand smooth. Wipe down again to remove dust before priming.
How do I choose the right paint and finish for ceilings and walls?
Start with the manufacturer’s guidance on adhesion and coverage. For ceilings, consider flat or matte finishes to hide imperfections; for walls, choose a finish that suits traffic level and room use. Always check label instructions for sheen, cleaning ability, and preparation needs.
What tools and materials do I need for cutting in, rolling, and cleanup?
Have a quality angled brush for cutting in, rollers with appropriate naps, and fresh trays or liners. Keep drop cloths, edge guards, and a scraper or putty knife on hand for quick fixes. After painting, clean brushes and rollers as directed by the label, and store leftover paint as recommended.
What are the best practices for sanding and priming before painting?
Sand to smooth any rough spots and feather edges. Wipe away dust thoroughly before priming. Use a compatible primer for the surface and paint you plan to apply, following the manufacturer’s instructions for drying time and coverage.