
Introduction
Baluster tape trick refers to using tape as a quick fix to stabilize wobbly balusters. It’s a DIY method you can try before pulling everything apart. The idea is to wrap or attach tape to create friction and prevent movement.
Common causes are loose hardware, slight wood shrinkage, or gaps that let a baluster wobble. Do a quick test by gently applying pressure to see where the movement is and which fasteners or joints are insecure. Fixes range from reseating and retying with approved fasteners, to replacing a damaged baluster, or selecting a tape product that matches the material and follows the manufacturer instructions and local rules.
Key takeaways
- Identify tape residue patterns before cutting or scraping to avoid surface damage.
- Test adhesive with gentle solvent on hidden area to prevent finish staining.
- Wear eye protection and gloves during any tape removal or scraping.
- Label and store removed pieces to match repairs to original layout.
- Repair finishes promptly after removal to minimize moisture intrusion and staining.
- Use painter’s tape or protective sheeting to minimize additional damage.
Table of Contents
- Introduction
- Key takeaways
- What Is the Baluster Tape Trick?
- Causes — Why the Tape Trick Happens
- Visual Checkpoints — Inspect Before You Act
- Safe Tests to Diagnose the Problem
- DIY Fixes — Removing Tape and Adhesive Safely
- Repairing and Restoring Affected Finishes
- Preventive Measures and Best Practices
- Tools and Materials Checklist
- Conclusion
- FAQ
What Is the Baluster Tape Trick?
The baluster tape trick refers to adhesive tape that shows up on stair balusters and either hides damage or leaves residue. You’ll notice edges lifting, finish clouding, or unexpected texture where the tape sat. This intro sets up the diagnostics and repairs you’ll read about later.
Typical scenarios involve contractors using tape to mark or protect areas, or temporary trim that wasn’t removed. If you see tape-related issues, start with a careful inspection and a plan for safe removal and repair. This section previews what to check and what you’ll fix down the line.
Origins and common uses of baluster tape
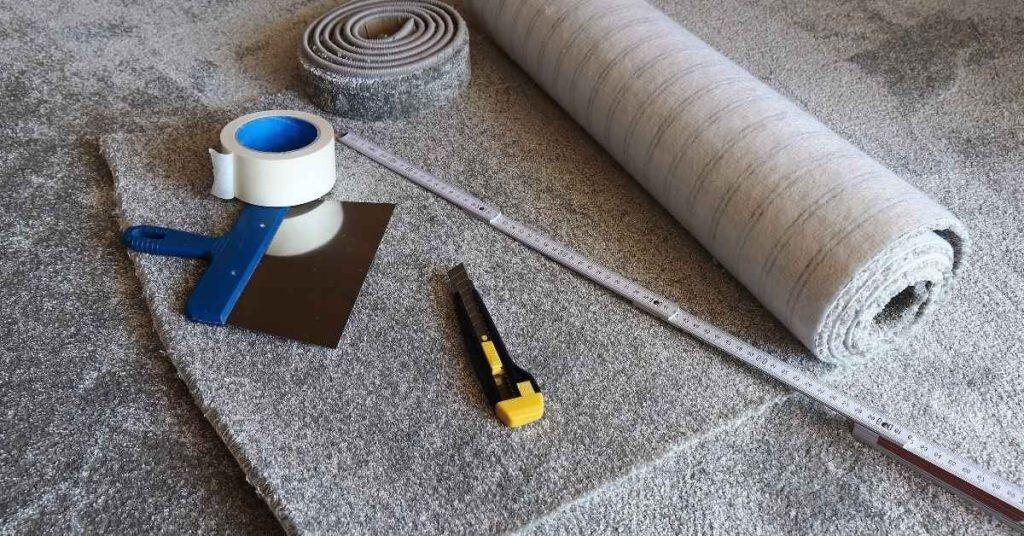
Baluster tape, also known as painter’s tape, is a must-have on any stair building or renovation site. It serves three main purposes:
Temporary protection: Tape shields balusters from paint, stain, and other substances during construction and finishing stages.
Marking: It helps mark measurements, levels, and cutting lines for precise baluster installation.
Assembly aid: Tape can hold balusters in place temporarily until glue or screws secure them. The most common types are standard painter’s tape (blue) and masking tape (crepe paper).
Typical symptoms and how they present
When baluster tape isn’t removed properly or left too long, it can cause visible signs of damage:
Adhesive residue: Leftover adhesive may remain on the balusters’ surface, making them sticky to touch.
Finish damage: Prolonged contact with tape can lift paint or stain, leaving bare spots. Removing tape too quickly might also pull off finish.
Discoloration: Tape can leave behind a faint outline or yellowing where it was applied.
Structural signs of trouble include:
Loosened balusters: If tape holds balusters in place too long, they might not be fully secured, leading to wobbling or instability.
Altered fit: Improperly removed tape can leave behind debris that affects how balusters fit together or with the stringers.
Causes — Why the Tape Trick Happens
Many factors can damage baluster finishes after tape goes on. Mechanical pressure from tape edges can scratch or lift coatings. Adhesive breakdown is common if the wrong tape sits too long or reacts with the finish.
Chemical incompatibilities and environmental conditions matter too. Moisture and humidity can soften adhesives and finishes. UV exposure can fade or craze finishes, making tape problems more noticeable.
Adhesive and finish interactions
The baluster tape trick often happens due to chemical reactions between adhesives and wood finishes. Certain adhesives can react with stains, paints, or varnishes, causing residue, lifting, or discoloration.
For instance, some adhesives may not be compatible with oil-based finishes. When these two come into contact, they can cause the tape to lift off over time. Always check compatibility before applying any adhesive.
Water-based adhesives are generally safer as they’re less likely to react with wood finishes. But even these can cause issues if not allowed to dry properly before applying finish.
Environmental and time factors
Heat, humidity, sunlight, and time can all contribute to the baluster tape trick. These environmental factors change the adhesion properties of the tape over time.
High heat and humidity can cause adhesives to break down faster than normal. Sunlight, especially UV rays, can also degrade adhesives, leading to loss of stickiness and eventual lifting.
Even with the best adhesives and finishes, time can be an enemy. The longer tape is left on, the more likely it is to start peeling due to natural aging of the adhesive.
Installation and handling errors
Human factors can also play a significant role in the baluster tape trick. Here are some common mistakes to avoid:
- Leaving tape on too long: Tape should be removed as soon as it’s no longer needed. Leaving it on for extended periods increases the risk of it becoming difficult to remove and potentially damaging the surface.
- Improper removal technique: Ripping or pulling tape off quickly can cause it to lift off the surface, leaving residue behind. Always peel slowly and steadily.
- Using the wrong tape for the surface: Not all tapes are suitable for every surface. Using a tape that’s not designed for your specific surface can lead to premature lifting or damage.
- Not allowing adhesive to dry properly: Applying finish before the adhesive is completely dry can cause it to react with the wet adhesive, leading to lifting or discoloration.
By avoiding these common mistakes, you can significantly reduce the risk of experiencing the baluster tape trick.
Visual Checkpoints — Inspect Before You Act
Do a surface-type scan first—the finish, paint, stain, or varnish on the baluster. Look for shine changes, hazy film, or rough texture around tape zones. Check for any visible residue that might tell you what you’re dealing with.
Also test for looseness or movement at joints and posts. Note any stains or color shifts that stray from the surrounding wood. These cues guide your next steps and safety measures.
Surface and finish identification
Before you start, figure out what you’re dealing with. This checklist helps.
- Check for shine: If it’s glossy or semi-gloss, it’s painted.
- Feel the surface: Smooth and even? It’s stained. Rough? Raw wood.
- Look for sheen: Dull but not rough? Sealed.
- Avoid: Skipping this can lead to wrong treatment choices, causing more damage.
Quick rule: Knowing the surface and finish helps pick the right fix.
Residue and damage classification
Not all problems are created equal. This checklist helps you sort them out.
- Scrape gently: If it comes off easily, it’s removable residue.
- Look for lifting: Edges peeling up? Finish is lifting.
- Inspect closely: Deep cracks or holes? Surface damage.
- Avoid: Mixing these up can make problems worse.
Quick rule: Classify the problem right to fix it right.
Safe Tests to Diagnose the Problem
Use non-destructive tests to identify adhesive type and finish sensitivity. Try a small, inconspicuous spot with a mild cleaner and observe results before broader use. If the finish blisters or reacts, stop and reassess your approach.
Spot-test any chemical cleaners in a hidden area first. Verify compatibility by checking product labels or manufacturer instructions. The goal is to avoid damage while confirming the problem source.
Solvent and adhesive spot tests
Start with a mild solvent like water. Dip a cotton swab, apply to an inconspicuous area. If it beads or doesn’t spread, your finish is likely oil-based.
Next, try isopropyl alcohol. If it dissolves the residue, you’ve got a water-based acrylic or latex paint. No reaction? Move on to mineral spirits for an oil-based paint.
Be patient. Let each solvent sit for 30 seconds before wiping off with a clean cloth.
If none work, it’s likely a specialty finish like epoxy or polyurethane. Consult a professional.
Mechanical test for finish adhesion
Gently press and lift a piece of painter’s tape onto the affected area. Let it sit for 15 minutes, then pull it off quickly at a 45-degree angle.
If paint comes off with the tape, your finish is delaminating. This means the adhesive has failed and the finish is peeling from the surface.
If no paint sticks to the tape, your finish is cohesive. The problem lies elsewhere – perhaps in the substrate or the original application.
Repeat this test on a different area if needed, but always start in an inconspicuous spot to avoid further damage.
DIY Fixes — Removing Tape and Adhesive Safely
Start with gentle mechanical removal: peel slowly, use a plastic scraper, and work at a low angle to protect the finish. For tougher residue, try an oil-based cleaner and a soft cloth, then wipe clean. Avoid aggressive tools that could scar the baluster.
If adhesive remains, consider a solvent option aligned with the finish type and manufacturer guidance. Always preserve safety: ventilate, wear gloves, and test first in a hidden area before full use.
Gentle mechanical and household methods
Start by heating the tape residue with a hair dryer on low heat. This softens the adhesive, making it easier to remove.
Apply some cooking oil or a commercial adhesive remover alternative onto a soft cloth or non-abrasive pad. Gently rub the residue in small circular motions. The oil helps break down the adhesive without damaging the finish.
If the tape is still not budging, try using a plastic scraper to carefully lift the edges. Be gentle to avoid scratching the surface.
When and how to use solvents
Solvents like isopropyl alcohol or mineral spirits can dissolve tough adhesive residue. But remember, they’re strong stuff – use them safely.
Always test on a small, hidden area first to ensure the solvent doesn’t damage your finish. Let it soak in for a few minutes before trying to remove the tape.
Dip a soft cloth or cotton swab into the solvent and gently rub the residue. Work in small sections at a time. Avoid over-soaking – too much solvent can penetrate deep into the material, weakening it.
Ventilate your workspace well when using solvents. They give off strong fumes that can be harmful if inhaled. Keep children and pets away from the area until it’s well-ventilated and dry.
Repairing and Restoring Affected Finishes
After residue removal, assess the finish condition and plan repairs accordingly. For painted balusters, a light cleaning and touch-up can often restore uniform appearance. For stained or varnished surfaces, you may need light sanding and refinishing in the affected zone.
Match the finish type and sheen as closely as possible, and apply in thin, even coats. If you’re uncertain about the exact finish, check the original product, label, or manufacturer instructions before proceeding.
Touch-up for painted balusters
First, clean the affected area with a damp cloth to remove any dirt. Let it dry.
Gently scuff sand the spot using fine-grit sandpaper. This helps paint adhere better. Wipe off dust with a tack cloth.
Apply a coat of primer designed for your paint type. Let it dry according to the manufacturer’s instructions.
Match your existing paint color as closely as possible. Apply a small amount to a test area first, then touch up the baluster. Lightly sand and wipe clean between coats if needed.
Restoring stained or varnished wood
Start by cleaning the area with a mild soap solution. Let it dry completely.
Lightly sand the spot using fine-grit sandpaper. Be careful not to sand too deeply, as this can remove stain and affect the overall finish.
Wipe off dust with a tack cloth. Match your existing stain color and apply a small amount to a test area first. Once satisfied, stain the baluster according to the manufacturer’s instructions.
If needed, apply a topcoat of varnish or polyurethane to restore the sheen. Lightly sand between coats if necessary.
Preventive Measures and Best Practices
Choose tape with appropriate adhesion and compatibility for wood finishes, and remove it on a scheduled timeline. Before application, clean the balusters to reduce bond issues. Use painter’s tape or finish-safe options as recommended by the manufacturer.
Protect unwrapped areas with masking or barriers and test a small area when using new products. Document the steps you take so future work follows the same safe routine.
Choosing the right tape and application tips
The first step to preventing baluster tape trick issues is using the right type of tape. For finished wood, low-tack painter’s tape or film masking tape works best.
Low-tack means it sticks well enough to stay put but won’t pull off finish when removed. Apply it in a smooth, steady motion, pressing down firmly with your fingers or a squeegee to ensure good contact and minimize air bubbles.
Avoid using duct tape or other high-stick tapes on finished surfaces. They’re too aggressive and can lift the finish off when removed.
Removal timing and technique
Timing is key when it comes to tape removal. The ideal window is after the paint or stain has fully dried but before it’s had time to cure too much.
Start by scoring the edge of the tape with a utility knife to break the seal. Then, use a low-angle pull – hold the tape at a 45-degree angle to the surface and pull slowly and steadily. This reduces stress on the finish.
If you’re having trouble, try heating the tape first with a hair dryer set to low heat. The warmth can help loosen the adhesive’s grip. But be careful not to overheat and damage the finish.
Tools and Materials Checklist
Keep a practical set on hand: soft cloths, plastic scrapers, mild cleaners, oil-based cleaners, and a few compatible solvents. Have applicable abrasive pads and finish touch-up supplies ready for quick fixes. Don’t forget PPE like gloves and eye protection.
Include product labels, manufacturer instructions, and your local rules reference in the kit. If you’re unsure about a material, verify compatibility before proceeding.
Minimum toolkit for inspection and light fixes
Use this checklist when you first notice baluster tape issues. It helps diagnose minor problems and perform gentle fixes.
- Hair dryer: To soften adhesive for easy removal.
- Microfiber cloths: For cleaning surfaces without scratching.
- Isopropyl alcohol: To remove residue and test finish adhesion.
- Painter’s tape: To protect adjacent areas during repairs.
- Soft pads (e.g., magic eraser): For gentle abrasion to lift tape without damaging finish.
- Flashlight or magnifying glass: To inspect hard-to-see areas for damage.
- Gloves: To protect hands from residue and solvents.
- Safety glasses: To shield eyes from debris and drips.
Quick rule: Always start with the gentlest methods. If they don’t work, move on to stronger tools and solvents.
Advanced supplies for refinishing
Use this checklist when baluster tape issues require more extensive repairs or refinishing. Some items may need professional consultation.
- Mineral spirits: To dissolve tough adhesives and clean surfaces.
- Stain samples (matching your current stain): For touch-up and blending after repairs.
- Sandpaper grits (120-220): To smooth surfaces before refinishing. Start with coarser, progress to finer.
- Brushes (natural or synthetic, 1-3 inches): For applying stain and clear coats.
- Clear coat (polyurethane, varnish, or lacquer): To protect repaired areas and restore gloss.
- Putty knife: To scrape off stubborn adhesive residue.
- Steel wool (0000 grade): For light abrasion to prepare surfaces for refinishing.
- Professional consultation: If you’re unsure about matching stains, clear coats, or complex repairs.
Quick rule: When in doubt, consult a pro. The wrong stain or clear coat can ruin your project.
Conclusion
What matters most is that you treat the baluster tape issue as a safety and durability check, not a cosmetic shortcut. Fixing it correctly protects the structure, the finish, and your pockets from bigger headaches down the line.
First, visually inspect the area, then run the safe tests in place, remove tape and adhesive carefully, repair any finish after confirming the problem isn’t ongoing, and finally recheck for adhesion and appearance after it cures. Work in small steps, and document what you find as you go so you don’t miss a detail.
Avoid rushing the process, never yank or heat the tape loose, and don’t skip testing before you act or skip repairing the finish after you remove evidence of the tape trick. Always keep a clear workspace, use proper PPE, and follow the order: assess, test, remove safely, repair, and reseal.
If you have loose balusters, widespread adhesive failure, or you’re unsure about the structural integrity, it’s time to call a professional rather than push forward. Stay disciplined, use these checks as your guide, and you’ll finish with a solid, clean result you can trust. You’ve got this—steady progress beats costly mistakes every time.
FAQ
What scenarios typically trigger the baluster tape trick to come back after a fix?
Common triggers are using the wrong tape for the surface, inadequate surface prep, and moisture getting behind the tape. Movement or traffic on the railing can also re-worsen the bond. Check the product label and manufacturer instructions to confirm compatibility before re-application.
How should I test the bond before finishing to avoid reissues?
Do a small pull test in a discreet spot after installing and curing as directed by the product. If it peels or tears away easily, stop and re-prep. Always follow local and product guidelines for safe testing practices.
What simple steps can prevent the tape trick from failing again during reinstall?
Clean and dry the surface thoroughly, choose the correct tape type for the material, and apply with steady pressure across the full width. Avoid stretching or twisting the tape, and give the adhesive the time it needs to cure per the label. If in doubt, consult the manufacturer’s instructions for your exact product.
When should I replace the baluster tape instead of trying another repair?
Replace the tape if you see peeling, lifting, cracking, or adhesive transfer to finishes. If there’s ongoing moisture behind the tape or signs of mold, stop and reassess with new tape and proper prep. Always verify the new tape is suited to the surface and environment per the label.