
Introduction
Soften old masking tape by loosening the adhesive and easing the tape up rather than pulling hard. Peel back the edge at a low angle and use gentle warmth or a compatible solvent if the label on the tape allows. Check the tape label and the finish you’re working on before applying any cleaner or heat.
For residue, rub gently with a cloth dampened with a mild solvent recommended for the surface, or warm soapy water in a pinch. Use a plastic scraper at a shallow angle to lift stubborn bits without scratching. If the tape tears, re-warm the edge and peel back slowly from a fresh angle, rechecking the surface as you go.
Key takeaways
- Assess surface type, age of tape, and potential paint lift before proceeding.
- Gather non-abrasive tools and mild solvents recommended for delicate substrates.
- Start with low-risk softening methods; wear gloves when solvents are used.
- Test solvent on hidden area to avoid swelling or discoloration.
- Remove residue carefully with minimal pressure and microfiber cloths to avoid scratching.
- If tape tears, cut cleanly along edges and protect underlying paint.
Table of Contents
- Introduction
- Key takeaways
- Quick Assessment: Surface, Tape Age, and Risk
- Tools and Materials Checklist
- Low-Risk Softening Methods (Start Here)
- Solvent and Chemical Methods (Use with Care)
- Techniques for Removing Residue After Softening
- Fixes for Torn Tape and Embedded Bits
- Repairing Surface Damage and Paint Lift
- Prevention: Best Tape Choices and Removal Timing
- Conclusion
- FAQ
Quick Assessment: Surface, Tape Age, and Risk
Start by noting the surface type you’re dealing with—painted wood, glass, metal, wallpaper, or another finish. This helps you pick a gentler approach and avoid lifting finishes. Consider how old the tape is and how brittle it feels when you handle it.
Identify the main risks you might face, such as paint lift, veneer damage, or staining from adhesive. If you’re unsure about a surface, check the product label, manufacturer instructions, or local rules before proceeding. Use this quick assessment to choose a method that minimizes harm to the underlying material.
Identify the surface and finish
The first step is to figure out what you’re dealing with. Look at the surface and its current finish.
Painted surfaces need careful handling, especially if they’re glossy or have a delicate topcoat. Wood can be forgiving but may show marks if not treated gently. Glass and metal are tough but can scratch easily. Wallpaper might peel off with the tape if it’s old or poorly adhered.
Check for any special finishes like lacquer, varnish, or wax. These need extra care as they can be damaged by moisture or harsh chemicals.
Gauge tape condition and adhesive transfer
Now, let’s assess the masking tape itself. Old tape can be brittle and crumble, making it hard to remove in one piece.
Check for signs of cross-linked adhesive – that’s when the sticky part has hardened and turned brown or yellow. This makes removal tougher as the adhesive won’t soften easily.
If the tape is already lifting at the edges, that’s a good sign it’s ready to come off. But if it’s stuck fast, be prepared for some effort.
Note: If the tape has been up for years, there’s a chance the adhesive has transferred onto the surface. This can make removal even trickier and may require extra steps to clean up.
Safety and test patch protocol
Before you start, ensure good ventilation. Open windows or use a fan to keep the area well-ventilated.
Wear protective gear – gloves for your hands, safety glasses for your eyes, and maybe even a face mask if you’re sensitive to solvents.
Do a small test patch in an inconspicuous spot before tackling the whole job. This lets you check how the surface reacts to your chosen method without damaging the main area.
Important: Always check that your chosen solvent is compatible with the surface and finish. Some solvents can damage certain materials, so it’s crucial to know what you’re working with.
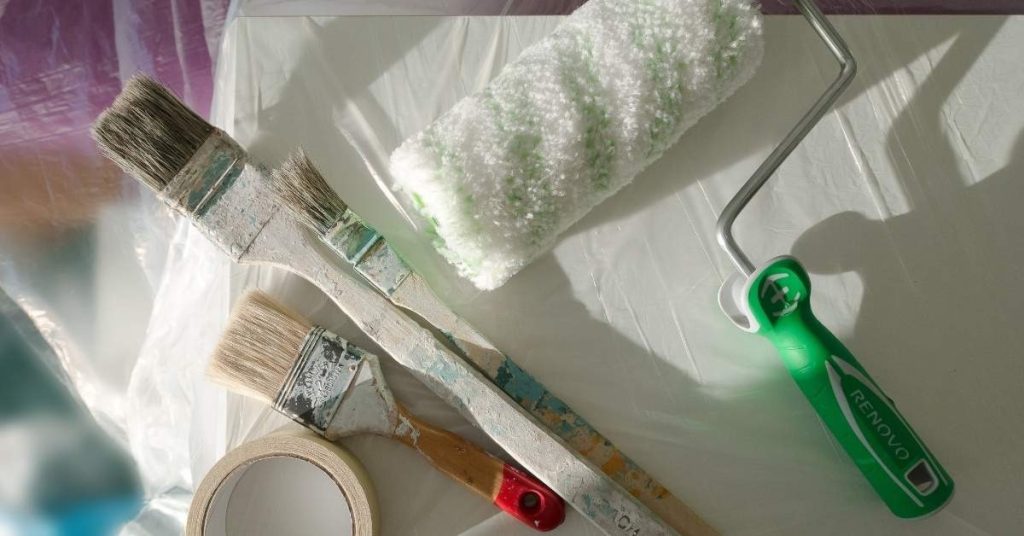
Tools and Materials Checklist
Gather a basic kit with gentle options first: a soft cloth, mild soap, warm water, and a plastic scraper or card. Add a gentle solvent or oil for tougher cases if the surface permits. Have a heat source on hand for low-heat approaches, and tweezers or needle-nose pliers for small pieces.
Organize optional items by gentleness and effectiveness: non-abrasive scrub pads, painter’s tape remover if advised, and a commercial adhesive remover only after patch testing. Include safety gear and a small patch-testing area to verify compatibility per product instructions. Always verify any tool choice against the surface and manufacturer guidance.
Gentle tools for delicate surfaces
Use these tools when dealing with sensitive surfaces like painted walls, wallpaper, or varnished wood.
- Soft cloths: Use microfiber or soft cotton cloths to gently rub the tape without damaging the surface. Skip this if you use harsh materials that may scratch or abrade the finish.
- Plastic scrapers: Gently scrape off excess adhesive with a plastic scraper, being careful not to dig into the surface. Metal scrapers can gouge delicate surfaces.
- Adhesive erasers: Use an adhesive eraser to remove tape residue. These are gentle and won’t damage most surfaces. Avoid using on textured or porous surfaces where it might leave marks.
- Steam: For stubborn tape, use a steamer to soften the adhesive before scraping. Be careful not to oversaturate the surface and cause damage.
- Warm water: Soak a cloth in warm water and apply it to the tape to soften the adhesive. Too hot or too cold water can warp or crack surfaces.
- Dull knife: Use a dull knife to carefully lift edges of the tape before pulling. A sharp knife can cut into the surface.
- Toothpick: For small areas, use a toothpick to gently scrape off adhesive residue. Be careful not to poke holes in delicate surfaces.
- Cotton swabs: Use damp cotton swabs to clean up small areas or edges. Saturating the surface can cause damage if not dried properly.
Quick rule: Always test these methods on a small, hidden area first to ensure they won’t damage your specific surface.
Common household products to try first
Start with these low-risk, common items before moving on to stronger chemicals.
- Warm soapy water: Mix dish soap with warm water and apply it to the tape using a cloth. Too hot or too cold water can warp or crack surfaces.
- Vegetable oil: Apply vegetable oil to the tape, let it sit, then wipe off with a cloth. This method may leave a residue that needs cleaning up.
- Rubbing alcohol: Apply rubbing alcohol to the tape using a cotton swab or cloth. Avoid using on painted surfaces as it can remove paint.
- White vinegar: Apply white vinegar to the tape, let it sit, then wipe off with a cloth. Vinegar may leave a smell that needs airing out.
- Baking soda paste: Mix baking soda with water to form a paste, apply it to the tape, and let it sit before wiping off. Avoid using on porous surfaces where it might leave marks.
- Mayonnaise: Apply mayonnaise to the tape, let it sit, then wipe off with a cloth. This method may leave a greasy residue that needs cleaning up.
- Peanut butter: Apply peanut butter to the tape, let it sit, then wipe off with a cloth. This method may leave a sticky residue that needs cleaning up.
- Cooking oil: Apply cooking oil to the tape, let it sit, then wipe off with a cloth. This method may leave a residue that needs cleaning up.
Quick rule: Always do a test patch first to ensure these methods won’t damage or discolor your specific surface.
Commercial removers and safety gear
Use commercial adhesive removers when gentler methods have failed. Always prioritize safety first.
- Adhesive removers: Choose a remover specifically designed for your type of tape residue. Using the wrong product can cause damage or discoloration.
- Gloves: Wear rubber gloves to protect your hands from chemicals. Skip this and you risk chemical burns.
- Goggles: Protect your eyes with safety goggles when using harsh chemicals. Splashing can cause serious eye injuries.
- Ventilation: Work in a well-ventilated area or use a respirator to avoid inhaling fumes. Poor ventilation can lead to dizziness, headaches, or other health issues.
- Label reading: Always read and follow the manufacturer’s instructions on the product label. Ignoring these can result in improper use and potential damage or injury.
- Patch test: Before applying any commercial remover, do a patch test in a hidden area to check for adverse reactions or surface damage. Skipping this step could lead to unexpected results.
- Rags and towels: Use old rags or towels to apply and wipe off removers. Using good quality materials ensures you won’t cause further damage while cleaning up.
- Proper disposal: Dispose of used rags, towels, and any remaining remover according to local regulations. Improper disposal can be harmful to the environment or cause injury during disposal.
Quick rule: Always prioritize safety first when using commercial adhesive removers. If in doubt, consult a professional.
Low-Risk Softening Methods (Start Here)
Begin with heat or gentle moisture. Use low heat or a warm steam setting if you’re working on non-sensitive surfaces. Apply soap and water with a soft cloth to loosen the adhesive gradually.
Oil-based approaches can help on some surfaces; apply a small amount to a cloth and test first. If a surface shows no adverse effects, proceed slowly and wipe away residue as you go. Always patch-test on an inconspicuous spot before full use.
Warmth and controlled heat (hairdryer/heat gun low)
Low heat is your friend when softening old masking tape. It helps break down the adhesive’s bond without damaging surfaces like paint or vinyl.
Use a hairdryer on its lowest setting or a heat gun at around 150°F (66°C). Keep it moving to avoid overheating any one spot. Aim for brief, even heat application.
Pro tip: Start from the center of the tape and work outwards. This helps prevent lifting edges.
Steam and moist heat for porous substrates
For porous surfaces like wood or wallpaper, steam or a damp cloth can do the trick. The moisture relaxes the adhesive, making it easier to remove.
Use a steamer designed for fabric or wallpaper, or simply dampen a clean cloth. Gently apply heat and moisture, but beware of over-saturation. Too much water can cause swelling, warping, or damage.
Caution: Avoid using steam on delicate surfaces that could be damaged by excess moisture.
Oils and diluted soap are gentle yet effective at penetrating and loosening adhesive. They’re safe for most surfaces and easy to clean up.
For oils, apply a small amount directly onto the tape. Let it dwell for 15-30 minutes before attempting removal. For soapy water, create a solution with warm water and mild dish soap. Apply, let it sit, then gently scrape off the tape.
Clean-up: Wipe away excess oil or soap residue with a damp cloth. No harsh chemicals mean no harsh fumes or residue to worry about.
Solvent and Chemical Methods (Use with Care)
Compare common options like isopropyl alcohol, citrus cleaners, or a dedicated adhesive remover. Check the product label for surface compatibility and recommended dilution or use guidelines. Patch-test in a hidden area to confirm it won’t damage the finish.
Use chemical methods only when gentler options fail. Follow manufacturer instructions and local rules, and avoid using strong solvents on delicate surfaces. If in doubt, consult the instructions or seek professional advice before proceeding.
Alcohols and citrus-based cleaners
Isopropyl alcohol (IPA) and citrus-based cleaners can be effective on old masking tape, especially if it’s not too old or hasn’t been exposed to harsh conditions. They’re generally safe on most finishes like paint, wood, and metal.
IPA is great for removing fresh adhesive residue. It evaporates quickly, so it won’t leave behind any residue. Just apply a little on a cloth and rub gently.
Citrus-based cleaners are less harsh than IPA but still effective. They’re usually safe on most surfaces, but always patch test first. Apply with a cloth or spray directly onto the tape, let it soak for a bit, then scrape off the tape and wipe away the residue.
Commercial adhesive removers and degreasers
Products like Goo Gone or similar commercial adhesive removers can tackle old, stubborn tape. They’re designed to break down adhesives quickly.
To use, apply a generous amount onto the tape, let it soak for a few minutes, then scrape off the tape with a plastic scraper or putty knife. Wipe away any residue with a cloth dampened with warm water.
Rinsing is important. After removing the tape and residue, rinse the area thoroughly with clean water to remove any remaining chemicals. This will prevent damage to your surface over time.
Strong solvents and cautions (acetone/nail polish remover)
Acetone, or nail polish remover, is a powerful solvent that can dissolve old adhesive quickly. It’s best used as a last resort when other methods have failed.
Use acetone with extreme caution. It can damage plastics and painted surfaces if left on too long. Always patch test first to ensure it won’t harm your surface.
Apply acetone sparingly onto the tape using a cotton swab or cloth. Work quickly, scraping off the tape as soon as the adhesive starts to soften. If you see any discoloration or softening of the finish, stop immediately and rinse with water.
Techniques for Removing Residue After Softening
Once the adhesive is softened, start with light mechanical removal: a soft cloth, thin plastic scraper, or gentle pressure to lift residue. Work in small sections to prevent spreading. Wipe clean with a damp cloth as you go.
If residue sticks, repeat the softening step and reattempt removal with the gentlest method that works. Avoid aggressive scrapes that could gouge or scratch the surface. Stop if you see any lifting or color loss and reassess.
Mechanical removal with plastic scrapers and cloths
Once your masking tape adhesive has softened, it’s time to start removing the residue. Grab a plastic scraper or an adhesive eraser – these are gentle on surfaces yet tough on sticky stuff.
Start at one corner of the residue and work your way across, using light pressure. If you’re working on delicate surfaces like paint or wallpaper, opt for a microfiber cloth instead. The soft fibers will lift the adhesive without scratching.
Be patient. Work slowly and steadily to avoid tearing or damaging the surface beneath.
Solvent-aided wiping and spot treatment
For stubborn residue, you might need a little extra help. That’s where solvents come in. Choose one from your earlier checklist – mineral oil, soapy water, or even a mild commercial remover.
Dip a cloth into the solvent, then wring it out to remove excess liquid. You don’t want drips making more of a mess. Work in small sections, wiping gently until the residue dissolves.
Rinse and dry. After each section, rinse with clean water and dry thoroughly. This helps prevent any remaining solvent from causing damage over time.
Dealing with gummy film on porous or textured surfaces
Porous materials like unsealed wood or textured paint can be tricky. The adhesive seeps into the pores, leaving a gummy film behind. Don’t worry – you can still get it off.
Start by softening the adhesive as before. Then, use your gentle mechanical tools to lift as much residue as possible. For tough spots, apply a small amount of solvent directly onto a cloth and work in tiny circles until the gummy film dissolves.
Patience is key. Repeat this process, letting the surface dry between attempts. It might take time, but you’ll get that residue off without damaging your surface.
Fixes for Torn Tape and Embedded Bits
For torn pieces, lift what you can with tweezers or a plastic card without forcing fibers into the surface. Gently pull along the grain of any veneer or finish. Collect embedded bits as you go and keep them from spreading.
Use a fresh tool edge to avoid embedding adhesive deeper. If adhesive fragments remain, reapply a softening method around the area and re-check before continuing. Stop if you notice new damage forming.
Lifting torn edges and peeling in layers
Torn masking tape can be a pain to remove, but with the right technique, you can lift it off without spreading residue. Start by gently lifting one edge of the torn piece.
If it’s stubborn, use a hairdryer on low heat to warm the adhesive. The warmth will help re-adhere the tape to itself, making it easier to peel back in layers. Be careful not to overheat and damage the surface beneath.
Work slowly and steadily, using your fingers or a thin plastic scraper to lift each layer. With patience, you should be able to remove the entire piece without leaving residue behind.
Using adhesive tape and floss tricks
For small torn pieces or embedded fibers, reach for some fresh low-tack tape. Press it firmly over the piece, then pull it off quickly to lift away the tiny bit of tape.
If you’re dealing with threads of adhesive that are flush with the surface, use a piece of dental floss or fishing line. Gently saw back and forth at the base of the thread until it snaps free. This way, you won’t spread residue around.
Remember, these methods work best on small pieces and threads. For larger bits, you’ll need to switch to other techniques.
When to switch to solvent-first for embedded adhesive
Sometimes, mechanical lifts just won’t cut it. If you’ve tried lifting torn tape and embedded bits with no luck, it’s time to break out the solvents.
Before you start, make sure the surface beneath is protected from any potential damage. Then, apply a small amount of mineral oil or mild solvent to a cloth and gently dab at the embedded adhesive.
Let it soak for a few minutes, then try lifting again with your fingers or a plastic scraper. With luck, the adhesive will be softened enough to come away cleanly. If not, you may need to repeat the process or try a stronger solvent, following all safety precautions.
Repairing Surface Damage and Paint Lift
Identify any paint lift, flaking edges, or small chips caused by removal. Prepare to stabilize the area with compatible touch-up or filler after cleaning. Follow up with a finish that matches the surrounding surface where possible.
Test any repair approach on a hidden area first and observe for several days if possible. Use compatible products and apply in thin coats, allowing proper drying between steps. If the damage seems extensive, consider seeking guidance on best restoration options.
Stabilize and clean edges before touch-up
Before you start touching up any damaged areas, it’s crucial to stabilize and clean the edges. This ensures your repair will last and blend seamlessly with the rest of the surface.
Gently clean the area using a soft cloth dampened with water or a mild soap solution. Avoid harsh chemicals that could damage the surrounding paint.
Dry the area thoroughly to prevent any moisture from affecting the adhesion of your touch-up paint.
Remove any loose flakes or chips using a soft brush or your fingertips. Be careful not to create more damage.
Small touch-ups and blending techniques
For small areas of paint lift or damage, you can often perform a touch-up yourself. Start by spot-priming the area with a primer that matches your existing surface.
Once primed, apply your touch-up paint in thin layers, allowing each layer to dry completely before adding another. This helps ensure an even finish and prevents overworking the paint.
If you’re working with stain, follow a similar process, but be sure to test your stain on a small, hidden area first to ensure it matches the existing color.
For larger areas or complex repairs, you may need to sand the area lightly before touching up. If you’re unsure about your ability to match the existing finish, consider consulting a professional painter.
Knowing when to stop and call a pro
While there are many touch-ups you can do yourself, there are also times when it’s best to leave the job to a professional. Large areas of paint loss, for example, may require specialized equipment or techniques.
If your surface has a delicate antique finish or is structurally compromised (like veneer damage), it’s wise to consult a conservator or contractor who specializes in such work. They have the knowledge and tools to preserve the integrity of your surface without causing further damage.
Trust your instincts. If a repair seems too complex or you’re not confident in your ability to do it safely, don’t hesitate to call in a professional. It’s always better to err on the side of caution when it comes to preserving your home’s surfaces.
Prevention: Best Tape Choices and Removal Timing
Choose masking tape with adhesion suited to your surface and project duration. Read labels to confirm compatibility with finishes and substrates. Plan to remove within the recommended window to minimize lift or residue.
Store tape in a cool, dry place and keep edges clean to prevent transfer. For future projects, test a small patch first and note how the surface reacts to removal. Use the plan as a preventative measure for better results next time.
Tape types and recommended uses
When it comes to masking tape, you’ve got options. Let’s break down a few:
Low-tack painter’s tape is your go-to for most surfaces. It sticks well but peels off easily. Use it on walls, trim, and baseboards.
High-tack masking tape has more grip. It’s great for heavy-duty jobs like protecting floors or edges of large areas. But be careful – it can pull off paint if not removed promptly.
For specialty jobs, consider specialty tapes. Some are designed to resist moisture, others to stick to textured surfaces. Always check the label before you buy.
Proper application and timed removal
Applying tape right is half the battle. Press down firmly along the edge to seal it. Use a putty knife or your fingers for best results.
Now, here’s where timing comes in. Tape adhesion increases over time. That’s why you should remove it within manufacturer guidelines. If that info’s missing, test a small area first.
Here’s a general rule: remove low-tack tape within 24 hours, high-tack within 1-3 days. But remember, every surface and job is different. Always check if you’re unsure.
Storage and shelf-life tips
Proper storage can extend your tape’s life. Keep it in a cool, dry place away from heat sources. That means no storing in your car trunk or on the garage floor.
Before using old tape, check its tackiness. Stick a piece to a scrap surface and pull. If it doesn’t stick or peels off easily, it’s time for new tape.
If you find old tape that’s still usable but lost some stick, try heating the roll in hot water (not boiling) before use. This can revive its adhesive properties.
Conclusion
Take control of the job with a plan that keeps your surface intact, your finish even, and you safe while you work. When you follow a measured path—from quick surface checks to careful residue removal and thoughtful repairs—you prevent costly mistakes and extend the life of the project.
Start by confirming the surface type, the tape age and condition, and your risk tolerance, then gather the right tools and materials, begin with low-risk softening methods, test a small area, proceed to residue removal, address any tears or embedded bits, and finally repair surface damage and plan for future prevention. Keep the process simple: test first, use gentle heat or solvents only as needed, wipe with a clean cloth, and stop at the first sign of lifting paint or damaged substrate. Finish with preventive steps and a clear removal plan for the next project.
Common mistakes to avoid are rushing through tests, using harsh chemicals or heat beyond the safe range, and pulling tape that’s already stiff or strongly bonded. Always work in small steps, wear eye protection if splashes or debris are possible, and never force removal or scrape too aggressively. If you see primer or paint lift, or if the surface is delicate or cost-sensitive, pause and reassess rather than pushing through. If the job involves delicate finishes, large or aged coatings, or uncertain substrate, call a professional instead of risking bigger damage, and stay focused on a clean edge, a smooth finish, and a safe, repeatable routine to finish strong.
FAQ
How do I choose the right softening method for old masking tape on different surfaces?
Match the method to the surface and tape age. Start with low-risk options like warm air or gentle water dampening, then test a small area first. Always check the tape label or manufacturer instructions for any surface cautions.
What should I do if residue sticks to concrete after removing the tape?
Work residue with a soft scraper or cloth, avoiding gouges. If needed, try a mild, brand-safe residue cleaner and wipe clean, then rinse and dry. Check product labels for surface compatibility and follow local safety tips.
How can I handle torn tape and embedded bits without making a mess?
Remove torn pieces in small portions to avoid tearing more or pulling paint. Use a dull tool to lift edges gently and prevent embedding scraps deeper. If bits remain, inspect the surface guidelines and consider repeating a safe softening step before another pass.
How can I prevent paint lift or surface damage while removing masking tape?
Always test a hidden area first and slow down near edges. Use a method that stays within the surface tolerance you’re working with and avoid aggressive scraping. If you’re unsure, check the paint manufacturer instructions or local guidelines before proceeding.