

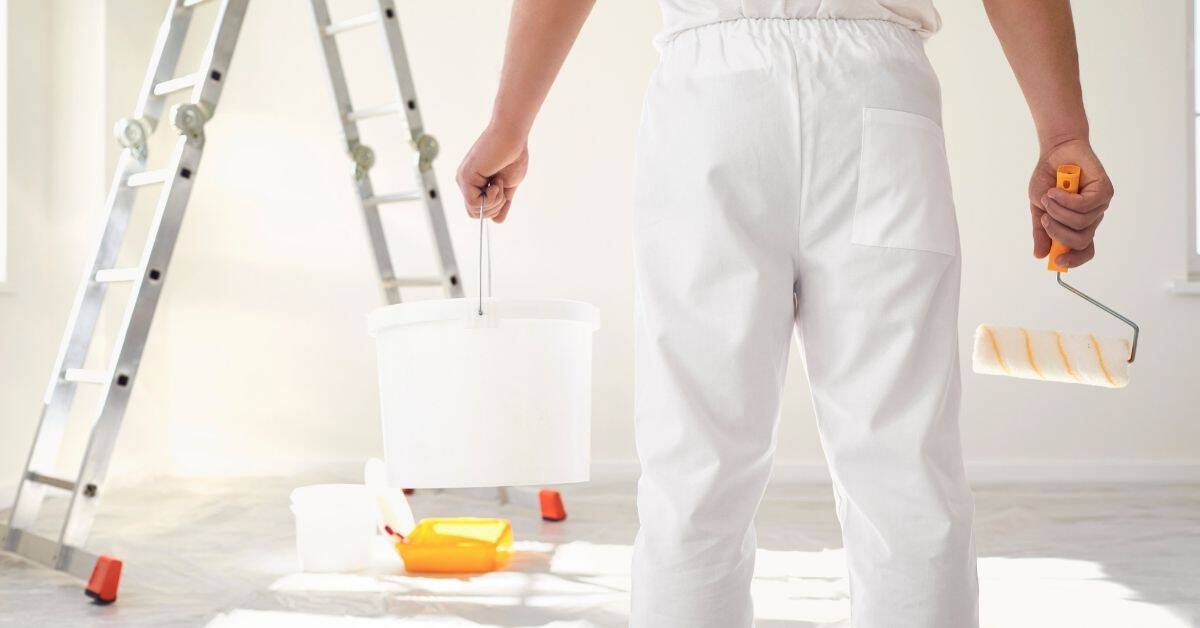
Introduction
Paint pulling off with tape occurs when tape removal disturbs the surface, lifting fresh or existing paint.
Timing matters: don’t rush the tape if the paint isn’t fully cured, and test a small patch on a hidden area to see if adhesion holds. Reserve surface prep for a clean, dry base, and choose a tape whose adhesive strength matches the job and surface material. When you test, try a few tapes on representative spots and note which one lifts paint the least; then document removal steps before you commit to the whole project.
Key takeaways
- Test tape on hidden edge areas before full application to gauge pull.
- Choose painter’s tape rated for the surface material and finish.
- Clean and dry the surface; remove dust or oils before taping.
- Apply tape during correct surface temperature and avoid over-stretching the edge.
- Test adhesion with sample strips on inconspicuous spots and wait briefly.
- Remove tape slowly at a shallow angle; wear eye protection.
Table of Contents
- Introduction
- Key takeaways
- Why Paint Pulls Off When You Use Tape
- Timing — When to Apply Tape and When to Remove It
- Surface Tests and Compatibility Checks to Prevent Pull-Off
- Choosing the Right Painter’s Tape for the Surface and Job
- Techniques to Prevent Paint Pull-Off While Taping and Painting
- Safe Removal Methods and Aftercare for Damaged or Sensitive Surfaces
- Environmental, Planning, and Long-Term Considerations
- Safety Precautions, Common Mistakes, and Greener Alternatives
- Conclusion
- FAQ
Why Paint Pulls Off When You Use Tape
Tape can lift paint for two main reasons: mechanical pull and chemical interactions. When adhesion strength between layers isn’t balanced, the tape can grab onto the coating as it’s removed. Solvents or adhesives in the tape can also soften or miscibly interact with certain paints, loosening the bond.
Surface condition and paint type drive the risk. Bare concrete, bare wood, primed surfaces, or previously painted layers behave differently when masked. Oil, latex, and enamel paints each have distinct adhesion tendencies that affect tape performance. Common failure modes include peeling edges, pulled pigment, and fuzzy edges—signs you can spot quickly during a quick inspection and test.
Adhesion mechanics and failure modes
The main reason tape lifts paint is due to the mechanical force applied when removing it. The tape’s adhesive strength can exceed the bond between the paint film, primer, or substrate, causing lifting or flaking.
Paint adhesion issues often start at the surface level. If the paint doesn’t adhere well to the underlying layer (primer or substrate), it’s more likely to lift with tape. This is especially true if the paint is weak or under-cured.
Tape can also interact chemically with the paint, particularly if the paint is still wet or not fully cured. Some tapes contain solvents that can soften or dissolve certain types of paint, leading to lifting.
Common surface and paint issues that increase risk
Dirty or glossy surfaces can cause tape to lift paint. Dirt reduces adhesion, while glossy surfaces can make it harder for the tape’s adhesive to stick properly.
Weak or under-cured paint is also at higher risk of lifting. If the paint hasn’t had enough time to dry and cure, it won’t be able to withstand the force of removing the tape.
Previously painted layers can pose a risk as well. If the old paint has poor adhesion or is flaking already, applying new paint and then tape can cause further lifting or peeling.
Timing — When to Apply Tape and When to Remove It
Rely on the paint manufacturer’s open and recoat guidance rather than a fixed clock. Different coatings require different windows to cure or dry to the touch. Use this as a baseline for planning masking steps and removal timing.
A practical framework helps prevent pull-off. Apply tape once the surface is adequately cured to the manufacturer’s tack-free or dry-to-touch stage, then plan removal when edge integrity is strong. Check substrate porosity, prior coatings, and moisture risk to decide if lower-adhesion tape is appropriate for delicate surfaces.
When to apply tape before or after painting
Taping before or after painting has its pros and cons. Let’s dive into both.
Before painting: Applying tape before painting gives you clean, sharp lines. It’s great for high-contrast color changes or when precision is key. But it might leave visible edges if not removed on time.
After painting: Painting to the edge of the tape can give a more seamless look, hiding any imperfections in the tape itself. However, it risks pulling off paint if removed too early.
The choice depends on your surface and paint type. Delicate surfaces or high-contrast colors might need taping before painting, while others could benefit from painting to the edge.
How to decide the right removal window
Removing tape at the wrong time can lead to paint pulling off. Here’s how to decide when it’s safe:
Dry-to-touch and tack-free: Follow your paint manufacturer’s guidelines for dry-to-touch and tack-free times. These indicate when the surface is ready for tape removal.
Quick surface checks: Perform a light finger swipe test or tack test on a hidden area to ensure the paint won’t stick to your fingers or leave residue.
Test strips: Apply and remove tape from a small, inconspicuous area at different intervals. This helps you see how the paint reacts and when it’s ready for full removal.
Surface Tests and Compatibility Checks to Prevent Pull-Off
Run quick readiness checks you can do without special equipment. Verify surface dryness, moisture levels, and porosity as indicators of how tape will behave. These checks help you predict potential lift before you start masking.
Perform a simple tape pull test to gauge adhesion risk. Apply standard painter’s tape, burnish, wait a short time, and peel at a controlled angle to observe any lifting. Also confirm paint compatibility with the substrate and whether a primer or bonding agent is needed for the new coat.
Quick adhesion and cross-hatch tests
Before slapping tape on your entire project, do a quick test to check paint adhesion. Here’s how:
1. Apply a small piece of painter’s tape to the surface.
2. Burnish it with a finger or a squeegee.
3. Let it sit for 5 minutes, then peel it off at a 45-degree angle.
If paint comes off, your surface isn’t ready yet. Try again after letting the paint cure longer. If it’s solid, you’re good to go.
Checking porosity, contamination, and sheen
Your surface needs to be clean and porous enough for tape to stick. Here’s how to check:
Porosity: Dab some water on the surface. If it beads up, your surface is too glossy or contaminated. Wipe tests can help here.
Contamination: Use a clean cloth with mineral spirits or soap and water to wipe the surface. If grime comes off, clean it thoroughly before taping.
If your surface passes these tests, you’re ready for taping.
Matching tape to paint type and finish
Different paints behave differently with tape. Here’s what to consider:
Water-based paints: Use a low-tack, painter’s tape. They’re easy to remove without pulling off the paint.
Oil-based and enamel paints: These can be tricky. Use a high-quality, low-tack tape designed for these paints. Test first in an inconspicuous area.
High-gloss finishes: These are tough to tape. Use a high-quality, low-tack tape and ensure the surface is clean and deglossed if necessary.
Choosing the Right Painter’s Tape for the Surface and Job
Match tape type to the substrate and the project length. Delicate surfaces may need gentle, low-adhesion tapes, while multi-surface tapes suit typical walls and trim. Consider how long the tape will stay on and exposure to heat or moisture when choosing.
Evaluate adhesion level, tensile strength, edge behavior, and release performance. Decide between solvent-free and solvent-based options based on your materials and ventilation. A quick decision framework helps you pick the right tape for delicate vs. rugged tasks and test a small patch if you’re unsure.
Adhesion level categories and substrate guidance
The right tape’s adhesion level prevents damage to surfaces. Here are three categories:
Low Adhesion (Delicate Surfaces): Use for delicate trim, wallpaper, or painted walls. These tapes stick lightly, preventing pull-offs.
Medium Adhesion (Typical Interior Walls): Ideal for smooth surfaces like drywall and painted woodwork. They balance adhesion and removability.
High Adhesion (Rough Exterior Surfaces): Suitable for rough surfaces like brick, metal, or textured walls. They stick firmly but may leave residue if not removed carefully.
Material specs, standards, and eco options explained
Tape materials affect performance. Here’s what to look for:
- Backing Material: Paper or plastic? Plastic is more durable but less flexible.
- Adhesive Material: Acrylic or rubber-based? Acrylic sticks better, lasts longer, but costs more.
- Longevity Rating: Check the ‘open time’ – how long tape stays tacky. Longer open times mean better performance over extended projects.
- Sustainable Options: Choose low-VOC or eco-friendly tapes to reduce environmental impact. They perform as well but cost more.
- Avoid: Tapes with poor materials can crack, stain, or leave residue. Check reviews and labels for performance warnings.
Cost vs performance and what to compare
Higher cost doesn’t always mean better tape. Compare these specs:
Adhesion: Higher adhesion isn’t always better. For delicate surfaces, low-adhesion tapes perform best.
Conformability: Tapes that conform to surfaces leave less residue. They cost more but save time and effort in removal.
Residue-Free Claims: Some tapes claim easy removal with no residue. These usually cost more but perform as promised if used correctly.
Techniques to Prevent Paint Pull-Off While Taping and Painting
Start with solid prep and proper tape selection. Clean and dry the area, test compatibility if unsure, and choose tape with appropriate adhesion. Be mindful of edge burnishing on delicate surfaces to avoid trapping moisture beneath the edge.
Control application pressure and tool handling. Press the tape firmly with a suitable tool and avoid heavy paint buildup near the edge. When removing, pull slowly at a low angle once the paint is tack-free to minimize lift and residue.
Proper tape application and edge sealing
Start by applying painter’s tape smoothly along the edge you want to protect. Press firmly with a plastic tool or putty knife, especially at corners and edges.
Use a back-rolling technique or a plastic putty knife to press down the tape’s edge, forcing out any air bubbles and ensuring good adhesion. This helps prevent seepage and reduces the risk of paint lifting.
Be careful not to overpress, as this can cause the tape to adhere too strongly and pull off paint when removed.
Painting technique adjustments to protect edges
When painting near taped edges, use a brush or roller with light pressure. Work from the edge towards the center of the surface to avoid building up too much paint at the edge.
Apply thin coats and allow each coat to dry completely before applying the next. This helps prevent lifting as the paint dries and shrinks.
Feather your brush or roller strokes near the tape line to create a smooth transition between the painted area and the edge, reducing stress on the paint at the edge.
When to use alternative masking methods
If you’re working with delicate surfaces or have concerns about tape lifting paint, consider using alternative masking methods. Liquid mask can be applied and peeled off once dry, avoiding the risk of pulling off paint.
Frost paper is another option that provides a similar effect to tape but adheres differently, reducing the risk of lift. It’s often used for intricate or delicate surfaces where precise lines are not required.
For very fine details, consider cutting in freehand with a brush instead of using tape. This method requires skill and practice but can help avoid lifting issues altogether.
Safe Removal Methods and Aftercare for Damaged or Sensitive Surfaces
Begin with a quick risk assessment of surface type and any existing damage. Use low-adhesion or delicate-surface tapes and gentle removal techniques to minimize further harm. If heat or solvents are needed, proceed cautiously and test on an inconspicuous area first.
Address any pulled paint or lifted edges right away with simple, repair-friendly steps. Clean residue, patch small nicks, and choose compatible primers or topcoats for delicate or damaged surfaces. Document what worked for future projects to avoid repeating problems.
Best-practice tape removal technique
When removing painter’s tape, patience and a gentle touch are key. Here’s how to do it right:
Angle matters: Peel the tape off at a 45-degree angle to the surface. This reduces stress on the paint and helps prevent lifting.
Speed counts: Go slow and steady. Ripping the tape off quickly can cause paint to peel or lift.
Warm it up: For stubborn tape, use a hairdryer on low heat to warm the adhesive before peeling. This softens the adhesive and makes removal easier without damaging the paint.
Repair steps for pulled-off paint
If you’ve ended up with pulled-off paint, don’t worry. Here’s how to fix it:
Assess the damage: Check the size and extent of the peeled area. If it’s large or deep, you might need to sand and prime before repainting.
Clean and prep: Use a damp cloth to clean the affected area. Let it dry completely. Then, use fine-grit sandpaper (220-320 grit) to thin-sand the edges of the peeled paint to create a smooth surface for painting.
Prime if needed: If the peeled area is large or you’re repainting with a different color, apply a primer to seal and prepare the surface. Let it dry according to the manufacturer’s instructions.
Repaint: Use a compatible paint and apply it carefully, following your original painting technique. This will help ensure a lasting repair.
Post-removal protection and monitoring
After removing tape, protect your paint job with these simple steps:
Gentle cleaning: Use a soft, damp cloth to wipe away any residue or dust. Avoid harsh chemicals that could damage the paint.
Touch-up schedule: Keep an eye on your painted surface. If you notice any small nicks or scratches, touch them up promptly to prevent further damage or peeling.
Monitor for deeper problems: Watch for signs of deeper adhesion issues, such as bubbling, cracking, or more paint lifting. If you see these signs, it’s time to address the problem before it gets worse.
Environmental, Planning, and Long-Term Considerations
Plan around environmental conditions that affect tape adhesion and paint cure. Consider how temperature and humidity influence performance and adjust timing accordingly. Seasonal changes can affect masking decisions and outcomes.
Document tests and results for future reference and scale your plan to the project size. Align tape and paint choices with the surface delicacy and expected exposure to elements. Include staging and recheck steps to maintain reliability over longer jobs.
Effects of temperature, humidity, and ventilation
Temperature and humidity play a big role in how well your tape adheres and how quickly your paint dries. Here’s what you need to know:
Ideal Temperature Range: 65-85°F (18-29°C) is best for both tape adhesion and paint drying.
Humidity: Keep it below 80% relative humidity. High humidity can cause moisture to build up under the tape, preventing proper adhesion and causing paint to peel.
Ventilation: Good airflow helps paint dry faster. But be careful – too much draft can cause the tape to lift at the edges.
Planning large or multi-surface projects
When you’ve got a big job, planning is key. Here’s how to tackle it:
Phase Work: Break the project down into smaller sections. Tape and paint one section at a time.
Stagger Removal: Don’t remove all your tape at once. Take it off in phases as you finish painting each section.
Coordinate Substrates: Different surfaces need different tapes. Plan ahead to switch tapes when moving from one surface to another.
Long-term effects of improper taping
Improper taping can lead to issues down the line. Here’s what you might face:
Edge Yellowing: Sunlight can cause the tape’s adhesive to yellow over time, staining your paint job.
Adhesion Loss: Over time, improperly applied or low-quality tape can lose its stickiness, leading to peeling paint.
Increased Maintenance: Repeated improper taping can cause damage that needs frequent touch-ups. It’s easier – and cheaper – to do it right the first time.
Safety Precautions, Common Mistakes, and Greener Alternatives
Always wear appropriate PPE and ensure ventilation when working with paints, solvents, and tapes. Protect skin and eyes, and follow surface-specific precautions to prevent damage. Keep areas free of trip hazards and ensure proper storage of materials.
Avoid common mistakes such as using the wrong tape type or failing to prep the surface. Explore greener masking options like low-adhesion tapes and reusable tools, and minimize waste through careful planning and disposal. Use a simple flow to select materials based on surface type, temperature, and project duration, and keep a quick cleanup checklist handy.
Handling paints, solvents, and residue removal safely
When working with paints and solvents, safety should always be your top priority. Wear gloves, goggles, and a respirator to protect your skin, eyes, and lungs.
Ventilate the area well by opening windows or using fans. Solvents can be harmful if inhaled in large amounts.
For residue removal, use safe solvents like mineral spirits or citrus-based cleaners. Never mix different types of solvents, as this can create harmful fumes. Always dispose of solvents and paint waste according to local regulations.
Common taping mistakes and how to avoid them
Even with the best tape, mistakes can happen. Here are some common ones to avoid:
- Over-taping: Using too much tape wastes material and increases the risk of paint bleeding under the edge.
- Wrong adhesion level: Using a tape that’s too aggressive on delicate surfaces or not aggressive enough for rough surfaces can lead to lifting or pulling off paint.
- Removing too late: Waiting too long to remove the tape can cause it to stick harder, making removal difficult and increasing the risk of paint damage.
- Not sealing edges: Without proper edge sealing, paint can seep under the tape and create a messy line.
To avoid these mistakes, always choose the right tape for your surface, apply it carefully, seal the edges, and remove it promptly once the paint is dry but still flexible.
Eco-friendly masking and sustainability tips
Being mindful of your environmental impact doesn’t mean sacrificing quality. Here are some eco-friendly masking options:
Reusable masking films can be washed and reused multiple times, reducing waste compared to traditional paper or plastic tapes.
Low-VOC tapes emit fewer volatile organic compounds than conventional tapes, making them a healthier choice for you and the environment. They’re also often recyclable.
To minimize tape waste, label and store leftover rolls for future use. Always dispose of used tape according to local recycling guidelines. Remember, every little bit helps in reducing our environmental footprint!
Conclusion
Take control of the project by testing first, choosing the right tape, and timing your taping and painting to protect the surface and your finish. When you plan and test, you reduce the chance of pull-off, and you keep walls looking clean and durable.
Next, handle the work with a simple checklist in one flowing sentence: inspect the surface for texture and finish, choose a tape that matches the surface, run a quick test on a hidden spot, apply tape and paint in the recommended order, remove tape while the paint is at the right touch-up stage, and closely inspect the result before moving on to the next area.
Avoid these common mistakes: skipping surface tests, using the wrong tape for the texture or paint type, and pulling tape at the wrong time or angle. Always work with a clear safety plan, protect adjacent areas, and stop if the surface shows signs of damage or unusual adhesion.
If the job involves delicate or high-value surfaces, or you’re unsure about compatibility and removal, consider bringing in a pro. When in doubt, don’t push past your comfort zone—resolve the area with a controlled, safer approach and finish with confidence.
FAQ
When is the best time to apply painter’s tape?
Apply tape after you’ve cleaned and prepped the surface but before you start painting. Don’t tape over dusty, oily, or uneven edges. Check the tape label for any surface limitations and follow the manufacturer’s guidance.
How should I prep the surface before taping?
Wash and dry the area, remove loose paint, and repair cracks if needed. Lightly sand glossy surfaces to give the tape something to grab, then wipe away dust. If you’re unsure about a surface, test a small patch first.
How can I test surface adhesion with different tapes?
Try a small strip of each tape on a hidden area to see if paint lifts when removed. If any tape pulls off finish or leaves adhesive, don’t use that tape there. Always check the label or datasheet for surface compatibility and test instructions.
What are safer removal methods and are there alternatives to painter’s tape?
Remove tape while the paint is tacky or after it has set, following the tape’s guidance. Use masking film or edge guards for long straight lines, and consider pre-cut edge guides for delicate surfaces. If paint pull-off occurs, have a damp cloth handy and peel slowly to minimize damage.