
Introduction
Hollow tiles occur when the bond between the tile and the substrate fails, leaving empty space behind. You can spot it early by tapping tiles and listening for a dull thud, or feeling movement underfoot. Look for inconsistent grout lines or tiles that crack easily under light load.
Correcting course means improving surface prep, choosing the right adhesive and keeping tiles well supported until set. Follow manufacturer guidelines for prep, installation, and curing, and check local rules if you’re unsure. If a tile is truly hollow, you’ll want to resecure or replace the tile and rework the substrate bond, then recheck with a gentle tap test.
Key takeaways
- Inspect tile bond early by tapping and sounding for hollow areas during installation.
- Visual checkpoints include groutvoids, protruding edges, and inconsistent tile depth patterns.
- Use non-destructive tests first: tapping, light sounding, moisture checks, and infrared if available.
- Document findings clearly and avoid destructive tests without approval from the project owner.
- Apply corrective actions tailored to bond failure type with proper adhesives and curing guidance.
- Wear eye protection and masks when chipping or removing suspect tiles.
Table of Contents
- Introduction
- Key takeaways
- What Causes Hollow Tiles and Poor Bond
- Visual Checkpoints to Spot Hollow Tiles During and After Installation
- Non-Destructive and Minimally Invasive Diagnostic Methods
- When and How to Perform Destructive Testing Safely
- Corrective Actions for Different Failure Scenarios
- Tools and Materials Checklist for Inspection and Remediation
- Best-Practice Installation Steps to Prevent Hollows in the First Place
- Documentation, Quality Control, and When to Call a Pro
- Conclusion
- FAQ
What Causes Hollow Tiles and Poor Bond
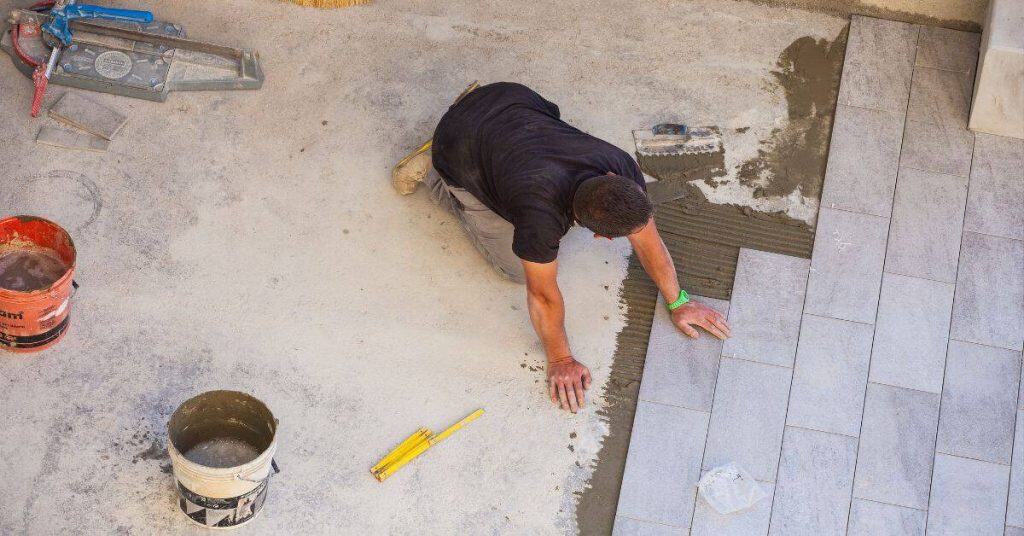
Hollow tiles usually start with something not quite right underfoot. Substrate prep that’s rough, dusty, or uneven creates air pockets that prevent adhesive from grabbing. If you use the wrong adhesive, it won’t bond properly to the substrate or tile back.
Movement, contamination, or poor trowel technique can leave voids that feel hollow once the tile is set. Voids can form during installation or show up later as tiles settle or crack. Look for patterns that point to one root cause rather than a random failure.
Substrate and Surface-Prep Failures
Proper substrate preparation is key to a strong bond. Dust, laitance (a cement-rich layer), uneven screeds, and inadequate curing can all interfere with adhesion.
Dust: It acts like tiny ball bearings under your tiles, preventing proper contact with the adhesive. Ensure surfaces are clean before applying adhesive.
Laitance: This weak layer forms on concrete if it’s not properly cured or washed off. Remove it mechanically or chemically before tiling.
Uneven screeds: These can cause tiles to sit at different levels, creating voids under some tiles. Ensure your screed is flat and level.
Adhesive and Mixing Errors
Using the wrong adhesive or mixing it incorrectly can lead to poor bond strength.
- Wrong adhesive: Using an adhesive not suited for your substrate or tile type can result in weak bonds. Always choose the right one.
- Incorrect water ratio: Too much or too little water can affect set time and bond strength. Follow manufacturer’s guidelines precisely.
- Expired product: Old adhesive may not perform as expected. Check expiration dates before use.
- Pot-life issues: Adhesive that sets too quickly won’t allow enough time for tile placement. Mix small batches to control set time.
Remember, mixing and application instructions vary by product. Always follow the manufacturer’s guidelines.
Installation Technique and Environmental Factors
How you install your tiles and the conditions they’re installed in can impact bond strength.
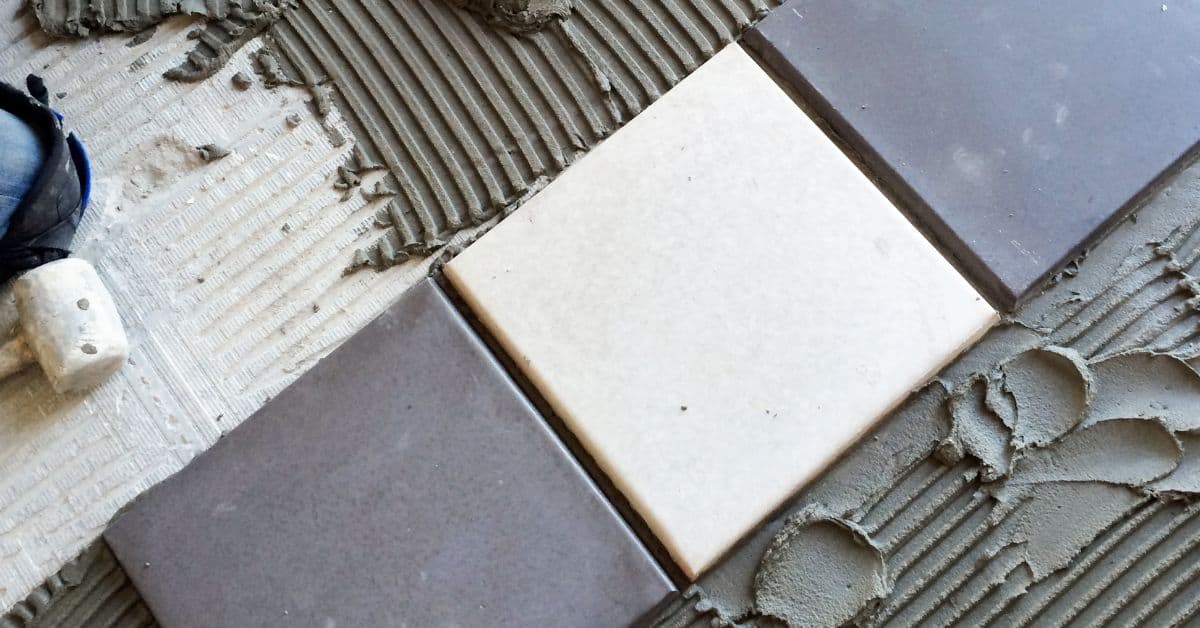
Trowel notched size: Using a trowel with too small or too large a notch can result in insufficient adhesive coverage. Use the right size for your tile and adhesive type.
Lack of buttering: Not applying enough adhesive to the back of the tile (buttering) can lead to voids. Ensure full coverage.
Temperature extremes: Cold or hot conditions can affect set time and bond strength. Maintain recommended temperatures during installation.
Substrate movement: Movement in the substrate, like settling or expansion, can cause tiles to lift. Use flexible adhesives for areas prone to movement.
Visual Checkpoints to Spot Hollow Tiles During and After Installation
During installation, listen for unexpected clicks as you place tiles against the substrate. A hollow sound when tapping a tile after setting is another red flag. Loose edges or grout that doesn’t fill uniformly can also signal poor bond.
Post-install, inspect frequently for flatness, high spots, or areas where grout cracking appears around a tile edge. Note any sections that feel springy or give under light pressure. Set up a routine check cadence for large jobs and document findings as you go.
Knock and Tap Testing
Use this method during installation to check for hollow tiles. It’s quick and easy, but has its limitations.
- Tap gently: Use your knuckles or a light tapping tool to tap each tile.
- Listen carefully: A solid tile will sound full and dull. A hollow one will sound high-pitched and empty.
- Compare with good tiles: If unsure, compare the sound with known good tiles nearby.
- Avoid false positives: Don’t rely solely on this method. Some tiles may sound hollow but are still well-bonded.
- Check edges too: Tap along tile edges to check for loose or unsupported areas.
- Inspect regularly: Check every few rows during installation to catch issues early.
- Mark problem tiles: Use a pencil to mark any hollow-sounding tiles for further inspection.
- Recheck after correction: After fixing issues, recheck with the tap test to confirm they’re resolved.
Quick rule: If it sounds hollow, it’s probably a problem. But don’t stop there – follow up with other checks.
Grout and Edge Inspection
Inspect grout lines and edges for signs of delamination or lack of support during and after grouting.
- Check grout lines: Look for wide, inconsistent gaps between tiles. This could indicate poor bonding or movement.
- Feel for cold spots: If it’s cold outside, feel along grout lines for cold spots. These can indicate air pockets and hollow areas.
- Look for cracked grout: Cracks in the grout soon after installation may indicate movement due to poor bonding.
- Inspect edges: Check tile edges for any gaps or movement. This could mean they’re not properly supported.
- Check corners: Corners are high-stress areas. Ensure they’re well-supported and show no signs of movement.
- Recheck after grouting: Inspect again after grouting to ensure no new issues have appeared.
- Compare with good areas: If unsure, compare problem areas with known good areas nearby.
- Mark problem tiles: Use a pencil to mark any suspect tiles for further inspection or correction.
Quick rule: If you see gaps, cracks, or movement, it’s time to investigate further.
Using Straightedges and Levels
Use these tools during installation to spot lippage, unsupported spans, and other issues that may indicate hollow areas.
- Check for lippage: Run a straightedge along tile surfaces. If it wobbles or rocks, you’ve got lippage – tiles aren’t level.
- Feel for gaps: Along the straightedge, feel for any gaps between the tile and the straightedge. This could indicate an unsupported span.
- Use a level: Check each row with a level to ensure it’s properly supported and not sagging or humping.
- Check corners: Use a straightedge along corners to check for any gaps or movement.
- Inspect after setting: After setting tiles, recheck with the straightedge and level to ensure nothing has shifted.
- Check large spans: On long runs, use a longer straightedge to check for unsupported spans in the middle of the run.
- Recheck after correction: After fixing issues, recheck with the straightedge and level to confirm they’re resolved.
- Compare with good areas: If unsure, compare problem areas with known good areas nearby.
Quick rule: If it’s not level or supported properly, it’s probably a problem waiting to happen.
Non-Destructive and Minimally Invasive Diagnostic Methods
Electronic tap testers can help you map out spots with reduced bond without breaking tiles. Infrared thermography highlights temperature differences that may indicate moisture or voids behind the setting layer. Moisture meters can reveal damp zones that undermine adhesion and cure conditions.
Use these tools as a guide and verify readings with manufacturer instructions or product data sheets. Choose the method that fits the size of the area and the type of tile you’re working with. When in doubt, consult local rules or a professional for interpretation.
Electronic Tap Testers and Impact Hammers
Electronic tap testers and impact hammers are tools that measure the soundness of tile installations by analyzing the sound waves they produce when tapped. They’re useful for detecting hollow spots, indicating poor bonding.
Interpreting Results: A strong, clear tone means good bond. A dull, weak, or echoing sound indicates a void or poor adhesion.
False Positives: False positives can occur due to air pockets in the adhesive or moisture behind the tile. To minimize this, ensure proper substrate preparation and allow adequate drying time before testing.
Infrared/Thermal Imaging
Infrared or thermal imaging cameras detect temperature differences, which can reveal voids in tile installations. They’re non-contact and non-destructive.
How it works: Voids allow heat to transfer differently than solid areas, creating temperature variations that the camera picks up as different colors.
Conditions for reliable imaging: For best results, test in a controlled environment with consistent temperatures. Avoid testing immediately after installation or when tiles are heated by sunlight.
Moisture and Substrate Probes
Moisture meters and substrate probes measure the moisture content in your tile installation’s substrate. High moisture levels can indicate adhesion problems.
When to suspect adhesion problems: If readings are consistently high, especially if other diagnostic methods suggest poor bond.
Correlating findings: Use moisture readings alongside other testing methods for a comprehensive diagnosis. High moisture and weak tap tester results, for instance, strongly suggest adhesion issues.
When and How to Perform Destructive Testing Safely
Destructive testing is warranted when non-destructive methods raise concerns or when performance is clearly failing. Cutouts should be confined to the affected area, not the entire installation. Protect surrounding surfaces and work with careful, controlled cuts.
Remove tiles with care to avoid damaging surrounding layers, then document the condition of the substrate and adhesive. Record findings to guide corrective action and communicate results to any stakeholders involved in the project. Always follow safety guidelines and local requirements.
Targeted Removal Techniques
When it’s necessary to cut out tiles for inspection, do so carefully to minimize damage. Here’s how:
Step 1: Choose the right tool. Use a tile nippers or a score-and-snap tool to remove small areas.
Step 2: Work from the center outwards. Start cutting in the middle of the area you want to remove, then work your way towards the edges. This helps prevent cracking surrounding tiles.
Step 3: Be patient and take your time. Apply gentle pressure and let the tool do the work. Rushing can cause damage.
Interpreting Exposed Substrate and Adhesive
Once you’ve removed a tile, carefully examine the back of it and the substrate. Here’s what to look for:
The coverage percentage tells you how well the adhesive covered the substrate. Aim for 95% or more.
Check for adhesive transfer. If there’s a lot of adhesive stuck to the back of the tile, it might mean the bond was weak and breaking at the substrate level.
Look out for any contamination on the substrate. This could be dirt, grease, or other substances that prevent the adhesive from bonding properly.

Corrective Actions for Different Failure Scenarios
For isolated bond issues, re-bonding tiles with proper adhesive caliber can save time, but confirm substrate flatness and moisture levels first. If a larger area shows poor bond or delamination, partial or full rip-out with substrate repair may be needed. Choose the option that minimizes disruption while restoring performance.
Consider the pros and cons of each approach, including cost, downtime, and potential impact on surrounding fixtures. Verify that the chosen method aligns with label directions and local standards, and plan for proper cure or setting time before re-installation.
Re-bonding and spot repairs
If you’ve spotted hollow tiles early, re-bonding might be your best bet. This involves removing the loose tile, cleaning the area, and re-applying adhesive or using injection grout.
When to consider: If only a few tiles are affected and the substrate is still sound.
Success factors include thorough cleaning of the area before re-adhesion, using appropriate adhesive or injection grout for your tile type, and ensuring proper curing time.
Partial and full replacements
Sometimes, partial or full removal of tiles is necessary. The choice depends on the extent of the problem.
Partial replacement: If hollow spots are localized, you might get away with removing just those tiles and their immediate neighbors to ensure a solid base for retiling.
Full replacement: If the issue is widespread or the substrate is compromised, it’s often best to remove all affected tiles. This allows for a thorough inspection and repair of the substrate before retiling.
Substrate remediation techniques
Before retiling, it’s crucial to address any issues with your substrate. This could involve fixing screeds, applying primers or leveling compounds, or installing movement joints.
Screed repair: If your screed is uneven or damaged, it needs to be leveled and repaired before tiling.
Priming: Priming the substrate can improve adhesion and prevent moisture issues. Use a primer suitable for your tile type and substrate.
Leveling compounds: If your substrate isn’t perfectly flat, you might need to apply leveling compounds before tiling.
Tools and Materials Checklist for Inspection and Remediation
Keep a basic set of inspection tools on hand: a rubber mallet, a notch gauge or straightedge for checking flatness, and a simple hand gauge to test tile feel. Add an electronic tap tester, a moisture meter, and a basic infrared thermometer if available. Gather the recommended adhesives and replacement tiles for future work.
If budget is tight, look for affordable, compatible substitutes that product labels approve for the substrate and tile type you’re using. Always confirm compatibility with the substrate, adhesive, and tile from the data sheet or manufacturer instructions before purchasing.
Inspection tools
Before starting any remediation work, use this checklist to inspect your concrete surfaces. These affordable and professional tools will help you identify issues early, saving you time and money.
- Tapping Tool: Tap the surface with a rubber mallet and listen for a dull thud. A hollow sound indicates delamination or voids. What goes wrong if you skip this: You might end up repairing only the surface, while the underlying issue persists.
- Echo Tester: Strike the surface with an echo tester and listen for the sound to bounce back. A weak or delayed echo indicates a problem beneath the surface. Check the product label for specific usage instructions.
- Moisture Meter: Insert probes into the concrete to check moisture content. Excessive moisture can lead to efflorescence and other issues. Aim for readings between 12-18 pF (check manufacturer’s guidelines).
- Thermal Camera: Scan the surface to detect temperature differences, which may indicate moisture, voids, or other problems. Check local rental shops for affordable options.
- Concrete Luster Meter: Measure the reflectivity of the surface to assess its condition and prepare for proper cleaning or sealing. Aim for readings between 20-35 (check manufacturer’s guidelines).
- Reinforcement Locator: Use a magnetic or electromagnetic locator to find reinforcement bars before drilling or cutting. This helps prevent damage to the structure and ensures safety on site.
- Concrete Cover Meter: Measure the depth of concrete cover over reinforcement. Insufficient cover can lead to corrosion and other issues. Aim for a minimum cover of 2 inches (check local building codes).
- Chloride Test Kit: Test concrete samples for chloride content, which can cause corrosion in reinforcement bars. Acceptable levels vary by region; check local guidelines.
Quick rule: Always inspect your concrete surfaces thoroughly before starting any remediation work. A thorough inspection helps you identify and address issues early, saving you time, money, and effort in the long run.
Repair materials and adhesives
Use this checklist when selecting repair materials for your tile inspection and remediation project. It’s crucial to choose the right products to ensure a durable, long-lasting result.
- Adhesive type: Check if it’s suitable for your tile type (ceramic, porcelain, natural stone) and substrate (concrete, plywood, existing tiles).
- Trowel size: Ensure you have the correct trowel sizes. For small tiles (<6″x6″), use a 3/8″ or 1/2″ notched trowel. For larger tiles (>12″x12″), use a 1/4″ x 1/4″ square-notch trowel.
- Primer: Verify if it’s compatible with your adhesive and substrate. Primer helps improve adhesion and prevent moisture issues.
- Leveling compound: If needed, ensure it matches the required thickness and is suitable for your tile type and substrate.
- Grout type: Choose a grout that complements your tile color and has the right properties (sanded or unsanded) based on joint size.
- Sealer: Check if it’s suitable for your tile type. A sealer protects grout and tiles from stains, moisture, and mold.
- Mastic adhesive: If using for small tiles or mosaics, ensure it’s flexible enough to accommodate movement.
- Epoxy grout: Verify if it’s needed for high-traffic areas or where stain resistance is required. It’s more expensive but offers better durability.
Quick rule: Always follow the manufacturer’s instructions for mixing, application, and cure times to avoid product failure and costly rework.
Best-Practice Installation Steps to Prevent Hollows in the First Place
Begin with a clean, solid substrate and address any moisture or movement risk before laying tile. Choose an adhesive that suits the substrate and tile, and mix it to the manufacturer’s instructions. Back-butter if the product specifies it, and comb the adhesive with the recommended trowel size for proper coverage.
Press tiles evenly and twist slightly to set, then check for even distribution of adhesive and alignment. Keep environmental conditions within the product’s guidelines during setting and curing, and perform a quick check of bond every few rows as you go.
Target coverage and bond-check milestones
For floors, aim for full coverage with your adhesive. This means no gaps between the tiles and the substrate.
Perimeter-buttering is crucial for large-format tiles to prevent lippage and ensure a strong bond at the edges.
Check bonds every 20-30 minutes during installation. Press down firmly on each tile, twist slightly, then lift up. If it’s solid, you’re good. If it moves, re-apply adhesive and try again.
Trowel selection and buttering techniques
Choose a notch size that matches your tile size. Larger tiles need deeper notches for more mortar.
For large-format tiles, use the buttering technique. Spread adhesive on the back of the tile and also on the substrate (back-buttering) before setting it in place.
This ensures full mortar contact, maximizing bond strength and preventing hollows.
Environmental and timing controls
Keep the temperature between 50°F to 90°F (10°C to 32°C). Adhesive performance drops off outside this range.
Maintain humidity levels around 40% to 70%. Too dry or too wet can affect curing and bonding.
Manage open time and pot-life. Once you mix your adhesive, you’ve got a window (usually 30-60 minutes) before it starts to set. Work quickly but carefully within this time frame.
Documentation, Quality Control, and When to Call a Pro
Maintain a simple inspection log with dates, areas checked, and any signs of hollow spots. Take clear photos of problem areas and outcomes of non-destructive tests. Define acceptance criteria for handover with the client or homeowner.
Know when to escalate: persistent large-area delamination, signs of structural movement, or failure that doesn’t respond to remediation should trigger a pro consultation. Document everything and share findings to guide next steps.
Jobsite QC checklist and acceptance criteria
The job’s not done until it’s checked. Use this list to ensure your tiling work is up to snuff before signing off.
- Tile Coverage: Check 100% of tiles are adhered. Less than 95%? Rework needed.
- Tap Test Frequency: Tap every tile with a handle of a trowel. Hollow sound? That’s an air pocket, fix it.
- Grout Condition: Check grout is fully cured before final inspection. Cracked or missing? Re-grout.
- Tile Alignment: Ensure tiles are level and straight. Wobbly or crooked? Reset them.
- Seams: Check all seams are tight with no gaps. Wide gaps? Fill and re-grout.
- Movement Joints: Ensure they’re filled and aligned properly. Cracked or misaligned? Fix ’em.
- Edge Tiles: Check edges are secure and flush. Loose or uneven? Re-adhere.
- Corners: Ensure corners are tight with no gaps. Wide gaps? Fill and re-grout.
Quick rule: If it’s not right, it’s not done. Don’t sign off on shoddy work.
When to involve building/structural engineers or manufacturers
Sometimes, you need a pro’s eye. Here are times when it’s wise to call one in.
Persistent Issues: If you’re seeing repeated failures despite your best efforts, it might be a structural issue. Time to consult an engineer.
Movement Joints Woes: If movement joints are cracking or misaligning, there could be underlying structural problems. Get an engineer’s opinion.
Warranty Disputes: If you’re having a warranty claim rejected, it might help to have a manufacturer’s tech support weigh in. They can provide expert insights and back up your case.

Conclusion
Spotting hollow tiles and weak bonds is about acting smart, not guessing. Fixing the problem right protects safety, keeps the surface looking good, and saves big money down the line.
Start with a careful visual review of every tile, then use non-destructive checks to map out the bad areas, mark them for repair, verify bond with light tapping and gentle probing, and if needed confirm with minimally invasive tests before any cutting or removal. Proceed in a small, controlled sequence: test a tiny area, document what you find, then expand only if the results are solid and repeatable. Keep notes, use the documented steps to guide repairs, and verify every fix with a final clean-check before you call it done.
Common mistakes to avoid are pushing ahead after a single uncertain reading, over-tapping or prying without proper support, and using inappropriate patch materials or methods that don’t address the root cause. Do not skip safety: wear eye and hand protection, set up a stable work zone, and test small areas first to prevent needless damage. If you see widespread hollowing, loose tiles, active cracking, or you’re unsure about the diagnostic results, pause and reassess rather than forcing a fix.
When in doubt, or when the issue involves structural integrity, moisture intrusion, or complex remediation, call a qualified pro. Use the professional path early if the area is large, the substrate appears compromised, or corrective actions require destructive work beyond your comfort zone. Stay disciplined, follow the checks you documented, and you’ll finish with a durable, safe, and clean result that lasts.
FAQ
How can you spot early bond problems during the tile setting process?
Watch for hollow sounds when you tap edges or centers during setting. Look for gaps between tile and substrate when you press with a bag or aim for a firm sit, not a bounce. If you see shading or grout gaps forming, stop and re-check the substrate and adhesive thickness.
What should you do if you suspect hollow tiles after installation?
Stop using the area and inspect with a tapping test and light visual check. Mark any suspect spots and plan targeted probing after the adhesive has set. Follow manufacturer guidance for rework, and avoid hammering or forcing tiles.
How can you verify bond integrity without heavy destructive methods?
Use a simple tapping test across several tiles to identify loose areas. Look for grout gaps, tile rocking, or cracks radiating from a suspect edge. Compare to a test tile or a known-good section if available.
When is it time to correct course, and how do you document it?
If multiple tiles show hollow signs, correct before finishing joints. Re-seat or replace tiles as needed and re-check with the same tests after repair. Keep notes with photos, dates, and what you changed for future reference.