
Introduction
Setting mosaic sheets straight means aligning the sheets so the grout lines stay in straight, even rows and the sheet edges blend with the pattern. You’ll want a straight edge, a notched trowel, spacers, and a level, plus a method to back-butter where needed. Always check the adhesive label and tile sheet instructions for any special prep, and test a small area before full deployment.
To hide sheet lines, use consistent back-buttering, press from center to edges, and interlock sheets so joints land between rows. Avoid snake rows by starting at a defined reference line, checking with a level as you go, and adjusting as you go rather than forcing tiles. Focus on even adhesive coverage and follow the manufacturer’s guidance to ensure proper adhesion and cure, then come back and tweak if lines show.
Key takeaways
- Plan mosaic layout with dry run; mark grid lines before setting sheets.
- Use a straightedge and spacers to keep sheets aligned during setting.
- Back-buttering adhesive evenly to prevent gaps and ensure uniform sheet contact.
- Stagger joint lines and press sheets firmly to hide seams.
- Avoid snake rows by tracing layout with a loose string guide.
- Wear eye protection and follow surface prep and safety warnings.
Table of Contents
- Introduction
- Key takeaways
- Planning Your Mosaic Layout
- Tools and Materials Checklist
- Surface Preparation and Substrate Tips
- Techniques for Aligning Mosaic Sheets and Hiding Sheet Lines
- How to Avoid “Snake” Rows (Alignment Drift) While Installing
- Grouting, Finishing, and Sealing for Seamless Results
- Safety, Time, and Cost Considerations
- Troubleshooting Common Mistakes and Visual Checkpoints
- Conclusion
- FAQ
Planning Your Mosaic Layout
Begin by evaluating the surface you’re going to tile. Check adhesion, cleanliness, moisture, and levelness. Note cracks or high/low spots that could cause misalignment or snake-like rows later.
Then set up accurate measurements and a grid that mirrors sheet dimensions. Use reference lines from fixed corners with a laser or chalk line, and map out the full layout before you place any sheet. Perform a dry run to identify potential cuts and adjust to minimize waste and alignment errors.
Mapping grid and reference lines
Start by drawing reference lines to guide your mosaic layout. Use a laser level for precise lines, or snap chalk lines if that’s not available.
Establish a center point or starting line to work from. This helps maintain symmetry across the layout. If you’re working with a large area, consider using a staggered grid pattern. This minimizes visible sheet seams and creates a more uniform look.
Pro tip: Use a straightedge to ensure your reference lines are perfectly level and plumb.
Calculating sheet placement and cuts
Measure from fixed corners or edges to determine where your first full mosaic sheet will go. This ensures a straight, even start.
For partial sheets near the edges, measure for edge tiles first. Then, calculate how many full rows of tiles you can fit before needing to cut a row. Maintain consistent pattern flow across the installation by rotating or pairing sheets as needed.
Remember: Mosaic sheets are typically 12″ x 12″. Plan your cuts accordingly to minimize waste and maintain straight lines.
Tools and Materials Checklist
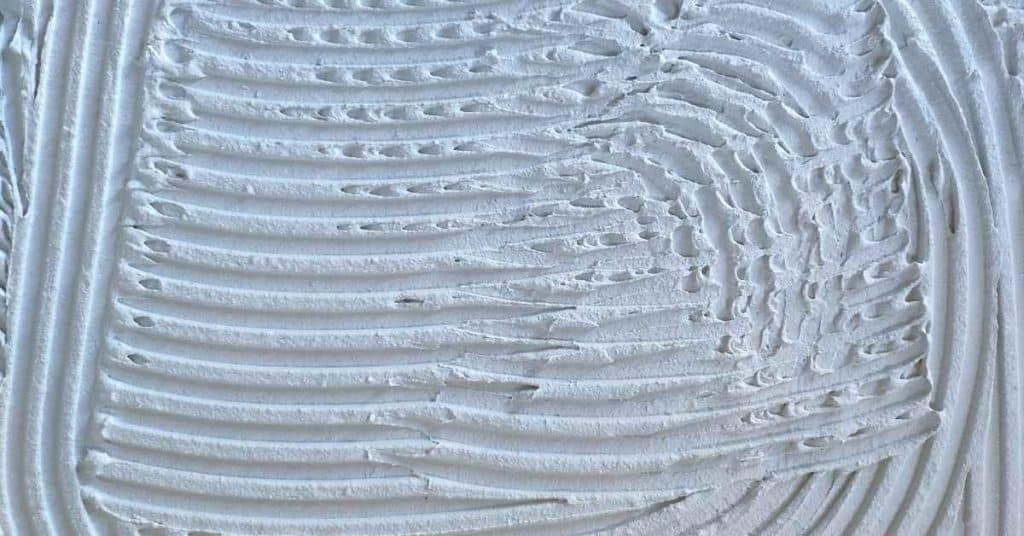
List the core adhesives suitable for mosaic sheets, including substrate compatibility and working times. Consider open time, cure time, temperature ranges, and how to calculate mortar for waste and spacing. Always verify product data sheets and manufacturer instructions for your project.
Detail spacers, alignment aids, and layout strategies that keep sheets straight and evenly spaced. Cover grid systems, center-out or perimeter-first sequencing, and how to handle edges with partial sheets. Include cutting tools and safe handling practices to minimize breakage.
Recommended adhesives and backer options
Before you start setting your mosaic sheets, ensure you’ve got the right adhesive and backer for a strong, lasting bond.
- Thinset mortar: Use on concrete or cement board. Sets in 24-72 hours. Ideal for heavy tiles.
- Mastic: Suitable for drywall and backer board. Dries in 16-24 hours. Best for lighter tiles.
- Epoxy: Bonds to most surfaces. Cures in 7-28 days. Ideal for wet areas or heavy traffic.
- Working time: Check manufacturer’s specs. Too short, you’ll rush; too long, it dries out.
- Open time: Time between applying adhesive and placing tiles. Longer open time means more working room.
- Cure time: How long before full strength is reached. Plan accordingly for grouting.
- Temperature/humidity range: Ensure it’s within the adhesive’s recommended range to prevent failure.
- Calculate mortar: Add 10-15% extra for waste and spacing. Better to have too much than run out mid-job.
Quick rule: Always follow manufacturer’s guidelines for best results.
Cutting, aligning, and leveling tools
To keep your mosaic sheets straight and even, you’ll need the right tools to cut, align, and level them.
- Tile nippers: Handheld tool for cutting small pieces. Useful for tight corners or edges.
- Wet saw with diamond blade: Cuts larger sheets cleanly and quickly. Essential for straight, even cuts.
- Mosaic shears: Scissor-like tool for cutting small pieces. Ideal for intricate patterns or tight spaces.
- Tile leveling system: Helps keep tiles level and consistent. Useful on uneven surfaces.
- Scoring technique: Make a deep, straight score before snapping to prevent breakage.
- Edge finishing: Smooth rough edges with sandpaper or a wet stone to prevent injury and improve appearance.
- Minimize waste: Plan cuts carefully. Use offcuts for smaller pieces or borders.
Quick rule: Always measure twice, cut once. It’s the key to straight rows and minimal waste.
Surface Preparation and Substrate Tips
Identify and remove dust, grease, and any release agents. Use a degreaser for oily residues and gap-fill cracks as needed. Check that the surface is ready for adhesive bonding.
Ensure the substrate is clean, dry, and properly primed if required. Test porosity and consider a primer if the instructions call for it. Protect the prepared surface from contamination until installation begins.
Fixing uneven substrates and height differences
Before laying mosaic sheets, ensure your substrate is flat. Here’s how:
For dips or low spots, use a self-leveling compound to fill them in. Follow the manufacturer’s instructions for mixing and application.
If you’ve got lippage or high spots, shave them down with a grinder or sander, then apply a thin layer of compound to smooth it out.
For major height differences, consider using cement board. Cut it to fit, secure it with screws, and fill any gaps with compound.
Moisture and bonding considerations
Proper moisture management is key for a strong bond. Here’s what to do:
First, test for moisture. Use a calcium chloride test kit on concrete or masonry surfaces. Follow the manufacturer’s instructions.
If you’re working in areas like showers or pools, apply a waterproof membrane. This acts as a barrier between your substrate and mosaic sheets.
Before applying adhesive, prime the surface. Use a primer that’s compatible with your adhesive. This helps ensure a strong bond.
Techniques for Aligning Mosaic Sheets and Hiding Sheet Lines
Define a practical alignment plan using staggered seams and offset patterns to minimize visible joins. Decide on a consistent offset before you start, such as a fraction of a sheet. This sets the stage for straight lines throughout the install.
Outline butt-joining strategies and grout-line planning, including how to stagger patterns across rows and manage grout color and thickness. Use dry-lay and progressive setting steps with clear reference lines to stay true from top to bottom.
Butt-joining vs. Overlapped Sheets
When it comes to connecting mosaic sheets, you’ve got two main methods: butt-joining and overlapping.
Butt-joining is when you align the edges of two sheets tightly together. This method works best with mesh-mounted sheets as they hold tiles in place perfectly. It gives a clean, seamless look but requires precise cutting and alignment to avoid gaps or overlaps.
Overlapping, on the other hand, involves staggering the edges of one sheet over the next. This technique is great for hiding sheet lines but can be tricky with smaller tiles as it might cause lippage – where some tiles stick out more than others. It’s also harder to achieve a perfect overlap without mesh backing.
Choose your method based on your tile type and mesh backing. Both techniques require careful alignment, so use reference lines and clamps to keep sheets straight while setting.
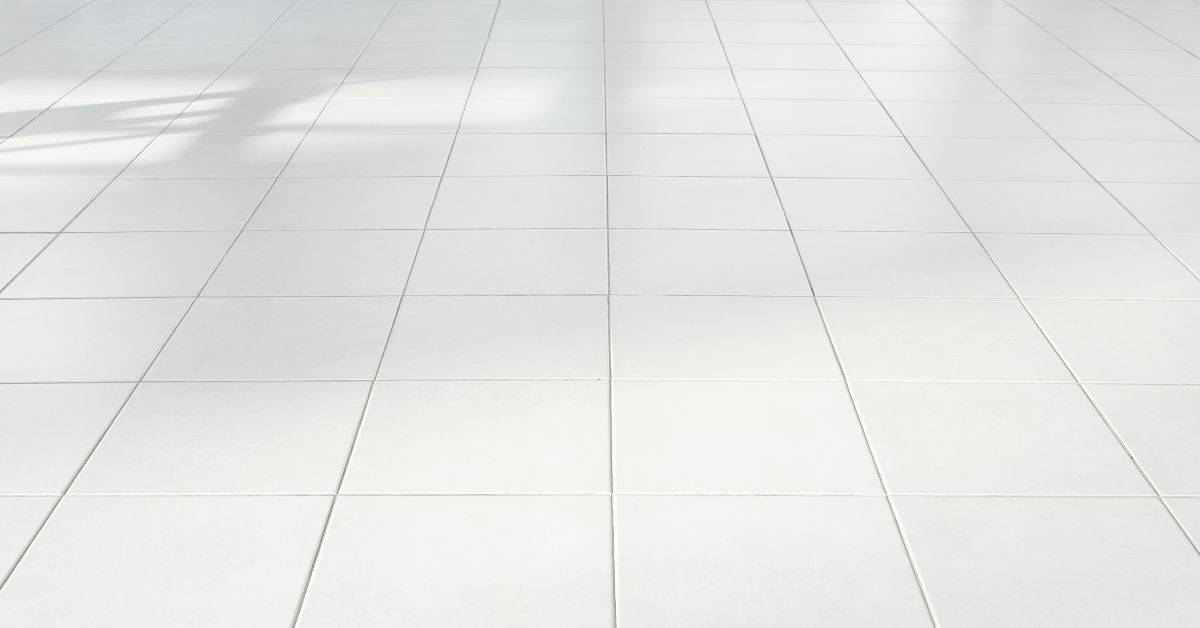
Using Grout Color and Joint Width to Conceal Seams
Grout plays a big role in hiding those pesky sheet lines. Here’s how you can use it to your advantage.
First, choose a grout color that blends with your tiles. A close match will help seams disappear. If you want to make a statement, consider a contrasting color, but remember, it’ll highlight sheet lines rather than hide them.
Next, think about joint width. Narrower joints (around 1/8 inch) are less visible and can help conceal seams. Wider joints draw attention to themselves and the lines between sheets. Use spacers to maintain consistent joint widths.
Finally, consider micro-grouting. This technique involves filling the gaps between tiles with a thin layer of grout before applying the main grout coat. It helps create an even surface and reduces the visibility of seams. Just be sure not to overfill, or you’ll end up with a bumpy finish.
How to Avoid “Snake” Rows (Alignment Drift) While Installing
Define what constitutes a snake row and how alignment can drift as you add sheets. Explain why cumulative misalignment is problematic for a clean look. Use sight lines to prevent drift before it starts.
Establish reliable sight-line methods such as chalk lines or laser guides aligned to the grid. Transfer these lines across rows for consistency and use temporary spacers to maintain spacing during setting.
Step-by-Step Installation Process
Follow this clear, numbered sequence to avoid “snake” rows (alignment drift) while installing your mosaic sheets.
- Prepare the surface: Ensure it’s clean, dry, and structurally sound. Refer back to Surface Preparation and Substrate Tips for details.
- Mark out grid lines: Use chalk or a laser guide aligned with the sheet grid to create reference lines across the entire installation area.
- Dry-fit first: Lay out your mosaic sheets without adhesive to ensure they fit correctly and align with your grid lines. This helps identify any issues before you start setting.
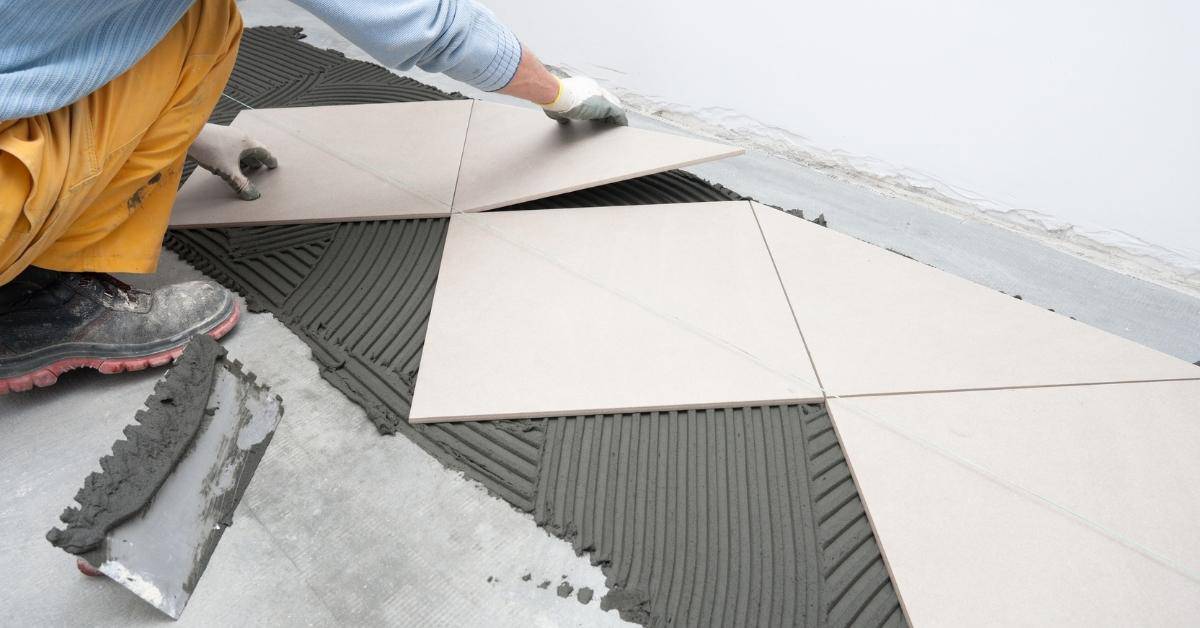
- Apply adhesive: Spread thin-set mortar or other recommended adhesive evenly over a small section, usually 3-4 sheets at a time. Keep it workable but not too wet.
- Set the sheets: Starting from one corner, press each sheet firmly into the adhesive, following your grid lines and using temporary spacers to maintain even grout lines.
- Check alignment: Before setting the next sheet, verify that it’s aligned with both the previous sheet and your grid lines. Use a level or straightedge for accuracy.
- Let it set: Allow the adhesive to cure according to the manufacturer’s instructions before proceeding with the next section.
- Clean up: Remove any excess adhesive or debris from the surface and tools. Keep your workspace clean to avoid introducing contaminants that could affect adhesion.
- Final check: Once all sheets are set, perform a final walkthrough to ensure there are no misaligned rows or other issues. Address any problems immediately.
Installation pacing and frequent alignment checks
Setting small sections at a time, checking frequently, and correcting drift immediately will help prevent “snake” rows from developing.
Working in manageable sections allows you to maintain control over the installation process. It also makes it easier to identify and correct any misalignments before they become cumulative.
Frequent checks are crucial for catching alignment issues early. Use a level or straightedge to ensure each sheet is plumb and level, and that it aligns correctly with the previous sheet and your grid lines.
Correcting drift immediately prevents “snake” rows from forming. If you notice a sheet is out of alignment, remove it carefully (refer to Correcting and reworking misaligned rows) and reset it properly before proceeding.
Correcting and reworking misaligned rows
If you encounter a problematic row, follow these safe steps to remove and reset the sheets without damaging adjacent tiles or compromising the installation.
First, carefully pry up the misaligned sheet using a flathead screwdriver or a thin crowbar. Work slowly and gently to avoid breaking any tiles or disturbing the adhesive beneath.
Inspect the back of the sheet for signs of excessive adhesive buildup. If present, use a damp cloth to remove it. Reapply fresh adhesive to both the sheet and the substrate before resetting it.
Realign the sheet according to your grid lines and temporary spacers. Press it firmly into place, ensuring that it’s level and plumb. Allow the adhesive to cure as directed by the manufacturer before proceeding with the next section.
Grouting, Finishing, and Sealing for Seamless Results
Explain surface prep and the clean-up steps to prepare for grouting. Remove thinset residue and ensure backing is ready to receive grout. Dry and uniform tile edges help prevent notching or haze.
Discuss grout options and techniques to hide lines, including how to work grout into joints and prevent squeezing into sheet seams. Cover color choices, sealing needs, and final checks to protect the look over time.
Grout Application and Cleanup Best Practices
Start by choosing the right grout. For mosaics, unsanded grout is usually better as it’s less likely to clog small joints.
Apply grout diagonally or in small sections using a rubber float. Work it into the joints at a shallow angle to avoid squeezing grout into sheet seams. Be patient, let the grout set for a few minutes before cleaning off excess with a damp sponge.
Polish lightly with a clean, damp cloth after 15-20 minutes. This helps remove any haze and ensures joints aren’t recessed, which could highlight seams.
Sealants and Long-Term Maintenance
Choose a penetrating sealer for stone or ceramic mosaics, or a breathable one for porous backs. Epoxy sealers are great for high-traffic areas.
Apply sealant according to the manufacturer’s instructions. Let it cure completely before exposing your mosaic to moisture or heavy use. Be patient, this could take anywhere from 24 hours to a week.
Maintain your mosaic by reapplying sealer every few years, depending on traffic and exposure. Regularly check for any signs of wear or staining, and address them promptly to keep your mosaic looking seamless.
Safety, Time, and Cost Considerations
Outline safety practices and PPE needed for cutting and handling mosaic sheets. Ensure a clean, well-ventilated work area and proper ladder or stability checks. Address fall protection if required by the job site.
Discuss practical time estimates and a realistic workflow for a typical project. Include budgeting tips and a QA checklist to keep lines straight and edges finished without rushing.
Personal protective equipment and safe cutting
Safety first. Here’s what you need to protect yourself and your work.
- Gloves: Protect hands from cuts, abrasions, and chemical burns. Choose durable, flexible gloves like nitrile or rubber.
- Safety glasses: Shield eyes from debris and tile fragments. Consider using goggles for better protection.
- Dust mask: Guard against inhaling silica dust when cutting tiles. A respirator is recommended for prolonged exposure.
- Ear protection: Use earplugs or earmuffs to safeguard hearing from loud tools like wet saws.
- Optional: Safety glasses with side shields: For added protection against debris, these can be rented for around $5/day.
Estimating time and material costs
Material choices impact your project’s outcome and budget. Here’s how to estimate time and cost effectively.
- Mosaic sheets: Plan for 5-10% waste due to cutting. Sheets range from $2-$7 per sq ft, depending on design complexity.
- Adhesive: Thinset mortar is recommended for its bonding strength. Expect to use around 6 sq ft of coverage per 60 lb bag ($15-$30).
- Grout: Plan for 2-3 sq ft of grout needed per sq ft of mosaic, plus 10% waste. Grout ranges from $8-$20 per 10 lb bag.
- Labor time: Allocate around 4-6 hours per 10 sq ft for layout, installation, and cleanup. Rushing can lead to alignment issues.
- Contingency fund: Set aside 10-20% of your total budget for unexpected expenses or rework.
Troubleshooting Common Mistakes and Visual Checkpoints
List common mistakes to flag early, such as uneven grout lines, shifting sheets, and visible seams. Explain why these issues affect hiding sheet lines and the overall layout. Identify priority fixes for each problem.
Provide visual checkpoints during installation using levels, straightedges, and grid lines. Encourage pre-install and mid-process checks to catch pattern misreads before the adhesive sets.
How to spot early signs of snake rows or sheet gaps
Use this checklist during installation to catch potential issues early and avoid ‘snake’ rows or visible gaps.
- Drifting lines: Check if lines are staying straight. If they’re drifting, stop and realign sheets.
- Uneven lippage: Feel for even edges. Unevenness can cause light to show through seams.
- Light showing: Inspect seams in bright light. Any visible light means a gap needs filling.
- Sheet shifting: Gently pull on sheets. If they move, re-seat them with gentle pressure.
- Warping: Check for bowed or warped sheets causing ‘snake’ rows.
- Grout joint width: Ensure grout lines are consistent. Inconsistency can highlight sheet edges.
- Seam visibility: Inspect seams from different angles. Visible seams need masking or adjusting.
- Cracking at edges: Check for cracks where sheets meet walls or other surfaces.
Quick rule: If in doubt, stop and inspect. Catching issues early saves time and materials.
When to call a professional
Know when to seek help from a pro to ensure a successful mosaic installation.
- Large-scale projects: For extensive areas, consider hiring a pro for consistent results.
- Complex patterns: Intricate designs may require a pro’s expertise to maintain alignment and quality.
- Persistent adhesion problems: If sheets keep lifting or coming off, it might be an adhesion issue best handled by a pro.
- Moisture issues: High moisture areas need special treatment. A pro can advise on suitable materials and methods.
- Time constraints: Tight deadlines may warrant hiring extra help to meet completion dates.
- Unique substrates: Unusual surfaces (e.g., curved walls, uneven floors) might require a pro’s touch.
Quick rule: If the project is beyond your skill or time level, don’t hesitate to call in a professional.

Conclusion
Keep a straight, durable finish by treating alignment as a concrete requirement. When you rush or skip steps, you invite visible seams, jagged edges, and failed grout bonds—the costs come back later as repairs and rework. safety first stays at the center of every move you make on this project.
Start with a dry layout, confirm the substrate is flat, and establish reference lines before you commit any adhesive. Lay the sheets, press them in with steady confidence, wipe away excess adhesive as you go, and continuously check the alignment and level. If something looks off, pause, adjust now, then proceed only after the sheet lines sit true. Let the area cure as directed, then grout, finish, and seal in the proper sequence for a seamless result. test a small area first if you’re unsure about any product or step.
Common mistakes to avoid include letting gaps creep in from misaligned sheets, skipping or rushing the substrate prep, and forcing sheets over high spots or crooked edges. Never mix adhesive or grout in a way that ignores the manufacturer’s instructions, and check your substrate for flatness and clean the surface before bonding. Use proper PPE, work in a well-ventilated space, and don’t leave wet grout unattended or exposed to traffic until it’s fully cured.
If the layout demands complex cuts, or you encounter stubborn drift that won’t self-correct, don’t push it. Consider bringing in a pro for tricky transitions or large areas, especially when grouting or sealing would require access to corners you can’t safely reach. Keep moving with purpose, stay patient, and you’ll end up with a clean, durable look that lasts. You’ve got this— finish strong and enjoy the result.
FAQ
What tools are essential to keep mosaic sheets straight during install?
Have a straightedge or framing square handy to check edge lines as you go. A level or laser line helps keep rows even across large sheets. A small notched trowel, a tile nipper, and a damp sponge nearby make quick corrections easier.
How can I hide sheet lines effectively in mosaic layouts?
Overlap sheets slightly at joints and use consistent grout thickness to blur seams. Place lines where lighting isn’t hitting directly, and stagger edges so joints don’t line up in a straight column. Keep the same orientation on every sheet to reduce visible gaps.
What techniques help prevent “snake” rows and alignment drift?
Work in short runs and check alignment often with a straightedge. Push sheets gently into the adhesive, not away from it, and back-butter where needed so sheets seat flat. If you see drift, pause, reset the starting line, and re-check before continuing.
How should I apply adhesive and prep grout to ensure even coverage and a clean finish?
Spread adhesive with even pressure using a proper notch size, then back-butter tiles if the sheet needs it. Use a damp sponge to clean adhesive haze before it dries and follow grout manufacturer directions for mixing and application. Don’t rush grout around mosaic sheets; work in sections for a uniform look.