
Introduction
Bowed tiles are tiles that are not flat, causing uneven edges to sit higher than neighboring tiles. This article explains simple layout tricks to reduce the visible lippage when you install them. It stays practical and hands-on, focusing on what you can do on the job site.
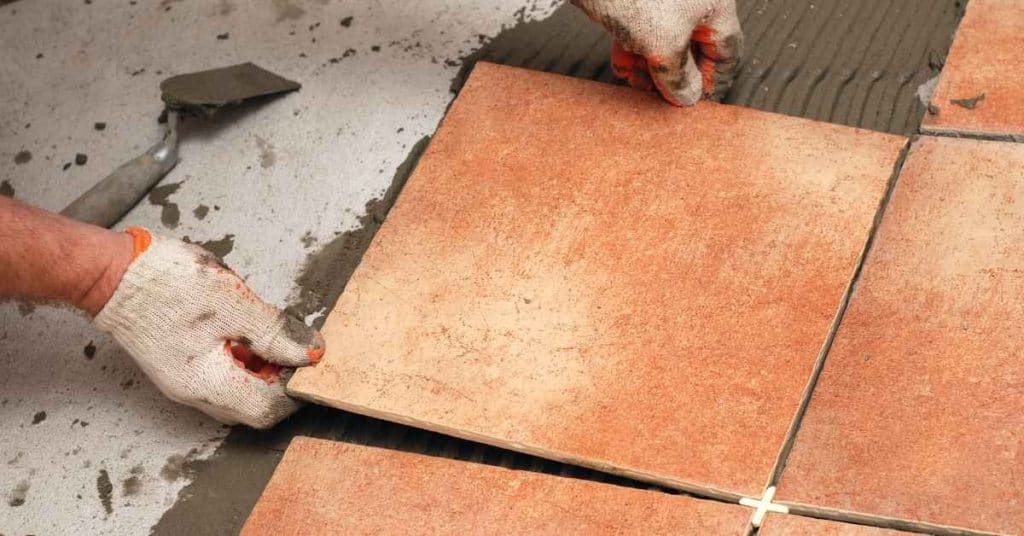
Start with a dry layout in small patches to see how the curves line up with your grid. Use temporary spacers and rotate or alternate tiles to hide offsets and keep a consistent edge. Check for high spots by eye and with a straightedge, and adjust before you commit to thinset, following the tile and thinset manufacturer instructions.
Key takeaways
- Inspect tiles for bow, cupping, and warping before planning layout.
- Sort bowed tiles by degree of bow to balance the grid.
- Offset bowed tiles in rows to minimize visible lippage at joints.
- Use feathered or trimmed edges to blend uneven tiles with surrounding rows.
- Check substrate flatness and bed preparation to avoid future settlement.
- Wear safety glasses and follow manufacturer guidelines during cutting and setting.
Table of Contents
- Introduction
- Key takeaways
- What Causes Bowed Tiles and Why Lippage Appears
- Assessing Tiles Before You Install: Sorting and Inspection
- Planning Your Layout to Hide or Minimize Lippage
- Setting Techniques and Bed Preparation to Compensate for Bowed Tiles
- Cutting and Trimming Strategies for Uneven Edges
- Grout and Finishing Choices That Minimize Visible Height Differences
- Corrections and Remediation for Installed Bowed Tiles
- Preventive Best Practices for Future Projects
- Conclusion
- FAQ
What Causes Bowed Tiles and Why Lippage Appears
Bowed tiles come from how they were made or handled. Warpage, moisture pockets, and firing inconsistencies can push the tile edges up or down. When you install these edges next to flat tiles, you see the height difference as lippage.
For DIYers, check the tile label or product data sheet to understand bowing and handling notes. Inspect edges and run a quick flatness check before laying out a full piece to catch problem tiles early.
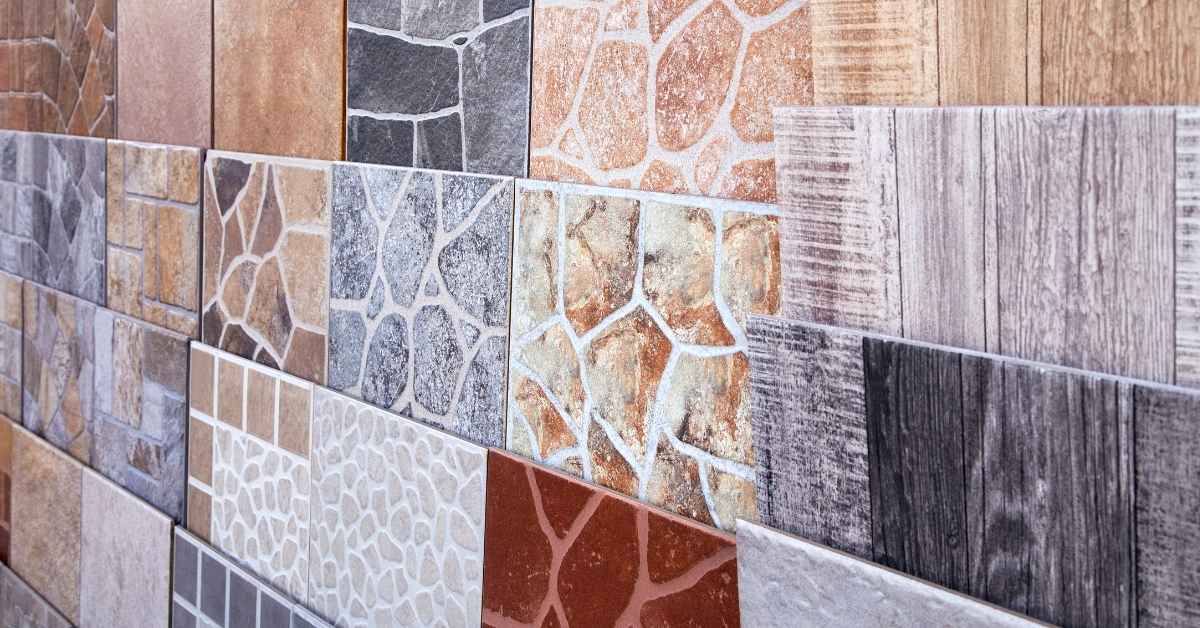
Tile types and manufacturing tolerances
Not all tiles are created equal when it comes to bowing. Porcelain and ceramic tiles, especially large-format ones, are more prone to warping due to their size and composition.
Manufacturers have tolerance ranges for flatness. For instance, 1/64″ is a common tolerance for 12″ x 12″ tiles. This means the tile can vary up to that amount from being perfectly flat. Some high-end tiles may have tighter tolerances.
Always check the manufacturer’s specifications before purchasing. If you’re unsure, ask your supplier or the manufacturer directly.
Environmental and jobsite factors
Moisture and temperature fluctuations can exacerbate bowing in tiles. High humidity during storage or transport, or sudden changes in temperature on the jobsite, can cause warped tiles to become even more bowed.
Proper storage is key. Keep your tiles in a cool, dry place until you’re ready to install them. If possible, keep them in their original packaging to protect them from moisture and dust.
On the jobsite, avoid installing tiles on days with extreme temperature changes. Try to maintain consistent temperatures throughout the installation process.
Assessing Tiles Before You Install: Sorting and Inspection
Set up a sorting station with all tiles face up. Group bowed tiles separately from flat tiles so they don’t sneak into the layout.
Do a simple wobble test and dry-fit a few tiles in a small area. Keep the suspect tiles out of the main pattern until you decide the best fit.
Simple tools and visual checkpoints
Before you start laying tiles, use this checklist to detect bowed tiles. It’s quick and helps prevent lippage.
- Straightedge: Place it on the tile face. If it wobbles or gaps, the tile is bowed.
- 90-degree square: Check corners for squareness. Bowed tiles can throw off your layout.
- Flat surface: Lay tiles on a flat area to check for bowing. Uneven surfaces can hide defects.
- Light source: Hold the tile up to light. Shadows reveal low or high spots.
- Edge alignment: Check edges for straightness. Bowed tiles can cause misaligned rows.
- Face flatness: Tap the face gently. A hollow sound indicates a concave bow.
- Back flatness: Feel the back. Ridges or valleys signal convex bowing.
- Cross-check: Check tiles from different angles to confirm bowing.
Quick rule: If in doubt, mark and set aside suspected bowed tiles for further inspection.
Grading and batching tiles
Before mixing tiles from different boxes, grade them to minimize visible transitions. This helps reduce lippage.
- Sort by flatness: Lay out tiles and tap gently. Group those with similar sound.
- Check edges: Line up tiles edge-to-edge. Separate those with misaligned or wavy edges.
- Batch by grade: Combine tiles of similar quality to create batches.
- Plan layout: Sketch out your layout using the batches. This helps visualize transitions.
- Avoid mixing batches: Keep like with like. Mixing can cause visible lippage.
- Check batch size: Ensure each batch has enough tiles for one section of your layout.
- Label batches: Mark each batch for easy tracking during installation.
- Inspect before use: Check each tile from the batch before laying. Bowing can occur during storage.
Quick rule: The more consistent your tiles, the less visible lippage will be.
Planning Your Layout to Hide or Minimize Lippage
Use directional patterns or offsets that help hide small height differences. Avoid placing bowed tiles where a seam or corner will be highly visible.
Think about focal points like doorways or feature walls and plan alignment to steer the eye away from joints. If you use patterns, verify the layout instructions from the tile manufacturer or data sheet for guidance.
Orientation, seam lines, and grout width choices
Changing tile orientation can help disguise lippage. Instead of laying tiles end to end in rows, try a brick or herringbone pattern.
Stagger seams too. Don’t align them vertically or horizontally. This breaks up the eye’s line of sight and makes it less likely to notice small height differences.
Grout width matters as well. Narrower grout lines draw less attention to themselves, making lippage less noticeable.
Starting points and sightline considerations
Start tiling in low-visibility areas. If you’re doing a floor, start in a corner away from doorways or main walkways.
For walls, begin near the ceiling or behind a piece of furniture. This way, any lippage is less likely to be seen.
Focal points are where the eye naturally goes. Keep them in mind when planning your layout. Try to keep lippage away from these areas.
Setting Techniques and Bed Preparation to Compensate for Bowed Tiles
Prepare the substrate and use leveling methods or adjustable supports to minimize lippage. A proper bed and consistent mortar help you align tiles more accurately.
Match the mortar type and consistency to the tile and adhesive instructions. Use recommended leveling systems and follow the manufacturer’s directions on installation steps.
Choosing the right thinset and trowel technique
First off, you gotta understand that there’s two types of mortar for your tiles: bond coat and medium-bed. Bond coat is thin, as the name suggests, and it’s best used when you’re setting on a solid, flat surface. Medium-bed, on the other hand, is thicker and gives you more flexibility to compensate for those bowed tiles.
For bowed tiles, I’d recommend using a medium-bed thinset. It’s usually around 3/8″ to 1/2″ thick when spread out. Check your product label to be sure. You want something that’s flexible enough to fill in the gaps under those curves.
Now, let’s talk trowels. You’ll need two: a square-notched one for spreading and a smooth one for back-buttering. The size depends on the tile you’re laying. For most residential jobs, a 1/4″ x 3/8″ notch should do the trick. But always check your tile’s specs. You don’t want to be using a trowel that’s too small or too big.
Back-buttering is when you apply mortar to the back of the tile before setting it in place. It might seem like extra work, but it’s worth it. It ensures even coverage and helps prevent voids under those bowed tiles. Use your smooth trowel to spread a thin layer on the back of the tile, then use your notched trowel to comb through it, creating grooves that’ll hold more mortar.
When and how to use leveling clips and wedges
You’ve mixed your thinset right and laid out your tiles. Now, you’re staring at a few that are higher or lower than their neighbors. Don’t panic, that’s where leveling clips and wedges come in.
Leveling clips are your friends when you’ve got a tile that’s too low. Slip them under the tile, near the edges, before you press it down. Check the clip’s thickness to ensure it’s not too much for your grout joint. Tighten gently with a screwdriver or pliers.
Wedges, on the other hand, are for those tiles that are too high. Slide them under the tile at an angle, then press down to level it out. Again, check they’re not too thick for your grout joint. Remove them once the thinset has set.
Remember, less is more. You don’t want to over-tighten clips or use wedges that are too thick. That’ll just cause problems later on. Always check your work as you go, and don’t be afraid to adjust if needed.
Cutting and Trimming Strategies for Uneven Edges
Plan cuts near walls or transitions to reduce visible height differences. Use a wet saw or a diamond blade with proper safety steps for cleaner edges.
Keep trims tight to the layout line and avoid overcutting. Always check local rules or manufacturer guidance for edge finishing and acceptable tolerances.
Planning reveal and transition joints
When dealing with bowed tiles, planning your reveals and transitions can help hide lippage. Use these techniques:
Transitions: At room edges and thresholds, use transition pieces or reducers to cover the tile edge. This hides any unevenness and creates a smooth, finished look.
Thresholds: For floor-to-floor transitions, consider using metal threshold strips with adjustable height. These can help level out bowed tiles and create a seamless transition.
Techniques for safe, precise edge cuts
To ensure your cuts don’t exacerbate lippage issues, follow these techniques:
Blade choice: Use a diamond blade or a high-quality, fine-toothed blade for clean, smooth cuts. Avoid using blades with large teeth that can leave rough edges.
Scoring and snapping: For straight edge cuts, score the tile with a wet saw, then snap it along the scored line. This method helps prevent chipping and maintains a smooth edge.
Wet cutting: Always cut tiles using a wet saw to keep dust down and maintain blade sharpness. This results in cleaner, more precise cuts.
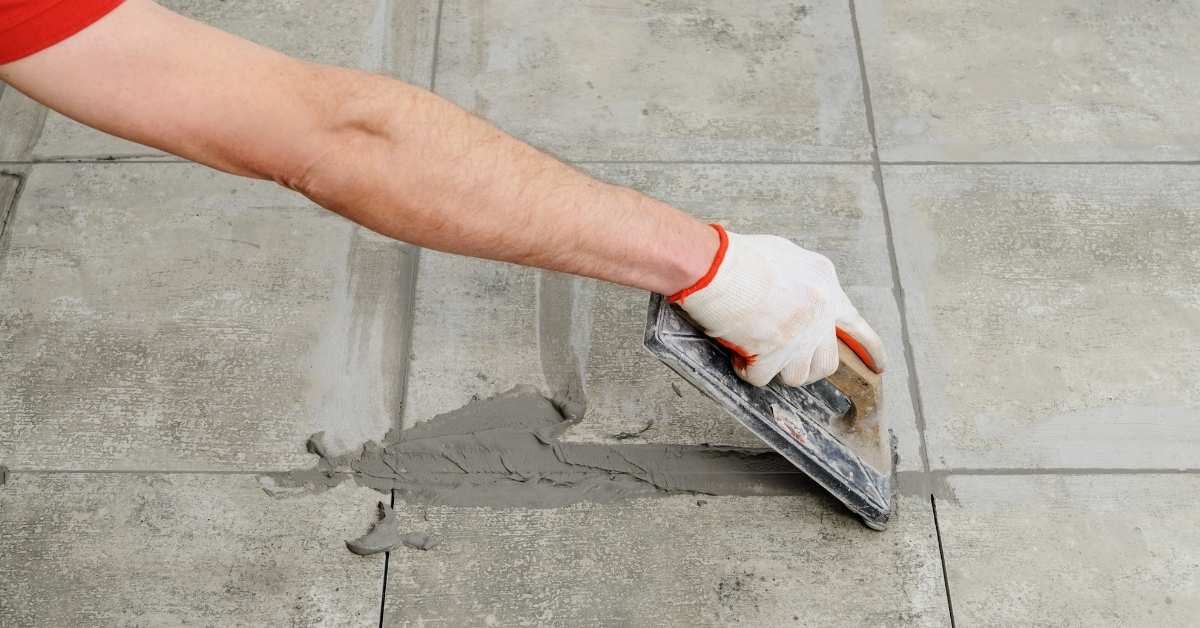
Grout and Finishing Choices That Minimize Visible Height Differences
Grout color and joint width can soften or emphasize lippage. Lighter or mid-toned grout often blends with variations better than a contrasting shade.
Sealing and surface finishing affect how joints read under lighting. Check the product data sheet and follow sealing recommendations from the manufacturer.
Grout width, color, and texture considerations
The grout you choose can either hide or highlight those minor height differences. Here’s what to consider:
Width matters. Narrower grout lines (like 1/8″ or 3/16″) make joints less visible, helping to blend tiles and minimize height differences. Wider joints (1/4″ or more) draw attention to them.
Color choice. Match the grout color to your tile as closely as possible. This helps to create a seamless look that minimizes the appearance of height variations. Check product labels for suitable shades and undertones.
As for texture, sanded or unsanded? Unsanded grout has a smoother finish but less stain resistance. Sanded grout is more durable and hides minor imperfections better, making it a good choice if you’re trying to minimize visible height differences.
Final cleaning and inspection checklist
Before you call the job complete, follow this checklist to ensure a smooth, even finish. Perform these checks after grouting and allowing sufficient cure time (check product label).
- Remove excess mortar: Use a damp sponge or cloth to wipe away any remaining mortar from tile surfaces. Check for any missed spots.
- Check for lippage: Inspect each tile to ensure they are level with their neighbors. Use a straight edge (like a level) to check for any high or low spots.
- Verify grout lines: Ensure grout lines are consistent and filled properly. Check for any voids or gaps.
- Inspect corners: Corners can be tricky. Make sure they’re clean, filled, and level.
- Check for stains: Wipe tiles with a damp cloth to check for any stains from mortar or grout. If present, clean immediately (check manufacturer instructions).
- Inspect edges: Ensure edges are clean and even. Check for any overhanging grout.
- Check for cracks: Inspect tiles and grout lines for any hairline cracks. These can worsen over time if not addressed.
- Test for stability: Gently press on tiles to ensure they’re securely attached. Any movement could indicate a problem.
Quick rule: Always double-check corners and edges, as these areas are prone to issues and can be expensive to rework if not addressed properly.
Corrections and Remediation for Installed Bowed Tiles
If lippage is already visible, you can target re-setting, grinding high spots, or partial tile replacement in certain cases. Plan the repair carefully to avoid disturbing nearby tiles.
Know when to call a pro if the bowing or lippage involves large areas or structural concerns. Verify warranty terms or local regulations before proceeding with costly fixes.
When to attempt DIY fixes vs. replace
Before you grab your trowel and thinset, consider these factors first:
Extent of lippage: If it’s just a few tiles with minor bowing (less than 1/8″), you might be able to fix them. But if half the floor is buckled like a bad dance move, it’s time for replacement.
Substrate condition: Check base compaction. If it’s soft or crumbly, that’s why your tiles are dancing. You’ll need to replace the substrate and start fresh. If it’s solid, you might get away with fixing the tiles.
Tile value: High-end tiles? It might be worth trying to save them. But if they’re cheapos from the big box store, replacing could be the better option.
Safe grinding and panel replacement methods
Before you start, check your tiles. If they’re severely bowed or cracked, it’s best to replace them. Grinding can make things worse.
For minor bowing, use a low-grit diamond cup wheel, around 50-100 grit. Start with the lowest setting on your grinder and work up. Keep it level and move slow.
To replace tiles, first remove the damaged ones. Use a utility knife to score the grout, then pry them off with a flathead screwdriver. Be careful not to damage neighbors.
Before setting new tiles, check base compaction. If it’s soft, compact it before proceeding. Then, mix your thinset mortar and apply it. Set the new tile, using spacers for even grout lines. Let it cure as per manufacturer instructions.
Preventive Best Practices for Future Projects
Create a procurement and storage plan that flags bowing risks and keeps tiles in a controlled environment. Sort tiles by batch and test a sample before full use.
Develop a layout and installation checklist that emphasizes leveling, adhesive choice, and pattern planning. When in doubt, consult the product label, manufacturer instructions, or local rules to confirm acceptable practices.
Supplier communication and acceptance criteria
Before you even start your project, it’s crucial to communicate clearly with your tile supplier. You want tiles that are as flat as possible to minimize lippage issues.
Ask for flatness specifications in the order. Most suppliers can provide this. Look for something like ‘1/32″ or less’ variation across the face of each tile.
Insist on inspection before delivery. Have them check for warped, bowed, or chipped tiles and remove any from your order. Document their inspection process and results.
Upon delivery, inspect again. If you find issues, don’t accept the tiles until they’re resolved.
Jobsite handling and storage procedures
Once your tiles arrive, it’s your responsibility to keep them flat and safe. Here’s how:
Store them flat on the ground, not stacked vertically. This prevents warping from uneven weight distribution.
Keep them protected from the elements. Rain, snow, or extreme heat can all cause tiles to warp. Cover your storage area if necessary.
Avoid walking on stored tiles. Not only can this break them, it can also cause warping. Keep a clear path around your tile storage area.

Conclusion
Bowed tiles and hidden lippage are not a mystery you have to live with. Do the right checks, plan the layout, and work with controlled techniques to keep a tight, durable surface that looks right and stays safe.
Before you start the next phase, lock in a simple checklist: verify tile bow and edge conditions, sort and inspect tiles, mark a layout that hides or minimizes lippage, set and bed with consistent pressure and appropriate skim or mortar thickness, trim or cut edges carefully, choose grout and finish that level height differences, and test a small area first before full execution. Follow the plan in a steady, stepwise fashion and avoid rushing any cut or setting step.
Common mistakes to avoid are guessing tile behavior without checking, mixing or applying materials in a hurry, and overpulling grout or forcing tiles to sit with uneven bed. Safety rules to keep in mind: wear eye and hand protection, clean as you work to prevent slips and accidental damage, and never force a bowed tile into a joint or onto a substrate that won’t support it. If the layout or tile condition is beyond what you can safely correct—such as severe bow, widespread lippage, or inconsistent substrate—call a professional instead of pushing on, and remember that a solid, careful approach now saves costly repairs later. You’ve got this—steady steps now pay off with a confident, durable finish.
FAQ
How do I spot bowed tiles and decide what to use in a layout?
Check a few tiles in different spots for uneven backs or noticeable curvature. If several tiles won’t lay flat together, set them aside and prioritize use where you can control the gaps. Don’t force tiles that clearly won’t sit flat.
What layout tricks actually hide lippage when tiles are bowed?
Use stagger patterns that break up straight grid lines and mix tiles in a way that keeps high spots away from prominent edges. Consider ending long runs with variations that don’t line up lippage visually. Keep joints consistent, and avoid running a straight line where bowed tiles would line up at the edge.
What bed prep and setting technique helps compensate without risking failure?
Back-butter bowed tiles and press them into a stable bed with a consistent thickness. Use the right notch size for your medium and work in small areas to control adjustment time. Dry-fit first, then set to minimize movement as the adhesive cures.
When should I stop and swap tiles instead of forcing a layout?
If a batch shows multiple tiles that won’t sit flat or create obvious high spots, swap them out or rotate their positions. Check manufacturer instructions and local guidance, and test a few tiles in the actual layout before committing to the whole job.