
Introduction
Tile leveling systems are tools meant to hold tiles flat during setting, but when used wrong the clips and wedges can create lippage, hollow spots, or waste time. In plain terms: wrong clip placement, uneven mortar, or over-tightening are the usual culprits. This piece tells you what to watch for and how to think like a foreman when you’re on your own jobsite.
Expect hands-on tips about where people commonly slip up, what to check on the product label, and how to adjust your technique rather than relying on the clips to fix everything. If you’re unsure about a product’s torque or mortar open time, check the manufacturer instructions and local rules before proceeding.
Key takeaways
- Confirm tile leveling clips match thin-set bed and substrate; no gaps behind wedge.
- Avoid mixing clip types mid-job; inconsistent spacing causes lippage and uneven tiles.
- Check substrate flatness before installation; hollow spots indicate underlayment or thin-set issues.
- Wear eye protection and gloves when trimming wedges and removing damaged clips.
- Lock wedges securely; test after each row to prevent future rocking or gaps.
- Use proper workflow: dry lay, skim coat, then compress with level; no rushing.
Table of Contents
- Introduction
- Key takeaways
- How Tile Leveling Systems Work and Why Clips Matter
- Common Installer Mistakes That Lead to Lippage
- How Clips Contribute to Hollow Spots and Weak Bedding
- Time-Wasting Pitfalls and Inefficient Workflows
- Correct Technique: Step-by-Step to Avoid Lippage and Hollow Spots
- Troubleshooting and Fixes for Lippage or Hollow Areas After Installation
- Selection Guide: Choosing Clips, Wedges, and Accessories
- Visual Checkpoints, QA, and Best-Practice Checklist
- Conclusion
- FAQ
How Tile Leveling Systems Work and Why Clips Matter
Clips, plus their mating wedges or caps and the pliers used to tension them, form the basic kit that holds tile edges at a common plane while mortar cures. The clip hooks under adjacent tile edges and the wedge or cap applies adjustable pressure so you can bring ridges and depressions into alignment.
The system balances edge contact against the setting mortar: clips position the tiles and the wedge tension keeps them from moving, but you must verify wedge travel and clip height against the tile thickness and manufacturer instructions for reliable results.
Types of leveling systems and clip designs
Tile leveling systems come in a few main families, each with its own clip design. The most common are:
Clip-and-wedge systems: These use clips that hold the tile edge and wedges that slide into the clip to adjust height.
Clip-and-cap systems: Similar to the above, but instead of wedges, they use caps that screw onto the clip for adjustment.
Reusable cam systems: These clips have a built-in cam mechanism that allows for height adjustment and reuse. The form of the clip affects how it distributes contact pressure on the tile edge.
Intended benefits versus practical limitations
Tile leveling systems aim to provide consistent joint widths and reduce lippage (unevenness) between tiles. Here’s what you can expect:
Benefits: Consistent joint width helps create a neat, professional look. Reduced lippage means no tripping hazards or water pooling.
Limitations: Even with leveling systems, tile warp or inconsistent mortar application can cause issues. User technique is also crucial – if clips aren’t installed properly, they won’t work as intended.
Common Installer Mistakes That Lead to Lippage
Placing clips too far from the tile edge, using inconsistent tension on wedges, or skipping checks for warped or cupped tiles all change the way load transfers across joints and create edge-high or edge-low conditions. Each misstep alters the small vertical relationships between tiles that become visible as lippage after grouting.
Watch for patterns: if lippage repeats in one direction it usually traces to placement or tension habits, and if it appears sporadically check individual tile flatness and follow the product guidance on clip spacing and wedge force.
Over-tightening and under-tightening clips
Tensioning your clips too much can pull tiles out of plane, causing them to sit higher than the rest. This is called over-tightening.
Too little tension, on the other hand, allows tiles to settle over time, leading to hollow spots and lippage.
The key is finding that Goldilocks zone – not too tight, not too loose, just right. You want a slight resistance when you press down on the tile, like pressing into a well-made mattress.
Incorrect clip spacing and placement
Spreading your clips unevenly across the tile can lead to localized lippage. Imagine trying to hold up a table with only one leg – it’s not going to work.
Placing clips only at the centers of tiles might seem logical, but it ignores the corners where support is also needed. This can result in those areas sagging or popping up over time.
The best practice? Space your clips evenly across the entire tile surface, including the corners. This distributes the weight and support more evenly, reducing the risk of lippage.
How Clips Contribute to Hollow Spots and Weak Bedding
Clips can lift tile edges off the mortar bed when wedges are over-torqued, mortar is too thin/too thick, or the substrate wasn’t properly primed, creating voids under the tile corners and edges. That separation reduces load-bearing contact and increases the risk of hollow-sounding areas or tile breakage under load.
Assess conditions that increase this risk—mortar consistency, trowel size, open time, tile backing—and follow manufacturer or product data sheet guidance to match clip use with proper bedding technique.
Insufficient mortar coverage and poor back-buttering
Clips alone won’t keep your tiles level if you skimp on mortar. Large or uneven tiles need full coverage, top and bottom.
That’s where back-buttering comes in. Spread a thin layer of mortar over the tile’s underside before installing. This fills any gaps and ensures even support.
Neglect this step, rely solely on clips, and you’ll end up with hollow spots. Tiles can rock or wobble, leading to lippage and weak bedding.
Mortar consistency and tile characteristics that worsen hollows
Mortar too stiff? It won’t spread evenly, leaving voids under your tiles. Too fluid, and it slips through clips, creating weak spots.
Thin or warped tiles exacerbate the problem. They don’t displace mortar like thicker, flatter ones. Clips can’t compensate for these issues alone.
Adjust your technique based on tile and mortar characteristics. Thicken stiff mortars with cement powder. Add water to fluid ones. For thin or warped tiles, use larger clips spaced closer together.
Time-Wasting Pitfalls and Inefficient Workflows
Starting in the wrong location, choosing the wrong clip system for tile size, or repeatedly redoing sections because clips were removed prematurely all add hours to a job. Inefficient sequences often force installers to backtrack and redo setting beds rather than proceed in a planned, staged workflow.
Plan the layout, select a system suited to the tile and joint width, and follow a consistent tension and removal sequence to reduce rework; when in doubt, check the manufacturer instructions for recommended workflow and removal timing.
Picking the wrong system for tile and substrate
The first mistake many DIYers make is choosing a leveling system that’s not suited to their tiles or substrate. Here’s what you need to consider:
Tile size and thickness: Bigger, thicker tiles need sturdier clips and wedges. Go for systems designed to handle your tile’s weight and dimensions.
Substrate flatness: If your floor isn’t perfectly level, you’ll need a system with adjustable clips or one that can accommodate variations in substrate height. Skimping here will lead to slow installs and rework.
Poor sequencing, removal timing, and cleanup
Inefficient workflows can eat up your time and energy. Here’s how to avoid common pitfalls:
Setting clips: Don’t set all the clips at once. Start in one corner, work your way across, then back along the opposite side. This helps keep things level and makes adjustments easier.
Waiting and removal: Don’t rush to remove clips before mortar has set. Wait the recommended time, then remove them carefully to avoid damaging tiles or leaving behind residue that’s hard to clean.
Cleanup: Clean as you go. Wipe off excess mortar from tiles and clips immediately after setting. This saves you from scrubbing dried-on muck later.
Correct Technique: Step-by-Step to Avoid Lippage and Hollow Spots
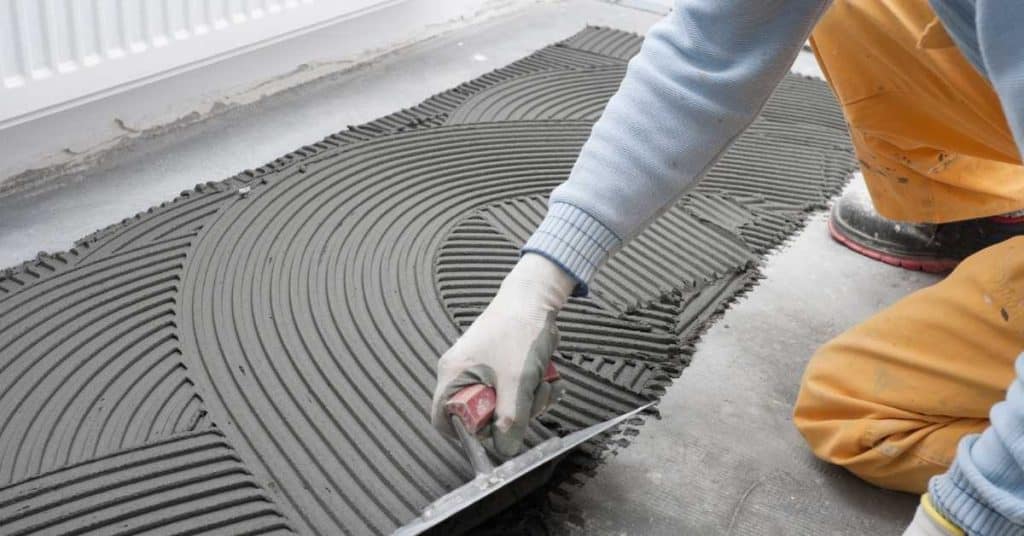
Begin with a flat, clean substrate and the correct trowel notch for your tile, butter where needed, press tiles into full contact, then insert clips at recommended spacing and tension wedges just enough to level edges. Work in small sections so mortar remains workable and inspect bedding behind tiles as you progress.
Use the pliers or tool to apply even, repeatable pressure; verify clip height matches tile thickness and check for mortar squeeze-out or gaps under corners before continuing—consult the product label or manufacturer instructions when uncertain.
Step-by-Step Process
A clear, numbered sequence to avoid lippage and hollow spots, from prep to finish.
- Preparation: Check substrate for levelness. Ensure safety with proper footwear and eye protection.
- Mortar Application: Use appropriate trowel notch (1/4″ or 3/8″) for your tile size.
- Clip Placement: Position clips evenly, following manufacturer’s guidelines. Too close can cause lippage; too far apart leaves hollows.
- Tile Installation: Press tiles firmly into mortar, ensuring full contact with the substrate and clip.
- Inspection & Cleanup: Use a straightedge to check for lippage. Wipe excess mortar immediately to prevent staining.
Substrate preparation and mortar application best practices
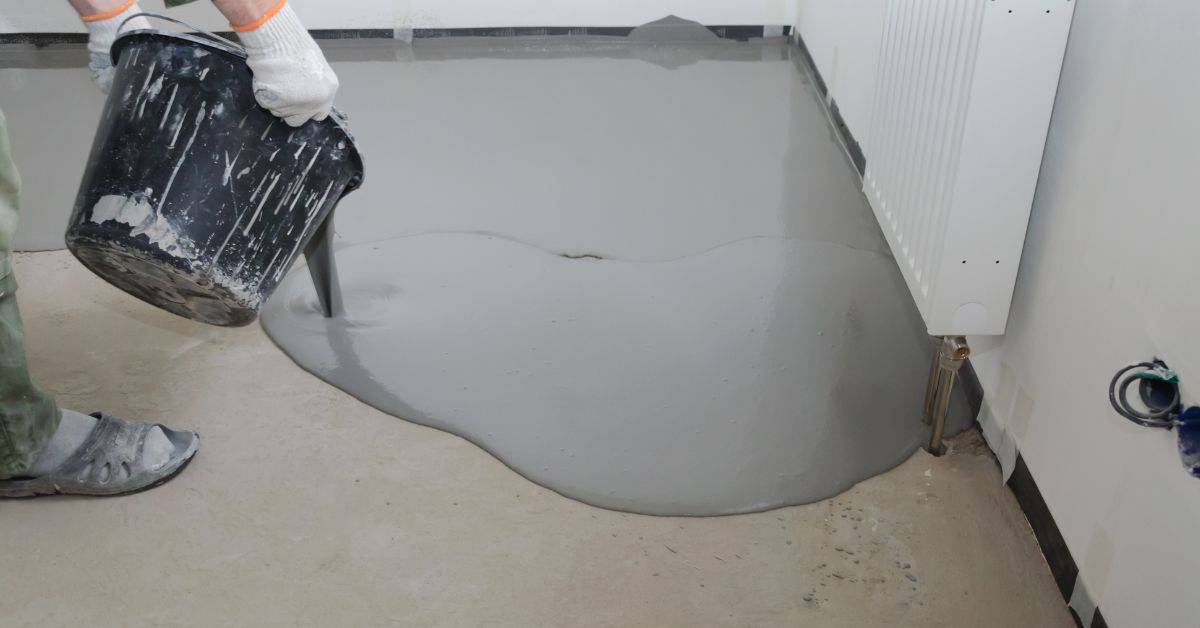
Start with a clean, dry substrate. Prime if necessary for better adhesion.
Use a leveling compound to fill any low spots or cracks before applying mortar. This ensures consistent tile height.
Choose the right trowel notch: Smaller tiles need less mortar, so use a 1/4″ notch. Larger tiles require more, so use a 3/8″ notch.
Back-butter your tiles for full mortar contact and better grip during installation.
Clip placement, engagement cues, and visual alignment checks
Position clips evenly along the substrate. Too close can cause lippage; too far apart leaves hollows.
Press clips firmly into mortar until you feel them engage. You should hear a ‘click’ or ‘pop’.
Check clip tension: Gently pull on a tile to ensure it’s secure but not over-tightened. It should move slightly, then snap back into place.
Use a straightedge to check for lippage. Look for any high or low spots that need adjustment. Sight along the grout lines to confirm flatness.
Troubleshooting and Fixes for Lippage or Hollow Areas After Installation
First determine whether the issue is minor lippage that can be eased with sanding/planing or a hollow spot that needs localized removal and re-bedding; severity, tile type, and location dictate the remedy. Small edge differences sometimes can be corrected with careful grinding and regrouting, while voided areas usually require partial tile removal and fresh mortar.
Use a logical decision tree: inspect, probe for voids, measure the deflection, then choose between repair, partial re-bedding, or full replacement; when in doubt, follow manufacturer repair guidance or consult local code/product documentation.
How to assess severity: simple tests and signs
First, perform a visual inspection. Look for any visible gaps, uneven surfaces, or wobbly tiles.
Tap test: Gently tap each tile with a wooden block or rubber mallet. A hollow sound indicates an issue beneath the tile. Solid sound means it’s secure.
Straightedge inspection: Run a straight edge, like a level or ruler, across the tiles. If it wobbles or doesn’t sit flat, you’ve got lippage or hollow spots.
Grout behavior can also tell a story. Cracks in grout lines might indicate movement or settling beneath the tile.
Repair options: re-bedding, grout remediation, and localized correction
If you’ve found issues, don’t panic. Most problems can be fixed with the right approach.
Localized correction: For minor hollows or lippage, you might get away with adding more mortar under the affected tiles, then re-grouting. But be careful not to over-pressurize the tile.
Re-bedding: If the problem is extensive, you may need to remove grout, lift the tiles, and re-bed them properly. This involves removing old mortar, cleaning the surface, applying new mortar, and re-laying the tiles.
If water damage or structural issues are suspected, stop. Call a professional to assess before proceeding. Safety first!
Selection Guide: Choosing Clips, Wedges, and Accessories
Match clip profile and height to your tile thickness and select wedges or caps designed for the joint width and tile format—large-format tiles often need a different clip spacing or stronger wedges than small tiles. Consider job scale and reusability when picking a system, and check compatibility with your setting mortar and substrate.
Ask suppliers specific questions: what tile thickness range the clip covers, recommended spacing for this format, and whether the wedges are single-use or reusable; verify answers against the product data sheet or manufacturer instructions.
Single-use plastic versus reusable systems: pros and cons
The choice between single-use plastic clips and reusable metal ones depends on your job’s scale, budget, and environmental concerns.
Pros of Single-use Plastic Systems
- Cost-effective: Cheaper upfront, especially for small jobs.
- Lightweight: Easier to carry around the job site.
- Disposable: No need to clean or store after use.
- Variety: Available in different sizes and types.
Cons of Single-use Plastic Systems
- Wasteful: Contributes to landfill waste. Not eco-friendly.
- Limited durability: Can break or bend under pressure, leading to lippage.
- Less precise: May not provide the same level of support as metal clips.
- Costly in the long run: Regular purchases can add up for large jobs.
Reusable systems make sense for larger jobs, where you’ll see long-term savings and reduced environmental impact. For small, one-off projects, single-use might be your best bet.
Tools and materials checklist
Before starting, ensure you have all the necessary tools and materials to avoid delays. Use this checklist as a guide.
- Clips: Suitable for your tile format and thickness. Check with supplier if unsure.
- Wedges: For adjusting height and leveling.
- Plier tool: To engage and disengage clips.
- Beater/tap tool: To gently tap tiles into place without damaging them.
- Straightedge: To check levels and ensure even spacing between tiles.
- Mixing tools: Trowel, notched trowel, grout mixer (if using powdered mortar).
- Mortar: Suitable for your substrate and tile type. Check with supplier if unsure.
- Safety gear: Gloves, goggles, ear protection (for power tools).
- Measuring tape: To ensure accurate spacing between tiles.
- Pencil: For marking levels and lines.
- Level: To ensure your tiles are flat and even.
Quick rule: Always double-check your tools and materials before starting. Missing something can lead to delays, poor results, or even damaged tiles.
Visual Checkpoints, QA, and Best-Practice Checklist
In-process checkpoints should include flatness of the substrate, consistent mortar ridges, correct clip placement and even wedge tension, and visible mortar contact at tile edges and corners. These quick visual inspections catch many issues before they become costly defects.
Create a short pre-grout checklist tailored to the project—verify clip spacing, check for hollow spots by tapping, confirm wedges reached their recommended travel, and consult product labels or manufacturer instructions for any unspecified tolerances.
Pre-grout inspection points
Before you start grouting, use this checklist to ensure your tile leveling system has done its job right.
- Check flatness: Run a straight edge across tiles. No gaps or high spots.
- Mortar coverage: Ensure mortar fills behind clips and under tiles evenly.
- Joint consistency: Check joints are uniform, no thin or wide areas.
- Clip engagement: Verify all clips are fully engaged with the substrate.
- Tile alignment: Ensure tiles are straight and level using a laser level if needed.
- Mortar drying: Check mortar is dry to touch but not fully cured.
- Clip removal: If using removable clips, ensure they’re ready for extraction.
- Grout lines: Ensure grout lines are clean and consistent.
Quick rule: A thorough pre-grout check saves you from costly rework later.
Post-installation verification and early maintenance
After installation, follow this checklist to ensure your tile leveling system has performed as expected and maintain your work for longevity.
- Check lippage: Run a straight edge across tiles. No visible gaps or high spots.
- Grout lines: Ensure grout lines are filled evenly and consistently.
- Tile movement: Gently push on tiles to ensure none wobble or move.
- Clip removal (if applicable): Remove clips as per manufacturer’s instructions.
- Cleanliness: Ensure no debris remains in grout lines or on tile surface.
- Sealing: Apply sealant to grout lines after they’ve cured, following manufacturer’s guidelines.
- Monitor for issues: Keep an eye out for any signs of movement, cracking, or moisture over the next few days.
- Regular maintenance: Clean and maintain your tiles as per the manufacturer’s recommendations to prevent long-term issues.
Quick rule: Regular checks and maintenance ensure your tile leveling system continues to perform well over time.
Conclusion
Getting this right saves you from lippage, hollow spots, and wasting time. Do it with solid protection for the floor and a durable, clean finish you can rely on for years.
First, check the basics as you start: confirm you have the right clips and wedges for your tile, dry-fit in a small area, verify the substrate is flat, mix thinset to the proper consistency, work in small sections, and keep a steady pace with consistent pressure. Keep an eye on every row for level and spacing, wipe away excess as you go, and tighten gradually only as needed. After setting, perform a quick visual check at several angles and recheck lippage before the thinset cures, and document any adjustments for future work. Safety matters here—protect hands, eyes, and feet, and stay mindful of edge cuts and wet floors as you proceed.
Avoid these common mistakes: over-tightening clips or wedges, using the wrong clip size for your tile, skipping back-buttering or not securing a solid bedding layer, and ignoring hollow spots or uneven substrate. Keep the rule of thumb simple: test a small area first, protect the substrate, and check progress frequently rather than hoping it will look right at the end. If anything feels off, pause, recheck your setup, and correct it before continuing.
If the area shows persistent lippage or hollow spots after initial setting, or if the substrate reveals unexpected dips, heat and moisture issues, or you’re unsure about the right clip-to-tacer combination, don’t push through. Consider calling a professional for a quick assessment or remediation. Stay deliberate, stay safe, and you’ll end with a floor that looks good, performs well, and stands up to daily use.
FAQ
Can over-tightening or misplacing the clips cause lippage even when tiles look flat?
Yes. If clips are pressed too tight or not centered, they can push tiles unevenly as you tighten wedges. Check that each tile sits flat before and after tightening, and verify consistent joint width across the field.
Do all tile leveling systems work the same with large-format tiles on uneven substrates?
No. Different systems have different clip designs and behaviors. Read the manufacturer instructions for your system and test a small area first to confirm they keep tiles level on your substrate.
Should I remove or trim clips after the mortar cures?
Many systems require removing the protruding parts after setting. Some clips snap off cleanly, others stay embedded and are left below grout level. Follow the manufacturer instructions and trim or remove only what is specified.
How can I spot hollow spots or weak bedding without risking tile damage during install?
Tap the tiles gently after the mortar cures to listen for hollow sounds. Use a grout line as a guide to check for uniform support. If you hear a hollow area, address it before grouting by reworking that section per instructions.