
Introduction
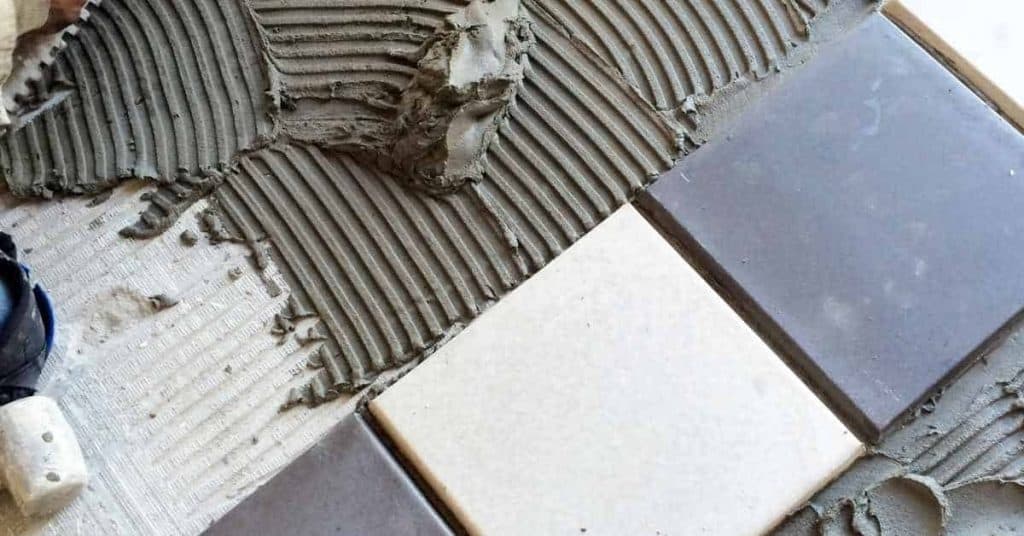
Choosing the right trowel notch size depends on tile size and how flat the surface is. In plain terms, it defines how much adhesive is spread and how evenly the tile will bed. Get this right before you start so you don’t have to redo tile later.
Check the tile size and flatness of the substrate, then pick a notch that matches both. Always follow the tile manufacturer’s instructions and local building rules, and test a small area first. If in doubt, ask at the store or read labels to confirm the notch size options and use safe ranges.
Key takeaways
- Choose notch size to tile dimensions and flatness for even adhesive coverage.
- Match notch to tile type and recommended adhesive film thickness per manufacturer.
- Assess substrate flatness early; plan for shading or high spots before setting.
- Check adhesive working properties and pot life under room temperature and humidity.
- Perform a dry run and visual checkpoints before committing to full installation.
- Always wear PPE, use proper trowel technique, and clean excess adhesive promptly.
Table of Contents
- Introduction
- Key takeaways
- Why Trowel Notch Size Matters
- Match Notch Size to Tile Size and Type
- Account for Substrate Flatness and Surface Condition
- Adhesive Type and Working Properties
- Visual Checkpoints and Testing Before Full Installation
- Tools, Materials Checklist and Best Practices
- Special Cases and Advanced Considerations
- Troubleshooting Common Installation Problems
- Conclusion
- FAQ
Why Trowel Notch Size Matters
The notch size on your trowel controls how much adhesive is laid under each tile and how it holds the tile to the substrate. A wrong notch can leave spots of hollow tile, poor transfer, or lippage that becomes obvious on the finished surface. Pay attention to the ribbon of adhesive and the bond you’re creating to avoid adhesive gaps and tile rocking.
Check the product label or data sheet to confirm the recommended notch size for your specific mortar, tile type, and substrate. If in doubt, ask the supplier or read the manufacturer instructions and follow their guidance for your tile and setting product.
Adhesive coverage and contact percentage
The size of your trowel notch plays a big role in how much mortar comes into contact with your tile. This is crucial because it’s this contact that creates the bond between the two.
Smaller tiles need more contact to stay put, so you’d want a larger notch for them. Larger tiles can get away with less contact, so a smaller notch will do.
Rule of thumb: For tiles under 6″ use a 3/8″ or 1/2″ notch. For tiles over 6″ go down to a 1/4″ or 3/16″.
Risks of incorrect notch selection
Using the wrong trowel notch can lead to a world of trouble. Too small and you’ll end up with lippage – where your tiles aren’t level, creating a wavy surface.
Too large and you risk debonding – where your tile comes loose because there’s too much mortar behind it, not enough on the face.
You might also end up with uneven grout lines. The excess or lack of mortar can cause your grout to sit at different heights, creating an unsightly look.
Match Notch Size to Tile Size and Type
Small tiles usually pair with smaller notches, while large-format tiles typically need a larger notch to ensure full coverage. Porcelain and natural stone can have different bonding needs, even at the same size. The goal is even contact from edge to edge with no air pockets under the tile.
Refer to the tile manufacturer’s recommendations and the adhesive data sheet for guidance. If you’re unsure, run a small test with a scrap tile to confirm the coverage you’re achieving before committing to the whole area.
Small tiles and mosaics
For tiny tiles and mosaics, you’ll want to use a trowel with a small notch. This could be as little as 1/8″ or 3mm.
Why? Small tiles have less surface area for the adhesive to grip onto. A smaller notch gives you more control over the amount of adhesive you’re applying, helping prevent excess mortar from oozing out and causing issues.
Mosaics need special attention. Use a notched trowel with very fine teeth or even a comb-notched trowel to apply thin layers of mortar. This helps maintain the grout lines between tiles.
Medium and large tiles
As tile size increases, so should your notch size. For medium-sized tiles (around 12″ to 24″), consider a 3/8″ or 10mm notch.
Large-format tiles (over 24″) often need deeper notches for full support. A 1/2″ or 12mm notch is usually suitable, but you might need to go up to 5/8″ or 16mm for extra-large tiles.
Remember, the goal is to provide enough adhesive coverage without using too much. Too little adhesive can cause tiles to lift, while too much can lead to cracking and other problems.
Porcelain vs. natural stone considerations
Tile type also affects notch choice. Porcelain tiles are usually lighter and less porous, so you can get away with smaller notches – around 1/8″ to 3mm.
Natural stones, on the other hand, are often heavier and more porous. They require larger notches for better adhesion – typically 3/8″ or 10mm, sometimes even larger depending on tile size and weight.
Additionally, natural stones may need special adhesives designed to penetrate their pores and provide a strong bond. Always check the manufacturer’s recommendations for your specific tiles.
Account for Substrate Flatness and Surface Condition
Flatness and surface irregularities directly affect how the adhesive fills under the tile and how evenly it bonds. A highly uneven substrate may require a different notch size or a substrate correction before tiling. If the surface isn’t true, you risk hollow spots and uneven tile heights.
Always check the substrate with a straightedge or level, and follow up with leveling as needed. If you see high spots, dips, or sudden changes in plane, correct them before choosing your notch and applying adhesive.
Measuring flatness and acceptable tolerances
Before you start notching your trowel, check the substrate’s flatness. Grab a straightedge – a long level or even a 2×4 will do.
Place it on the surface. If there’s a gap of more than 1/8 inch (3mm) at any point, your substrate isn’t flat enough for tiling directly. That’s too much movement for mortar to bridge.
If you find gaps up to 1/8 inch, you can still tile, but you’ll need to adjust your trowel notch size to accommodate the unevenness. More on that later.
When to level or skim coat the substrate
If you find gaps larger than 1/8 inch, don’t try to compensate with your trowel notch. That’s asking for trouble.
Instead, level or skim coat your substrate. For deep voids, use a self-leveling compound. For minor imperfections, patch with thinset mortar mixed a bit thinner than usual.
Once leveled, let it cure completely before tiling. This ensures a smooth, even surface for your tiles to stick to. After curing, recheck the flatness as described earlier.
Adhesive Type and Working Properties
Modified thinset, unmodified thinset, and mastics behave differently in how they hold, spread, and open time. The notch size that works for one adhesive can crowd out a proper bond with another. The working properties of the adhesive will influence how thick or thin the bed ends up being.
Always read the adhesive data sheet for open time, pot life, and consistency, then pair that with the notch recommended for your tile size. If you’re unsure, verify with the manufacturer instructions or your supplier before mixing and applying.
Modified vs. unmodified thinset
You’ve got two types of thinset: modified and unmodified. Both are good for different jobs.
Unmodified thinset is basic, no frills. It’s cheaper but not as strong or flexible. Use it for small tiles (under 12″ sq.) on stable, flat surfaces. Check your tile size and substrate before you decide.
Modified thinset, now that’s a different story. It’s got polymers mixed in, making it stronger and more flexible. This is what you want for larger tiles (12″ sq. and up) or thicker beds (over 3/8″). Why? Because those big boys need extra support to prevent cracking. Plus, the polymers help with suction on porous surfaces.
Here’s where notch depth comes in. For bigger tiles and thicker beds, you’ll want a trowel with a deeper notch (like 1/4″ or more) to hold more thinset. That extra adhesive gives your tiles better support and grip.
Mortar consistency and trowel technique
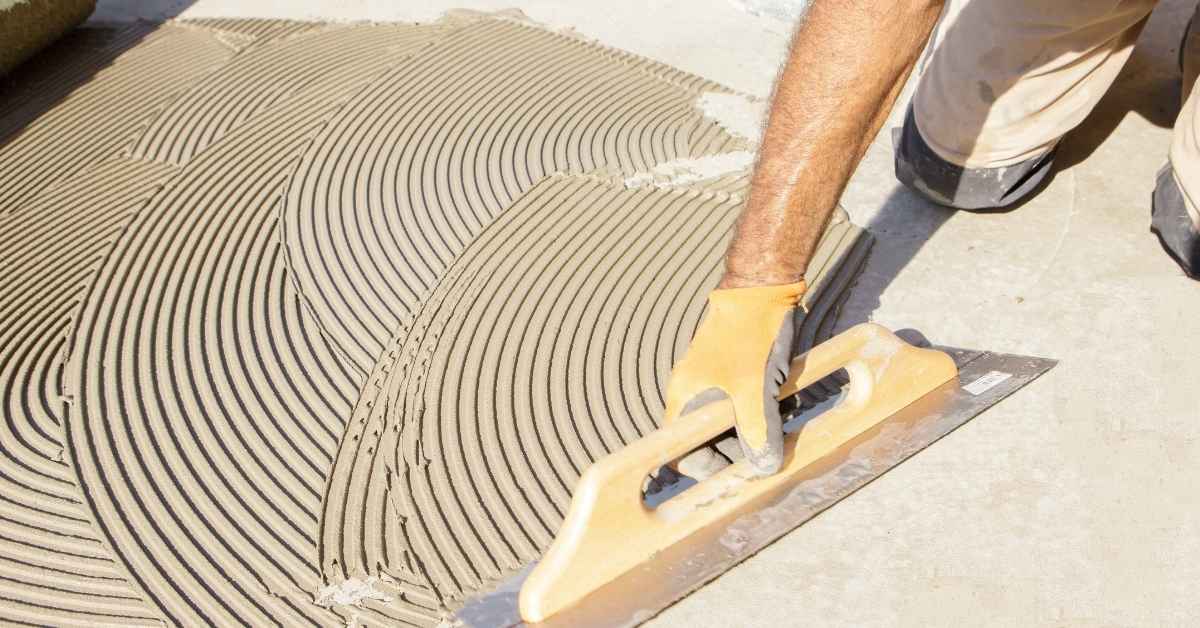
First things first, check your mortar mix. It should be like peanut butter – not too runny, not too stiff. Too fluid, it’ll be a mess; too stiff, won’t stick.
Now, let’s talk ridges. You want those 3/8″ to 1/2″ high, even ridges on your trowel. Not too many, not too few. Too many, you’re wasting material; too few, you ain’t got enough grip.
Buttering’s next. Spread that mortar thin, like you’re spreading butter on bread. You want a 1/8″ to 3/32″ layer. Too thick, it won’t stick; too thin, it’ll flake off.
Visual Checkpoints and Testing Before Full Installation
Do quick on-site checks as you begin: look for uniform transfer and clean lines along the tile edges. A simple pull or coverage test can show whether the notch choice is giving proper embedment. Any hollow spots or gaps should be addressed before continuing.
Designate a small test area, lay a few tiles, and inspect the bond up close. If you see inconsistent coverage, re-evaluate the notch size or substrate condition and adjust as needed per the product instructions.
Coverage test and back-buttering check
Before laying all your tiles, do this quick check to ensure proper mortar transfer and contact percentage.
- Press tile into place: Apply even pressure across the entire tile.
- Lift tile: After a few seconds, lift the tile gently. Check for mortar coverage.
- Inspect mortar transfer: Look at the back of the tile. It should be evenly coated with mortar.
- Check contact percentage: Aim for 85-90% coverage. Less than this may lead to weak adhesion and potential failures.
- Repeat test: Do this on multiple tiles from different areas of your batch.
- Observe cure behavior: Keep an eye on how the mortar cures under these conditions.
- Adjust notch if needed: If coverage is poor, consider a larger notch or adjusting your trowel technique.
- Inspect edges: Ensure edges are well-covered to prevent delamination.
Quick rule: If you’re not getting good mortar transfer and contact percentage, re-evaluate your notch size and trowel technique before proceeding with full installation.
Trial grid placement for large-format tiles
Before laying all your large-format tiles, install a small test area to observe their behavior and make adjustments if needed.
- Mark out test area: Choose a representative spot on your substrate. Make it big enough to see settling patterns (around 1m x 1m).
- Lay tiles in grid pattern: Start from the center, lay tiles in a grid pattern to mimic full installation.
- Observe lippage: Check for any high or low spots that might cause uneven surfaces. Adjust your leveling compounds if necessary.
- Check settling: Large tiles can settle over time. Observe how they move during the curing process.
- Monitor cure behavior: Keep an eye on how the mortar cures under these conditions, especially with large-format tiles.
- Inspect grout joints: Check for any issues that might arise when grouting, like excessive lippage or cracking.
- Adjust notch or technique: If you see excessive settling or lippage, consider adjusting your notch size or trowel technique.
- Let it cure: Allow the test area to cure fully before making any final decisions.
Quick rule: For large-format tiles, always do a trial grid placement first. It’s better to find issues now than after full installation.
Tools, Materials Checklist and Best Practices
Have the right trowel, a compatible float, a level, spacers, and the adhesive you’ve selected. Keep extra blades or notches on hand in case you need a different size for a section. A clean, orderly work area helps you spot issues early.
Follow safety and cleanliness best practices: wear eye protection, protect adjoining surfaces, and keep mixing containers and tools clean.