
Introduction
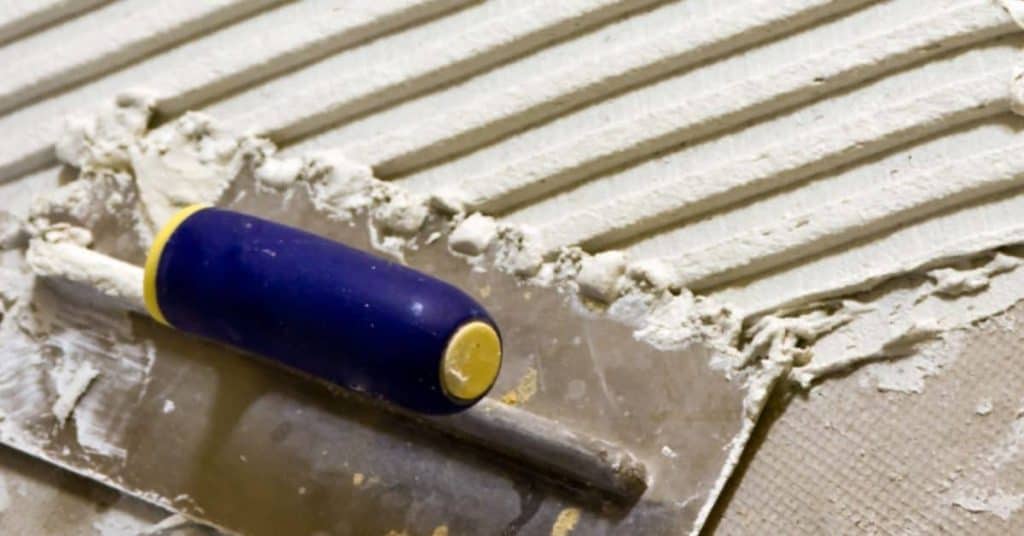
The consistency of your thinset mortar is crucial for a successful tile installation. It needs to be thick enough to hold the ridges on your trowel, but still wet out and adhere properly to the surface.
In this guide, we’ll walk you through a simple test to ensure your thinset mix is just right for tiling.
Key takeaways
- Balance workability and bonding: achieve ridge hold while evenly wetting tile backs.
- Standardize water addition and mixing time for repeatable field results.
- Use a consistent mixer speed and order: dry, add water, rest, remix.
- Document test parameters: substrate, temperature, humidity, batch, and measurement outcomes.
- Record wetting and ridge behavior with a simple pass/fail rubric.
- Avoid common mistakes: over-wet hides ridges; under-wet prevents proper bonding.
Table of Contents
- Introduction
- Key takeaways
- Why Consistency Matters for Tile Bond and Finish
- Materials and Tools Checklist (What to Buy and Why)
- Material Specs and Desired Test Parameters
- Step-by-Step Mixing Methodology for Repeatable Results
- The Consistency Test Procedure (Practical Field Test)
- Interpreting Results and Recording Data
- Common Mistakes and Troubleshooting
- Environmental and Jobsite Factors That Change Results
- Safety, Cleanup, and Storage Best Practices
- Cost, Time, and Practical Tradeoffs
- Best Practices for Project Planning and Documentation
- Next Steps: From Testing to Installation
- Conclusion
- FAQ
Why Consistency Matters for Tile Bond and Finish
Consistency in thinset is crucial for a strong, durable bond. It balances two key aspects: ridge-holding (tack) and wetting. Too much tack causes the mortar to stick to itself rather than the tile, while too much wetting leads to smearing and slippage. Achieving the right balance ensures solid initial adhesion and long-term bond integrity, regardless of whether you’re tiling ceramic or natural stone.
Optimal mix behavior varies based on your substrate’s readiness, moisture levels, and tile type. Regular checks help maintain balance: a ridge test, observing wetting or slump, and monitoring weight/flow cues indicate when to adjust water, powder, or additives. Avoid over-wetting, over-stiffness, or excessive latex use, which can damage bond and finish quality.
Ridge-Holding vs. Wet-Out Defined
Ridge-holding refers to how well thinset grips tile edges, keeping them in place during installation. Poor ridge-holding results in flattened ridges and weak bonds. Wet-out determines how well the thinset adheres to the base surface. Good wet-out prevents premature drying and ensures a strong bond.
Both aspects are vital for reliable adhesion. Insufficient ridge-holding can cause tiles to shift or fall off, while poor wet-out leads to weak bonds that may crack over time. When mixing thinset, aim for a consistency that holds its shape and sticks well without being too runny or stiff.
How Consistency Affects Different Tile Types
Porcelain and ceramic tiles require a wet-out consistency, where the paste just starts to spread under the tile. Too much water can cause slipping and loss of bond.
Natural stone needs a thicker thinset for better control but not so thick that it doesn’t spread evenly. Ensure base compaction is checked beforehand to avoid surprises later.
Large-format tiles require a ridge-holding consistency to provide a solid grip from the start. Too much water can cause sliding and cracking under their own weight.
Materials and Tools Checklist (What to Buy and Why)
To conduct reliable tile setting tests, you’ll need specific materials and tools. This checklist covers thinset types, modifiers, mixing gear, notched trowels, test boards, and safety equipment. You’ll learn about different thinset families—polymer-modified, latex-enhanced, white vs. gray—and their suitability for various goals, including ridge formation and bond integrity on common substrates.
Having the right tools, measuring gear, and personal protective equipment (PPE) ensures repeatable results and safety, saving time and reducing errors. This list also highlights must-have tools and test board preparation methods to observe bite, ridge formation, spread, and working time under realistic conditions. You’ll understand when to use additives, primers, or bonding agents, how they influence wet-out and ridge hold, and tips on storage and contamination control.
Choosing the Right Thinset Mortar
Use this checklist when selecting thinset mortar at the store or on-site to ensure you pick the right one for your tile job.
- Type of Project: Consider if you’re working with small, large format tiles, or need a fast-setting option. Check package labels and descriptions for confirmation.
- Modified vs Unmodified: Modified thinset is suitable for most jobs; unmodified is for basic interior tile work only. Look for “latex modified” on the label to ensure it meets your needs.
- Rapid-Set Thinset: Choose this if you need a quick set time, such as in cold weather or tight schedules. Check the setting time on the package for confirmation.
- Larger Tiles: Select thinset designed for large tiles to ensure strong adhesion and less cracking over time. Look for “large tile” on the label.
- Ridge-Holding Test: Ensure the thinset can hold a ridge of mortar without sagging when tilted at an angle. This confirms proper coverage and bonding strength.
- Mix Ratio: Follow the water-to-powder ratio on the package exactly to avoid weak or overly stiff mixes. Use a small container for consistent measurements.
- Dry Time: Confirm if your thinset dries in 24 hours or less, which is crucial for fast projects. Check the packaging for drying time information.
- Temperature Range: Ensure the thinset works well within your project’s temperature range to prevent issues with setting times and adhesion.
- Variety of Colors: Pick a color that contrasts with your tile grout for easy inspection of proper application thickness. This helps identify any areas needing rework.
Note: Always read the label to confirm you have the right thinset for your specific project needs.
Measuring and Mixing Tools
This checklist ensures you have the right tools for accurate measurements and consistent mixes when working with thinset mortar.
- Scales: Use to measure dry materials precisely. Confirm by weighing a known quantity of material against your scale’s reading. Skipping this can lead to inconsistent mix ratios, affecting bond strength.
- Graduated cups: For measuring liquids accurately. Check by pouring water into the cup and verifying the markings with a calibrated measuring device. Missing this step may result in incorrect moisture content in thinset.
- Mixing drill attachment: Ensures thorough mixing of materials. Test by running it for 2-3 minutes to see if it mixes evenly without splashing out. Not using can cause uneven distribution and poor adhesion.
- Margin trowel: For scraping excess thinset from containers during mixing. Confirm the blade is straight and sharp, ensuring no material waste or contamination. Neglecting this leads to wasted materials and potential mix contamination.
- Spatulas: Essential for spreading small amounts of thinset precisely. Verify flexibility and durability by pressing against hard surfaces. Skipping can result in uneven application and poor bonding.
- Test substrate samples: To ensure your mix matches the surface requirements. Check by applying a small amount to a sample piece and assessing adhesion after curing. Missing this step risks improper fit with existing materials, causing rework.
- Mixing containers: Must be clean and free of debris for accurate mixing. Confirm cleanliness before each use by visually inspecting the container. Failure to do so can lead to contamination and poor quality mixes.
- Measuring spoons: For precise small measurements in thinset recipes. Test accuracy with a known volume of water or dry material. Omitting this step may cause mix inconsistencies, affecting performance.
Note: Always measure twice and mix once to avoid costly mistakes on the job site.
Material Specs and Desired Test Parameters
To ensure consistent results, track these key specs and parameters:
- Water-to-cement ratio by weight: Aim for 0.4 to 0.5 for most jobs.
- Notch size and geometry: Use a standard notch trowel (e.g., 1/8″ or 3/16″) for consistent results.
- Substrate porosity: Measure the substrate’s moisture content to ensure optimal adhesion.
- Environmental conditions: Monitor temperature and humidity, as they affect curing and ridge formation.
- Open time and pot life: Track these to ensure your mix is workable within the given timeframe.
Use precise scales for water and powder, a standard notch trowel, and a simple rubric to rate ridge definition versus surface wet-out. This helps compare results across substrates and conditions, set reliable targets, and avoid guesswork on-site.
Standard Consistency Targets (Guidelines)
When mixing concrete, achieving the right consistency is crucial:
- Water-to-powder ratio: Aim for 0.4 to 0.5 by weight; roughly one gallon of water per 94 pounds of dry mix.
- Slump test: For general work, aim for a slump between 2 to 4 inches. For thin sections or vibration techniques, shoot for around 1 inch.
- Ridge retention: A good ridge should stay intact without crumbling or breaking apart easily.
Visual and Tactile Checkpoints
Before troweling, verify your concrete mix with these quick checks to catch issues early:
- Holds a ridge: The concrete should form a small peak when scraped. If it collapses or cracks, adjust the mix.
- Wets out: Water should appear on the surface after floating but before troweling.
- No segregation: Check for separated aggregate chunks that can weaken structural integrity and cause surface issues.
- Uniform color: The concrete should be consistent without streaks or patches of different shades.
- No air bubbles: Look for large air pockets that can weaken the slab and cause surface imperfections.
- Consistent texture: The surface should feel smooth but not slippery after floating.
- No cracks on edges: Inspect all slab edges for hairline cracks and address them immediately.
- Proper slump: The concrete should be workable but not soupy, holding its shape well without being too runny or stiff.
Step-by-Step Mixing Methodology for Repeatable Results
To achieve consistent results, begin with a repeatable target: select a specific thinset type, fix your batch size, and determine a viscosity range that yields the same ridge formation and wet-out every time. Use precise weighing protocols for powder and water, allowing clear tolerances for minor deviations. Follow this order: dry mix, then measured water, then a brief rest. Mix the slurry with a drill or whisk at a steady speed, allow it to hydrate, and remix until you achieve a smooth, peanut-butter-like consistency that wets the substrate without over-penetrating.
This approach isn’t merely about following steps; it’s about knowing what your mix should be and proving it through checks. Document environmental conditions, batch details, mixer speed, rest times, and measured viscosity for future reference. If the mix drags or pours unevenly, adjust with small water increases, reblend, and recheck promptly; maintaining a simple log and clear corrective path saves you from guesswork on real jobs.
Step-by-Step Process
The following sequence guides you through mixing thinset efficiently and safely, ensuring optimal results.
- Begin by dry-mixing the thinset powder to ensure even distribution. Then, add measured water slowly while continuing to mix at a low speed until no dry patches remain. Check consistency; if too thick or thin, adjust immediately.
- Gradually introduce half of the sand, mixing thoroughly to ensure even distribution. The mixture should appear uniform with no large chunks. If inconsistencies are present, remix or consult a professional.
- Continue adding the remaining sand while stirring continuously. Aim for a workable consistency that holds its shape but isn’t too stiff. Test by squeezing the mix; it shouldn’t crumble easily. If dry, add water slowly and stir well.
- Mix in any additives like color or accelerators now, following package instructions carefully. The final mix should be consistent with a uniform look and feel. If clumps of additive are present, remix thoroughly to avoid weak spots.
- Transfer the mixed thinset into your forms immediately after mixing is complete. Gently tap the sides to remove any air bubbles. Ensure the surface is smooth and level before setting; any unevenness can weaken the structure.
Pro tip: Always mix small batches at a time to avoid waste and ensure quality control throughout your project.
Wet Mix, Rest, Remix — Why Each Step Matters
Mixing thinset is a precise process. First, wet-mix your ingredients to achieve the correct consistency. This step is crucial as it’s where you control water content—too little results in a dry mix, while too much creates a weak slurry.
After mixing, allow the batch to rest for a few minutes. This resting period isn’t just about taking a break; it lets the thinset hydrate. Hydration is key because it helps the mix settle and become more workable without adding extra water. Plus, this pause reduces air entrapment, which can weaken your installation.
Finally, remix the batch before application. This step ensures everything’s well mixed and ready to go. Skipping this final remix may result in pockets of dry thinset or uneven consistency on your surface. So don’t skip it—your future self will thank you when that new tile job holds up for years.
Adjusting Consistency Mid-Job
If your mix is too thick, add water slowly while stirring to reach the right consistency. Be careful not to overwater; it can delay set time and weaken bond strength. If you need a thicker mix, use less water or add dry thinset carefully. Always check base compaction before adjusting to avoid uneven applications.
To adjust mid-job, take small steps. Add just a little at a time—1/4 cup of water for every 5 gallons of mixed thinset is usually enough. Stir well and apply a test batch to see if it meets your needs. If unsure, refer back to the wet mix, rest, remix process covered earlier.
Maintaining consistency means keeping an eye on weather changes too. A hot day can dry out thinset faster than expected. Keep mixes cooler and add water more frequently if needed. But remember, every adjustment risks altering set time, so stay vigilant about timing your applications right.
Installation and curing workflow aligned to mixing results: To convert the tested mix into a reliable installation, follow this practical sequence after achieving the target consistency and viscosity from the test batch.
- Substrate prep: Ensure the substrate is clean, dry, free of dust, and structurally sound. Dampen porous substrates lightly just before applying thinset, but avoid standing water.
- Back-buttering: Apply a thin, even layer of thinset to the substrate or tile back, depending on tile size and substrate type, to improve bond coverage and reduce voids.
- Layout and set timing: Dry-lay sections to confirm layout. After applying thinset, install tiles within the open time window specified by the product, typically 15–25 minutes for many modified thinsets, before the mix begins to stiffen.
- Set and align: Use a two-step press and twist technique to ensure full bed contact and avoid air pockets. Use spacers as needed and check alignment frequently.
- Grouting readiness: Allow the tile to cure per the thinset manufacturer’s guidelines before grouting. The surface should be stiff enough to hold a straight edge without indentation but not fully cured; this timing varies with temperature and mix.
- Curing conditions: Maintain a stable environment during cure—temperature roughly 50–95°F (10–35°C) and relative humidity around 40–70%. Protect from direct sun, drafts, and rapid cooling. Use curing blankets or misting as recommended by the thinset and substrate manufacturers to prevent rapid water loss and cracking.
- Post-cure care and maintenance: After the recommended cure period (often 24–72 hours for light foot traffic, longer for full cure), grout per product instructions. Seal natural stone or dense tile as required and periodically check for bond integrity during the first weeks.
Safety and cost notes: Use PPE (gloves, eye protection, and a dust mask if mixing dry powders). Ventilate work areas and keep children/pets away. By sticking to measured batches and documenting conditions, you minimize waste, reduce material costs, and shorten rework time. Regular maintenance checks after installation help catch early issues before they become costly repairs.
Pro tip: Always mix small batches at a time to avoid waste and ensure quality control throughout your project.
The Consistency Test Procedure (Practical Field Test)
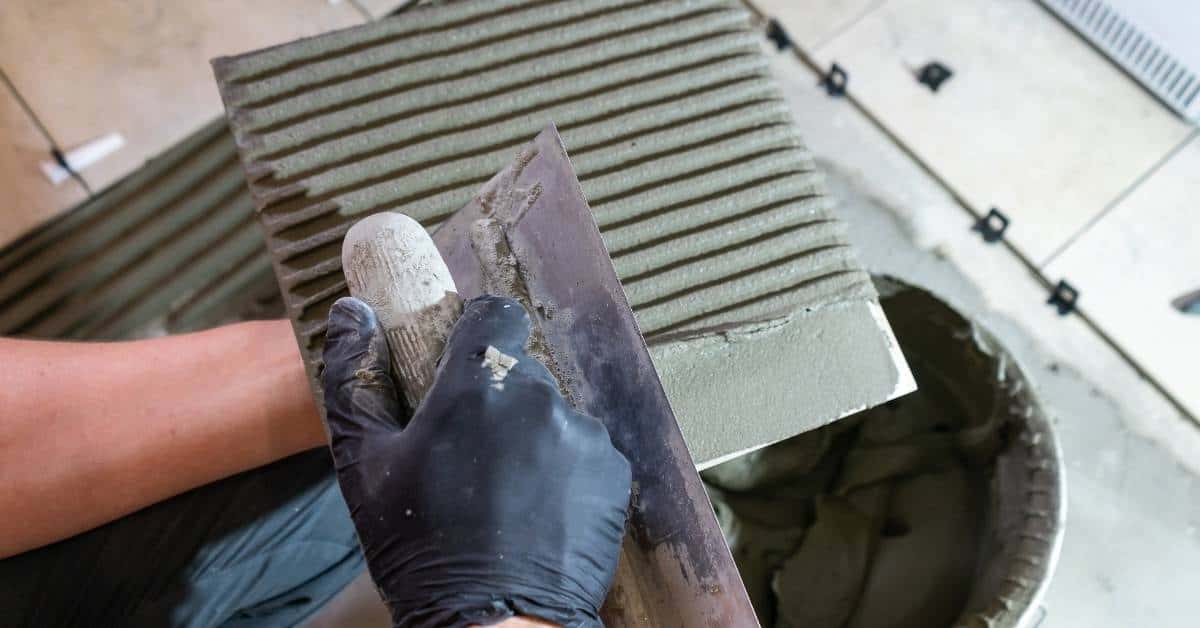
This test evaluates a thinset mix’s ability to hold trowel ridges while still wetting the substrate, using clear, repeatable steps. Gather consistent substrate prep, a suitable notch trowel, mixing tools, water source, digital timer, and a flat testing board for side-by-side comparisons.
Mix each batch to a defined consistency, apply with the same notch trowel, and time the open-wet window to compare ridge formation and full wet-out. For practical field use, create a simple Visual Field Guide: compare ridges to familiar standards (e.g., visible, sharp ridges holding shape under light pressure) and capture quick photos from two angles for every batch.
Setting Up Test Panels and Marking Variables
Lay out test panels measuring 6×6 to 12×12 inches. Check base compaction before laying concrete, photograph substrate prep, document ambient conditions, and consider marking a reference line on each panel for comparison.
Label each panel clearly with mix number and date, keep them in an area mimicking real slab conditions, and add a checklist near the panels: substrate moisture, trowel notch size, timing windows. Mark variables like water content or aggregate type directly on the panel or nearby.
Performing the Ridge Test
Mix a small batch of thinset using your project ratio and spread it across a marked test area with your chosen notch trowel. Create ridges by running the notched side over the mix in a single pass, observing their shape and consistency.
Make a light second pass to check consistency. If ridges feel too sticky or don’t move, add water; if they’re too loose, add dry mix. Record changes made for future reference.
Performing the Wet-Out (Contact) Test
Press a tile sample firmly onto the ridge, hold for 10 seconds, then lift straight up. Inspect both surfaces for full-bed contact—consistent concrete transfer. If only spots or patches appear, add more water and repeat tests until full contact is achieved.
Interpreting Results and Recording Data
To ensure reliable, repeatable tile installations, translate your on-site observations into measurable data. Key metrics include ridge height retention, tile contact percentage, slump over time, and a straightforward consistency score for field use.
Record fresh and cured states, temperature and humidity, batch IDs using simple forms with consistent intervals and techniques. This data enables batch comparison, trend spotting, and connecting metrics to adhesion, coverage, and edge ridges risks, guiding mix adjustments.
Visual Indicators of Good vs. Bad Mixes
A shiny wet film on poured concrete indicates sufficient water and proper mixing. Dry patches or clumps signal potential setting issues.
Under tiles, look for gaps. Air pockets or poor coverage can lead to water seepage and future problems. Aim for snug, gap-free surfaces.
Monitor mix slumping into ridges due to excess water or insufficient aggregate. These weak spots may cause cracking and uneven surfaces.
Creating a Simple Scoring Sheet
Develop a scoring sheet with fields for mix ratio, trowel size used, temperature, humidity, wet-out score, and visual observations from the good vs. bad mixes section.
Include a notes section for application recommendations based on observed results. Maintain consistency in format for easy comparison across projects and days. Don’t forget to check base compaction, as it significantly impacts concrete performance.

Common Mistakes and Troubleshooting
Several common errors can derail your thinset project quickly. Excess water weakens the mix, compromising ridge retention. Over-mixing can overheat and separate binders. Using the wrong trowel notch results in inconsistent bed depth. A cold or damp substrate can absorb moisture, slowing setting time. Stale or fast-setting mixes reduce open time and proper wet-out.
On-site checks include running a simple slip-test, observing for excessive dragging or quick dry-out, checking if ridges collapse under trowel pressure, and verifying the substrate is clean, dry, and within temperature range before remixing or retempering. Fixes follow this order: adjust water within recommended limits, re-temper in small batches or remix fresh, switch to the correct notch trowel, and pre-warm or cool the substrate as needed for optimal wet-out.
Fixes for Excessive Slump or Poor Ridge Holding
If your mix is too soupy and doesn’t hold its shape, you’re dealing with excessive slump. First, check your water ratio. Too much water weakens the mix. If that’s not the issue, consider adjusting thinset or using a different type of sand with larger particles.
Another option is to add approved concrete admixtures designed to firm up the mix without changing the water ratio. However, use these cautiously and seek professional advice before adding anything new. Poor ridge holding may indicate a weak base or insufficient curing time. Ensure the ground under your slab is well-compacted, and allow proper setting time before cutting or shaping.
Fixes for Poor Wet-Out or Low Transfer
Poor wet-out or low transfer often stems from issues with the base. Check base compaction. A weak substrate can lead to inconsistent adhesion and bonding problems. If your base isn’t up to par, prime it properly before laying down new material.
For tricky surfaces where standard thinsets fall short, consider switching to a modified thinset that offers better workability and adhesion. Additionally, don’t hesitate to increase trowel size if your current one isn’t pushing enough material. Back-buttering can also help ensure strong contact between layers by applying a thick layer of adhesive behind tiles or stones before setting them in place.
Environmental and Jobsite Factors That Change Results
Several factors can influence the setting, performance, and ridge formation of thinset mortar. Monitor and adjust for these conditions to achieve consistent results:
- Temperature: Cold (below 50°F/10°C) or hot (above 90°F/32°C) weather can affect setting time and workability. Compensate by heating the mix, pre-wetting the substrate, or delaying application.
- Humidity and Dew Point: High humidity and dew point reduce pot life and slow curing. Mist the substrate, cover the site, and adjust water content within manufacturer guidelines to maintain optimal consistency.
- Substrate Porosity and Absorption: Different substrates require varying amounts of water for proper wet-out and ridge formation. Use primers or bonding agents, perform moisture tests, and conduct small field trials to determine if rework is necessary.
Cold, Heat, and Humidity Adjustments
In cold weather, heat the mix water to 40°F (4°C) to maintain workability. After placement, cover the pour with insulating blankets to retain heat.
On hot days, add more water or use a retarder to extend setting time. Be mindful of humidity levels and adjust mix water content accordingly; high humidity may require less water.
In humid conditions, monitor for flash sets and maintain a slightly wetter mix within acceptable limits to prevent cracking.
Substrate Preparation and Primers
Proper substrate preparation is crucial for successful thinset application. Seal highly porous boards to prevent water absorption and weak spots in the new slab. Skipping this step risks poor bonding and an uneven surface.
For non-porous surfaces like metal or plastic forms, apply a primer before pouring concrete. A good primer promotes wet-out, ensuring proper adhesion without gaps or ridges that could compromise the slab’s integrity.
Remember, substrate preparation and priming are as important as adjusting for weather conditions. They significantly impact the final outcome and longevity of your installation.
Safety, Cleanup, and Storage Best Practices
Prioritize safety and efficiency in your thinset mixing project with proper personal protective equipment (PPE) and smart handling practices. Wear a dust mask or respirator, gloves, eye protection, and long sleeves to safeguard against irritation, chemical contact, and heat.
Before mixing, establish a safe workspace: ensure good ventilation, prepare the area, manage moisture, and have spill containment ready to minimize dust and prevent trips. For cleanup, follow this routine: promptly wash tools and residues, rinse skin, apply a mild cleanser, dry hands, and reapply barrier lotion. Store leftover thinset in airtight containers, label clearly with date and contents, keep it cool and dry, and monitor pot life to prevent contamination or unsafe reuse.
Personal Protective Equipment (PPE) and Ventilation
Protect your skin and lungs by wearing gloves, eye protection, and a dust mask when handling concrete. These are essential safety measures, not mere formalities.
Maintain adequate ventilation in the work area. Open windows or use fans if necessary to prevent harmful fumes from accumulating, especially in enclosed spaces.
Tool Cleaning and Disposing Leftover Mortar
Clean tools promptly after laying thinset to maintain their condition. Remove excess mortar while it’s fresh using a wire brush or scraper; avoid waiting until it sets hard for easier cleanup.
Dispose of leftover mortar responsibly, as it is considered hazardous waste due to its cement content. Consult local regulations and dispose of it safely at recycling centers or construction waste facilities. If storing temporarily, keep it covered and dry until proper disposal.
Cost, Time, and Practical Tradeoffs
When comparing unmodified and modified thinsets, costs can vary significantly. Additives and primers further impact performance and cost per square foot. Labor considerations include mix firmness versus wetter blends: firmer mixes hold ridges better but take longer to set up and trowel, while wetter mixes go down faster yet may require more passes and cleanup.
Factor in pot-life, cure time, and traffic restrictions for a practical tradeoff. Firmer mixes might offer better adhesion and durability, but wetter mixes can speed up the schedule. However, improper application could lead to porosity and slumping, affecting bids and waste estimates. As a DIY homeowner, consider unit costs, estimated labor hours, material waste, and regional price swings for each mix approach.
When to Choose a More Expensive Modified Thinset
For large format tiles, heavy stone, or exterior surfaces, the extra cost of modified thinset is justified. These situations demand better wet-out performance and ridge handling. Check base compaction before laying any tile; if there are settling issues, opt for modified thinset to prevent future problems.
In exterior applications where moisture is a constant threat, modified thinset’s water resistance can be crucial. While it costs more upfront, it saves you from costly repairs down the line when cheaper alternatives fail.
Estimating Material Waste and Extra Labor
Choosing the right materials can save you time, money, and hassle. Avoid these common mistakes that lead to wasted material or extra labor:
- Type N mortar: Used for non-load-bearing walls; opt for Type S if more durability is needed. Spend a bit more for quality bags to avoid cracking over time.
- Modified thinset: Ideal for wet areas like showers or kitchens; ensure it’s waterproof and acid-resistant. Regular thinset deteriorates quickly with water exposure.
- Concrete mix: Choose high-strength concrete (4000 psi) for driveways or patios to prevent cracking and wear. Mix only what you need to avoid waste.
- Sand: Use clean, coarse sand; avoid beach or river sand due to potential salt and organic matter contamination.
- Grout: Select epoxy-based grout for high-traffic areas to resist stains better. Cheaper options wear out faster and look unsightly.
- Masonry adhesive: Use this for attaching stone veneers; match the product to the substrate material. Avoid using regular silicone or caulk.
- Rebar: Essential for reinforcing concrete in structural applications; use rebar of appropriate diameter based on load requirements.
Pro tip: Always buy materials from a reputable supplier and store them properly to avoid moisture damage or contamination. Mix only what you need for the day to prevent waste.
Best Practices for Project Planning and Documentation
Effective project planning and documentation involve establishing a structured testing schedule, clear approval processes, and standardized records for each mix tested. Plan initial tests, mid-project checks, and final validations, documenting who approves each mix and the criteria used (workability, open time, cure performance). Develop templates for material ratios, batch size, water content, ambient conditions, substrate preparation notes, and ridge-wetting observations. Maintain versioned master specifications and store approvals centrally to prevent overwrites.
This approach benefits DIY projects by reducing guesswork, aligning installers with project requirements, and instilling client confidence. Clear communication—through one-pagers, carryover notes, and simple decision trees for alternate mixes—accelerates decisions and minimizes back-and-forth. In case of failed test mixes, documented adjustment steps and traceable records of deviations facilitate future planning.
Creating a Job-Specific Thinset Spec Sheet
A comprehensive thinset spec sheet serves as your project’s reference guide, detailing approved mix ratios (obtained from suppliers or trusted sources), trowel sizes for each application, and pot life limits. Note storage conditions to maintain thinset quality—keep temperatures within manufacturer-recommended ranges—and include contingency notes for short supply scenarios.
Training Crew with Quick Onsite Tests
Before commencing tile installation, ensure your crew understands the required thinset consistency and mixing process. A quick 15-minute test helps prevent on-site mistakes. Have each installer mix a batch according to the spec sheet and compare their results against project standards. Demonstrate desired thinset consistency—stiff or fluid—and conduct a quick test pour to assess understanding. Correct any discrepancies immediately to maintain a professional finish.
This training isn’t limited to mixing; it also covers proper tile laying based on thinset consistency. Ensure everyone knows how to spread the thinset evenly and lay tiles without gaps or lippage issues. Quick tests keep your crew proficient and ensure high-quality results.
Next Steps: From Testing to Installation
After successful consistency tests, translate your findings into practical, reproducible specifications for any job site. Define target slump, water-cement ratio, aggregate size, and admixtures, along with performance criteria for ridge definition and wet-out. Establish a clear documentation workflow including mix IDs, environmental notes, batch logs, test results, archiving system, and installation SOPs covering substrate prep, mixing timing, trowel technique, and crew training.
For DIY pros, this standardization ensures consistent results, reduces guesswork, and builds trust in the final finish. Pilot jobs and on-site verifications refine specs and prevent material waste on full jobs. Skipping this step may lead to inconsistent results, missed performance criteria, and weak bonds or ragged ridges.
Integrating Test Results into Quality Control
Leverage test results by updating your tile crew’s quality control checklist. Ensure base compaction, moisture levels, and surface flatness are verified before laying any tiles. Address any testing issues promptly to avoid future problems like cracking or shifting.
Implement strict sign-off procedures with a team member reviewing each test log before installation begins. This early intervention helps prevent costly mistakes down the line.
When to Consult Manufacturer Technical Support
If you encounter unusual issues during thinset application, such as unusual shrinkage cracks, consult the manufacturer’s technical support. Reach out if conditions are extreme or test results deviate significantly from expectations. They can help diagnose material or on-site issues like wrong base compaction.
Remember, manufacturers want to ensure a successful job. Don’t hesitate to seek their assistance early when problems arise.
Conclusion
Achieving the correct mix consistency is crucial for a strong bond, smooth finish, and job site safety. Begin with a small area to confirm that your mix retains ridge hold while still wetting out. Only scale up once you’re confident in the repeatability of your mix’s consistency and workability.
Before proceeding, perform these checks: verify the mix adheres to specifications, add water incrementally and stir until no dry spots remain, allow the mix to slake if necessary and remix for uniform consistency, conduct a ridge-wet field test on a sample patch, monitor cure time and workability, record relevant data and conditions, and maintain cleanliness of tools, pots, and workspace while protecting ridges and edges.
Common pitfalls to avoid include mixing at extreme temperatures, over- or under-mixing which compromises ridge hold, skipping practical field tests or weather checks. Prioritize safety by wearing gloves and eye protection, ensuring adequate ventilation, and never applying material if you suspect contaminated or expired product. If unsure about material suitability or persistent issues, pause and reassess before continuing.
If after thorough testing you’re still uncertain, don’t proceed beyond your comfort zone—consult a professional to verify material compatibility or install in critical areas. Maintain rigorous testing, document all steps, and you’ll transition from tests to installations with confidence and fewer unexpected issues.
FAQ
What is the right thinset consistency for holding ridges but still wetting out?
You want it stiff enough to hold a ridge when you pull the notch, but not so stiff it won’t wet the tile edges. It should lay in a nice, dimply surface with only a light skin on top. If it drags or looks dry, it’s too thick.
How do I test the mix with a notched trowel?
Spread a small bed on a clean, dry surface and pull the trowel flat. A good mix will leave ridges that still flatten out as you press with the tile. If the ridges stay sharp or pull off, you’ve mixed too thin or too dry for some brands.
Why does it need to wet out, not just stay on top?
Wet out means the thinset grabs the back of the tile and fills the voids. If it stays dry and lumpy, you get hollow spots and weak bonding. Always aim for a smooth, slightly glossy look when you pull the tile away.
How long should I wait before grouting after setting?
Check the manufacturer’s guidance, but don’t rush. Most thinsets cure in about 24 hours for foot traffic and longer for heavy loads. Humidity and temperature can slow it down, so give it extra time if the room is cool or damp.