
Introduction
Installing mosaic tile means placing small tiles on a surface in predefined sheet patterns, then securing them with adhesive and preparing for grout. Work with the sheets carefully, cut as needed, and keep edges intact to avoid chipping. Align sheets on the substrate by checking straight lines, matching edges, and avoiding gaps that misalign later.
Grout control comes from working in small sections, keeping joints filled evenly, and cleaning as you go. Adhesive application methods vary, so follow the product label and use the right tool for spreading and pressing the tiles to avoid hollow spots. When cutting mosaic tiles, plan your cuts, support the sheet, and test-fit before committing to a full layout, checking that you’re staying within the sheet’s pattern.
Key takeaways
- Inspect sheet mesh for tears and alignment before setting tile edges; plan layout first.
- Dry-fit sheets on a flat surface to anticipate lippage and bond coverage.
- Use the correct notch size and trowel method for adhesive application.
- Back-butter mosaic sheets if recommended to improve grout control and bonding.
- Check for consistent grout joints with minimal lippage during setting.
- Protect fresh grout from early drying and clean excess grout promptly.
- Wear gloves and eye protection during cutting and grout cleanup.
Table of Contents
- Introduction
- Key takeaways
- Project Planning, Scope and Cost Estimation
- Tools, Materials Checklist and Material Specifications
- Substrate Preparation and Layout Strategy
- Sheet Handling, Bonding Checks and Quality Inspection
- Cutting Mosaic Tiles and Finishing Cut Edges
- Alignment, Seam Blending and Lippage Control
- Grout Selection, Application, and Grout Control Techniques
- Final Cleaning, Sealing, Maintenance and Troubleshooting
- Conclusion
- FAQ
Project Planning, Scope and Cost Estimation
Start by defining the project scope and objectives. Identify exact mosaic sheet sizes, patterns, and the rooms involved. Set clear finish expectations to guide decisions on layout and sequencing. Check with the manufacturer or product data sheet for any specific requirements. Look at your overall timeline and how materials will move through the jobsite to avoid rework.
Assess site constraints early, including space access, moisture zones, substrate condition, and ventilation. Consider how nearby trades will impact workflow and sequencing. Map lead times for tile, mortar, grout, and edge profiles, and build in a contingency for defects or delays. Break out labor tasks and estimate man-hours, possible overtime, and any specialty trades. Note required permits, inspections, and moisture testing where relevant, and assign responsible parties. Create a phased schedule with milestones and buffers to keep the project on track while coordinating waterproofing, electrical, and cabinet work.
Measuring and ordering tile quantities
First, measure your space. For mosaics, you’ll need length and width in inches.
Use the manufacturer’s sheet coverage. It’s usually in square feet or square meters. Divide your total area by this number to find out how many sheets you need.
Add 10-15% for waste. Cuts, breaks, and mistakes happen. Plus, you might need extra for pattern repeats.
Order matching dye-lots. Mosaics can vary in color from batch to batch. Order enough for the whole job at once to avoid running short mid-project.
Cost components and quotes
Tile’s the big one, but don’t forget setting materials – mortar, grout, sealant. Waterproofing’s crucial in wet areas.
Tools can add up too. You might need to rent or buy. Labor’s usually priced per square foot or hour.
Get multiple quotes. Prices vary. Make sure you’re comparing apples to apples – same materials, labor included?
Ask for a written scope. It protects both you and the installer. Know exactly what you’re getting before you sign off.
Scheduling, permits and site prep coordination
Check local codes. Some areas require waterproofing or specific materials in wet rooms.
Schedule inspections. You’ll need them at various stages – before tiling, after waterproofing, etc.
Coordinate deliveries. Tiles and materials should arrive just before they’re needed. Not too early, not too late.
Prepare the site. Remove old tile, level the surface. Make sure it’s clean, dry, and ready for tiling.
Tools, Materials Checklist and Material Specifications
Gather core tools and safety gear in a logical order to avoid backtracking on the job. Include trowels, notched trowel, grout float, spacers, tile cutter or nippers, level, straightedge, utility knife, mixing bucket, drill with mixer, sponge, and clean cloths. Add PPE and basic jobsite safety considerations you can rely on daily. Verify the latest product labels and data sheets for each item you buy.
Make a thorough materials list with mortars and adhesives suitable for mosaic sheets and substrates. Include both cementitious and epoxy grout options, sealers, cleaners, edge profiles, membranes or primers, and spacers. Note storage and shelf-life tips to prevent premature curing or damage. Check compatibility across mortars, grouts, sealers, and edge profiles for different mosaic types and substrates, and remember movement joints. Use the manufacturer’s data sheets to confirm warranty and performance criteria before purchasing.
Essential tools and alternatives
Before you start your concrete project, use this checklist to ensure you have the right tools. This will help prevent costly mistakes and make your job easier.
- Wet Saw or Diamond Blade: Check blade condition; replace if worn. Test saw by making a cut on scrap material.
- Mosaic Cutters (wet or dry): Ensure blades are sharp and secure. Test by cutting a small piece of tile.
- Trowels (straight edge, square edge, and float): Inspect for bends or damage. Check trowel size; common sizes are 1/4″, 3/8″, and 1/2″.
- Leveling Tools (laser level, water level, or 2′ level): Calibrate and test before use.
- Spacers: Ensure they are the correct size for your tile. Check if they’re durable enough to withstand pressure.
- Grout Float: Inspect for damage or wear. Test by spreading grout on a flat surface.
- Tape Measure and Chalk Line: Calibrate measure; test chalk line by snapping a line on scrap paper.
- Safety Gear (gloves, safety glasses, ear protection): Check condition of gear. Ensure proper fit.
Quick rule: Always check your tools before starting work to avoid delays and rework.
Mortars, adhesives, mesh and grout types
Use this checklist to ensure you’ve got the right materials for your tiling job. Check each item before starting work.
- Thin-set mortar: Choose between polymer-modified and unmodified based on tile material and location.
– Check: Read product label for compatibility with your tile type (ceramic, stone, etc.).
– Confirm: Follow manufacturer’s instructions for mixing and application.
– Gotcha: Using the wrong thin-set can cause tiles to debond or crack. - Adhesive: Select a suitable adhesive for your tile size and weight.
– Check: Consult tile manufacturer’s recommendations for adhesive type.
– Confirm: Ensure adhesive is within its usable life once mixed. - Mesh-backed sheets: Use for large format tiles or areas with high foot traffic.
– Check: Measure tile size and consider installation area’s wear and tear.
– Confirm: Ensure mesh backing is compatible with your chosen adhesive. - Grout type: Choose between cement-based or epoxy grout based on tile material and location.
– Check: Consider tile material (porous vs non-porous) and installation area (wet vs dry).
– Confirm: Read product label for compatibility with your chosen tiles. - Grout color: Select a grout color that complements your tile.
– Check: Consider the overall aesthetic and lighting of the installation area.
– Confirm: Ensure grout color is within available options for chosen grout type. - Grout sealant: Choose a suitable sealant for your grout and tile combination.
– Check: Consider tile material and installation area’s moisture levels.
– Confirm: Ensure sealant is compatible with chosen grout type. - Primer: Use a primer to improve adhesion and prevent mold growth (for wet areas).
– Check: Consider installation area’s exposure to moisture.
– Confirm: Ensure primer is compatible with chosen adhesive and substrate.
Quick rule: Always follow manufacturer’s instructions for mixing, application, and cure times. Skipping this can lead to poor performance or failure of your tiling job.
Material specs and standards to verify
Before you start mixing or laying any concrete, use this checklist to ensure your materials meet the required specifications. This will help prevent costly mistakes and rework.
- Cement type: Check it matches your project’s requirements (e.g., Type I for general use, Type II for sulfate resistance).
- Water-cement ratio: Verify it falls within the recommended range (typically 0.45 to 0.6) for your mix design.
- Aggregates size and type: Ensure they match your mix design (e.g., coarse, fine, or a combination).
- Admixtures: Check each one is suitable for your project’s needs (e.g., air-entraining, water-reducing) and follow manufacturer instructions.
- Mesh type and size: Confirm it aligns with your reinforcement plan and local building codes.
- Grout type: Make sure it’s compatible with your concrete mix and suitable for the intended use (e.g., non-shrinking, rapid-hardening).
- Slip classification: Verify the concrete’s slip resistance is appropriate for the surface (check manufacturer technical data or local standards).
- Water absorption: Ensure it falls within acceptable ranges to prevent issues like efflorescence.
Quick rule: Always check and double-check your materials before starting work. A few minutes spent verifying specs can save hours of rework later on.
Substrate Preparation and Layout Strategy
Define substrate requirements and flatness tolerances, and explain how to measure with a straightedge. Describe how to plane or fill low spots and test moisture or porosity for the tile you chose. Align these checks with your substrate’s expected movement to prevent future failures. Refer to the tile and substrate specs on the product label or data sheet for precise guidance.
Decide priming, waterproofing, or uncoupling membranes based on substrate condition, tile location, and movement considerations. Note any specific installation notes from the membrane or primer manufacturer. Plan your layout for pattern alignment, center points, reference lines, and sheet handling to minimize visible cuts. Include guidelines for joint spacing, symmetry, and edge conditions near doors or niches. Address movement and deflection before setting tile to avoid lippage and cracking, and provide step-by-step layout checks you can perform on site.
Surface flatness, priming and membranes
The substrate must be clean, dry, and structurally sound. Use a straightedge to check for high or low spots. Aim for no more than 1/8″ variation over 6 feet.
For porous surfaces like concrete, apply a primer like Laticrete 254 to seal it before tiling. For showers and floors with movement concerns, consider using waterproofing membranes or uncoupling systems like Schluter-KERDI.
Moisture/porosity testing is crucial for mosaic tiles. Consult your tile supplier for specific requirements.
Establishing reference lines and focal points
Start by finding the center point of your wall or floor. Snap a chalk line from this point to create a datum line.
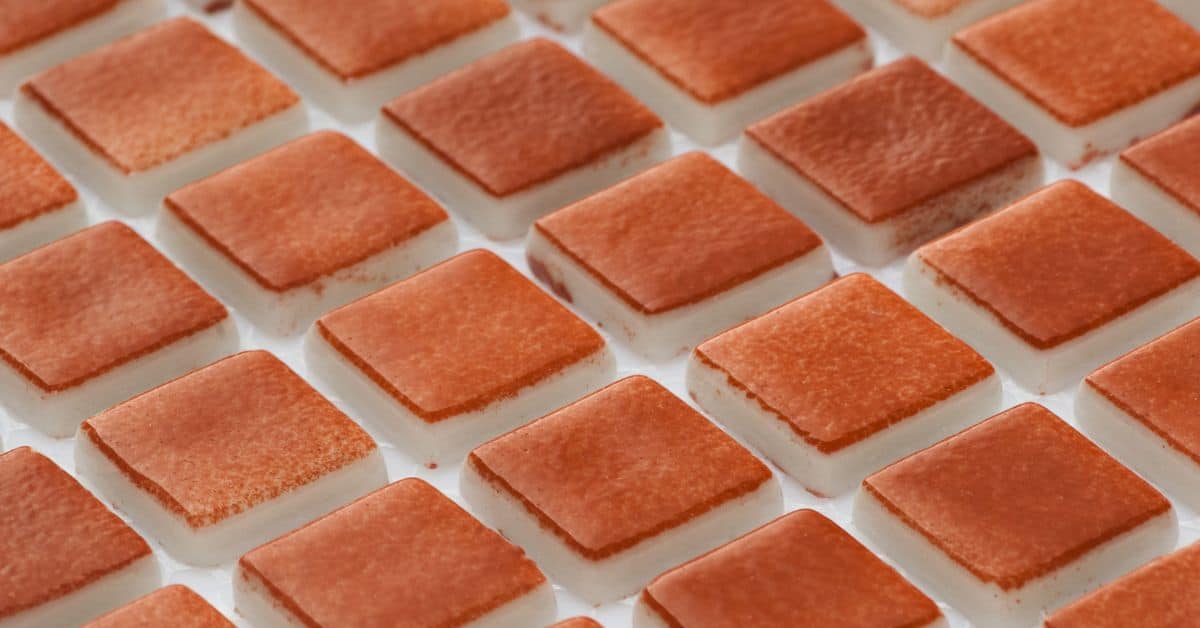
Use this line to locate seams, symmetry points, and any special tiles (like focal points). Most mosaic sheets are 12″ x 12″. Plan for full sheets where possible to minimize cuts.
Consider using offsets if your layout doesn’t align perfectly with the room’s dimensions. This can help hide visible cuts near edges or corners.
Dry layout and mockups
Before spreading adhesive, dry-fit your mosaic sheets to ensure pattern alignment and minimize cuts. Start from your established reference lines.
Create a mockup section on the floor or wall to visualize the final look. This helps catch any layout issues before committing to adhesive.
Photograph approved layouts for future reference. This can help resolve disputes if there are questions about the original plan.
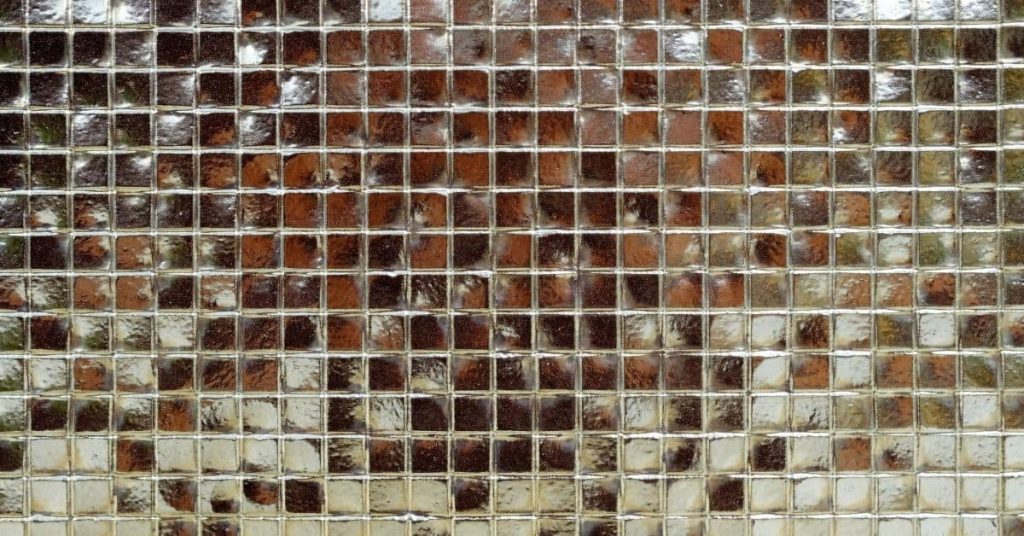
Sheet Handling, Bonding Checks and Quality Inspection
Perform a receiving inspection to check mesh integrity, chip damage, and pattern consistency. Create a standardized unloading and labeling routine to separate panels by color and finish variance, preventing field failures later. Document any obvious defects and set aside questionable sheets for replacement decisions. Refer to manufacturer guidance if damage scoring affects warranty coverage.
Store and acclimate sheets in a protected area with controlled conditions. Elevate storage to avoid moisture damage and edge chipping. Rotate stock to keep sheets within a uniform acclimation window and observe stacking limits. Establish a clear pass/fail threshold for sheet flatness and adhesion before you set anything down, and keep a simple on-site record of deviations for traceability.
Receiving, Storage and Acclimation Best Practices
Before unloading mosaic tile sheets, follow this checklist to ensure they’re in good condition and ready for installation.
- Inspect cartons: Check for damage during transit. Any punctures or tears could let moisture in, damaging tiles.
- Keep flat: Stack sheets carefully to prevent edge chipping and maintain flatness.
- Dry storage: Avoid moisture to prevent tile delamination and edge damage.
- Elevated storage: Keep sheets off the ground to protect from moisture and dirt.
- Controlled temperature: Store in a consistent temperature to avoid thermal shock during installation.
- Humidity control: Maintain a steady humidity level to prevent tiles from absorbing or losing too much water.
- Rotate sheets: Regularly move inner sheets to the outside to ensure uniform acclimation.
- Stacking limits: Don’t stack more than 10-12 sheets high to maintain flatness.
- Racking method: Use racks or pallets that support the entire sheet surface, not just the edges.
Quick rule: Always prioritize keeping mosaic tiles flat, dry, and at a consistent temperature and humidity to prevent damage.
Mesh/Adhesion and Simple Pull Checks
Before installing, perform these quick checks to ensure mosaic sheets are well-adhered and ready for setting.
- Visual mesh check: Inspect the mesh backing for any tears or weak spots. A damaged mesh can’t hold tiles securely.
- Pull test (mesh): Gently pull on the mesh to ensure it’s firmly attached. Any movement indicates a weak bond.
- Pull test (tiles): Try lifting individual tiles. If any move, they’re not properly adhered and should be rejected or reworked.
- Alignment check: Ensure chips are evenly spaced and aligned within the mesh. Misaligned tiles can cause grout issues later.
- Delamination test: Press on tiles firmly but gently. If they feel loose, they may be delaminating from the mesh.
Quick rule: Always perform these simple checks before setting to avoid field failures due to weak adhesion or alignment issues.
Visual Checkpoints Checklist
Before installation, use this visual checklist to ensure mosaic sheets are consistent and ready for setting.
- Color/dye lot: Compare sheets side by side. Significant color variations could indicate different dye lots or batches.
- Pattern repeat: Ensure the pattern repeats correctly from sheet to sheet. An off-pattern can ruin the final look.
- Edge squareness: Check all four edges are square and straight. Crooked edges cause installation issues.
- Lippage potential: Look for tiles that stick out more than others. These can cause lippage, making grouting difficult.
- Sheet-to-sheet alignment: Align sheets edge to edge to ensure a seamless look once installed.
Quick rule: Always perform these visual checks before setting to avoid costly field failures and rework.
Cutting Mosaic Tiles and Finishing Cut Edges
Identify mosaic types you’re cutting, from small-format sheets to larger mosaics, and note material specifics like glass or ceramic. Tailor cut methods and blade choices accordingly, keeping the risk of breakage in mind. Plan your approach so you can make straight, clean cuts with minimal waste. When in doubt, verify tool compatibility and blade type with the tile or blade manufacturer’s instructions.
Cover cutting methods such as scoring and snapping, wet saws with diamond blades, and specialty tools for delicate sheets. Use each method at the appropriate time to protect sheet integrity and achieve accurate angles. Detail edge-finishing options like burnishing, polishing, sanding, or beveling, and choose protective edging profiles where needed. Prioritize safety and waste control by using dust management and PPE, and consider special handling for fragile or non-porous tiles to ensure clean, consistent cut edges and seamless grout lines.
Cutting methods by tile material and size
The method you choose to cut your mosaic tiles depends on the material, size, and type of tile. Here are some options:
- Small-format sheets (glass, ceramic): Use mosaic snips/clippers or score-and-snap method. Look for snips with sharp blades and a comfortable grip. To score, use a glass cutter or tile scorer, then snap along the line.
- Larger mosaics (ceramic, metal): Use a wet saw with diamond blade. Opt for a saw with adjustable speed control and a good quality diamond blade. Cut at medium speed to avoid cracking.
- Stone or porcelain mosaics: Use a diamond wheel cutter. Choose one with a high diamond concentration and a stable base. Cut slowly for clean edges.
- Avoid: Using the wrong tool can cause cracking, chipping, or weak bonds. Always use the right tool for the job.
Deburring and edge smoothing
After cutting, mosaic tiles often have sharp edges that need smoothing to prevent injury and ensure a smooth installation. Here’s how:
Use carbide paper, starting with coarse grit (60-80) for quick removal of sharp edges, then switch to fine grit (120-220) for a smooth finish.
Alternatively, use white stone or fine diamond pads. These are gentler on the tile surface and can achieve a high polish. Start with medium grit, then progress to finer grits.
Test edges for smoothness before installation. Any rough spots can cause lippage or grout issues.
Terminations, trim and transitions
Exposed edges of mosaic tiles need finishing to prevent chipping and provide a clean look. Here are some options:
Use metal or ceramic profiles for a sleek, finished look. These come in various sizes and colors to match your tile.
For rounded edges, use bullnose tiles. These have one or more rounded corners and can be used at the end of runs or around obstacles.
At plane changes, use color-matched silicone. This provides a flexible seal and can be painted to match your wall color. Always use a high-quality, mold-resistant silicone.
Alignment, Seam Blending and Lippage Control
Set alignment goals for straight edges, consistent gaps, and pattern repeats to minimize seams. Plan how each sheet will sit in relation to the reference lines so the overall pattern reads correctly. Use a straightedge or laser level to verify alignment during installation and adjust as needed. If you’re unsure about pattern repeats, double-check against the layout drawings or data sheets from the manufacturer.
Blend seams by staggering joints between sheets and offsetting partial sheets to keep transitions smooth. Plan joint placement to follow the tile pattern for cohesion and easier maintenance. Use leveling systems and proper adhesive coverage to control lippage, and sequence cuts to keep all tiles flush. Establish a sheet-by-sheet workflow with regular checks, and be prepared to adjust substrate or adhesive if misalignment shows up. Finish with on-site checks for straight edges and consistent grout lines to reinforce the pattern.
Hiding seams and maintaining pattern continuity
When installing mosaic tiles, it’s crucial to minimize visible seams for a cohesive look. Here are some tactics:
Stagger sheets: Start each new row or column with a different tile to break up the pattern and hide seams.
Align grout joints: Plan your joint placement so they follow the tile pattern. This helps maintain visual continuity across the surface.
Partial sheets: If you need to use partial sheets at edges, stagger them too. Start with a full row or column, then offset subsequent rows or columns by one tile to hide cut edges and seams.
Tile leveling systems and back-buttering
Maintaining a consistent plane is key for a successful mosaic installation. Here’s how:
Clip-and-wedge/strap systems: Use these to keep tiles level as the adhesive cures. Apply them along reference lines, spacing evenly.
Spacers: For larger mosaics, use spacers to maintain consistent grout joints and prevent lippage.
Back-buttering: For thicker mosaics, apply a thin layer of adhesive directly onto the back of the tile before setting it. This ensures full bed adhesion and helps prevent hollow spots.
Working around penetrations and plane changes
Fitting mosaics around obstacles requires careful planning:
Outlets & drains: Measure and mark the location of these features on your layout. Cut tiles accordingly, using a template if necessary to maintain alignment.
Plane changes: For steps or other changes in plane, use a level to ensure each section is properly aligned with the next. Plan movement joints at these transitions to accommodate substrate movement.
Use spacers and back-buttering as needed to maintain consistency around penetrations and plane changes.
Grout Selection, Application, and Grout Control Techniques
Choose grout type and color to complement the mosaic pattern, considering stain resistance and maintenance. Distinguish between sanded, unsanded, epoxy, and cementitious options, and verify suitability for your tile and location. Use the product data sheet to confirm compatibility with the tiles and substrate you’re working with. Avoid making color decisions based on appearance alone without checking the manufacturer’s guidance.
determine appropriate joint sizes for small-format mosaics, including considerations for movement joints and substrate. Provide a step-by-step approach for mixing, slaking, and application to ensure full grout coverage and color consistency. Address haze prevention, staining avoidance, and crack control by following cure timing, misting, sealing, and cleaning recommendations from the product data sheet. Include window or glass surface care and timing guidance to protect adjacent surfaces during cure.
Choosing Grout Type and Color Strategy
When it comes to mosaics, you’ve got two main grout types to choose from: cement-based and epoxy. Both have their uses, so let’s keep it simple.
Cement-based grout is your standard, budget-friendly option. It’s great for most mosaic jobs, but it ain’t the best choice for areas that see heavy foot traffic or get wet a lot. Why? ‘Cause it can crack and stain over time. So, check where you’re laying your mosaic and choose accordingly.
Now, let’s talk color. You’ve got two strategies here: highlight or subdue. If you want your pattern to pop, go for a contrasting color. But if you want a more subtle look, match the grout to your tiles. Just remember, light colors show dirt easier, so keep that in mind.
Lastly, joint width. Narrower joints (about 1/8″) can make your pattern stand out more. Wider joints (up to 1/4″) can help hide imperfections and give a more rustic look. So, pick what suits your mosaic best.
Grouting techniques and cleanup timing
When grouting, work in small areas to avoid the mix drying out. Start from the furthest corner and move towards the exit.
Use a rubber float for spreading the grout evenly. Hold it at a 45-degree angle to the surface. Work diagonally across the joints, then straighten up the joints with the float’s edge.
After applying grout, let it set for about 15-30 minutes before washing off any excess. Check the product label or manufacturer instructions for exact timing. Use a damp sponge to wipe away haze and clean the surface gently.
If you’re using large format tiles (24″ x 48″ or bigger), consider using a grout release product or haze remover to prevent grout from sticking to the tile surface. Apply it according to the manufacturer’s instructions before starting your work.
Preventing stain, efflorescence and shrinkage cracks
First off, don’t skimp on pre-sealing. If your tiles are porous, seal them before grouting. It’s a bit more work but saves headaches later.
Now, water ratio. Too much and you’ve got a soupy mess that won’t set right. Too little and it’s crumbly. Check your grout mix instructions, but aim for a consistency like peanut butter. Not runny, not dry.
Efflorescence happens when minerals in the concrete leach out. To prevent this, ensure your base is well-compacted. No air pockets. Also, keep that slab clean and free of contaminants before you lay your tiles.
Shrinkage cracks? That’s usually from not curing right. Follow those cure times on the grout bag like they’re gospel. Keep it damp for as long as they say. Don’t rush it. And if you’re in a hot, dry climate, consider using a retarder to slow down that initial set.
Final Cleaning, Sealing, Maintenance and Troubleshooting
Outline a realistic post-install cleaning schedule, starting with immediate cleanup and extending through the curing window and ongoing maintenance. Recommend cleaners suitable for grout, porcelain, ceramic, and glass tiles, and note any surfaces that require special care. Use the product label or manufacturer instructions to guide sealing and routine maintenance. If you’re unsure, verify recommendations on the data sheet before proceeding.
Provide sealing guidance tailored to grout and any porous tiles, including penetrating vs. topical sealers, timing, and reapplication frequency. List routine maintenance tips to prevent issues like staining or moisture intrusion, and document common problems with quick DIY fixes. Include a simple decision tree for DIY repairs versus professional help in cases of substrate movement, extensive grout loss, or structural concerns. End with a quick on-site checklist to guide safety, disruption minimization, and warranty considerations.
Initial cleaning and safe maintenance products
After grouting, let the mosaic tiles cure for 24 to 72 hours. Then, gently clean with a damp sponge or soft-bristle brush using a mild cleaner like dish soap diluted in water.
Avoid harsh chemicals that can damage grout or tiles. For routine cleaning, use warm water and a mild detergent once every week to keep your mosaic looking fresh.
For glass or metal accents, use specialized cleaners to prevent tarnishing or scratching. Always spot-check new cleaners on a small area first to ensure they don’t cause discoloration.
Sealing schedules and methods
After grout has fully cured (around 72 hours), apply a penetrating sealer to protect porous tiles and grout. This helps prevent moisture absorption and staining.
For high-traffic areas or surfaces exposed to liquids, consider a topical sealer for added protection. Test sealers on a small area first to ensure they don’t alter the tile’s appearance.
Reapply sealers every 2-3 years, depending on usage and exposure to elements. Inspect your mosaic annually to determine if resealing is needed.
Troubleshooting common problems
Loose tiles: Check for proper back-buttering and adhesion. If a tile wiggles, reapply thinset or contact a professional if the issue persists.
Grout failure: Inspect for moisture issues or improper grout application. For hairline cracks, apply a grout caulk specifically designed for small gaps. Extensive grout loss may require professional repair.
Discoloration: Clean with a grout cleaner to remove stains. If discoloration persists, consult the manufacturer or a tile professional for advice tailored to your specific mosaic.
Efflorescence: This white powdery substance is often caused by moisture. Address any water intrusion issues and consult a professional if efflorescence reappears after treatment.
Conclusion
Taking a careful, methodical approach now pays off with a durable, good-looking result and fewer costly fixes later. Prioritize safety, test your work in small areas, and respect the substrate and grout timing to keep tiles from shifting or cracking.
Before you wrap up, run a quick, practical checklist in your head: confirm the substrate is flat and clean, double-check sheet layout and alignment marks, dry-fit sheets first, mix adhesive to the spec, apply with a proper notch trowel, press and level each sheet, wipe away excess grout as you go, and finally cure and seal as directed. Do each step in that rough order, and document any deviations or measurements so you can reproduce good results on the rest of the job.
Common mistakes to avoid are clear: do not skip substrate prep or rely on old adhesives, do not over- or under-press tiles and tolerate lippage, and do not mix grout too wet or skip sealing when required. Follow a simple safety rule: test a small area first, wear eye protection and gloves, and work in a well-ventilated space. If anything seems off—loose substrate, strange tile gaps, or inconsistent grout—pause and fix it before the project proceeds.
If you face level changes, structural concerns, or unfamiliar behind-wall issues, consider calling a professional rather than pushing ahead. For most homeowners, solid planning, careful sheet handling, and disciplined alignment and grout control will deliver a lasting, showroom finish. Stay steady, stay safe, and you’ll finish with pride and minimal rework.
FAQ
How should I cut mosaic tiles without damaging the sheet or backing?
Place a straight edge across the tile sheet and score lightly with a sharp cutter. Use a tile nipper for curved cuts and support the sheet so it won’t bend as you trim. Always test a scrap piece first and wear safety glasses.
What are practical sheet handling tips to keep mosaic sheets from delaminating or breaking?
Handle sheets by the edges, not the middle, to avoid popping tiles loose. Lay sheets flat on a solid surface during layout and transport with ample support. If a sheet shows loose tiles, stop and re-press the bond before proceeding.
How do I keep grout under control during application and cleanup?
Apply grout in small batches and work it in firmly with a rubber float held at a shallow angle. Wipe residue off with a damp sponge before it hardens, and rinse the sponge frequently. Don’t let grout sit on the surface longer than the manufacturer’s guidance.
What layout guidelines help prevent lippage and ensure even seams?
Dry-fit sheets to plan alignment and avoid edges that will be driven by irregular walls. Use guides or spacers to maintain consistent grout lines across sheets. Check for level and adjust as you go if tiles seem to shift.