
Introduction
Tooling caulk for paint means shaping the joint so the caulk sits flush and smooth with the surfaces, hiding the seam instead of making it stand out. Do it by pressing or dragging a rounded tool along the bead to create a profile that sheds paint and blends with trim or drywall. Pick a profile that matches the look you want and check the caulk label for skin time and paintability before starting.
This is a hands-on, low-tech job you can do with a finger, a dedicated caulk tool, or a shaped piece of scrap wood. Work in manageable lengths, keep the bead consistent, and clean excess immediately for the neatest result. If you’re unsure about paint timing or product compatibility, check the manufacturer’s instructions or your paint supplier.
Key takeaways
- Inspect joint surfaces and select a concave caulk profile to hide the seam.
- Use painter’s tape to protect adjacent surfaces prior to tooling.
- Tool with steady pressure and continuous motion to avoid corner gaps.
- Check compatibility of caulk with paint and substrate per manufacturer.
- Allow recommended curing time and avoid touching until skin forms.
- Safety: ventilate area and wear gloves to protect skin and lungs.
Table of Contents
- Introduction
- Key takeaways
- Why Caulk Profile Matters for Painted Joints
- Tools and Materials Checklist
- Choosing the Right Joint Profile to Hide the Seam
- Step-by-Step Technique: Tooling a Concave Joint for Paint
- Alternative Methods to Avoid Highlighting the Joint
- Material Specs and Standards Explained
- Visual Checkpoints and Quality Inspection
- Conclusion
- FAQ
Why Caulk Profile Matters for Painted Joints
The shape of the sealed joint controls how light and shadow fall across the seam, which makes the difference between a joint that blends and one that stands out. Choosing a profile that breaks up strong edges reduces contrast so paint reads as a continuous surface rather than highlighting a gap.
A good profile aims to minimize visible shadow lines and reflective ridges so the eye doesn’t catch the joint. Think of the goal as hiding the seam, not decorating it—tooling should remove sharp angles that throw contrast under finish coats.
How profiles affect light and shadow perception
Caulk profiles can make a big difference in how your painted joints look. It’s all about how they catch the light.
Concave profiles, like ‘V’ or ‘U’, catch less light. They create subtle shadows that help hide the joint. It’s like a valley – it doesn’t reflect much light back at you.
Flush profiles, like ‘flat back’, don’t catch much light either. They’re smooth and even, so they blend right in with your paint.
Raised profiles, like ’round’ or ‘oval’, catch more light. They create visible lines because they reflect light differently than the surrounding wall. It’s like a mountain peak – it catches the sunlight and stands out.
Paint adhesion and film build over caulk
The shape of your caulk profile can affect how well your paint sticks and looks. You want a smooth, even coat.
Concave profiles give you that. Paint flows into the ‘V’ or ‘U’, creating a continuous film with no thin spots. It’s like pouring water into a cup – it fills up evenly.
Flush profiles are good too. They’re flat, so paint lays down smooth and even.
Raised profiles can be tricky. Paint might pool on top or thin out at the edges. That can leave you with visible lines or weak spots in your paint film. It’s like trying to pour water onto a ball – it doesn’t stick or spread evenly.
Tools and Materials Checklist
Gather the basic hand tools and consumables: a caulk gun, joint backer (rod) if needed, a selection of tooling tools or shaped sticks, utility knife, rags, and appropriate masking. Include both budget options and precision choices—simple plastic sticks or a shaped metal spoon for a smoother finish.
Also select the caulk type suited to the job and compatible with the paint; check the label or manufacturer instructions for substrate compatibility and paint-over guidance. Keep cleanup solvent or water per the product directions and extra gloves and tape for neat edges.
Caulk types and paintability
Before you start, know your caulk. Paintability matters.
- Acrylic: Water-based, low odor, paints well directly.
- Silicone Hybrid: Balances flexibility and paintability, check labels for paint-over instructions.
- Polyurethane: Tough, stains well but may require primer before painting.
- Silicone: Highly flexible, waterproof, but not paintable without primer.
Quick rule: Always check product labels for paint-over instructions.
Tools and accessories (guns, shaping tools, masking)
Right tools make the job easy. Here’s what you need.
- Caulk Gun: Choose a smooth-squeezing, affordable model for DIY.
- Finger Tool: Smooths caulk, creates profile; plastic or metal, both work.
- Metal/Plastic Caulk Shaper: For precise profiles, use with masking tape.
- Masking Tape: Protects surfaces, helps create clean lines.
- Backer Rod: Fills wide gaps before caulking for smooth finish.
- Cleanup Cloths: Wet wipes or rags for quick cleanup.
Quick rule: Use the right tool for the job, and your profile will thank you.
Choosing the Right Joint Profile to Hide the Seam
Main profile choices—concave, flush, recessed, or tapered—each change how shadows form at the edge; pick the one that minimizes contrast for your materials and finish. Consider substrate, expected joint movement, and final texture when deciding which profile will be least visible once painted.
For interior drywall you’ll often favor shallow, smooth concave or tapered profiles that take paint well; exterior or trim joints may need a profile that accommodates movement first and appearance second. Check product data sheets or manufacturer instructions for recommendations tied to movement class and substrate type before finalizing the profile.
Concave (inward) profile — when to use
The concave, or tooled-in, profile is your best bet for hiding joints. It’s like a tiny valley that catches light and shadows, making the seam less visible.
Use it on smooth substrates like drywall or painted surfaces. The tooling process creates a slight depression, so it works well with narrow joint widths (1/8″ to 3/16″).
Pro tip: For wider joints (up to 1/2″), you can use backer rod before caulking to create a deeper valley.
Flush, tapered, and beveled profiles — pros and cons
Flush, tapered, and beveled profiles are flat against the surface. They’re easy to tool but can highlight joints if not done right.
Pros
- Easier to tool compared to concave profiles.
- Good for wider joints (1/4″ to 3/4″).
- Can be used on textured surfaces and trim.
- Less noticeable on exterior corners.
Cons
- Can highlight the seam if not tooled properly or if joint width is too narrow.
- Doesn’t hide movement joints as well as concave profiles.
- May show imperfections in substrate.
- Less suitable for interior drywall seams.
Use these profiles when you need a clean, flat look or have wider joints. But remember, they require precise tooling to minimize the seam’s visibility.
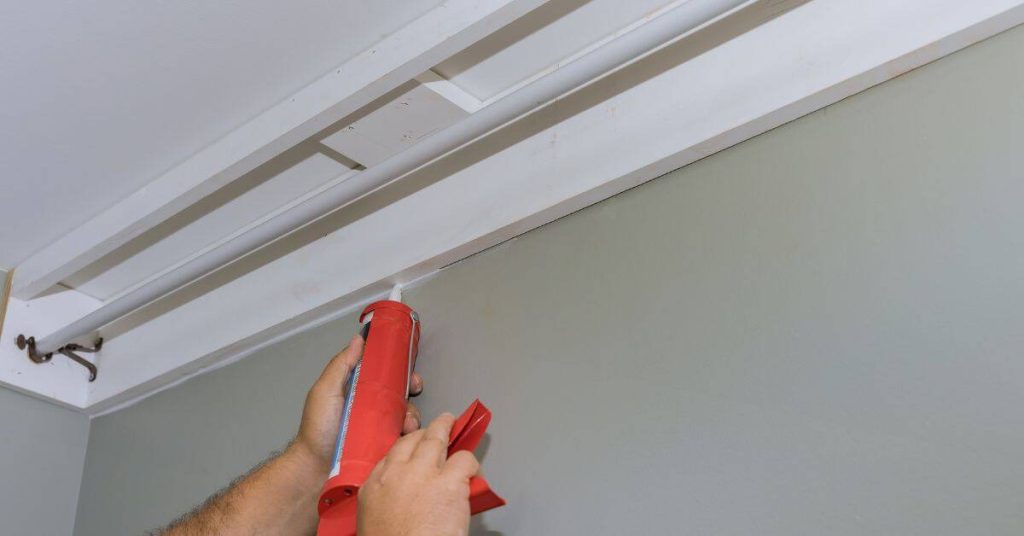
Step-by-Step Technique: Tooling a Concave Joint for Paint
Start by preparing the joint: remove loose material, verify backer rod or spacing, and mask edges if you need crisp lines. Cut the nozzle to the right bead size per the joint width, apply a consistent bead, and avoid overfilling which can create ridges that show through paint.
Tool immediately to form a smooth concave arc, using steady, even pressure and a lubricated tool or damp rag to prevent sticking. Inspect the arc for uniformity, clean any excess, and allow cure per the product label before painting.
Step-by-Step Process
The following steps will guide you through the process of tooling a concave joint for paint, ensuring consistent results that minimize shadows.
- Preparation: Gather your tools and materials. Check safety equipment like gloves and goggles.
- Mask off the area: Use painter’s tape to protect adjacent surfaces from caulk.
- Main work: Apply the bead of caulk, then tool it into a concave profile within 10-20 seconds (follow product-specific skin time guidance).
- Inspect and clean up: Check your work for any missed spots or imperfections. Clean tools and remove tape.
- Final check: Inspect the joint once paint is applied to ensure it’s hiding the seam as desired.
Surface prep and bead size selection
Proper surface preparation ensures a durable, paintable result. Clean the joint using a suitable cleaner or degreaser to remove any dirt, grease, or old caulk.
Rough up smooth surfaces with light sandpaper (120-grit) to improve adhesion. Remove dust and debris with a damp cloth.
Select a bead size that matches the joint width for a seamless look. For example, use 3/8″ caulk in 1/4″ to 1/2″ wide joints.
Applying the bead and timing for tooling
Maintain a steady gun speed while applying the caulk bead. Place it in the center of the joint for easy tooling.
- Gun speed: Keep it consistent to ensure even bead placement.
- Bead placement: Center the bead within the joint for easier tooling and a more uniform appearance.
- Tooling timing: Tool the caulk within 10-20 seconds after application (follow product-specific skin time guidance).
- Optional tools: Consider using a $30-$50 caulk gun with a smooth, consistent trigger for easier application.
Tool motion, pressure, and consistency
Use the right tooling technique to create an even concave curve across the joint’s length. Maintain consistent pressure for a uniform appearance.
- Hand position: Hold the tool at a 45-degree angle with your thumb on top and fingers underneath for better control.
- Stroke length: Use long, smooth strokes along the bead’s entire length. Start at one end and work towards the other.
- Pressure control: Apply even pressure throughout the stroke to maintain a consistent concave curve.
- Consistency tip: Practice on scrap materials first to get a feel for the right tooling technique before working on your project.

Alternative Methods to Avoid Highlighting the Joint
Beyond standard tooling, techniques like feathering the caulk into adjacent material, tapering the surrounding paint transition, and careful masking reduce hard edges that catch light. Proper placement of a backer rod to control bead depth also prevents high ridges that cast shadow once painted.
You can also use substrate preparation—sanding or lightly abrading—and thin skim coats of paint or primer to even out reflectivity across the joint. When in doubt about compatibility of a finishing trick, check the product label or data sheet so you don’t compromise adhesion or cure.
Feathering and tapering for minimal shadow
When tooling, don’t stop abruptly at the edge. Instead, feather the caulk into the adjacent surface. This blends the joint with its surroundings, reducing the chance of a visible line.
Taper the edges too. A sharp corner catches light and stands out under paint. By tapering, you create a smooth transition that’s less noticeable.
Pro tip: Use a rounded tooling knife for tapering. It helps create a gentle slope.
Using masking tape and backer rod to control geometry
Masking tape protects surfaces from caulk and provides a clean edge. But it also serves another purpose – it controls the joint’s width.
Backer rod sets the depth of your joint. It fills the gap, allowing you to tool a consistent profile across the entire length. This consistency ensures that your joint paints over invisibly.
Remember: Use painter’s tape for masking. It’s less likely to pull off paint when removed.
Material Specs and Standards Explained
Key terms on a caulk data sheet—cure time, elongation/elasticity, UV resistance, VOC content, and paint-over window—determine how the product behaves and whether it suits your project. Don’t guess at numbers; consult the product data sheet or label for the specific values you must meet for your application.
Match the material properties to the conditions—outdoor exposure, movement expected, and paint system—and follow any manufacturer instructions for surface prep and overcoating. If a spec matters to your climate or substrate, verify it directly with the technical data rather than relying on general rules of thumb.
VOC, Cure Time, Elasticity, Paint-Over Windows
When it comes to caulking for painted surfaces, understanding a few key properties is crucial. Let’s break down each:
Volatile Organic Compounds (VOCs): These are gases emitted by certain solids or liquids. Low VOC caulks are better for indoor use and the environment.
Cure Time: This is how long it takes for the caulk to dry and become paint-ready. Faster cure times mean you can paint sooner, but don’t rush – ensure it’s fully cured before painting.
Elasticity: Caulks stretch and shrink with temperature changes. High elasticity means it won’t crack or split over time, ensuring your painted joint stays looking good.
As for paint-over windows, some caulks can be painted immediately after application, while others need to cure first. Always check the manufacturer’s guidelines.
Compatibility with Primers and Paint Systems
Caulk compatibility with primers and paints is vital for a lasting, good-looking finish. Here are some key points:
Most caulks can be used with latex or oil-based paints, but always check first. Some may require a primer to seal the surface and improve paint adhesion.
For example, oil-based caulks often need an oil-based primer before painting with latex. Conversely, using latex paint over oil-based caulk without priming can lead to peeling.
To verify compatibility, look for manufacturer recommendations on the product data sheet. It’s also a good idea to test a small, hidden area first to ensure there are no adverse reactions.
Visual Checkpoints and Quality Inspection
Inspect the joint close-up for uniform profile shape, smooth transitions, and full adhesion with no gaps, voids, or pinholes. Run a finger or tool along a sample area to feel for ridges or soft spots that will telegraph once painted.
Step back and view the joint from typical sight lines and lighting to catch shadows or highlights that wouldn’t show at arm’s length. If anything reads as a crisp line, address the profile or surface prep now rather than after paint—verify cure and adhesion per the product label before repainting.
What a well-tooled joint looks like close-up and at distance
Before you grab your paintbrush, use this checklist to ensure your caulking job is ready for prime time.
- Smooth surface: Run your finger along the joint. It should feel smooth, with no ridges or bumps.
- Edge blending: Check where the caulk meets the wall and trim. The edge should blend seamlessly into the surface.
- Concave profile: From a distance, the joint should have a slight concave appearance, helping to hide it from view.
- No gaps: Press firmly along the joint with your thumb. There should be no give or movement.
- Even width: The caulk bead should be consistent in width throughout its length.
- No tool marks: Inspect for any visible tooling marks, which can highlight the joint when painted.
- Adhesion: Gently pull at the caulk with your fingers. It should not peel away from the surface.
- No cracks or holes: Check for any small cracks or holes that could allow paint to seep through.
Quick rule: If it feels wrong, looks wrong, or doesn’t pass these checks, don’t be afraid to retool or touch up before painting.
Common defects and how to fix them before painting
Catch these common issues early to avoid costly repaints down the line.
- Voids: Small hollow spots in the caulk. Rewet the area with your tool, applying gentle pressure.
- Tool marks: Visible lines from your tool. Lightly sand and retool the area.
- Ridges: Bumps or raised areas. Spot-sand and retool to smooth out.
- Adhesion failures: Caulk peeling away from surface. Remove and re-caulk the affected area.
- Gaps: Spaces between caulk and surface. Rewet and tool the joint, applying more pressure.
- Cracking: Fine cracks in the caulk. Lightly sand, remove any dust, and retool.
- Uneven width: Inconsistent bead size. Remove excess or add more caulk as needed, then tool evenly.
- Paint seepage: Paint bleeding through caulk. Sand lightly, wipe clean, and re-caulk the area.
Quick rule: Fix defects now to save time and money later. A little extra effort upfront pays off in the long run.
Conclusion
Get the profile right and you lock in safety, durability, and a clean, paintable joint without highlights or fuss. The right concave tooling and careful prep keep water and paint from chasing seams and save you time later.
To proceed, follow this practical flow: choose the profile that hides the seam, prep the joint and surrounding surfaces, clean the edges, apply a steady bead, tool the concave shape smoothly, wipe away excess while it’s fresh, let it cure as specified, and finally test a small area before moving on to the whole project. Do the work in that rough order and verify results in a visible spot before committing to a full repaint.
Common mistakes to avoid are using the wrong profile for the joint, overfilling or under tooling, and skipping prep or cure time. Don’t rush the tooling step, keep hands steady, and always test a patch in a safe corner first. If you’re uncomfortable with ventilation, height, or large or structural joints, pause and reassess—safety comes first.
If joints are very large, cracked, or you’re unsure about the substrate, it makes sense to bring in a pro rather than push your luck. Stay methodical, work small, and you’ll finish with a professional look that lasts. You’ve got this—take it one step at a time and trust your prep and tooling to do the heavy lifting.
FAQ
How do I choose a caulk profile that hides the seam when painted?
Pick a profile that creates a gentle, even transition rather than a hard line. Check the caulk’s shape when tooling and test a short edge on scraps or a hidden spot first. Always follow the manufacturer’s instructions for smoothing and tooling times.
Should I tool a concave joint before painting, or can I skip tooling altogether?
Tooling helps seal the joint and soften the edge so paint doesn’t highlight it. Skipping tooling often leaves a sharper edge that shows through paint. If you must skip, understand it will be harder to hide the seam and you may need more paint steps.
What common mistakes cause the paint to highlight the joint, and how can I avoid them?
Avoid overfilling, uneven tooling, and not cleaning excess caulk before it cures. Tool too little or too aggressively, and you’ll create a visible ridge or gaps. Always follow product instructions for tooling pressure and clean-up times.
How do I inspect the joint after tooling and before painting?
Look for a smooth, continuous edge with no jagged ridges. Run a finger lightly along the joint to feel for flatness and consistency. If you see ridges, rework the profile according to the manufacturer’s guidance and re-clean any dust or residue.