
Introduction
A DIY Level-5 finish is a near-perfect, impeccably smooth and flat wall or ceiling surface achieved with careful skim coats. This article walks you through skim tools, lighting checks, and the moment to stop before chasing perfection, in small rooms.
Use the right skim blade or trowel, keep tools clean, and test with steady lighting to catch ridges or hollows. If in doubt, check the product label, follow the manufacturer instructions, and verify local rules; decide to stop when the surface looks and feels consistently smooth.
Key takeaways
- Understand Level-5 finish purpose and when skim methods suit small rooms.
- Inspect room lighting and reflections to plan skim passes and coverage.
- Verify surface condition, repairs, and moisture before skimming begins.
- Prepare skimming setup: mix consistency, clean tools, and protective gear.
- Apply thin, even passes; maintain feathered edges and flat surface.
- Use lighting checks to decide when to stop; wear eye protection and mask.
Table of Contents
- Introduction
- Key takeaways
- What a Level-5 Finish Is and When to Choose It
- Tools and Materials Checklist
- Assessing the Small Room and Lighting Conditions
- Surface Preparation and Repairs
- Skimming Technique: Mixing and Application
- Drying, Sanding, and Screening for a Flat Surface
- Lighting Inspection and Determining “When to Stop”
- Troubleshooting, Safety, and Project Planning
- Conclusion
- FAQ
What a Level-5 Finish Is and When to Choose It
A Level-5 skim is a very smooth, near-perfect surface. It aims to be free of texture and visible imperfections. Use it when the room will be under critical lighting or when reflective surfaces are present, even in small spaces.
Explain to readers that this finish is justified for high-gloss paints, strong light angles, or rooms with reflective materials. Encourage checking the product label or manufacturer instructions to confirm suitability and limitations. Remind readers to verify local rules or recommendations before attempting this level of finish.
Definition and differences from other levels
A Level-5 finish is the highest standard in drywall finishing. It’s a smooth, seamless look that hides all tape seams and screw holes.
It differs from lower levels like Level 2 (screw holes visible) or Level 4 (tape seams barely visible). With Level-5, you’re adding extra steps to achieve that perfect, flawless surface.
Why go for Level-5? It’s ideal for rooms with high-gloss paint, reflective surfaces, or critical lighting. The smooth finish reflects light evenly, minimizing imperfections.
When a small room needs Level-5
A small room doesn’t mean you can skimp on quality. In fact, sometimes it’s the opposite.
Bright directional lighting can make imperfections stand out. With Level-5, you’re ensuring every angle looks perfect.
Open-plan visibility also plays a role. If your small room is open to others, a smooth finish helps maintain visual continuity.
Demanding clients or high-end materials might also warrant a Level-5 finish. It’s the best way to ensure your hard work and investment pay off.
Tools and Materials Checklist
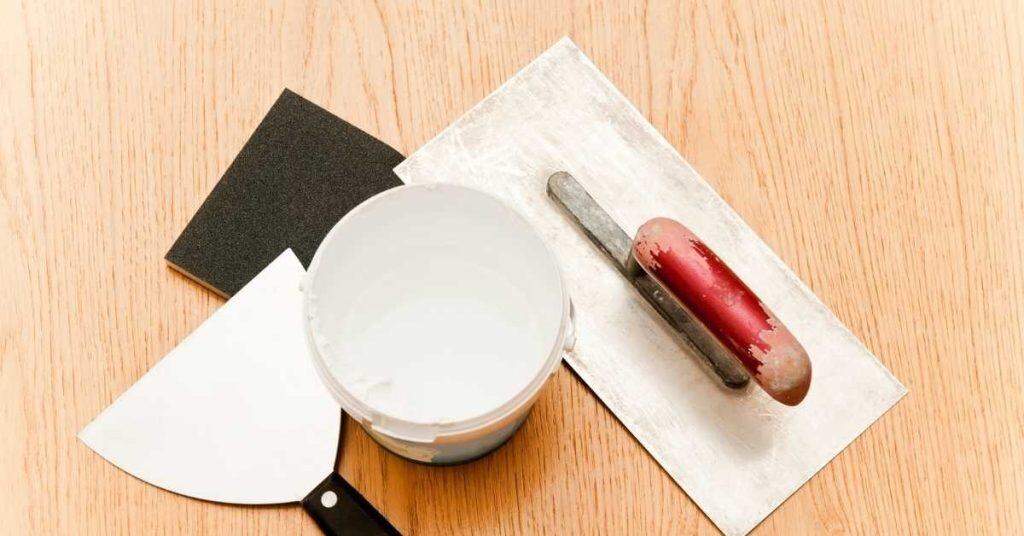
Put together a practical DIY inventory of tools, compounds, primers, and inspection lighting. Include abrasives, taping tools, and mixing containers. Have light sources ready for inspection in small rooms.
Note what to check on product labels and data sheets, such as type, compatibility, and coverage guidance. Emphasize choosing quality tools and materials that suit the skim technique. When unsure, verify with the label, datasheet, or manufacturer instructions before starting.
Skim Tools and Accessories
Before you start, ensure your tools are in good condition. Here’s a quick checklist.
- Straight-edged trowel: Check for bends or nicks that can ruin your finish.
- Square-notched trowel: Ensure the notches are clean and sharp to create consistent grooves.
- Margin trowel: Inspect for wear on the edges that could cause uneven application.
- Hawk: Check for cracks or warping that might affect stability.
- Float: Ensure it’s straight and smooth to create a level surface.
- Pole: Inspect for wobble or instability, which can lead to an uneven finish.
- Knee pads: Check they’re in good condition to protect your knees during long hours of work.
- Safety glasses: Ensure they provide adequate protection from debris.
Quick rule: Inspect all tools before each use. Bent, nicked, or worn-out tools can ruin a perfect finish.
Compounds, Primers, and Sundries
Choose the right materials for your project. Here’s what to check.
- Setting compound: Choose one that matches your substrate. Check the label for compatibility.
- Ready-mix compound: Ensure it’s suitable for your room size and application method.
- Lightweight compound: Consider if you need to reduce weight or improve insulation.
- All-purpose compound: Check if it suits your project needs, as it may not be ideal for all applications.
- Primer: Choose one that bonds well with your substrate and compound. Read the label for application guidelines.
- Tape: Inspect for any damaged or sticky edges before use.
- Corner beads: Ensure they’re straight and undamaged to create a smooth corner finish.
Quick rule: Always read the label. Following manufacturer guidelines ensures the best results.
Lighting and Inspection Aids
Good lighting is crucial for a quality finish. Here’s what you need.
- Portable lamps: Check they’re stable and provide adequate, shadow-free light.
- Adjustable fixtures: Ensure they can be positioned to cast minimal shadows.
- Shadow lights: Inspect for any damaged or missing bulbs before use.
- Mirror: Check for cracks or warping that could distort your view of the surface.
- Mobile flashlight: Ensure it’s bright enough to reveal defects in low-light conditions.
Quick rule: Always inspect your lighting setup before starting. Poor lighting can hide defects and lead to rework.
Assessing the Small Room and Lighting Conditions
Evaluate the room’s natural and artificial light to plan the skim read. Identify corners and surfaces most likely to show flaws under light. Plan where you will stand and move during inspection.
Discuss using multiple light angles to reveal texture, ridges, and thin spots. Check manufacturer guidance for recommended lighting setups, and compare to your room’s layout. Consider local rules or best practices for adequate lighting while working.
Mapping natural light and reflective angles
Before you start, map out how natural light moves through your small room. This helps you plan where to place your skim coat and avoid hot spots or shadows.
Check at different times of day: Morning, afternoon, and evening. Natural light changes throughout the day, so see it all.
Note window positions: Mark down where windows are. They’ll affect how light hits your walls.
Identify reflective surfaces: Mirrors, shiny furniture, or glossy paint can bounce light around. Make note of these too.
Setting up artificial inspection lighting
Use artificial lights to mimic harsh viewing conditions. This helps you spot any imperfections before they become problems.
- Place lamps: Position them at different heights and angles to simulate various viewpoints.
- Use floodlights: These cast a wide beam, mimicking the effect of bright sunlight.
- Avoid harsh shadows: Place lights carefully to minimize deep, dark shadows.
- Check corners: Ensure light reaches all four corners of the room.
- Inspect under artificial light: Check your work in progress with these lights on.
- Avoid mixing natural and artificial: Stick to one type at a time for consistent results.
- Test before starting: Make sure your setup exposes any issues before you begin skimming.
Quick rule: The brighter the better, but avoid harsh shadows. You want to see every detail.
Visual checkpoints before starting
Before you prep your walls, take a moment to record some visual cues. This helps you avoid surprises later on.
- Hot spots: Mark down areas where the sun hits hardest or light bounces off shiny surfaces.
- Shadows: Note where deep shadows might hide imperfections.
- Texture contrasts: Make note of any stark differences in wall texture.
- Cracks and holes: Mark down any damage that needs repair before skimming.
Quick rule: The more you record now, the fewer surprises you’ll have later. It’s worth the extra time.
Surface Preparation and Repairs
Start with thorough cleaning to remove dust, grease, and residue. Check adhesion of existing coatings before skimming over them. Address fasteners that sit proud and joints that need tape or filler.
Decide when it’s best to remove texture or old coatings before applying a Level-5 skim. Follow manufacturer instructions for any primers or bonding agents. Verify steps with product labels and local guidance if you’re unsure.
Cleaning and Adhesion Testing
Before you start mixing concrete or applying a skim coat, you need to make sure your surface is clean and ready for adhesion. Here’s how:
Check for contamination: Look for any old paint, oil, grease, or other substances on the surface. These can prevent concrete from sticking. Use a wire brush or scraper to remove them.
Next, test your surface for adhesion. This is quick and easy:
Adhesion testing: Apply some adhesive (like PVA) to the surface using a paintbrush. Let it dry for about an hour. Then, stick a piece of duct tape onto the dried adhesive. After another hour, pull off the tape quickly. If the adhesive comes off with it, your surface isn’t ready. You might need to etch or grind the surface first.
Repairing holes, seams, and tape strategy
Before you start filling, check base compaction. Soft spots need fixing first. Use a tamper or plate compactor.
For larger defects:
- Use a patching compound for holes up to 1″ deep. Mix according to package instructions, apply with a trowel, and let it cure.
- For deeper holes or seams, form a patch using a piece of wood or plastic as a dam. Fill with the compound, smooth with a trowel, and remove the dam once set.
Choosing tape:
- For small seams (<1/8″), use paper-faced tape. It’s easier to handle and provides good adhesion.
- For larger seams, go with fiberglass mesh tape. It’s stronger and can span wider gaps.
Feathering joint edges:
- Use a feather edge trowel to create a smooth, even skim. Start at the center of the seam and work outwards.
- Apply thin coats, letting each one cure before applying the next. This ensures an even, seamless finish.
When to strip texture or convert walls
Before you start applying Level-5 finishes, take a good look at your walls. You might need to strip off old textures or apply a leveling coat. Here’s when:
Texture stripping needed: If your walls have heavy texture, popcorn ceilings, or uneven surfaces, you’ll want to strip them down. This ensures a smooth base for your Level-5 finish.
Check for these signs:
- Visible imperfections like cracks, holes, or seam lines
- Uneven surface due to previous repairs or poor construction
- Heavy texture that won’t sand down easily
Leveling coat required: Even if your walls look smooth, they might need a leveling coat. This is especially true if you’re painting over old paint jobs or wallpaper.
Check for these signs:
- Previous repairs that stand out from the rest of the wall
- Walls with multiple layers of paint or wallpaper
- Uneven sheen or color due to previous finishes

Skimming Technique: Mixing and Application
Mix to the manufacturer’s recommendations and note any pot life or drying guidance. Aim for a smooth, workable consistency that resists pinholes. Plan the order of application passes for a small room to avoid retrimming large areas.
Keep technique steady and controlled, with even pressure and consistent strokes. Check label instructions for tool speeds or blade angles if provided. If details are unclear, consult the product data sheet or instructions to confirm the approach.
Mixing and consistency guidance
First things first, always follow the manufacturer’s instructions. They know their product best.
Start small. Test a small batch before mixing your entire load. This way, you can adjust water content if needed without wasting material.
Water is your friend… or foe. Too much and your concrete becomes weak soup. Too little and it’s dry as desert sand. Aim for the sweet spot recommended by the manufacturer. If you’re unsure, check their guidelines or give them a call.
First pass, knockdown, and finish passes
Now that you’ve mixed your concrete to the right consistency, it’s time to apply it in layers. This way, you’ll get a smooth, even surface without overworking the concrete.
First pass: Start at one corner of your formwork and pour a thin layer (around 1-2 inches thick) across the entire area. Use a shovel to spread it out evenly, checking regularly with a straight edge or level to ensure uniformity. Don’t worry about making it perfect just yet.
Knockdown pass: Once you’ve covered the whole area, use a bullfloat to smooth and flatten the surface. Work in sections, applying firm, even pressure as you push the float across the concrete. This will remove any high spots and bring the level down slightly.
Finish passes: After knocking down, let the concrete sit for a few minutes to allow any bleed water to rise to the surface. Then, use a trowel to make your final finish passes. Start with a wide-bladed trowel (around 12-14 inches) to smooth out any remaining imperfections and bring the level down again. Follow up with a narrower trowel (6-8 inches) for a more refined finish, working in small sections at a time.
Working with corners, ceilings, and tight spaces
Corners, ceilings, and tight spots can be a pain when it comes to concrete skimming. Here’s how to tackle ’em like a pro.
Corners: Use a corner trowel or a straight edge with a slight bend for inside corners. For outside corners, use a V-notch trowel or a straight edge with a 90° angle. Work from the bottom up to avoid leaving marks.
Ceilings: You’ll need a pole-mounted trowel or a long-handled tool for this one. Start at the outer edges and work your way in, using smooth, even strokes. Remember, safety first – use proper fall protection!
Tight spaces: For those hard-to-reach spots, a small, flexible trowel or a straight edge with a bend will be your best friend. Take your time and work carefully to avoid leaving marks or damaging the surrounding area.
Drying, Sanding, and Screening for a Flat Surface
Watch for drying cues such as tackiness or skinning over in the skim layer. Decide when to do gentle sanding versus more thorough smoothing. Maintain flatness, avoiding ridges or gouges that show under light.
Use screening methods that won’t gouge or remove too much material. Refer to product guidance for acceptable sanding grits and pressure. When in doubt, verify with the label or manufacturer instructions to stay within recommendations.
Deciding when to sand vs float again
After the first skim coat, you’ll need to decide whether to lightly sand or apply another thin layer. Here’s how to tell:
Lightly sand if there are only minor imperfections – small bumps, slight ridges. This indicates your first pass was mostly successful.
Apply another skim coat if you see deep valleys, large bumps, or missed spots. These need more material to fill and smooth out.
Abrasives and grit selection guidance
When sanding your skim coat, choose the right abrasive and grit size for a smooth finish. Here’s how:
Start with fine grits, like 150 or 220. These are gentle on the surface and won’t leave visible scratches.
Check your sandpaper or sponge’s packaging. It should tell you what grit size it is and its intended use.
If you’re unsure, start with a finer grit. You can always go coarser if needed, but not finer.
Dust control and cleanup between coats
Maintaining a clean work environment between skim coats is crucial. Here’s how to manage dust and keep your space tidy:
Use wet sanding or damp sponges to minimize dust when sanding.
Between coats, use a damp cloth to wipe down the surface and remove any dust. This protects your fresh skim coat and keeps your inspection lighting effective.
If you’re using artificial light, cover it with a plastic bag or wrap to keep dust off. Uncover it when you need to inspect your work.
Lighting Inspection and Determining “When to Stop”
Run a repeatable inspection routine with several light angles and distances. Mark any remaining flaws and use consistent criteria to judge acceptability. Learn to recognize diminishing returns as you fine-tune the skim.
Set practical limits based on what the room will be used for and the lighting environment. Check local or manufacturer guidance for acceptable finish under specific lighting. If you’re unsure, consult product labels or instructions to decide when to stop.
Acceptance criteria under different lights
Use this checklist after each pass to ensure a consistent, high-quality finish. Inspect your work under various lighting conditions to catch any issues early.
- Diffuse light: Check for shadows and inconsistencies. Insufficient coverage or uneven application can cause visible differences in sheen.
- Directional light: Look for trowel lines, orange peel, or other defects that may not be apparent under diffuse light. Use a flashlight to simulate directional lighting.
- Typical room lighting: Inspect the surface with your room’s usual lights on. This helps ensure the finish looks good in everyday conditions.
- Close inspection: Get up close and personal. Check for missed spots, imperfections, or areas that need touch-up.
- Angle check: Inspect at different angles to catch any reflections or shadows that might indicate issues.
- Color consistency: Ensure the color is even across the entire surface. Inconsistencies may indicate improper mixing or application.
- Drying time: Check for any wet spots or areas that feel soft. These need more drying time before proceeding.
- Safety check: Ensure there are no safety hazards, like loose debris or slippery surfaces, before moving on.
Quick rule: If it looks good under all these conditions, you’re on the right track. Keep up the good work!
Common telltale flaws and thresholds
Use this checklist to identify and address common defects that can ruin an otherwise perfect finish.
- Shadows: Look for areas where the light seems to dim or change color. This could indicate low spots or insufficient coverage.
- Trowel lines: Check for visible marks left by your trowel. These can be sanded out, but it’s best to avoid them in the first place.
- Orange peel: Inspect for a textured, uneven surface. This usually indicates too much material was applied or not spread evenly.
- Cracks or chips: Check for any damage that may have occurred during drying or sanding. These need to be repaired before proceeding.
- Mud cracks: Look for fine cracks in the surface, often caused by applying too thick a coat or not allowing enough drying time between coats.
- Pinholes: Inspect for tiny holes left by air bubbles. These can be filled and sanded smooth.
- Color variations: Check for any areas that don’t match the surrounding color. This could indicate improper mixing or application.
- Uneven sheen: Look for areas that are shinier or duller than others. This can indicate inconsistencies in the finish.
Quick rule: If you find a defect, address it immediately. Small issues can become big problems if left untreated.
Avoiding overworking — knowing the stopping point
It’s easy to get caught up in chasing perfection, but remember: you’re working in a small room. Every pass counts, but so does knowing when to stop.
- Diminishing returns: Each additional pass provides less improvement than the last. Be aware of this and adjust your expectations accordingly.
- Time vs. effort: Consider how much time and energy you’re putting into each pass. Is it worth the marginal improvement?
- Lighting conditions: If your room’s lighting is harsh or inconsistent, it can make defects seem worse than they are.
- Eyes adjust: Our eyes can adapt to imperfections over time. What seems glaring at first may not be noticeable after a while.
- Stand back: Take a step back and look at the big picture. Is the overall finish what you want, or are you fixating on minor details?
- Touch-up vs. redo: Consider if it’s better to touch up small areas or start over with a new pass.
- Consult others: Get a second opinion from someone else in the room. Fresh eyes can spot things you might miss.
- Learn when to stop: This is a skill that improves with practice. Don’t be afraid to make mistakes; they’re how we learn.
Quick rule: If you find yourself spending more time and effort on each pass without significant improvement, it’s probably time to call it quits.
Troubleshooting, Safety, and Project Planning
Cover common fixes like small touch-ups, feathering edges, and rechecking adhesion. Keep ventilation and PPE at the top of the list for safety. Plan your time and material needs so you can decide when a pro is needed.
Walk through a simple decision path for when to escalate to a professional, based on room size, lighting, and surface condition. Verify safety guidelines on the label and follow local rules for ventilation and dust control. When unsure, rely on manufacturer instructions and your own judgment to proceed safely.
Quick fixes for common issues
Lap lines happen when you don’t overlap your trowel strokes properly. Fix: Sand lightly with 120-grit, then skim again.
Texture mismatches occur if you let the first pass dry too much before knocking down. Fix: Re-wet and knock down again.
Edge ridges form when you don’t feather out properly at walls’ edges. Fix: Lightly sand, then skim with a smaller trowel.
Safety, ventilation, and waste handling
PPE: Wear gloves, goggles, and a respirator. Concrete dust is harmful.
Ventilation: Keep windows open or use fans to circulate air. Don’t let dust accumulate.
Waste: Bag dry concrete waste for recycling. Dispose of chemicals according to local regulations.
Estimating time, materials, and when to hire help
Material choices impact your finish. High-quality compounds dry slower but offer better results.
- Room size: Larger rooms take longer. Allow 1-2 days per coat.
- Drying conditions: Cooler, humid conditions slow drying. Plan accordingly.
- Skill level: Beginners should allow more time for each step.
- Product coverage: Check product specs to ensure you buy enough. Most cover about 20-30 sq ft per gallon.
- Hiring help: If your room is larger than 500 sq ft, or you find yourself struggling with technique, consider hiring a pro.
Conclusion
Getting a true Level-5 finish in a small room is about careful prep, clean skim work, and solid lighting checks. Do it right, and you’ll have a durable, even surface that looks sharp and lasts without calling you back for touch-ups.
First, inspect the room and lighting, patch and prime as needed, mix and apply thin coats following the plan, keep the room dry and ventilated, and then sand, screen, and recheck under the lighting until the surface reads flat. Keep the work area clean, dust-free, and test a small area before committing to the whole wall, then stop when the finish remains uniform and no shiny patches appear.
Common mistakes to avoid are skipping repairs, piling on heavy coats, and rushing through drying or sanding. Protect nearby surfaces, wear proper safety gear, and don’t breathe dust or fumes. If you run into stubborn waves, damaged corners, or ceilings that won’t stay flat, it’s time to call in a pro rather than push on and risk costly damage.
You’ve got this: finish with care, verify with the lighting, and move forward with confidence, knowing you can complete the job safely and without wasting material or time.
FAQ
How do I know when the skim coat is ready to sand or buff without risking damage?
Trust your touch and a clean, dry surface. If the surface feels tacky or rubbery, wait. If it powders or slides, it’s not ready yet. Always use a light, controlled pass and wipe clean before testing again.
What are the most common mistakes that wreck a Level-5 finish in small rooms?
Dust control is critical. Keep surfaces covered and vacuums running to minimize particles. Don’t rush drying or sanding, and avoid overworking edges where thin films can crack or haze.
How can I spot high spots or dull patches after skimming, before applying the final coat?
Play with a strong oblique light at a low angle to reveal flaws. Run a light pass with a trowel or sanding block to even out peaks. Mark problem areas and address them before moving on.
When should I stop and move on to other work or final checks?
Stop when the surface reads flat with consistent light reflection and no obvious texture differences. If you can’t get a uniform sheen with a final pass, don’t rush the next step. Check labels and instructions from the material you used before proceeding.