

Introduction
Brown patch is a lawn disorder that creates circular brown patches in the turf. It shows up in patches, often in warm, humid weather, and can spread if ignored. This article covers causes, testing, and fixes in plain, no-nonsense terms.
Diagnosing requires watching for signs and following the product label for approved uses. Fixes involve practical steps you can do in your yard and on your schedule, with attention to watering, mowing, and soil health. Always check the label, manufacturer instructions, or local rules for safety and suitability before starting.
Key takeaways
- Understand Brown Patch as a turf fungal issue worsened by moisture and heat.
- Check environmental factors and cultural practices to prevent spread before symptoms appear.
- Visual checks and basic DIY tests help distinguish brown patch from other issues.
- Plan cultural fixes first: improve airflow, avoid overwatering, and rake thatch.
- Wear gloves and eye protection when handling sprays or soil amendments.
- Schedule applications with weather windows and document timing to prevent runoff.
Table of Contents
- Introduction
- Key takeaways
- Quick Overview: What Brown Patch Is and Why It Matters
- Causes and Risk Factors — Environmental and Cultural Drivers
- Identify Brown Patch: Visual Checkpoints and Differential Diagnosis
- Diagnostic Tests and Sampling Protocol (DIY and Lab)
- Fixes — Cultural Controls That Reduce Disease Pressure
- Fixes — Chemical and Biological Controls (Selection and Stewardship)
- Timing and Application Planning (When and How to Act)
- Tools, Materials Checklist and Visual Checkpoints
- Conclusion
- FAQ
Quick Overview: What Brown Patch Is and Why It Matters
Brown patch is a turf disease that shows up as circular or irregular dead patches on the grass. It can affect home lawns, sports turf, and sod fields, often spreading from hot, damp conditions to nearby healthy areas. Left unchecked, the disease can create ragged edges, thinning turf, and patchy lawns that invite weed encroachment and bare spots.
Beyond looks, brown patch can hurt playability on athletic fields and increase maintenance costs due to more frequent reseeding and mowing. The pattern and progression of the damage can also create safety concerns if turf becomes uneven or thin. Understanding what starts and sustains the problem helps you act early and protect your investment.
Pathogen basics
The culprit behind brown patch is a fungus called Rhizoctonia solani. This pathogen thrives in warm, humid conditions and attacks the leaf blades and sheaths of turfgrass.
Here’s how it works: the fungus penetrates the grass tissue through tiny openings or wounds, feeding on the plant’s sugars and causing damage.
Key points: Warm weather, high humidity, and stressed grass are ideal conditions for this fungus.
Typical symptoms summary
Brown patch presents itself in distinct patches of discolored or dead turfgrass. Here’s what to look for:
The patches are typically 12-36 inches in diameter, with a brown, yellow, or tan color. The borders of these patches often have a smoky gray appearance.
The grass blades may wilt and collapse, giving the patch a ‘melting’ look. In severe cases, the entire patch may die off.
Causes and Risk Factors — Environmental and Cultural Drivers
Brown patch typically follows environmental stress like heat, humidity, and compacted soils that trap moisture. Weather alone can tip the balance, especially during periods of damp nights and warm days. Management choices, such as dense thatch buildup or irregular mowing, can create conditions the disease prefers.
High-risk scenarios include areas with poor drainage, overwatering, and stressed turf from shade or fertility imbalances. If you routinely mow too short or neglect aeration and overseeding, you’re increasing the chances of a breakout. Identify which factors you can adjust with reasonable, practical changes.
Weather and microclimate drivers
Brown patch loves humidity. It thrives when nights are warm too, usually between 60-85°F (15-29°C). That’s why you’ll often see it in late spring to early fall.
Leaf wetness duration matters. The longer your grass stays wet, the more likely brown patch is to spread. Early morning dew can be enough.
Be extra alert during humid nights and after heavy rain or irrigation.
Turf type and health factors
Certain grasses are more susceptible. Cool-season grasses like Kentucky bluegrass, tall fescue, and ryegrass are common targets.
Weak or stressed turf is an open invitation to brown patch. Poor drainage, compacted soil, or nutrient deficiencies can stress your lawn and increase risk.
Keep your lawn healthy with proper care to minimize risks.
Cultural practices that increase risk
Overwatering is a big no-no. It keeps your grass wet for too long, creating perfect conditions for brown patch.
Improper mowing can stress your lawn and make it vulnerable. Mow at the correct height for your grass type and avoid removing more than one-third of the grass blade at a time.
Excessive nitrogen fertilizer can lead to lush, succulent growth that’s easy prey for brown patch. Stick to recommended application rates.
Identify Brown Patch: Visual Checkpoints and Differential Diagnosis
Start with a visual survey: look for irregular brown areas with distinct edges and a slight halo of healthy turf. Compare the symptoms to other diseases and abiotic damage to avoid misdiagnosis. Take note of the advancing margin and any leaf tissue that shows darkened lesions or spotting.
Document what you see by photography and simple observations: shape, size, color, and progression over time. Keep in mind lookalikes such as other fungal diseases or drought damage, so you can differentiate them during diagnosis. This helps you decide whether to test further or adjust cultural practices first.
Key visual features and progression stages
Use this checklist to identify brown patch at different stages of development.
- Initial signs: Small, circular patches (1-2 inches) with light brown or yellowish centers.
- Classic ring/patch patterns: Dark brown rings surrounding lighter colored centers as the disease progresses.
- Symptom evolution: Patches can grow up to 3 feet in diameter and merge, forming large affected areas.
- Leaves: Leaves may appear water-soaked or greasy before turning brown and dying.
- Grass blades: Grass blades may wilt and collapse as the disease advances.
- Edges: Patch edges are usually well-defined, with a dark brown border.
- Timing: Brown patch typically starts at the center of affected areas and moves outward.
- Weather-dependent: Symptoms may worsen during humid, wet conditions and improve in drier periods.
Quick rule: If you spot these signs and symptoms, act fast. Brown patch can spread quickly under favorable conditions.
How to tell it apart from similar problems
Brown patch shares some similarities with other turf diseases and abiotic damage. Use this checklist to differentiate them.
- Dollar spot: Smaller (1-4 inches) silver dollar-sized patches, with bleached or straw-colored centers. Brown patch patches are larger and darker.
- Fusarium: Irregularly shaped patches with light brown to yellow centers. Fusarium patches often have a ‘frog-eye’ appearance in the center.
- Necrotic ring spot: Dark green rings surrounding lighter colored centers, unlike brown patch’s dark brown rings.
- Drought injury: Affected areas are typically larger and more uniform than brown patch patches. Grass blades may be wilted but not collapsed.
- Herbicide injury: Affected areas often have a distinct border or pattern related to herbicide application. Brown patch patches have no such pattern.
- Timing (Dollar spot & Fusarium): Both diseases can occur year-round, but brown patch is most active in warm, humid weather.
Quick rule: If you’re unsure, take photos and consult a local lawn care professional or extension agent for help.
Visual evidence to capture before treatment
Before treating brown patch, collect these visual records to aid diagnosis and track progress.
- Close-up photos: Capture images of affected leaves and grass blades at different stages of symptom development.
- Landscape photos: Take pictures of the entire affected area from various angles to show patch size, shape, and distribution.
- Timestamps: Note down or include timestamps in your photos to track disease progression over time.
- Recent care notes: Record recent lawn care activities (fertilizing, watering, mowing) that may have contributed to the outbreak.
- Environmental factors: Note down any unusual weather patterns or other environmental conditions that might be influencing the disease.
Quick rule: These records will help you and your lawn care professional monitor treatment progress and make informed decisions about future care.
Diagnostic Tests and Sampling Protocol (DIY and Lab)
On site, inspect for active symptoms by observing recent growth rings and moisture status in the soil. If you suspect active disease, collect symptomatic turf and nearby healthy tissue with clean tools to minimize contamination. Label samples clearly and avoid cross-contact between diseased and healthy areas.
For lab submission, include a short description of symptoms, the location, and recent management practices. Follow local guidelines for packaging and transport, and provide any known history of irrigation, fertilization, or chemical use. The goal is to capture the disease in action and get a reliable diagnosis.
Simple DIY tests and observations
Before you spend money on lab tests, try these simple at-home checks. They won’t give you a definitive answer but can point you in the right direction.
Leaf inspection: Brown patch leaves have dark brown to black patches with light-colored halos around them. The edges of these patches may be yellow or light brown.
Smell test: If your lawn has a musty smell, it could indicate the presence of Rhizoctonia solani, the fungus that causes brown patch. This smell is often most noticeable in the morning after dew has formed.
Microscopic look (if available): If you have a microscope and some experience using it, you can look for the fungal structures called sclerotia. They are dark, irregularly shaped, and about 2-3 mm in size.
How to collect a representative sample for a lab
Collecting the right sample is crucial for accurate lab results. Here’s how:
Sample size: You’ll need about 1 cup of turfgrass and soil from the affected area. Make sure it’s not too wet or too dry.
Collection method: Use a clean trowel to dig down about 2 inches into the soil, then cut out a plug of turfgrass and soil. Wrap it in a clean paper bag or aluminum foil to prevent contamination.
Documenting history and shipping: Note down any recent treatments, weather conditions, and other relevant details. Ship the sample to your chosen lab as soon as possible to maintain its integrity.
What to ask your extension agent or diagnostic lab
To get the most out of your lab test, provide them with as much relevant information as possible. Here’s what to ask for:
Sample metadata: Include details like turf variety, recent treatments (fertilizers, pesticides), soil moisture levels, and any other cultural practices you’ve used.
Interpretation guidance: Ask your extension agent or lab technician about the test results. They can provide insights based on their experience and help you understand what actions to take next.
Follow-up recommendations: Based on the results, ask for specific recommendations on how to treat and prevent brown patch in the future.
Fixes — Cultural Controls That Reduce Disease Pressure
Prioritize cultural changes that disrupt the disease cycle, such as improving drainage and adjusting irrigation to avoid prolonged leaf wetness. Regular dethatching and topdressing can reduce thatch buildup that harbors pathogens. Maintain consistent mowing height and remove clippings to prevent buildup that stresses the turf.
Implement targeted aeration or localized overseeding in thin areas to promote healthy, more resilient turf. Monitor nutrient balance to avoid excessive nitrogen that can encourage lush but vulnerable growth. Plan actions seasonally and align them with your local climate and turf type guidelines.
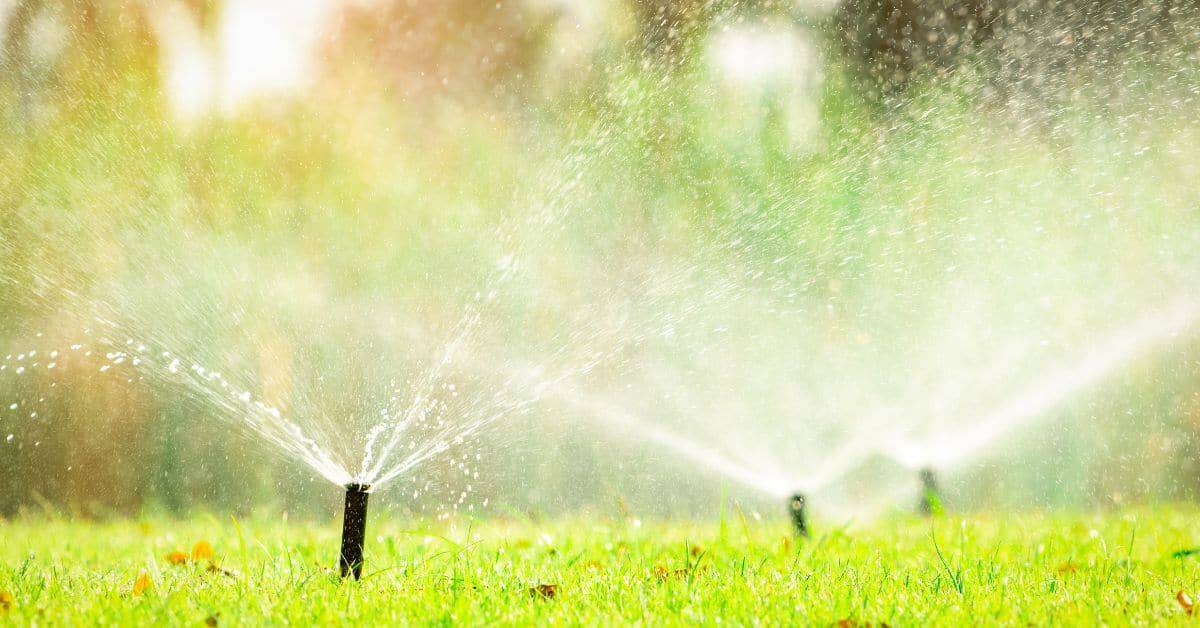
Watering strategies and irrigation adjustments
Brown patch thrives on prolonged leaf wetness. To reduce this, adjust your watering schedule.
Time it right: Water early in the day to allow leaves to dry quickly. Morning is best.
Cut back frequency: Deep, infrequent waterings encourage deeper root growth and make turf more drought-tolerant. Reduce watering to once a week.
Spread it out: Ensure your sprinkler system covers the entire lawn evenly. No dry or wet spots. Consider installing a rain sensor to avoid overwatering after rainfall.
Mowing, aeration, and thatch management
Maintain your lawn at the right height to reduce stress and disease risk. For cool-season grasses, keep it at 2.5-3.5 inches.
Aerate: Compacted soil prevents water and air from reaching roots. Aerate in late spring or early fall using a core aerator to relieve compaction.
Dethatch: Thatch buildup provides ideal conditions for brown patch. Dethatch when thatch layer exceeds 0.5 inches, usually every 1-3 years.
Overseed: Overseeding helps thicken turf and outcompete disease. Do this in late summer to early fall, after aerating and dethatching if necessary.
Fertility and soil health tweaks
Balanced fertilization promotes healthy turf that can better resist diseases. Test your soil pH annually. Ideal range is 6.0-7.0.
Nitrogen: Apply nitrogen in spring and fall, avoiding late-season applications that could stimulate new growth susceptible to brown patch.
Phosphorus and Potassium: Apply these based on soil test results. They help build strong roots and overall turf health.
Amendments: Incorporate organic matter like compost or topsoil to improve soil structure, water retention, and nutrient availability. Always check local recommendations and product labels before applying any amendments.
Fixes — Chemical and Biological Controls (Selection and Stewardship)
Explore fungicide classes with a focus on stewardship, resistance management, and label compliance. Where appropriate, consider approved biological options that support a balanced soil microbiome. Always check product labels for active ingredients, safety guidelines, and minimum retreatment intervals recommended by the manufacturer.
Integrate chemical and biological tools with cultural practices to reduce reliance on any single method. Avoid applying fungicides when conditions are unfavorable or when symptoms are inactive, and follow local advisories to protect surrounding materials and water sources. Prioritize treatments only when clearly warranted by the current risk level.
Fungicide classes and when to use them
Brown patch thrives in warm, wet conditions. Fungicides are your first line of defense. Here’s what you need to know:
Multi-site contact fungicides like chlorothalonil (Daconil) protect the leaf surface. They’re great for initial outbreaks but won’t prevent new infections.
Systemic fungicides like iprodione (Rovral) and thiophanate-methyl (Cleary’s 3336F) are absorbed by the plant, providing longer-lasting protection. Rotate these to delay resistance.
Use single-site contact fungicides sparingly due to quick resistance development. Always rotate classes to keep brown patch guessing.
Biologicals and reduced-risk products
Nature’s got its own fighters. Here are some biological options:
Biofungicides like Pseudomonas and Bacillus species compete with pathogens for space and nutrients. They’re eco-friendly but may not provide immediate results.
Cultural biostimulants like seaweed extracts (Maxicrop) enhance plant defense mechanisms. They won’t cure infections but can boost your lawn’s resilience.
Biologicals work best when conditions are favorable for the pathogen. Combine them with cultural controls and use fungicides as needed.
Safety, timing, and label compliance
Always read and follow labels. It’s the law and keeps you safe:
Check re-entry intervals to avoid contact with treated areas. Keep pets and kids away until it’s dry.
Time applications for maximum efficacy: apply late afternoon, after mowing but before irrigation or rain. Avoid applying when disease pressure is low.
Consider the environment: don’t spray if rain’s expected within 24 hours. Follow local advisories to protect water bodies.
Timing and Application Planning (When and How to Act)
Use a decision framework that weighs symptom severity, weather patterns, and risk factors before acting. Immediate action may be warranted when active symptoms expand rapidly or conditions are consistently favorable for disease growth. Otherwise, monitor and prepare preventive steps for the next favorable window.
When planning, verify local thresholds, product instructions, and any restrictions in your area. Schedule preventive measures ahead of peak risk periods and adjust timing based on observed turf response and seasonal changes. Keep a simple log of what you apply and when for future reference.
Emergency response steps for active outbreaks
If you’re seeing brown patch symptoms now, act fast to slow its spread. Here’s your immediate to-do list:
Adjust irrigation: Water early in the day and reduce frequency to keep soil moist but not soggy.
Remove clippings: Bag or collect clippings to prevent disease spread via mowing.
Targeted fungicide use: If symptoms are severe, consider a targeted fungicide application. Follow product instructions and consult your local extension agent for recommendations.
Preventive scheduling and seasonal cues
To stay ahead of brown patch, use your local climate patterns and turf growth cycles to build a preventive schedule. Here’s how:
In spring, as temperatures rise and grass starts growing, be ready with preventives.
In summer, when heat and humidity peak, stay vigilant and maintain cultural controls.
In fall, as nights cool down, focus on cleanup and winterizing. Consult your local extension resources for precise timing in your area.
Recordkeeping and monitoring to improve outcomes
Maintaining a simple log of weather, treatments, and observations helps you evaluate what’s working and makes future decisions easier. Here’s what to track:
Weather: Keep notes on temperature highs/lows, rainfall amounts, and humidity levels.
Treatments: Log cultural controls (watering, mowing, etc.) and any chemical or biological treatments applied.
Observations: Jot down symptom severity, turf recovery, and any other notable changes in your lawn’s health.
Tools, Materials Checklist and Visual Checkpoints
Prepare a DIY-friendly toolbox: basic hand tools, a notebook or digital log, clean sampling bags, and a camera or smartphone for photos. Include simple diagnostic aids and a moisture meter if available. Have maintenance items ready for immediate action if conditions are favorable for treatment.
When substitutes are needed, identify safe, practical alternatives for common tools and techniques. Keep notes on visual checkpoints such as edge progression, color changes, and surface moisture. Maintain a small, organized kit so you can respond quickly as conditions shift.
Essential tools and supplies for diagnosis and care
Before you start, make sure you have these essentials to accurately diagnose and treat brown patch.
- Camera: To document affected areas and track progress.
- Soil probe: To check soil moisture levels. If skipped, you might overwater or underwater your lawn.
- Spade: For digging up samples to examine root health.
- Moisture meter (alternative): A screwdriver with a built-in moisture sensor can help check soil moisture levels.
- pH testing kit: To ensure your soil’s pH is suitable for grass growth.
- Lawn spreader: For applying fertilizers and other treatments evenly.
- Garden hose with adjustable nozzle: For precise watering. Skipping this can lead to overwatering, encouraging disease.
- Rake or dethatching machine: To remove thatch buildup and improve air circulation.
Quick rule: Having the right tools ensures accurate diagnosis and effective treatment.
Visual checkpoints during recovery
After treating brown patch, monitor these visual signs to ensure your lawn is recovering properly.
- New growth: Look for green shoots and blades emerging from treated areas. If none appear, re-evaluate your treatment plan.
- Thatch reduction: Check if thatch layer has decreased after dethatching. Persistent thatch can hinder recovery.
- Soil color and texture: Healthy soil should be dark, crumbly, and moist but not waterlogged. If it’s still compacted or dry, consider aeration.
- Grass density: Monitor if grass is filling in bare spots. If not, you might need to overseed.
- Fungus residue: Check for any remaining fungal growth after treatment. If present, reapply fungicide as needed.
Quick rule: Regular visual checks help ensure your lawn is recovering and staying healthy.
Conclusion
Act now with a solid plan, because healthy turf is safer, lasts longer, and looks better when you control brown patch the right way.
Start by confirming symptoms with the visual checks you’ve learned, then run the DIY tests and sampling you’re comfortable with, begin cultural controls to ease disease pressure, align your timing and applications with the weather, and pick products only after reading the label and planning a small-area test first; proceed in a stepwise way and watch the result before scaling up.
Avoid common missteps: don’t overwater or overfeed while the patch is active, don’t mix or apply chemicals without reading and following the label, and don’t skip the small-area test or ignore safety gear and protective measures; if the weather is extreme or the disease persists after the initial steps, stop and reassess with safety in mind.
If the problem is widespread, if you’re unsure about the diagnosis, or if you’re dealing with potential pesticide exposure, call a professional rather than pushing on alone. Stay practical, stay safe, and you’ll keep the lawn resilient and looking sharp.
FAQ
What should I test or confirm before applying any treatment for brown patch?
Check the area for the exact symptoms and confirm it matches brown patch signs you’ve seen. Read product labels and follow the manufacturer instructions for timing, rates, and safety. If in doubt, check local rules or seek advice from the label or local extension service.
How do I tell brown patch from other turf problems?
Look for the specific pattern and timing of the symptoms you see, and compare with guides you trust. Note the environmental conditions and plant type, then verify with the recommended tests or sampling steps in the DIY guide. If unsure, don’t assume—check the label or instructions from the product or extension service.
When planning a treatment window and follow-up checks, what should I do?
Plan around a dry spell and apply only as directed on the label. Mark a follow-up date to re-inspect after a reasonable interval and adjust any cultural practices accordingly. Always verify any changes with the product instructions and local guidelines.
What common mistakes should I avoid when applying controls?
Avoid applying products at improper rates or times; follow the exact directions on the label. Don’t mix products unless the label allows it and you’re sure of compatibility. If you’re unsure, consult the label or manufacturer instructions before proceeding.