
Introduction
Water your lawn wisely with practical, DIY best practices and quick checks to keep it healthy and water-efficient.
You’ll learn how to gauge soil moisture, choose appropriate irrigation times, and spot signs of over- or under-watering, while following simple rules of thumb.
The guide walks through practical steps, from scheduling regular watering to making on-the-spot adjustments for weather and soil conditions.
Key takeaways
- Measure irrigation runoff; adjust sprinklers to avoid bald or oversaturated patches.
- Water deeply occasionally, not daily, to encourage deeper root growth.
- Water early morning before sunrise to reduce evaporation and disease risk.
- Test soil moisture weekly using a probe at 6–8 inch depth.
- Choose low-volume or drip options for irregular lawns to cut waste.
- Schedule seasonal adjustments for rainfall, soil type, and shade patterns.
Table of Contents
- Introduction
- Key takeaways
- Quick answer and what this guide covers
- How much and how often to water
- Best time of day and irrigation timing strategies
- Signs your lawn is overwatered or underwatered (visual and soil checks)
- Types of sprinklers and irrigation systems — pros, cons, and DIY tips
- Water conservation techniques and cost-effective strategies
- Tools, materials, and visual checkpoints for DIY watering maintenance
- Common mistakes and troubleshooting guide
- Conclusion
- FAQ
Quick answer and what this guide covers
This quick answer gives practical guidance on how often and how much to water most lawns. We cover general frequency and depth, and how to adjust for weather, soil type, and sun exposure. You’ll see a target moisture depth of about 6–8 inches and guidance on inches-per-week ranges, plus how to space irrigation events to reduce runoff, along with core DIY moisture checks and how to interpret the results.
Knowing this matters because it helps you spot under- or overwatering before damage shows up, and it keeps irrigation efficient in real garden conditions. You’ll learn about coverage and head alignment, the best times to water, wind considerations, and simple steps to fix poor drainage or adjust timers as seasons change. The sections ahead cover schedule templates, seasonal adjustments, common lawn pitfalls, a troubleshooting checklist, and the essential DIY tools and products you’ll want on hand.
Quick takeaway: frequency and depth
The quick rule of thumb is to water your lawn deeply but infrequently. This means giving the grass enough water to soak down about 6–8 inches into the soil, which encourages deep root growth for a healthier lawn.
To achieve this depth, you’ll need to adjust how often and how long you water. For most lawns in temperate climates, watering deeply once or twice a week is usually sufficient. Adjust based on weather conditions—more frequent watering during hot, dry spells and less when it’s cool and rainy.
Use your finger or a screwdriver to check soil moisture depth after watering. If you can easily push the tool 2–3 inches into the ground without much resistance, you’ve hit the right spot. This simple test helps ensure you’re not overwatering or underwatering.
Remember, depth is key—aim for that 6–8 inch penetration to keep your lawn green and healthy through all seasons.
Who this guide is for and scope
This guide targets DIY homeowners with typical lawns in temperate climates, covering both warm-season and cool-season grass types. It’s designed to help you understand the basics of lawn irrigation without diving into professional-level design or installation.
The article assumes you have a basic understanding of your sprinkler system and are comfortable making simple adjustments. If you’re new to lawn care, this guide will provide practical tips on how often and how much to water your grass for optimal health.
While we cover essential checks like ensuring even sprinkler coverage and avoiding dry spots, the guide does not delve into advanced irrigation systems or professional landscaping services. It’s all about getting you up to speed with simple, effective watering practices that anyone can follow.
If you’re looking for more detailed advice on specific grass types or need help with complex irrigation setups, consider consulting a landscape professional. But for the average homeowner, this guide should give you everything you need to keep your lawn lush and green without breaking the bank.
How much and how often to water
Watering needs hinge on soil type and drainage, your grass species and growth stage, and the season or current weather. Turn that into practical targets by delivering a deep soak per session and tracking a sensible weekly total, but always check the label or datasheet for your specific lawn and equipment. Pay attention to slope and avoid runoff by spacing long enough intervals between cycles.
Use catch cups or a soil moisture probe to see how quickly water infiltrates and how deep the moisture sits. Weather changes, heat waves, recent rainfall, and soil compaction all shift how often and how long you water, so adjust accordingly and keep an irrigation plan simple. Look for signs of imbalance like yellowing or overly blue-green leaves, and tune your schedule to protect the root zone.
Measuring water: inches per week and run-times
To figure out how much water your lawn needs, start by measuring the output of your sprinklers. Place several empty containers around your yard—like small cups or cans—and let them sit during a watering session. Once done, measure the depth of water in each container to get an average.
For example, if you find that your sprinkler system delivers about one inch of water per hour, and you want to give your lawn one inch of water per week, you can calculate how long you need to run it. Divide 1 inch by the amount delivered in each session—say, half an inch—to determine the number of sessions needed.
Remember, different grass types have varying needs. Fine fescue might only require a quarter-inch every few days, while Kentucky bluegrass could use up to three-quarters of an inch twice a week. Use these guidelines as starting points and adjust based on your lawn’s response.
To keep it simple, aim for deep, infrequent watering rather than light daily sprinkles. This encourages roots to grow deeper into the soil, making your grass more resilient during dry spells.
Adjusting for season and climate
The amount of water your lawn needs changes with the seasons and weather conditions. In spring, when temperatures are mild but still cool, you might need to water less frequently than in summer when it’s hot and dry.
In summer, increase watering frequency as heat intensifies. Aim for deeper, less frequent sessions rather than daily light sprinkles to encourage deep root growth. If there’s a sudden heatwave, bump up the watering slightly but avoid overwatering which can stress your lawn.
During fall, reduce watering gradually as temperatures drop and days shorten. By late autumn, you may only need to water once every week or two unless it’s unusually dry.
In case of heavy rainfall, skip scheduled watering sessions until the soil dries out a bit. Use a moisture probe or simply dig into your lawn with your fingers to check if more water is needed before turning on the sprinklers again.
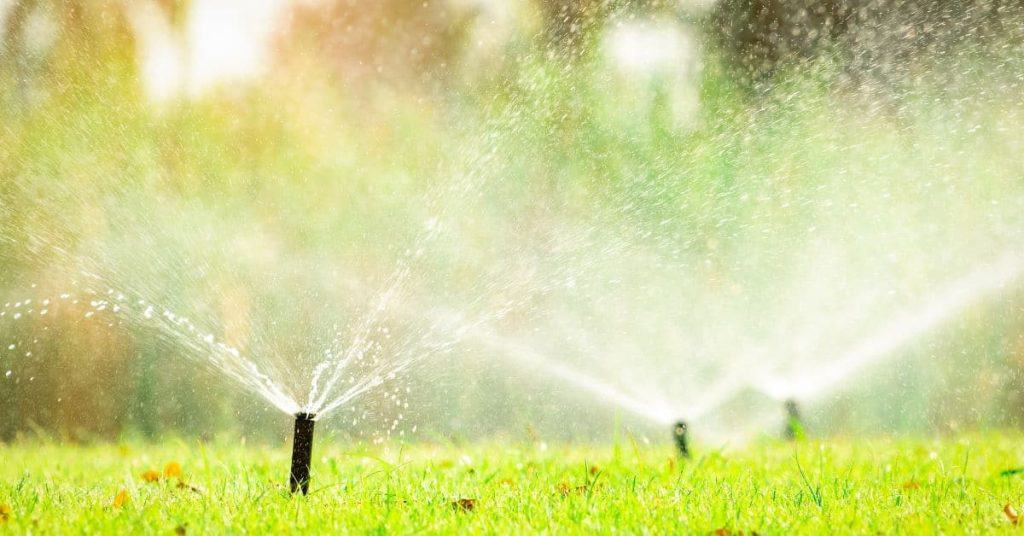
Best time of day and irrigation timing strategies
Early morning watering gives plants a chance to dry out before the heat of the day, which cuts evaporation, keeps leaf temperatures cooler, and uses the dew-to-dry window to reduce fungal risk. Evening watering often leaves extended leaf wetness hours and can invite disease, slug and snail activity, and unnecessary moisture overnight. That’s why I’m aiming for a morning window and avoiding late-day irrigation whenever possible.
For practical timing, think in short, deeper soak sessions rather than long, frequent sprays, and tune them to your soil type, turf density, and sun exposure. Check the forecast and use simple soil checks or moisture cues to avoid wasting water or creating runoff, and adjust with the seasons—spring and fall for calmer days, peak summer for tighter cycles. Use a straightforward routine: set a time-of-day rule, monitor soil moisture, and watch turf response so you know water is reaching root zone without sitting on the foliage; if you’re unsure, read the label or datasheet for your controller and irrigation heads.
Smart scheduling for sprinklers and timers
Set your sprinkler system to start early morning, around 5-6 AM. This timing allows water to soak into the soil before it evaporates or gets blown away by wind. For slopes or compacted areas, use a cycle-and-soak method. Water in short bursts with intervals for absorption.
Increase watering frequency during peak summer and reduce it in spring and fall when rainfall is more common. Adjust your timer settings accordingly to avoid overwatering. A good rule of thumb is to water less frequently but deeper, ensuring the roots get a thorough drink without surface runoff.
Check your system regularly for leaks or broken heads that waste water. Also, make sure nozzles are adjusted properly so they don’t spray onto sidewalks or driveways where it’s wasted and can cause erosion issues.
Weather-based adjustments and rain sensors
Use local weather forecasts to plan your watering schedule. Avoid setting the system to run during windy or hot days when evaporation is high. Instead, water early morning or late evening if it’s cooler.
Rain sensors are a smart investment for automatic shut-off when it rains. They prevent overwatering and save you money on utility bills. If your irrigation controller doesn’t have one built-in, consider adding an external rain sensor that connects to the system.
Smart controllers adjust watering based on real-time weather data. These devices learn from soil moisture levels and can be programmed via smartphone apps for easy adjustments. They’re particularly useful in unpredictable climates where rainfall patterns vary widely.
Signs your lawn is overwatered or underwatered (visual and soil checks)
Lawn problems from too much or too little water show up in color, texture, and how the turf handles foot traffic. Look for clear visual clues—blade color shifts, wilting patterns, edge crispness, and thatch changes—plus simple soil checks like how it feels and whether the lawn drains after a soak. Quick DIY tests, such as tugging to judge root/soil cohesion, doing a finger depth check, and noting thatch thickness, help confirm the trend without guessing.
These signs matter because misdiagnosis is common—fungal issues or drought stress can mimic over- or under-watering. Understanding soil cues, moss or algae presence, and any crusting tells you what the root problem is and what to fix first. A clear action path emerges: adjust irrigation duration or frequency, verify sprinkler coverage, address drainage, and re-test after a fix, while keeping in mind seasonal needs, lawn variety, and recent rainfall.
Simple soil moisture tests
To check if your lawn is overwatered or underwatered, start with the screwdriver test. Push a clean screwdriver into the ground; it should go in easily to about 4 inches deep without much resistance for healthy soil.
If you prefer a more precise measurement, use a moisture meter. Insert it at least 2-3 inches below the surface where roots are active. A reading of around 50% is ideal for most grass types.
For a deeper look, dig up some soil and inspect the root system with your hands or a trowel. Healthy roots should be white and firm—not brown and mushy from too much water.
When to dig deeper: diagnosing disease, pests, or compaction
If your lawn shows signs of overwatering like yellow patches but feels dry underfoot, it might be a fungal issue rather than too much water. Look for telltale spots or rings that spread.
Pests can also mimic drought stress by causing wilting and brown spots. Check for grub damage in the early morning when grubs are near the surface.
Compacted soil is another common problem, especially on high-traffic areas like paths or play zones. Soil feels hard and water pools rather than draining properly.
If you’re unsure about what’s causing your lawn issues, take a sample to your local garden center for expert advice. They can help identify the exact cause and recommend solutions.

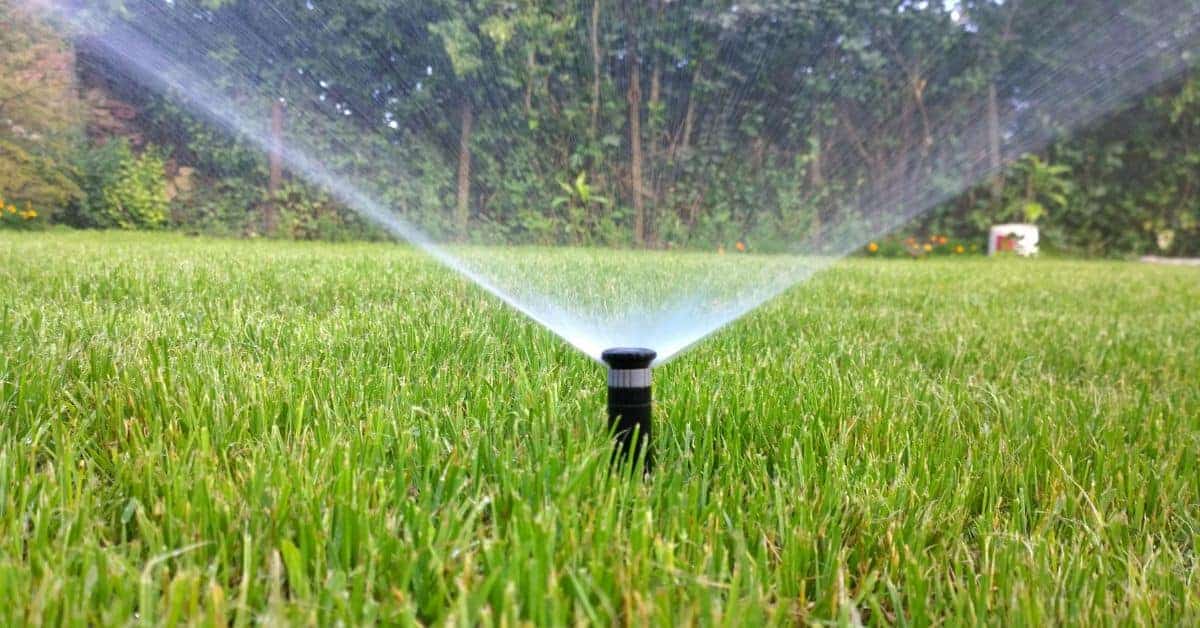
Types of sprinklers and irrigation systems — pros, cons, and DIY tips
This section breaks down the main sprinkler types—oscillating, rotary, fixed spray, drip emitters, and in-ground popup heads—and compares how they distribute water, where they fit best, and typical DIY use. You’ll see quick pros and cons for each type and practical notes on setup. No fluff—just the practical differences you need to plan a zone.
Choosing the right type comes down to yard size and shape, soil and sun exposure, water pressure, and budget, so plan zones and heads accordingly. For a DIYer, understanding the trade-offs helps prevent waste, overwatering, and early headaches with spacing, height, and timer integration. Watch for common pitfalls like improper spacing, pressure issues, and skipping backflow prevention; always check the product label or manufacturer instructions for specifics.
Choosing nozzles and spacing for even coverage
To get the best water distribution, start by selecting the right nozzle size based on your lawn’s slope and soil type. For flat areas with sandy soil, use smaller nozzles to prevent runoff. On slopes or clay soils, opt for larger nozzles to ensure deep watering.
Next, space your sprinklers correctly to avoid dry spots and overwatering. A good rule of thumb is to have each nozzle’s spray pattern overlap by at least 50%. This ensures even coverage across the entire lawn. For oscillating or rotary heads, aim for a spacing that allows water droplets to reach the edges of the next head’s spray.
Properly setting your sprinkler height also helps with coverage. Adjust each nozzle so it sprays at an angle just high enough to cover its intended area without wasting water on sidewalks or driveways. This might mean adjusting heads slightly higher in corners or lower in open areas.
Troubleshooting: If you notice dry spots, check your spacing and overlap first. Adjust the nozzle size if needed, but always ensure that each head is properly aligned to cover its designated area without gaps.
Low-water and precision options: drip, micro-spray, and smart controllers
Drip irrigation is ideal for shrubs, flower beds, and vegetable gardens where precise watering is crucial. It delivers water directly to the root zone with minimal evaporation or runoff, making it highly efficient.
Micro-sprays are great for small areas like borders or tight corners where traditional sprinklers might be impractical. They provide a fine mist that can reach closely planted flowers and shrubs without overwatering.
Smart controllers take water conservation to the next level by adjusting watering schedules based on real-time weather data. These systems learn your lawn’s needs and automatically adjust run times, saving water and money while keeping your grass healthy.
Tips: Consider using a combination of drip irrigation for plant beds and micro-sprays for tricky spots, complemented by smart controllers to manage overall watering efficiency. This setup minimizes waste and ensures every part of your yard gets the right amount of water at the right time.
Water conservation techniques and cost-effective strategies
Water conservation in the lawn comes down to practical choices you can implement without breaking the bank: mulch to lock in soil moisture, selecting drought-tolerant grasses or native mixes, using cycle-and-soak irrigation to soak deeply without ponding, harvesting rain where you can, and adjusting expectations with seasonal reductions as the weather changes. Start by setting realistic goals that tie turf health to lower irrigation needs, then choose mulches and plantings that fit your site, always checking labels or manufacturer guidance for layering thickness and compatibility with your soil type and existing irrigation setup.
This approach matters because it reduces weekly water bills and creates a more resilient lawn that handles heat and dry spells better, while giving you clearer signposts for when to tweak mowing height, monitor soil moisture, and address drainage or run-off issues. You’ll benefit from clearer maintenance routines, easier scheduling with timers or smart controllers, and a better sense of how much water your landscape truly requires, so you can make informed choices about rain barrels, irrigation adjustments, and seasonal reductions without guessing. If something seems off, check the product instructions, local recommendations, or your system’s label to confirm compatibility and safe operation.
Quick retrofits to improve efficiency
Improving your irrigation system’s efficiency can be as simple as making a few adjustments. Start by checking for leaks and fixing them immediately, as even small drips waste water over time. A rain sensor is another quick fix that stops the sprinklers during rain, saving you both water and money.
To further boost efficiency, adjust your sprinkler heads to ensure they’re not watering sidewalks or driveways. This simple change can significantly reduce wasted water. Also, consider upgrading older nozzles to dual-stream types that deliver more coverage with less water pressure.
Making these small changes can lead to big savings in your water bill and help keep your lawn healthy without overwatering. Remember, every little bit counts when it comes to conserving resources.
Regional tweaks and plant selection for lower water use
Selecting the right plants is crucial for reducing your lawn’s water needs. Opt for grass varieties that are native to your area or those labeled as drought-tolerant. These types of grasses naturally require less watering and can handle periods without rain better than traditional turf.
Consult local university extension services or gardening experts for recommendations on the best plants suited for your region. They often have detailed guides on which species thrive with minimal irrigation while still looking great in your yard.
In addition to grass, consider incorporating drought-resistant shrubs and flowers into your landscaping design. These not only add beauty but also reduce overall water usage compared to a full lawn area. By making these regional adjustments, you’ll create a more sustainable landscape that requires less maintenance and saves on resources long-term.
Tools, materials, and visual checkpoints for DIY watering maintenance
Build a simple DIY watering toolkit: moisture meter, graduated containers, a screwdriver, and a timer or controller, with extra batteries or a backup power option and basic measuring tools for even distribution. Use these to perform clear visual checkpoints: align irrigation heads, check sprinkler spacing, note dry or overwater footprints, watch soil surface moisture indicators, and spot obvious leaks or clogged emitters.
Keep calibration in mind: verify run times and target soil moisture by crop or turf type, and adjust for temperature, wind, rainfall, and seasonal shifts. Check coverage patterns, run quick uniformity checks, and look for spray drift, pooling, or wet spots. Create a simple maintenance cadence, clean nozzles and filters, and after watering, observe infiltration to catch problems early. If something looks off, start with tightening connections, swapping worn nozzles, or tweaking the controller; only escalate to more complex repairs if the basic checks don’t fix the issue.
Routine maintenance checklist and schedule
Use this checklist every season to ensure your irrigation system is running smoothly.
- Check timer settings: Adjust start/stop times for the season. Confirm by observing run cycles match planned schedule; skipping can lead to overwatering or under-watering.
- Clean sprinkler heads: Remove debris and dirt from each head. Check for clogs and clean with a screwdriver if needed; neglect leads to uneven coverage.
- Inspect nozzles: Look for wear, cracks, or misalignment. Replace damaged parts immediately to avoid dry spots.
- Test water pressure: Use a gauge at the main valve. Ensure it’s within manufacturer specs; low pressure means poor coverage.
- Check soil moisture levels: Test with a moisture meter in several areas. Adjust watering times if readings are off target; incorrect settings waste water and harm plants.
- Inspect for leaks: Look around valves, pipes, and heads for wet spots or puddles. Fix immediately to prevent damage and wasted water.
- Verify controller battery backup: Test the backup power source by unplugging the main supply briefly. Replace batteries if needed; failure can cause system downtime.
- Evaluate coverage uniformity: Use catch cans or a rain gauge under sprinklers to measure output. Adjust heads for even distribution; uneven watering stresses plants.
Quick rule: Regular checks keep your irrigation system running efficiently and prevent costly repairs.
How to test sprinkler output and adjust heads
Use this guide when you notice dry patches or uneven watering in your lawn.
- Set up containers: Place identical containers under each head. Run system for 15 minutes; measure water collected. Uneven amounts indicate misalignment or clogs.
- Check spray pattern: Observe the spread of water from each head. Adjust with screwdriver if needed to cover all areas evenly; skipping this step leads to dry spots.
- Inspect nozzle alignment: Ensure nozzles are straight and not tilted or blocked. Replace misaligned nozzles for even coverage; ignoring can cause overwatering in some spots.
- Test water pressure: Use a gauge at the main valve to check system pressure. Adjust as needed based on manufacturer specs; low pressure means poor coverage.
- Evaluate head spacing: Measure distance between heads and adjust if necessary for even distribution. Too close or too far apart leads to dry spots or overwatering.
- Adjust run times: Use the container test results to set appropriate run times in your controller. Ensure all areas receive adequate water; incorrect settings waste resources.
Quick rule: Regular testing and adjustments ensure even watering across your lawn.
Common mistakes and troubleshooting guide
This section highlights the most common watering mistakes and how they damage a lawn: too shallow or too frequent watering, underwatering, and skipping a deep soak. It also lays out corrective steps you can take, with a simple diagnostic framework to guide fixes.
You’ll get practical checks for symptoms, scheduling ideas by season and soil type, and fast, DIY fixes you can perform on the system. Use it to recalibrate run times, split cycles, adjust heads or controllers, and keep filters, nozzles, and gaskets in good shape for consistent performance.
Quick fixes for brown spots and puddling
If you notice brown patches on your lawn, start by checking the soil moisture. Use a simple probe or screwdriver to see if it’s too dry or waterlogged. If it’s dry, give those areas an extra soak; if wet, let them drain before watering again.
Adjust sprinkler heads that aren’t covering brown spots properly. Move them slightly closer or further away as needed for even coverage. Also, consider aerating the soil in these areas to improve water absorption and prevent puddling.
If you see standing water or persistent wet patches, check for leaks around your irrigation system. Even small drips can cause significant damage over time. Inspect hoses, connections, and sprinkler heads carefully.
Remember, some brown spots may just be a sign of recovery from stress. Wait a few days to see if the grass greens up naturally before taking more drastic measures.
When to call a pro
Sometimes, DIY fixes aren’t enough and you need professional help. If you notice major leaks or water waste from broken pipes or faulty valves, it’s time to bring in the pros.
If your irrigation system has persistent pressure issues—too high causing misting or too low leading to poor coverage—a pro can diagnose and fix these problems more efficiently than a DIYer.
Complex redesigns of your sprinkler layout might also require professional input. If you’re planning significant changes like adding zones for different water needs, a landscape expert will ensure everything is set up correctly from the start.
Signs to watch out for: persistent brown spots despite adjustments, major leaks or breaks in pipes, and uneven pressure across your system. These are clear indicators that professional assessment and repair are necessary.
Conclusion
Get confident that your lawn stays healthy without waste or damage by sticking to tested timing, soil checks, and smart system tweaks. The goal is durable growth, even color, and a lawn you can be proud of without breaking the bank or risking equipment.
First, check in this order: confirm your target zones and set a practical schedule, test a small patch for soil moisture, review today’s weather and upcoming forecast, run the system briefly to inspect heads and coverage, adjust sprinkler positions and run times as needed, look for runoff or pooling, and finally note any leaks or clogs before you seal up for the season.
Common mistakes to avoid are overwatering, watering at the wrong times, and ignoring changes in weather or soil. Don’t water when rain is forecast, don’t blast water onto sidewalks or driveways, and don’t skip seasonal checks or fail to test after making changes. Keep safety in mind: disable power before servicing controllers, and never work on live irrigation lines without shutting down the system first.
If you repeatedly fight uneven coverage, persistent leaks, or a controller you can’t tune, call a professional rather than pushing through on your own. Stay practical, stay cautious, and you’ll keep the lawn green, healthy, and affordable year after year.
FAQ
When should I water the lawn?
Water early in the morning. This helps roots drink before the day heat starts. Don’t water in the middle of the day or at night if you can help it.
How long should I water each area?
Water long enough to soak the root zone to a depth of a couple inches. Aim for uniform coverage across the lawn, not just the dry patches. Stop when the water starts pooling.
How often should I water in different seasons?
In hot weather, water more often but less each time so the soil dries a bit between sessions. In cool, damp periods, back off a lot and let the lawn drink from rain and cooler nights. Don’t overdo it in any case.
What signs show overwatering or underwatering?
Overwatering whispers as soggy soil, yellowing, and a soft feel underfoot. Underwatering shows as bluish-gray color, footprints that stay visible, and crisp edges. Adjust your schedule based on those cues.