
Introduction
These 14 ideas offer practical ways to create a mudroom feel without a dedicated space.
Key takeaways
- Prioritize a dedicated, weatherproof surface near entry for dirt-free routes.
- Measure doorway widths and clearance before choosing built-ins or freestanding units.
- Use a water-resistant mat and wipe-downable finishes for durable maintenance.
- Secure heavy items to walls or studs to prevent tip-overs.
- Plan modular pieces that can reconfigure when your space changes.
- Consider pet and kid zones with accessible storage and spill-friendly materials.
Table of Contents
- Introduction
- Key takeaways
- Quick Overview: Why Mudroom Alternatives Work
- Planning, Measurements, and Layout Basics
- Tools and Materials Checklist
- Built-in and Semi-Permanent Alternatives (Ideas 1–3)
- Furniture-Based and Freestanding Solutions (Ideas 4–6)
- Compact, Renter-Friendly, and Modular Ideas (Ideas 7–9)
- Outdoor, Seasonal, and Pet/Kid-Friendly Adaptations (Ideas 10–12)
- Creative Multipurpose and Dual-Use Ideas (Ideas 13–14)
- Conclusion
- FAQ
Quick Overview: Why Mudroom Alternatives Work
A good mudroom alternative creates a clear transition from outdoors to indoors. It helps you corral coats, shoes, and gear before they march through the house.
Think of it as a clutter-control zone that handles wet items and seasonal gear. The goal is to keep dirt and moisture contained and make first impressions feel orderly rather than chaotic.
When an alternative makes sense
A mudroom’s a dream, but not everyone can have one. Here’s when alternatives make perfect sense:
No dedicated space: If you’re short on square footage, don’t try to force a mudroom in. Alternatives can work wonders in tight spots.
Renter limits: As a renter, you might not have the freedom to build a permanent structure. Temporary solutions can keep your space tidy and dry.
Budget constraints: Mudrooms can be pricey. Alternative solutions offer affordable ways to control clutter and manage gear.
How to use this guide
This article’s packed with ideas, tips, and projects. Here’s how it’s organized to help you find what you need:
We’ve grouped ideas by type – from furniture hacks to wall-mounted solutions. Each has its own DIY tips, tools needed, and example projects.
Start by understanding your needs. Then dive into the sections that fit best. No need to read it all at once!
Remember: Pictures speak a thousand words. Check out the before-and-afters for real-life inspiration.
Planning, Measurements, and Layout Basics
Start with a quick scan of the entry: door swings, traffic flow, and available wall or floor space. Map out where you’ll place hooks, benches, and storage so things stay within easy reach.
Prioritize functions like shoe storage, outerwear, and drying space. Consider how often items are used and how many people will share the area to guide sizing and placement.
Measure and map your space
Before you start planning, grab a tape measure. You need to know what you’re working with.
Check these:
- Door swing – make sure it doesn’t block traffic or hit walls.
- Clearances – ensure there’s enough room for people and gear.
- Floor material – consider durability, traction, and ease of cleaning.
- Lighting – assess natural light and plan for artificial if needed.
Sketch a simple plan. Include doors, windows, outlets, and any fixed furniture. This helps visualize your layout before you buy or build anything.
Sizing and ergonomics to verify
Once you’ve measured, consider standard clearances and ergonomics. These ensure your space works well for users.
Clearances:
- Doors: 32″ minimum width for standard doors.
- Hallways: 36″ minimum width for comfortable traffic flow.
- Stairs: 36″ minimum width, with a landing at least 48″ x 30″.
Ergonomics:
- Seat height: Typical bench or chair heights are around 18″-24″.
- Hook reach: Aim for 48″ above the floor for easy access.
- Walking path clearance: Ensure there’s enough room to move around comfortably, even with bulky gear on.
Verify these against your occupants’ needs. Kids and elderly family members may require different considerations.
Tools and Materials Checklist
Have the basic cutting, fastening, and leveling tools on hand, plus safety gear for dust and splinters. A measuring tape, square, and orderly fasteners are essential for a clean install.
List optional tools that speed up assembly, then verify supplier instructions or rental terms before borrowing. Check local rules or guidelines if you plan any wall mounting or structural work.
Essential tools
Before you start, check off this list to ensure you have the right tools for your DIY project.
- Tape measure: To get accurate measurements. Wrong sizes mean wrong fits.
- Level: For straight lines and plumb walls. Crooked work looks sloppy.
- Circular saw: For cutting lumber to size. Wrong cuts waste material.
- Jigsaw: For intricate or curved cuts. Messy edges need touch-ups.
- Drill: To make holes for screws and nails. Cracked drywall from forced nails.
- Hammer: For tapping in nails. Bent nails mean weak holds.
- Screwdriver set: For driving screws. Stripped screw heads cause delays.
- Chalk line: To mark straight lines on large surfaces. Wavy lines lead to crooked cuts.
Quick rule: Don’t skip tools. It’s like trying to build a house with one hammer.
Material choices and durability notes
Choose the right materials for your project to ensure longevity and easy maintenance.
- Flooring: Opt for easy-to-clean, moisture-resistant options like luxury vinyl or porcelain tile. Spills soak in, stains stay.
- Wood species: Choose woods known for their resistance to moisture, like maple or bamboo. Warped wood means wasted money.
- Finishes: Use waterproof sealants and paints. Chipped paint needs touch-ups.
- Hardware: Select durable, rust-resistant materials. Broken hardware causes delays.
- Slip resistance: Ensure flooring has some texture to prevent slips. Smooth surfaces mean accidents waiting to happen.
- Waterproofing: Consider waterproof underlayment for added protection. Water damage leads to costly repairs.
- Wear resistance: Check the material’s durability rating. Scratched surfaces need refinishing.
Quick rule: Durable materials cost more upfront but save you money in the long run.
Built-in and Semi-Permanent Alternatives (Ideas 1–3)
Built-in cubbies or lockers with a bench create a compact, durable station that mimics a mudroom. They maximize vertical space and can be integrated with existing walls.
Pros include neat storage and a long lifespan, while cons are higher upfront effort and potential permanent layout constraints. DIY difficulty varies with cabinet construction, and you should follow manufacturer or local guidelines for mounting and finish care.
Built-in bench with cubbies and shoe storage
A built-in bench with cubbies and shoe storage is a space-saving, functional alternative to a mudroom. It provides seating for putting on shoes while keeping them organized.
Ventilation is key for shoe storage. Drill small holes in the bottom of each cubby or use mesh inserts to prevent odors. Prefabricated units can be cheaper and quicker, but custom builds offer better fit and design flexibility.
To build, frame out the bench using 2x4s, then attach plywood for the seat and backrest. Add cubbies with adjustable shelves for shoe storage. Secure to the wall for stability.
Wall of lockers or cubbies
A wall of lockers or cubbies is a great way to maximize space and keep everyone’s belongings separate. Modular units allow for easy rearrangement.
Use labeling systems to keep things organized, especially in family homes. Reinforce heavy use areas with 1/2″ plywood backing and sturdy hardware.
Install along a hallway or in an underutilized room. Secure to the wall for safety. Pre-made units can be assembled quickly, but custom builds offer better fit and design.
Nook closet conversion with sliding/bi-fold door
Converting an existing closet into a mudroom-style drop zone saves space and provides a dedicated area for coats, bags, and shoes.
Install shelving along the walls, using adjustable units to maximize space. Consider adding a bench or hooks for extra functionality.
Choose sliding or bi-fold doors to save hallway clearance. Sliding doors are easier to install but require more wall space. Bi-fold doors take up less space but can be trickier to install.
Furniture-Based and Freestanding Solutions (Ideas 4–6)
Moveable storage benches, cabinets on casters, or a sturdy console offer mudroom function without hard construction. They’re easy to tailor to your space and can be anchored for safety as needed.
Benefits include flexibility and simpler install, while downsides can be less integrated look or smaller capacity. Check stability, weight limits, and anchoring methods to suit your floor and walls.
Hall tree or coat rack with integrated bench
A hall tree or coat rack with an integrated bench is a great movable solution for your mudroom needs. Here’s how to choose one and make it work for you.
Stability: Look for a sturdy piece, preferably with a wide base and heavy-duty construction. Some come with levelers to ensure stability on uneven floors.
Positioning: Place it near the entrance, against a wall if possible, to maximize space and safety. If you have limited space, consider a corner unit or one that can be mounted on the wall.
DIY upgrades: Add baskets under the bench for shoe storage, extra hooks for coats and bags, or a cushion for added comfort while sitting. Make sure any additions don’t compromise the piece’s stability.
Console table with drawers, trays, and baskets
A console table can serve as a great freestanding mudroom solution. Here’s how to organize it effectively.
Drawers: Use drawers for small items like gloves, hats, or scarves. Keep them shallow to prevent overstuffing and ensure easy access.
Trays and liners: Add trays on top for sorting mail, keys, or other small items. Use non-slip liners to keep everything in place. Consider a tray with a dedicated slot for keys to prevent misplacing them.
Baskets: Place baskets under the table for shoes, umbrellas, or other larger items. Choose ones that slide easily in and out for convenience.
Shoe cabinet with ventilated shelves
A shoe cabinet is a practical solution for keeping your footwear organized and out of sight. Here’s how to choose one that works well in narrow halls.
Ventilation: Look for cabinets with ventilated shelves or slats at the bottom to allow airflow and prevent odors from building up. Some even come with adjustable shelves to accommodate different shoe sizes.
Slim profile: If space is limited, consider a slim-profile cabinet designed for narrow halls. These often have shallow depths but still provide ample storage.
DIY modifications: For added airflow and odor control, you can drill small holes in the back of the cabinet or add a small fan to circulate air. Always ensure any modifications won’t compromise the cabinet’s structural integrity.
Compact, Renter-Friendly, and Modular Ideas (Ideas 7–9)
Modular units or wall-hung organizers provide a lightweight, removable approach for small spaces. They can be reconfigured as your needs change or as you move later.
Benefits are minimal alterations and portable setup, while care must be taken to protect floors and ensure secure mounting when possible. Always verify weight tolerances and installation instructions for renters or non-structural walls.
Pegboard or Slatwall Organization System
For minimal damage, use removable adhesive hooks or command strips to mount pegboards or slatwalls. Choosepeg sizes that can hold coats and gear securely.
Pro tip: Avoid a workshop look by using decorative bins and baskets to store smaller items.
Arrange items by frequency of use, keeping everyday essentials at eye level for easy access.
Fold-down or Wall-Mounted Bench
Verify installation anchors can support the bench’s weight. Use materials like water-resistant MDF or plywood for durability against moisture.
For cushion comfort, use outdoor-rated foam and cover it with a waterproof fabric that wipes clean easily.
Pro tip: Consider adding a backrest for extra support when sitting.
When not in use, fold the bench up to save space.
Rolling Storage Cart or Coat Rack on Casters
Mobility is key with this option. Choose casters that lock in place to keep the unit steady when needed.
Configure tiers based on your storage needs – shoes at the bottom, umbrellas and outerwear above.
Pro tip: Use dividers or trays to separate smaller items like gloves or scarves.
When not in use, roll the unit out of sight to maximize space.
Outdoor, Seasonal, and Pet/Kid-Friendly Adaptations (Ideas 10–12)
Extend mudroom function outdoors with sheltered hooks and a dry seat that handles seasonal gear. Weatherproof materials help items stay organized without soaking through.
When kids or pets are involved, choose low, reachable storage and durable latches. Check for weather ratings, drainage considerations, and safe placement for all ages.
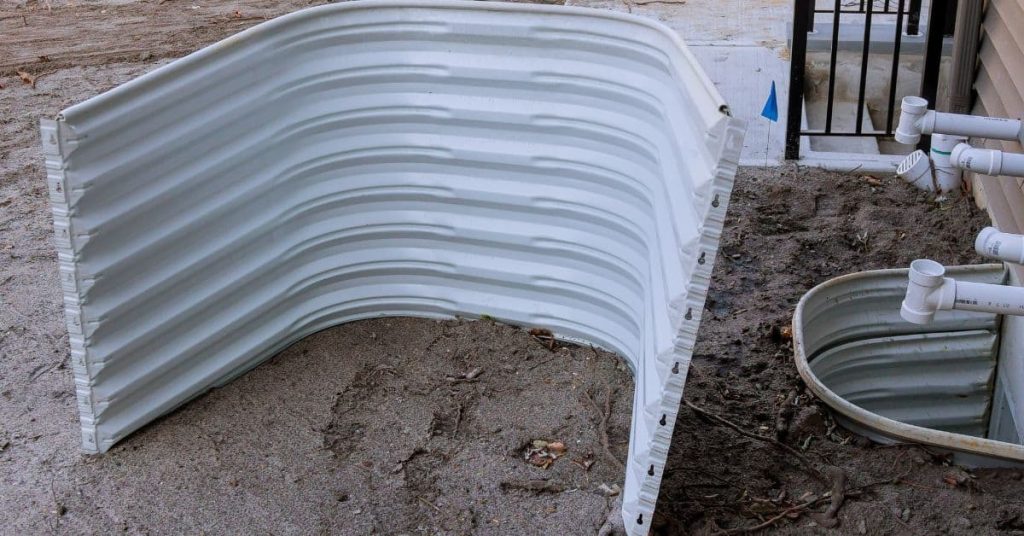
Covered Porch Boot Tray and Weatherproof Cubbies
Extend your mudroom function to the covered porch with a boot tray and weatherproof cubbies. This keeps dirt outside, protecting your floors.
Materials: Use weather-resistant materials like teak, composite, or sealed wood for trays and cubbies. Ensure they’re raised to allow water drainage.
Placement: Position the tray near the door to catch dirt from shoes. Cubbies should be placed high enough to keep contents dry during rain.
Heated or Ventilated Drying Station for Wet Climates
In wet climates, a drying station helps prevent mold and mildew. Consider both passive and active drying options.
Passive: Install a slatted shelf or rack to allow air circulation. Place it near an exterior wall with good ventilation.
Active (electrical): Use a heated boot tray or mat. Ensure proper electrical installation by a professional, keeping cords out of water’s way.
Pet and Kid Cleanup Station (Low Sink or Wipe Area)
A compact pet-cleaning station helps keep your home clean. Consider a low sink or wipe area for easy access.
Portable tub: Use a large, sturdy plastic tub on casters. Add a non-slip mat and secure it to the floor when in use.
Wipe area: Install a countertop with a backsplash near the entryway. Include a faucet for easy cleaning. Store supplies like towels and pet wipes in nearby cabinets or on hooks.
Creative Multipurpose and Dual-Use Ideas (Ideas 13–14)
Combine mudroom function with another use, like a laundry nook or small work surface. This creates efficiency but requires thoughtful planning for utilities and access.
Trade-offs include shared space and potential compromises on storage depth. Verify electrical or plumbing clearances if you’re pairing with a workspace or charging station and follow local codes for safety.
Entryway bench that doubles as laundry sorter or charging hub
A dual-purpose entryway bench combines seating with either laundry sorting or tech charging. Here’s how to keep it functional and organized.
For laundry, integrate ventilated cubbies under the seat for baskets. Use mesh or slatted shelves to allow airflow, preventing musty smells. Keep the bench backrest open for easy access to baskets. Hide tech cords by running them through the bench frame and out a small hole in the back.
For charging, add a power strip under the seat with cord management. Use USB ports for phones and tablets, and AC outlets for laptops or cameras. Keep the charging area separate from laundry to prevent cords from tangling or blocking access.
Sliding door or pantry-style organizer that conceals gear
A sliding door or pantry-style organizer hides clutter while keeping essentials accessible. Choose the right hardware for smooth operation and prevent overcrowding.
- Hardware: Use full-extension, soft-close slides for easy access to all shelves. Consider concealed hinges for a sleek look.
- Shelves: Adjustable shelves accommodate varying item heights. Keep them 12″ apart for optimal space usage.
- Depth: A 16″-24″ depth provides ample storage without blocking walkways.
- Organization: Use bins, baskets, and trays to keep small items contained. Label them for easy identification.
- Prevent overcrowding: Leave some space between items and at the back of shelves to allow air circulation and prevent dust buildup.
- Optional tools: Consider a vacuum cleaner with a long hose or a duster with an extendable handle for easy cleaning inside the unit.
Conclusion
One strong, durable setup is better than a dozen clever ideas that don’t hold up. Start with a solid plan, test a small area, and pick a solution that fits your space, your budget, and your daily habits.
To move forward, confirm your measurements, choose one or two off-the-shelf or simple built- in ideas, verify the weight and moisture tolerance of materials, gather the right tools, and run a quick fit test in a low-stakes spot before committing. If you’re renter-friendly or modular, sketch a simple layout, measure again, then assemble in stages and pause for a quick safety check after each step.
Common mistakes to avoid: overloading a hook or shelf and not checking weight limits, using slippery or subpar flooring where dirt and wet feet will land, and rushing through fasteners or seals that need to cure or set. Safety rules are simple—read manufacturers’ guidance, use level and fasteners appropriate for the surface, test a small area first, and don’t seal or alter an area if you’re not sure it won’t damage walls, floors, or finishes.
If you hit a tricky spot—unlevel floors, high humidity, or structural doubt—call in a pro rather than pushing through. A quick expert check can prevent costly fixes later. Stay focused, work in stages, and you’ll finish with a space that looks good, lasts, and keeps every day a little smoother.
FAQ
What’s the simplest way to start a mudroom alternative on a tight budget?
Use a sturdy bench with a shoe rack or cubbies underneath. Add a wall hook strip or pegboard for coats and bags. Keep flooring durable and easy to clean, like a sealed concrete patch, epoxy coating, or heavy-duty vinyl.
Label a small shelf for keys and mail to cut clutter right away. Check manufacturer instructions for weight limits on the hooks and the bench mounting options before you install.
How do I prevent mud and water from tracking indoors with portable or freestanding setups?
Raise footwear off the floor with a long, water-resistant runner or mat. Use a shallow tray or removable grate near the entry to catch water and dirt. Make sure the setup is easy to move for cleaning and drying between weather events.
Tell me what floors you have and I’ll help you pick a mat and tray that won’t slide or warp. For any product, verify installation guidance and slip resistance ratings on the label.
What should I consider when choosing built-in or modular pieces for durability?
Look for solid mounting points and properly rated hardware. Use water-resistant finishes on wood or choose metal-framed options for moisture exposure. Ensure the pieces fit your doorway width and leave space for movement.
Always follow the manufacturer’s assembly instructions and check weight capacities. If in doubt, ask about recommended fasteners and any required fastener spacing for your wall type.
How can I adapt a DIY entry area for pets and kids without score marks or damage?
Install low-level hooks and a catch-all tray at ground level to keep paw-shedding items contained. Use durable, easy-to-clean surfaces and wipeable mats that resist stains and odors. Keep sharp edges rounded and out of reach where possible.
Verify material safety and cleanability on product labels. For pets, pick entrance accessories that are easy to rinse and replace if needed. If you’re unsure about a material, check the manufacturer’s cleaning guidelines and local recommendations.