
Introduction
Setting up a DIY spray booth ventilation system can seem daunting, but with the right plan and timeline, it’s achievable in a weekend. This guide walks you through each step, from planning to installation, ensuring you stay on track and within your desired timeframe.
Before you start, gather all necessary tools and materials. This will save you time and ensure a smooth process. Let’s dive into the timeline and steps for creating an effective DIY spray booth ventilation system.
For the full guide, see Spray Booth Ventilation for DIY Projects: Fan Types and Safe Filter Stacks.
Timeline: Planning to Completion (Under 48 Hours)
The entire process can be broken down into two main phases: planning and installation. Each phase has specific tasks that should be completed within a certain timeframe to keep your project on track.
- Planning Phase (6-8 hours):
- Research and gather information about fan types, filter stacks, and safety considerations (2 hours)
- Measure your workspace and calculate airflow needs (1 hour)
- Create a detailed materials list and tool checklist (1.5 hours)
- Design the ducting layout and filter stack configuration (2 hours)
- Installation Phase (36-40 hours):
- Gather all materials and tools (1 hour)
- Build the fan mount, ducting, and filter box (12-15 hours)
- Install the fan, ducting, and filters according to your design (16-20 hours)
- Test the system for leaks and airflow (4-5 hours)
By following this timeline, you can complete your DIY spray booth ventilation project in under 48 hours, ensuring a well-ventilated workspace that keeps you safe and productive.
Key takeaways
The planning phase is crucial as it sets the foundation for a successful installation. Ensuring you allocate enough time for each task will help prevent delays and ensure your spray booth ventilation system meets your needs.
- Ensure ventilation planning starts with local codes and manufacturer instructions for components.
- Choose fans by practical needs, comparing noise, mounting space, and airflow rough estimates only.
- Build filter stacks from properly rated media, with fire-rated spacers between layers.
- Install ducting with minimal elbows, secure joints, and accessible cleanout points.
- Test system for leaks and airflow using safe checks; avoid electrical hazards.
- Document maintenance schedule and signs of filter clogging to avoid fires.
Table of Contents
- Introduction
- Key takeaways
- Why Ventilation Matters for DIY Spray Booths
- Basic Ventilation Principles for Small-Scale Booths
- Selecting Fan Performance Without Inventing Specs
- Filter Stacks: Layers, Materials, and Configurations
- Safe Materials, Fire Prevention, and Electrical Considerations
- DIY Installation, Ducting, and Tools/Materials Checklist
- Maintenance, Testing, and Troubleshooting
- Compliance, Certification, and When to Hire a Professional
- Conclusion
- FAQ
Why Ventilation Matters for DIY Spray Booths
Good ventilation protects your health by moving solvent fumes and paint mist away from your breathing zone; breathing those contaminants can cause short- and long-term effects. Poor ventilation also increases fire risk and can leave you with runs, orange peel, or trapped particulates in the finish.
Ventilation controls where contaminants travel so they don’t settle on the work or spread to adjacent spaces, and it helps keep flammable vapor concentrations below dangerous levels. If you’re unsure about exposure limits or flammability thresholds, check product labels and local guidance before proceeding.
Health and chemical exposure risks
Ventilation is your first line of defense against harmful chemicals in a spray booth. Paints, solvents, and isocyanates can cause serious health issues if inhaled or absorbed through the skin.
Airborne particulates and volatile organic compounds (VOCs) are a real concern. They can lead to respiratory problems, headaches, and even long-term damage like cancer. Controlling these with proper ventilation is crucial.
Remember, it’s not just about you. Poor ventilation can also affect others in your home or workspace. So, prioritize safety and keep those around you safe too.
Fire, ignition, and flammable vapor hazards
Spray booths can be ticking time bombs without proper ventilation. Overspray and solvent vapors create a highly flammable environment.
Ventilation helps reduce the concentration of these flammable vapors, minimizing the risk of fire or explosion. It also helps to remove hot spots that could potentially ignite the vapor.
Never smoke, use open flames, or operate electrical equipment with exposed wires in your spray booth. Always prioritize safety and maintain a clean workspace.
Basic Ventilation Principles for Small-Scale Booths
Airflow direction and speed determine how effectively overspray and fumes are captured and carried away from the workpiece; capture velocity at the spray zone matters more than random air movement. Pressure differentials—slight negative pressure inside the booth compared with surrounding areas—help prevent contaminants from escaping the enclosure.
Understand that airflow path should be straight and unobstructed from intake to exhaust to minimize dead zones where paint settles. When in doubt about required velocities or pressure relationships, consult product data sheets or a ventilation reference rather than guessing.
Airflow direction and capture strategies
In your DIY spray booth, you’ve got two main airflow strategies: capture-by-dilution and capture-at-source.
Capture-by-dilution is like a big fan blowing air around the booth. It dilutes overspray but doesn’t control it much. Not ideal for small spaces or high-risk materials.
Capture-at-source is better. You want airflow focused on where you’re spraying, pulling overspray away as soon as it comes out of the nozzle. This needs careful planning with your booth layout and fan placement.
For a bench or room booth, aim for a cross-draft pattern. Intake at one end, exhaust at the other. This creates a steady airflow across your work area, carrying overspray away efficiently.
Exhaust-only vs balanced systems
You can set up your booth with just an exhaust fan (exhaust-only) or balance it with supply and exhaust fans. Both have their pros and cons.
Exhaust-only is simpler, cheaper, and quieter. It works by creating a negative pressure in the booth, sucking air out. But it can cause makeup air to rush in through gaps, bringing dust and contaminants with it.
Balanced systems use both supply and exhaust fans to maintain neutral or slightly positive pressure. This prevents outside air from entering but requires careful fan sizing and balancing. It’s more complex and expensive but offers better control over your booth environment.
For most DIY projects, an exhaust-only system should suffice. But if you’re working with highly toxic materials or need a very controlled environment, consider a balanced system.
Selecting Fan Performance Without Inventing Specs
Start by measuring your booth volume and decide how many air changes per hour or what capture velocity you want, then use those targets to estimate required airflow. Compare that required airflow against fan curves while accounting for expected static pressure losses from filters and ducting to find a suitable fan.
Look up the fan’s performance on its product data sheet and verify that the fan can deliver required airflow at the calculated static pressure; check the manufacturer’s instructions for installation orientation and limits. If you don’t have the data, postpone selection until you can confirm the curve and pressure losses from the filters and ducts.
Conceptual airflow calculation
First, measure your spray booth’s volume. Multiply length by width by height to get cubic feet.
Next, decide how many air changes you need per hour. For most DIY projects, 10-15 is good. That’s the number of times all the air in your booth should be replaced every hour.
Now, calculate required airflow: Booth volume (in cubic feet) x Air changes needed (per hour).
Example: A 6’x4’x8′ booth needs 12 air changes per hour. That’s 192 cubic feet of air moved every minute.
Static pressure, duct loss, and fan curves
Filters, bends, and long ducts add resistance. They create static pressure that your fan has to push against.
Fan performance curves show airflow (CFM) at different static pressures. You need to know your system’s total static pressure to pick the right fan.
Here’s how: Measure or estimate your duct length and bends, then look up filter resistance. Add them together for total static pressure.
Now, find a fan that moves enough air (CFM) at your system’s static pressure on its performance curve.
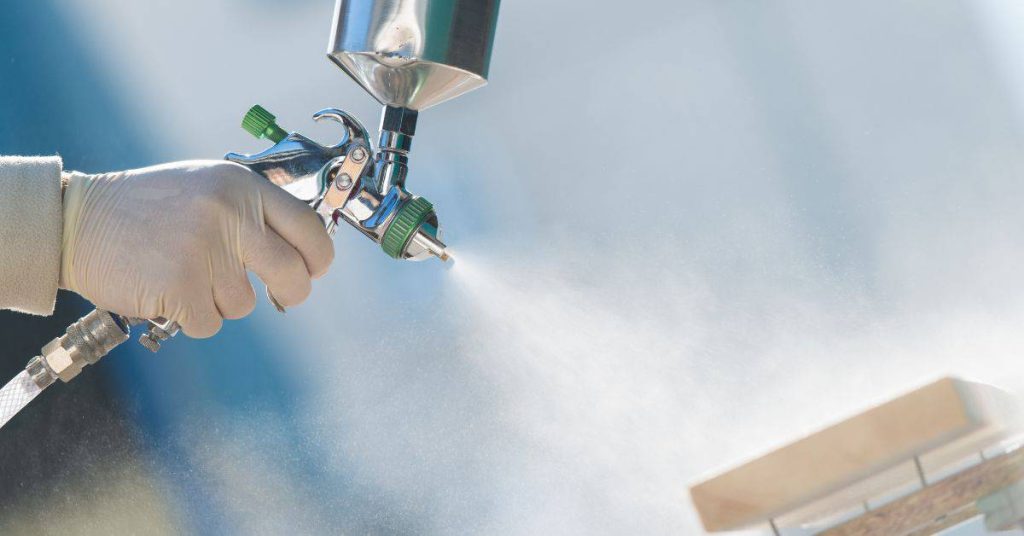
Filter Stacks: Layers, Materials, and Configurations
Use a multi-stage approach: coarse pre-filter to capture large particulates, then progressively finer particulate media, and a final stage for vapors such as an activated carbon or other adsorbent if you need VOC control. Place particulate stages upstream of adsorbents to prevent rapid clogging of the VOC media and to protect downstream components.
Select filter media appropriate for the contaminants you produce and verify chemical compatibility on product labels or manufacturer literature. If you’re unsure about media effectiveness for your solvents, consult the filter manufacturer or consider a professional recommendation.
Pre-filters and particulate arrestors
Your spray booth’s first line of defense against overspray and large particles are pre-filters. These are typically washable foam pads or pleated filters.
Washable foam pads are great for capturing larger droplets and can be cleaned and reused. They’re ideal for water-based paints but may not last as long with solvents.
Pleated pre-filters offer more surface area, trapping smaller particles than foam pads. They’re disposable, so keep extra on hand. Both types protect your main filters from clogging and maintain airflow.
Inspect pre-filters regularly. When they’re dirty or damaged, replace or clean them to keep your booth running smoothly.
High-efficiency particulate filters (HEPA or equivalent)
For fine particulates like dust and microscopic droplets, you’ll need high-efficiency filters. HEPA filters are the gold standard, capturing 99.97% of particles as small as 0.3 microns.
Install HEPA filters after your pre-filters to protect them from premature clogging. They increase static pressure, so you’ll need a fan with enough CFM to handle the extra load.
HEPA filters are disposable and should be replaced when they’re dirty or lose their efficiency. Regularly check your filter stack’s airflow to ensure it’s still performing as expected.
If HEPA filters aren’t necessary for your project, consider equivalent filters with a MERV rating of 16 or higher for comparable performance at lower cost.
Carbon and adsorption layers for VOCs and odors
Activated carbon filters are your weapon against volatile organic compounds (VOCs) and unpleasant odors. They work by adsorbing these contaminants onto their porous surface.
Use activated carbon filters when working with solvents, lacquers, or other high-VOC materials. They’re typically placed after pre-filters and HEPA filters in your stack.
Specialty adsorbents like potassium permanganate can enhance VOC removal but are usually reserved for professional-grade scrubbers. If you’re dealing with extremely hazardous fumes, consider hiring a pro to set up a safe system.
Carbon filters have a limited lifespan and should be replaced when they start to smell or lose their effectiveness. Regularly inspect your filter stack and follow manufacturer guidelines for replacement.
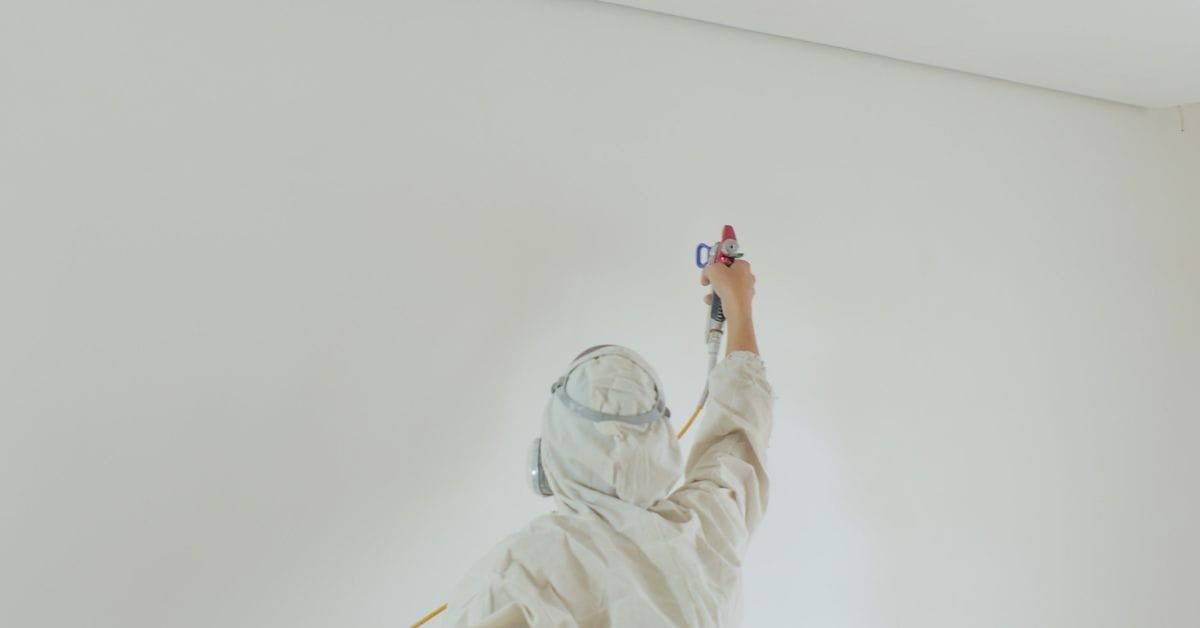
Safe Materials, Fire Prevention, and Electrical Considerations
Minimize ignition sources by using explosion-resistant fittings where required, locating motors and controls outside the booth or behind approved barriers, and avoiding hot surfaces near filters and solvent vapors. Use motors and wiring rated for the expected environment—check labels and wiring diagrams and follow local electrical codes for hazardous locations if applicable.
Keep filter housings and ducts free of accumulated deposits and position fans and filters so a fire in one component won’t directly ignite others; maintain easy access for inspection and removal. If you’re uncertain about classification of the area or required motor ratings, consult the product documentation or a qualified electrician.
Spark control, grounding, and bonding
In your spray booth, sparks can start fires. To prevent that, you need to control static electricity and sparks.
Ground all metal parts of the booth. This helps discharge any static buildup safely. Use a heavy-duty ground wire connected to an earth rod driven into the ground at least 8 feet deep.
Use intrinsically safe or spark-proof motors for your fans and other electrical equipment. These motors are designed to prevent sparks, reducing fire risk.
Filter fire resistance and placement strategies
Filters can catch sparks and ignite if they’re not protected. Here’s how to keep them safe:
Use fire-retardant filter housings. These are designed to resist flames, giving you more time to react in case of a fire.
Avoid placing temperature-generating components near filters. Heat can degrade the filter media and cause fires.
If your booth has spark traps, place them before the filter media. This helps catch sparks before they reach the filters, reducing the risk of ignition.
DIY Installation, Ducting, and Tools/Materials Checklist
Plan layout first: mark intake and exhaust locations to create a clear airflow path and measure duct runs so you can size components and anticipate elbows and fittings. Choose smooth-walled ducting where possible to reduce pressure loss and use appropriate connectors and support to prevent sagging or leaks.
Gather a basic toolset—drill, level, screwdrivers, duct straps, sealant compatible with your materials, and PPE—plus materials like mounting brackets, appropriate ducting, and rated electrical components. If any product instructions specify special fasteners or sealants, use those rather than substituting unknown alternatives.
Booth layout, intake/exhaust placement, and visual checkpoints
Before installing your ductwork, plan the layout to ensure proper airflow. Use this checklist to guide you.
- Intake: Place it low, near the floor for optimal air capture. Avoid placing it directly opposite exhaust to prevent short-circuiting.
- Exhaust: Position it high, near the ceiling to remove contaminated air effectively.
- Airflow path: Ensure a clear path from intake to exhaust with no major obstacles.
- No dead zones: Check for areas where air might stagnate and not be captured by the system.
- Visual check – intake: Hold a piece of lightweight material near intake. If it’s pulled towards the booth, your intake is working.
- Visual check – exhaust: Do the same near exhaust. The material should be pushed away from the booth.
- Uniform airflow: Check for even airflow across the entire booth width using a smoke test or visual inspection with a lightweight material.
- Avoid recirculation: Ensure intake and exhaust are not too close together to prevent recirculating air back into the booth.
Quick rule: Always check airflow visually before and after installation to ensure everything is working as intended.
Duct materials, joints, sealing, and flex vs rigid tradeoffs
Choosing the right ducting is crucial for efficient airflow. Consider these factors when selecting your ducts.
- Material: Choose between flexible (e.g., aluminum or plastic) and rigid (e.g., metal or fiberglass) ducts based on your needs.
- Size: Match duct size to fan capacity. Undersized ducts cause backpressure, while oversized ones reduce efficiency.
- Bends: Keep bends to a minimum and use gradual curves to avoid excessive static pressure loss.
- Transitions: Use transitions between duct sizes gradually to maintain airflow velocity.
- Sealing: Seal all joints with mastic or tape to prevent leaks. Leaks reduce system efficiency and can cause backdrafts.
- Fasteners: Use suitable fasteners (e.g., screws, clamps) to secure ducts together and to the booth structure.
- Support: Ensure ducts are properly supported along their length to prevent sagging or collapse.
- Insulation: Insulate ducts if they pass through unconditioned spaces to maintain air temperature.
Quick rule: Always choose ducting that matches your fan’s capacity and airflow requirements for optimal performance.
Tools and materials checklist
Before you start, gather all necessary tools and materials to ensure a smooth installation process.
- Tape measure: Essential for accurate duct sizing and placement.
- Level: Ensure ducts are properly aligned and mounted.
- Screwdriver/drill: For securing mounting brackets and fasteners.
- Duct mastic or tape: For sealing joints to prevent leaks.
- Mounting brackets: Secure ducts to the booth structure. Check fan manufacturer’s recommendations for suitable brackets.
- Gaskets: Use gaskets between ducts and mounting surfaces to create a proper seal.
- Clamps: Temporary clamps can help hold ducts in place while securing them permanently.
- Safety glasses: Protect your eyes from debris during installation.
Quick rule: Always check fan and filter manufacturer recommendations before purchasing tools, materials, or fasteners to ensure compatibility.
Maintenance, Testing, and Troubleshooting
Perform routine checks: inspect and replace filters when loading restricts airflow, clean ducts and housings of settled paint, and verify fan bearings and belts where applicable. Use smoke, light paper, or anemometer tests to confirm airflow patterns and that capture at the spray face is effective.
Handle used filters as contaminated waste per product instructions and local disposal rules, and isolate them during removal to limit dust or vapor release. If performance degrades and simple fixes don’t work, stop using the booth until you can determine whether the fan, ducting, or filters are the issue.
Visual inspection and performance testing
Regularly check your spray booth ventilation system to ensure it’s working properly. Use this checklist for simple, effective tests.
- Smoke test: Use incense or smoke pellets to confirm airflow. Light one up near the intake and exhaust. You should see a steady stream of smoke exiting the booth.
- Paper test: Hold a piece of paper near the intake and exhaust. Airflow should pull it towards the exhaust.
- Differential pressure gauge: Measure the pressure drop across your filters. If it’s too high, clean or replace them.
- Noise/vibration check: Listen for unusual noises or vibrations from the fan. Excessive noise could indicate a problem with the motor or blades.
- Check ductwork: Ensure all ducts are properly connected and sealed, with no leaks or kinks.
- Examine filters: Inspect pre-filters for dust buildup. If they’re clogged, clean or replace them.
- Monitor fan speed: Ensure the fan is running at the correct speed. Too slow could indicate a problem with the motor or controls.
- Temperature check: Feel the exhaust air. It should be warm but not hot enough to burn you.
Quick rule: If anything seems off, don’t ignore it. Address issues promptly to prevent bigger problems down the line.
Filter replacement, cleaning, and safe disposal
Regularly service your filters to maintain efficient airflow and protect your health. Here’s how:
Pre-filters: Clean or replace every 1-3 months, depending on usage. Wear a dust mask when handling.
High-efficiency media: Replace every 6-12 months. Always wear appropriate PPE during changes.
When disposing of filters, follow local regulations for hazardous waste. Some areas require special disposal methods for asbestos or other harmful materials found in some filter types.
Common problems and fixes
Reduced airflow: Check filters. If they’re clean, inspect ductwork for leaks or kinks. If all else fails, consult a pro.
Excessive noise: Inspect fan blades and motor. Clean any dust buildup. If the problem persists, stop using the system and call a technician.
Motor overheating: Ensure proper ventilation around the motor. If it’s still overheating, turn off the system immediately and contact a pro.
Safety first: If you’re unsure about any issue, stop using the system until you can consult an expert. Your safety is paramount.
Compliance, Certification, and When to Hire a Professional
Check local building codes, fire department rules, and environmental regulations for requirements on solvent handling, exhaust discharge, and electrical installations; these vary widely and can affect design choices. Look for documentation like local code sections, permit guidelines, or authority having jurisdiction instructions when in doubt.
Hire a professional if your project involves large quantities of flammable materials, classified hazardous locations, or when compliance documentation, testing, or certification is required. If you encounter system instability, unexplained odor/vapor migration, or anything that looks like a code violation, get a qualified designer or inspector involved before continuing.
What to verify with local authorities and standards
Before you start your DIY spray booth project, reach out to your local building department. They’ll guide you through the necessary permits and regulations.
Here’s what you should confirm:
Permitted VOC limits: Different areas have varying rules on volatile organic compounds (VOCs). Make sure your spray materials comply.
Electrical permits: If your booth requires electrical work, you’ll need a permit. Your local authority will tell you how to obtain one.
Required filtration standards: Check if there are specific filtration requirements in your area. This could affect the type of filters you use.
When to use a certified installer or industrial solution
While DIY is great, there are times when it’s best to leave things to the professionals. Here are some scenarios:
Large-volume solvent use: If you’re planning to use large amounts of solvents, consider hiring a professional. They can design a system that safely handles the volume.
Commercial operations: If your project is for a business or commercial space, it’s usually required by law to have a certified installer. Safety standards are higher in these environments.
Hazardous materials: If you’re working with hazardous materials, do not attempt to install the ventilation system yourself. Hire a professional who understands the risks and knows how to mitigate them.
Conclusion
Keep the booth safe, durable, and clean by focusing on proper airflow, sound filtration, and safe wiring. When you do it right, finishes look better and you avoid costly damage or fires.
First, verify your space and plan for intake and exhaust, confirm the filter stack order and materials, size a sensible fan without guessing, install fire-safe wiring, lay out ducting with gentle turns, seal joints, and then test with a simple smoke or airflow check before you spray anything. Run a real-world test in a small area, monitor temps and pressures, and adjust as needed until everything reads steady.
Common mistakes to avoid include using non-fire-rated filters or stacking filters without considering heat and ignition risks, stuffing ducts with sharp turns or long runs that choke airflow, and skipping electrical safety steps or proper disconnects. Never spray without confirming ventilation is under control, never bypass safety devices, and always disconnect power when you work on the setup.
If you’re unsure about wiring, electrical safety, or certification questions, call a professional rather than guessing. Stay disciplined, follow the steps, and you’ll finish with a safe, reliable system you can trust with every project. Safety first, test thoroughly, and keep it simple.
FAQ
How do I assemble a safe filter stack for a DIY spray booth?
Choose filter media your manufacturer approves for spray finishes. Layer from coarse to fine and keep interfaces sealed. Check labels for compatibility and follow local rules for fire and airflow safety.
What electrical and wiring checks should I do before powering a fan?
Make sure the circuit can handle the load and the switch is rated for the motor. Use proper wiring, a grounded outlet, and secure all connections per the manufacturer instructions. If in doubt, look up local rules and consult a qualified electrician.
How can I verify you’re getting adequate ventilation without exact specs?
Inspect the system for air movement at the booth opening and listen for steady airflow. Review the manufacturer instructions or label on the fan for recommended configurations. If you’re unsure, compare to similar setups and check for signs of stagnation or back-drafting.
What signs show my ducting or filters are not safe and need attention?
Look for loose connections, crushed or kinking ducts, and obvious wear on filter media. If filters or duct joints smell off or appear degraded, pause use and verify with the manufacturer’s guidance. Always follow local rules and replace components per label or instructions.