
Introduction
Interior and exterior paint differ in formulation and performance, and choosing the right type protects surfaces and keeps color looking good.
You’ll learn how to assess exposure and conditions to decide which paint to use, plus practical tips for applying and matching finishes across rooms and exterior projects.
Key takeaways
- Interior paints emphasize low odor, scrubbability, and stain resistance for living spaces.
- Exterior paints resist weather, UV, moisture, and cracking across multiple seasons.
- Using wrong paint causes peeling, fading, mildew, or solvent odors indoors.
- Short-term cost saves may equal higher maintenance or repaint in future years.
- Choose across surface: prep, stain blocking primer, and finish level per room.
- Prep and tools: caulk gaps, clean surfaces, protect surroundings before painting.
Table of Contents
- Introduction
- Key takeaways
- Chemical and formulation differences explained
- Designed-for conditions: performance in real-life environments
- What happens if you use the wrong paint — real-life consequences
- Cost comparison: short-term vs long-term consequences
- Choosing the right paint for each room and surface — a step-by-step selection guide
- Tools, materials checklist and prep best practices
- Case studies and common homeowner mistakes (real examples)
- When to hire a professional painter and what to expect
- Conclusion
- FAQ
Chemical and formulation differences explained
Interior and exterior paints use different blends of pigments, binders, solvents, and additives, and those choices drive how the coating behaves. The formulation changes affect durability, flexibility, breathability, and VOC emissions, so don’t assume one product fits all surfaces. You’ll see why pairing the right chemistry with the right space matters for long life.
For DIY folks, understanding these basics helps you pick the right product for the job—substrate type, climate, sun exposure, and how much moisture you’ll face all matter. Look for binder type, solvent system, and outdoor-ready additives when choosing exterior—or interior options that curb odors and improve indoor air quality. And watch for mismatches: a poor blend can peel, chalk, or trap moisture, so check the label and apply common-sense checks before you buy.
Binders and durability
The type of binder used in paint is crucial for determining its overall performance. For interior paints, common binders include acrylics and latex, which provide good flexibility and adhesion to a variety of surfaces. These binders are designed to be easy on the nose and quick-drying.
Exterior paints often use more robust binders like silicone-modified or alkyd resins. These binders are formulated with UV stabilizers and moisture resistance, making them ideal for outdoor conditions where they face constant exposure to sunlight and rain. For example, a high-quality exterior paint might contain silicone additives that enhance its durability against harsh weather.
When choosing between interior and exterior paints, it’s important to consider the environment you’re painting in. If you’re working on an indoor project, go for acrylic or latex binders for their ease of use and good adhesion properties. For outdoor projects, opt for silicone-modified or alkyd resins that can withstand the elements.
Additives and mildew resistance
The additives in paint play a significant role in how well it performs over time. Exterior paints often include UV stabilizers to protect against sun damage, while interior paints might focus on anti-microbial agents to prevent mold growth.
For example, an exterior paint might contain zinc oxide or other biocides that help fight off algae and fungi, which are common issues in humid climates. On the flip side, interior paints may have mildewcide additives specifically designed for bathrooms and kitchens where moisture is high.
Additives also affect how a paint covers imperfections on walls. Fillers like silica or calcium carbonate can smooth out rough surfaces, making your final coat look more professional. This is particularly important in areas with lots of traffic or wear-and-tear.
VOCs, odors, and indoor air quality
The level of Volatile Organic Compounds (VOCs) in paint is a key factor when choosing between interior and exterior paints. Interior paints typically have lower VOC levels to minimize odor and improve indoor air quality.
Exterior paints often contain higher solvent levels, which can lead to stronger odors during application. This is because they need to be more durable and weather-resistant, requiring tougher solvents that might not be suitable for enclosed spaces.
To ensure a comfortable living environment when painting indoors, look for low-VOC or zero-VOC paints. These options are designed to minimize odor and reduce the risk of respiratory issues during and after application. For outdoor projects, while VOC levels may be higher, they serve an important purpose in maintaining paint integrity over time.
Designed-for conditions: performance in real-life environments
Designed-for conditions means recognizing how real-life environments stress paint films. Different paints stand up to temperature swings, UV exposure, moisture cycling, foot-traffic abrasion, and cleaning frequency in distinct ways, and you’ll see that on color stability and film integrity. The right choice depends on whether you’re indoors with humidity shifts or outside facing weather, and on how often you plan to wash or scrub surfaces.
Knowing these stresses helps you pick the right product for drywall and plaster inside, or plywood and masonry outside, and it guides expectations for stain resistance, water repellency, mildew control, and overall life in use. It also points to practical failure modes and how prep, primers, sealers, and topcoats shape outcomes, plus when a mixed approach makes sense and how to schedule maintenance around seasons. Watch for signs that a coating is near its end and follow simple, home-friendly rules to keep paint looking good longer.
Exterior stressors
The sun’s UV rays can break down exterior paint over time, causing it to fade and chalk. Rain and freeze-thaw cycles also take a toll by swelling and shrinking the wood or masonry, leading to cracking and peeling.
Airborne particulates like dust and pollen stick to wet paint, leaving marks that are hard to clean off once dry. This is why exterior paints need additives for better durability against these elements.
When it comes to dealing with the sun, choose a paint with UV inhibitors. For moisture issues, look for one that’s water-resistant and can handle freeze-thaw cycles without cracking or peeling.
To protect your home’s siding and trim from all this wear and tear, pick an exterior-grade paint designed to flex with temperature changes and resist dirt buildup. It’ll last longer and keep looking good.
Interior stressors
Frequent cleaning is tough on interior walls. Grease from cooking can also stain the paint, making it look dingy over time. Condensation from showers or steamy kitchens adds to the wear.
The impact resistance of interior paints is crucial too. Kids’ toys and furniture moving around can scratch and dent drywall easily if you don’t have a tough finish.
When choosing an interior paint, look for one that’s easy to clean but also resists stains from grease and other household spills. A good scrub-resistant topcoat will save you time in the long run.
To keep your walls looking fresh longer, use a primer before painting if there are any stains or marks on the wall. This helps seal them off so they don’t show through the new paint layer.
Surface movement and flexibility
Exterior paints need to be flexible enough to move with temperature changes without cracking or peeling. This is especially important on wood siding, where expansion and contraction can cause stress.
Interior paint doesn’t face the same extreme conditions but still needs some flexibility for minor surface movement like plaster cracks. However, it prioritizes a smooth finish that’s easy to clean and maintain.
For exterior surfaces, look for paints with high elasticity ratings. They’ll stretch and contract without breaking down over time, keeping your home looking fresh longer.
In contrast, interior paint focuses more on scrub resistance and color retention. It needs to withstand daily wear from cleaning while maintaining its original appearance and gloss level.
What happens if you use the wrong paint — real-life consequences
Using the wrong paint shows up in real life as a chain of failures you’ll notice at first glance: peeling and cracking when the resin, substrate and surface prep aren’t aligned; mold and mildew forming in moisture-prone spots; and stubborn adhesion problems that make edges lift or entire coats flake off. You’ll also see discoloration or staining, often from UV exposure or chemical shifts, plus potential health concerns from VOCs or mold in living spaces, with practical indoor examples like bathrooms or kitchens where the wrong formulation meets high moisture. These signs point to mismatched resin systems, improper surface prep, and moisture, temperature, or humidity misfires that block proper curing and performance.
Why it matters to you as a DIYer is simple: misfits between interior and exterior formulations show up as ongoing upkeep costs, weathering, or the need for redo, sometimes sooner than you expect. You can spot issues early with quick checks—moisture readings, basic adhesion tests, and confirming substrate compatibility before buying—then plan the right remedy, from sanding or stripping to priming or full replacement, and ensure ventilation and adequate drying. When a substrate is troublesome, or the wrong paint is already in place, the best path is often to bring in a pro to avoid compounding failures and warranty headaches, plus a straightforward decision checklist helps you communicate with contractors and avoid mismatches in the first place.
Using exterior paint indoors
When you use exterior paint inside, it can cause a host of issues. Exterior paints are formulated to withstand the elements and often contain higher levels of VOCs (volatile organic compounds), which can lead to strong odors and potential health risks in enclosed spaces.
The finish might also be too rough or uneven for indoor aesthetics, and it won’t adhere well to interior surfaces like drywall. This mismatch means the paint could peel off easily, leaving a mess behind. Plus, exterior paints are designed for outdoor conditions where they can breathe and expand with temperature changes—indoors, this isn’t possible, leading to cracking and peeling.
Another issue is that exterior paints often have additives meant to resist UV rays and moisture, which aren’t necessary indoors but can cause discoloration or staining over time. Always check the label or consult a paint expert before making your choice to ensure you’re using the right type of paint for the job.
Using interior paint outdoors
Interior paints are not built to handle outdoor conditions, leading to rapid deterioration. They lack the UV resistance and moisture protection needed in exterior environments, causing them to peel off quickly after just a few months of exposure.
The finish will also be prone to mildew growth due to constant humidity and condensation, making it look unsightly fast. This can lead to more frequent maintenance and repainting cycles, costing you time and money.
Moreover, interior paints are designed for smooth surfaces like drywall, not rough or porous exterior materials such as wood or stucco. Poor adhesion means the paint won’t stick properly, leading to flaking and cracking over time. Always ensure you’re using a durable exterior-grade paint for outdoor projects.
Structural and health risks
Mismatched paints can lead to serious structural issues when used improperly. For instance, applying interior paint outdoors traps moisture inside the substrate, causing it to rot over time. This is especially dangerous on wooden structures where water damage can compromise the integrity of your home.
Additionally, using exterior paints indoors can inhibit proper breathability and ventilation in occupied spaces, leading to mold growth due to trapped humidity. Mold not only damages surfaces but also poses significant health risks like respiratory issues and allergies.
To avoid these problems, always check for moisture levels before painting and ensure the paint is suitable for its intended environment. If you’re unsure about a specific area or material, it’s best to consult with a professional who can provide expert advice tailored to your needs.
Cost comparison: short-term vs long-term consequences
Cost comparison shows how short-term paint costs stack up against long-term upkeep. You’ll break down material costs by interior versus exterior paint, primers, seals, and additives, plus estimated coverage per gallon and the coats you’ll need.
The section gives context on labor time, prep work, and whether DIY is feasible or you should hire help, along with hidden costs like power washing, patching, and tool needs. It also covers lifecycle and repair costs, and offers a simple budgeting approach to weigh upfront savings against future rework.
Upfront material and labor costs
The choice of paint materials can significantly impact your budget, especially when dealing with specialized exterior formulations that often come at a premium. Here’s what you need to know:
- Paint type: Choose interior or exterior based on durability needs; avoid using the wrong one as it leads to cracking and staining.
- Coverage per gallon: Check for high coverage ratings to stretch your budget further; aim for 350-400 sq ft/gallon.
- Number of coats: Plan for two coats minimum for exterior, one for interior; fewer coats can lead to weak bond and peeling.
- Labor costs: DIY is cheaper but takes more time; professional help speeds up the process but adds cost.
- Surface prep: Power washing, patching, sanding are essential steps that add to your budget; skip at your own risk.
Long-term repair and repaint costs
A cheaper paint choice upfront can lead to higher total costs over time due to frequent repairs and repainting. For example, using interior paint on an exterior wall might save you money initially but will likely require a full repaint every 2-3 years.
On the other hand, investing in quality exterior paint may cost more initially but could last up to 10 years with minimal maintenance. This means fewer repairs and less frequent repainting, saving you thousands over time.
Consider the long-term durability when choosing your paint type; a weak bond or poor resistance can lead to costly structural issues down the line.
When do additives or primers change the math?
Additives and primers can alter your budget by adapting one paint type for another application. For instance, using a primer designed for metal surfaces on wood can prevent rusting issues but adds to initial costs.
Sealers are essential if you’re painting over porous materials like concrete or brick; they help the paint adhere better and last longer, reducing long-term repair expenses.
While these additional products increase your upfront investment, their benefits in durability and longevity often outweigh the extra cost. Always weigh the immediate expense against potential future savings.

Choosing the right paint for each room and surface — a step-by-step selection guide
This guide walks you through a simple, step-by-step flow to pick the right paint. Start with room function, then surface type, then exposure to guide product choice. Plan for surface checks, priming needs, and the right sheen and features for each room, interior or exterior.
Knowing the flow helps you avoid mismatches and wasted work. It also makes selecting primers, coats, and special prep clear, from glossy surfaces to stained wood or concrete failures. Do swatch testing, note how finishes perform under light, and always check the product label or datasheet for exact guidance and local disposal rules.
Step-by-Step Process
This sequence helps you pick the right paint for your room and surface, ensuring a job that lasts.
- Identify room function. Is it high traffic? Moisture-prone?
- Check surface type: drywall, plaster, wood, or concrete.
- Determine exposure level: sunlight, humidity, exterior conditions.
- Select the right sheen based on durability and aesthetics needs.
- Test paint samples in different lighting to ensure color accuracy.
- Prime surfaces if needed for adhesion or coverage issues.
- Apply primer before painting if required by surface condition.
Room-based recommendations
In bathrooms and kitchens, choose satin or eggshell finishes for easy cleaning. Living rooms can use matte or eggshell for a more subtle look.
Nurseries need washable paints to handle spills easily. Basements should have moisture-resistant paint due to humidity levels.
Garages require tough, durable coatings like epoxy or high-build enamel to withstand heavy wear and tear.
Surface-based recommendations
Drywall and plaster need a smooth primer before applying any finish. Wood surfaces may benefit from a stain-blocking primer if there’s previous damage or discoloration.
Metal requires an appropriate metal primer to ensure the paint sticks properly. Concrete needs sealing with a concrete sealer before painting for better adhesion and durability.
Finish and sheen guidance
Flat finishes are great for low-traffic areas but show dirt easily, while semi-gloss or gloss finishes work well in high-moisture rooms like bathrooms.
Satin finish is a good compromise between durability and appearance. Eggshell offers slight texture to hide imperfections better than flat paint.
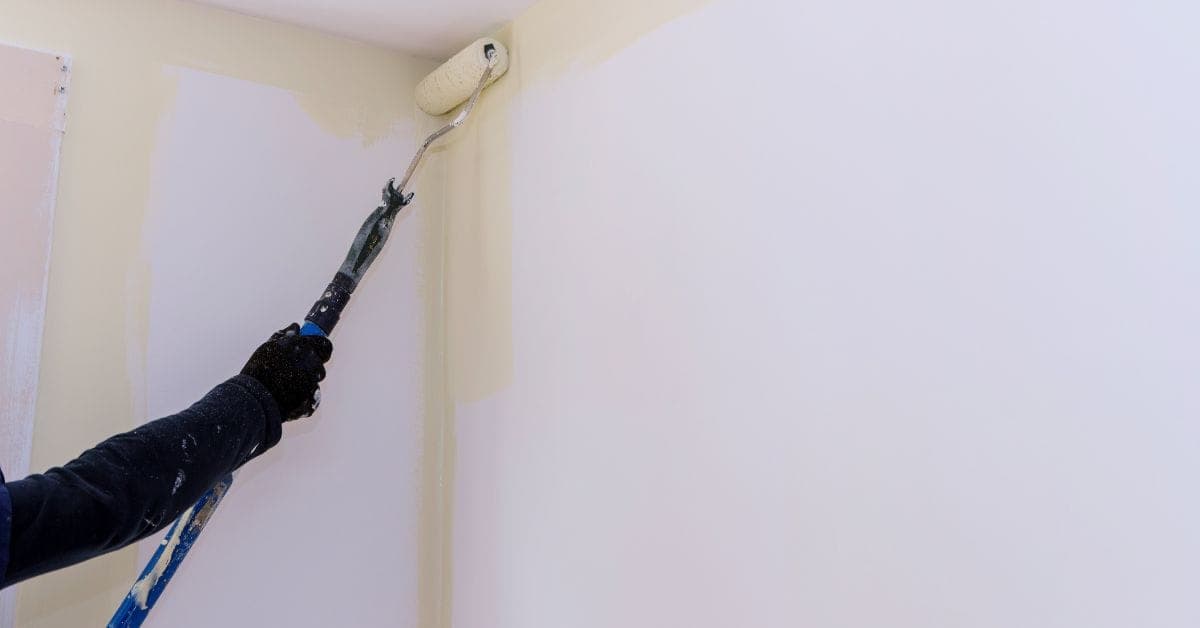
Tools, materials checklist and prep best practices
This section covers a practical, DIY-friendly toolkit and materials checklist plus a stepwise prep plan to keep coatings sticking and looking good. You’ll get core hand tools, brushes, rollers, trays, masking tape, cleaners, primers (bonding vs. stain-blocking), and the safety gear you actually wear on the job. It also walks through a simple prep flow from cleaning and patching to priming and a final coat, with notes on common pitfalls to avoid.
Knowing what to use and how to prep matters because surface issues and wrong primers wreck adhesion, speed, and finish. The guidance helps you tailor prep by surface type—wood, concrete, masonry, drywall, and previously painted areas—while highlighting exterior versus interior demands. Rely on the product labels and local rules for specifics on ventilation, temperatures, and safe storage, and don’t assume a one-size-fits-all approach or skip patch repairs or full drying as you go.
Essential tools and supplies
This checklist helps you gather everything needed for a smooth paint job, whether inside or out.
- Paint brushes: Choose sizes based on the surface area. Ensure bristles are right for your paint type.
- Roller covers: Select nap length according to texture (short for smooth, long for rough). Confirm fit with frame.
- Sandpaper: Use grits from coarse to fine. Check surface is smooth before moving on.
- Caulk gun and tubes: Fill gaps and cracks. Test seal by pressing firmly.
- Primer cans: Pick stain-blocking or bonding primer based on substrate. Apply evenly, covering all areas.
- Masking tape: Protect edges from paint splatters. Ensure it sticks well without damaging surfaces.
- Safety glasses and gloves: Prevent eye and skin irritation. Wear throughout the job to avoid injuries.
- Respirator mask: Filter out harmful fumes. Always wear when painting indoors or with strong-smelling paints.
Quick rule: Have all tools ready before starting, ensuring everything works properly and fits your needs.
Surface prep and priming checklist
This list ensures surfaces are clean, smooth, and ready for paint, adapting to interior or exterior conditions.
- Clean surface: Use appropriate cleaner. Confirm no dirt remains after rinsing.
- Sand rough spots: Smooth out bumps and ridges. Check surface is even before priming.
- Fill cracks: Apply caulk or spackle. Ensure gaps are sealed tight to prevent leaks.
- Prime stains: Use stain-blocking primer on dark marks. Confirm coverage is complete, no bare spots left.
- Check for mold/mildew: Clean and treat affected areas thoroughly. Skip this step risks future paint failure.
- Evaluate moisture levels: Ensure surface is dry before painting. Moisture can cause peeling or bubbling.
- Select primer type: Choose bonding for bare wood, stain-blocking for concrete. Confirm primer adheres well to substrate.
Quick rule: Always prep surfaces fully and use the right primer to ensure paint sticks and lasts longer.
Visual checkpoints for a professional finish
This checklist helps you maintain quality throughout your painting project, ensuring a flawless result.
- Adhesion test: Paint should stick firmly. Check by gently scraping with fingernail; no flaking indicates good adhesion.
- Coverage check: Ensure paint covers evenly without bare spots. Look for consistent color and thickness across surfaces.
- Drip control: Avoid drips and runs. Use steady strokes, let each coat dry before applying next layer.
- Edge crispness: Masking tape should leave clean lines. Remove tape while paint is still slightly tacky for sharp edges.
- Surface texture match: Paint should blend with existing textures. Compare new and old surfaces; no noticeable differences mean success.
Quick rule: Regularly inspect your work to catch issues early, ensuring a professional finish from start to finish.
Case studies and common homeowner mistakes (real examples)
This section highlights three real-world mistakes homeowners make with paint: interior paint used outdoors, exterior paint used indoors, and skimpy surface prep. Each case shows the wrong choice in context, the symptoms, and how the issue was fixed, with a clear cause-and-effect and a practical remedy.
For DIY readers, the payoff is simple: watch for mismatched paint types, skip neither prep nor ventilation, and follow proper curing cues. The three cases show common mistakes and practical fixes you can apply now to avoid repeat problems. Signs to watch for include unusual sheen, peeling, or paint that never dries fully.
Case study — siding painted with interior paint
A homeowner decided to save money by using leftover interior latex paint on their exterior wood siding. Within a year, the paint started peeling and showed signs of mold growth due to poor weather resistance.
The root cause was clear: interior paints are not designed for outdoor conditions. They lack UV protection and moisture resistance needed in harsh environments. The homeowner had to strip off all the old paint and start over with an appropriate exterior-grade primer and finish coat, adding several days of work and extra costs.
Fixing this mistake required thorough surface prep, including cleaning mold and mildew, sanding rough spots, and applying a quality exterior primer before reapplying proper exterior paint. The job took about two weeks to complete properly.
The lesson here is simple: always use the right type of paint for your project’s location and conditions. Don’t cut corners on materials or prep work.
Case study — garage door with interior paint
A homeowner painted their metal garage door using leftover interior gloss enamel, thinking it would look shiny and new. Over time, the paint began to fade and chip off due to exposure to sunlight and temperature fluctuations.
The problem was that interior paints lack UV protection and are not formulated for exterior durability. The glossy finish also made cleaning difficult, leading to dirt buildup and further deterioration of the paint job.
To fix this issue, the homeowner had to strip away all the old paint using a chemical stripper and repaint with an appropriate exterior metal primer followed by a high-quality exterior enamel or acrylic latex paint designed for garage doors. This process took about three days from start to finish.
The key takeaway is to always match your paint type to the surface material and environmental conditions. Use products specifically labeled for exterior use on outdoor surfaces.
Checklist of top mistakes to avoid
Before starting any painting project, review this quick checklist to ensure you’re setting yourself up for success:
- Wrong paint type: Check if the paint is labeled for interior or exterior use. Using the wrong one can lead to peeling and fading.
- Poor surface prep: Clean, sand, and prime surfaces properly before painting. Skipping this step leads to poor adhesion and uneven finishes.
- Improper ventilation: Ensure good airflow when painting indoors to prevent health risks from fumes.
- Inadequate curing time: Allow paint to cure fully between coats as per manufacturer instructions for best results.
- No primer used: Apply a primer if needed, especially on porous surfaces or when changing colors dramatically. Skipping this can cause poor coverage and durability issues.
- Incorrect tools: Use the right brushes, rollers, and sprayers for your paint type and surface to avoid streaks and unevenness.
- No weather protection: Cover painted surfaces during rain or extreme heat until fully cured. Exposure can ruin a fresh coat.
- Improper storage: Seal leftover paint properly to prevent drying out or contamination.
Quick rule: Always read the label and follow instructions for best results, no matter how small your project is.
When to hire a professional painter and what to expect
Hire a professional painter when you’re facing complex substrates such as new masonry, textured stucco, brick, or weathered surfaces, or when exterior work involves warranty requirements that demand thorough prep, proper primers, and durable finishes. Pros also differ in the products they use, choosing panel- or texture-specific primers, high-build or elastomeric coatings for exterior surfaces, mildew-resistant paints, and low- or zero-VOC options that DIYers rarely match. Warranties are common, but they’re not automatic; check what they cover, for how long, and what conditions may void them.
In practice, the hiring process should yield clear project scopes, several quotes, realistic timelines, color and finish decisions, and a plan for prep, priming, coats, caulking, repairs, masking, and cleanup. Understanding the why helps you plan; professional work typically includes surface prep, power washing, sealing, proper masking, and post-job touch-ups, with details on overcoats and cure times you must respect. Ask about licensing, insurance, portfolio references, and whether the warranty is transferable, and be vigilant for red flags like hidden costs or pressure to skip proper prep or rush the job.
Questions to ask any painter
Before hiring a painter, you need to know what you’re getting into. Start by asking about the products they use. What kind of primer and paint do they plan on using? You want to make sure it’s suitable for your specific surface and conditions.
Next up is prep work. How will they handle surface preparation? Will there be power washing, sanding, or any other steps needed before painting? Also, don’t forget about warranties. What kind of warranty do they offer on their work?
Insurance is another biggie. Is the painter insured and licensed to do this type of job in your area? And finally, ask for references from past clients who can vouch for their quality.
Value-adds professionals provide
Hiring a professional painter isn’t just about getting the job done faster. They bring expertise in product selection, especially when it comes to tricky substrates like new masonry or weathered wood.
They also do moisture testing and can apply finishes that resist mildew and mold. Plus, pros know how to navigate local building codes and VOC regulations, ensuring your project is compliant from start to finish.
Another big plus is the guarantee on their work. When you hire a pro, you get peace of mind knowing there’s a warranty covering both labor and materials for a set period after completion.
Cost vs DIY decision guide
The choice between doing it yourself or hiring a professional comes down to several factors. First, consider the size of your project. If you’re tackling large exterior walls or multiple rooms inside, the cost and effort might be too high for a solo job.
Risk is another key factor. Are there complex surfaces like stucco or brick that require special care? Or do you need to adhere to strict VOC regulations?
Lastly, think about your own skill level. If you’re confident in your abilities and have the right tools and supplies on hand, DIY might be a good fit. But if you’re unsure or short on time, hiring pros can save headaches and ensure quality work.

Conclusion
Choosing the right paint isn’t optional—it guards durability, safety, and how your room will actually look every day. If you match the finish to the room and surface, you’ll avoid peeling, chalking, or color shifts that drive up costs and frustration.
Make this your final checklist: verify that the surface is clean, dry, and properly primed; pick the correct base, sheen, and odor profile for each room; test a small area first and cure before committing; and follow the manufacturer’s recoat and ventilation guidelines. Step through the room in a logical order—prep, prime, paint, inspect—and document any missteps to learn for the next project.
A few big mistakes to dodge are using the wrong sheen for high-traffic zones, skipping surface preparation or ventilation, and overloading brushes or rollers in tight corners. Keep safety at the top of the plan: wear a respirator in poorly ventilated spaces, cover and seal nearby surfaces to prevent damage, and respect cure times before moving furniture back or cleaning the space. These habits save you time, money, and headaches.
If the job involves complex textures, high ceilings, or persistent moisture, or if you’re unsure about color and finish choices for real-life conditions, it’s smart to call a professional painter. They’ll bring the right products, testing, and timing to finish cleanly and safely, so you can get back to enjoying the room with confidence.
FAQ
What is the main difference between interior and exterior paint?
Interior paint is designed to resist wear from people and furniture indoors. Exterior paint fights sun, rain, and temperature swings outside. They use different mixes, so they don’t fail when the conditions change.
Can I use exterior paint indoors to get better durability?
No. Exterior paint fumes are stronger and not meant for enclosed rooms. It can smell and keep you from breathing easy, and it won’t wear right on indoor surfaces.
Which paint should I use for living rooms and kitchens?
Use interior paint for walls and ceilings inside. It cleans easy and lasts with daily use. Exterior paint will peel and look bad fast indoors.
When should I switch to exterior paint on a house siding project?
Use exterior paint on siding, trim, and any exterior surface that faces weather. Inside, it won’t cure right and may crack. Start with the right product for the job, or you’ll pay later with repairs.