

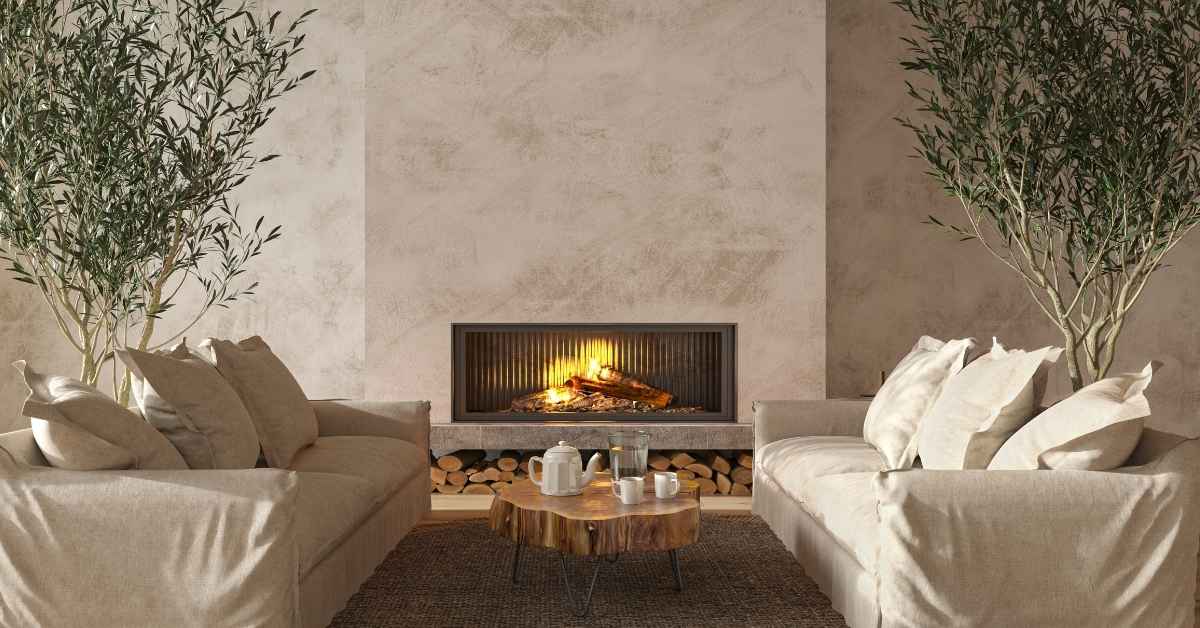
Introduction
Breathable plaster and finishes are materials that allow moisture to move through walls while still providing a solid, decorative surface. In practical DIY terms, that means choosing coatings that don’t seal the wall airtight, so old walls can dry out after moisture events. This matters most on older homes with lime or clay components that rely on evaporation to stay healthy.
Clay paint and lime-based plasters offer different breathing qualities, and the choice depends on the wall and climate. When you plan, check the substrate compatibility, application guidelines, and any instructions from the manufacturer about breathable performance. If you’re unsure, ask for guidance on suitable substrates and what to expect in terms drying and durability.
Key takeaways
- Breathability matters more in older walls to prevent trapped moisture damage.
- Work clay paints in well-ventilated areas and wear a dust mask during prep.
- Clay paint history: centuries of use showing breathable finishes with natural materials.
- Substrates suitable for clay paint include lime plaster and well-cured masonry.
- Clay paint vs lime plaster: different base materials, breathability and finish behavior.
- Maintenance relies on gentle cleaning and repainting before coatings degrade.
Table of Contents
- Introduction
- Key takeaways
- Why Breathability Matters in Older Buildings
- Clay Paint and Other Natural Breathable Finishes
- Suitable Substrates and Compatibility
- Breathability, Moisture Management, and Climate Considerations
- Application, Tools, and Practical Tips for Diyers
- Colour, Finish Options, and Aesthetic Considerations
- Health, Environmental Benefits, and Safety
- Cost, Lifespan, and Maintenance Compared to Modern Paints
- Conclusion
- FAQ
Why Breathability Matters in Older Buildings
Breathability in historic walls means letting moisture move through the fabric rather than trapping it behind a surface. It helps protect lime plaster and traditional masonry from salt damage, rot, and cracking that classic substrates are prone to when sealed up too tight. Understanding vapor flow helps you choose finishes that support long-term durability rather than short-term appearance.
Moisture sources in older buildings vary from rising damp to rain intrusion and interior humidity. Traditional pathways allow water to migrate through porous walls, so finishes must permit that movement without creating bottlenecks. When finishes are non-breathable, moisture can accumulate and cause efflorescence, substrate degradation, and accelerated decay of historic materials. A practical plan considers restoration versus retrofit and avoids cementitious layers that block vapor while staying compatible with existing substrates.
How traditional building materials manage moisture
Choosing the right materials for your older home’s walls is crucial. Traditional materials like lime plaster and porous masonry are designed to breathe, allowing moisture to move through them naturally.
- Lime Plaster: Absorbs excess humidity from the air, then releases it when conditions dry out. Look for high-porosity, low-CO2 emissions ratings. Avoid cement-based plasters that trap moisture.
- Limewash: Allows walls to breathe while providing a protective layer. Choose breathable limewashes with low pigment content. Avoid waterproofing paints that seal out vapor.
- Porous Masonry: Naturally absorbs and releases moisture. Specify permeable blocks or bricks. Avoid dense, impermeable concrete blocks.
- Hydraulic Lime: Used for rendering and pointing, it allows walls to breathe. Choose NHL 3.5 or 5 for best breathability. Avoid cement-based mortars that trap moisture.
- Clay Plaster: Regulates humidity by absorbing and releasing moisture. Look for natural clay plasters with high porosity. Avoid synthetic, non-breathable plasters.
Consequences of reduced breathability
When vapor is trapped in walls due to non-breathable finishes, it can lead to serious issues. Here’s what goes wrong:
Blistering Paint: Trapped moisture causes paint to peel and bubble, leading to costly redecoration.
Salt Efflorescence: Moisture draws salts to the surface, causing white deposits that damage finishes and can lead to structural issues if left untreated.
Timber Decay: Trapped moisture promotes rot in timber framing and joists, leading to costly repairs or even structural failure.
Mould Growth: Moisture encourages mould growth, which can cause health problems and further damage to your home.
Clay Paint and Other Natural Breathable Finishes
Clay paint is a breathable finish that relies on natural clay binders and pigments, offering a tactile, matte look that sits well on lime or earthen walls. It differs from limewash and silicate finishes in how it bonds with substrates and how it handles moisture. Historical walls often respond best to finishes that stay compatible with clay or lime plasters.
Breathable options include limewash and natural silicate-stabilised finishes, with each providing distinct appearance and texture while allowing vapor to pass. When compared to modern emulsions, these finishes typically offer better moisture management and compatibility with traditional systems, though color range and durability differ. Prep, number of coats, and environmental conditions all influence adhesion and breathability; plan accordingly and choose products with clear guidance for lime-based substrates.
Composition and properties of clay paint
Clay paint is a natural, breathable finish made from a mix of clays, mineral fillers, and plant or mineral binders. The primary ingredient, clay, provides the color and texture. It’s naturally porous, allowing moisture to pass through.
Mineral fillers like sand or marble dust are added for bulk and to adjust the paint’s consistency. They also contribute to its permeability.
The binder, typically a natural resin or casein, holds everything together. Unlike synthetic binders in modern paints, these allow moisture vapor to pass through while keeping the paint intact.
Comparison with limewash, silicate paint, and Roman clay
Limewash is made from slaked lime, water, and pigments. It’s highly breathable but less durable than clay paint. It has a chalky finish and is typically used on porous surfaces like lime plasters.
Silicate paints are made by reacting silicate minerals with sodium silicate. They’re durable, breathable, and have a slight sheen. Unlike clay paint, they can be applied to non-porous surfaces but require specific preparation.
Roman clay, or tadelakt, is a polished lime-plaster finish. It’s highly durable, waterproof when cured, but less breathable than clay paint due to its polishing process. It’s typically used on walls and bathrooms.
Suitable Substrates and Compatibility
Interior substrates that commonly accept breathable finishes include lime plaster, clay plaster, brick, and aged masonry, whereas modern gypsum board, sealed concrete, or cement renders can trap moisture. Exterior siding and walls that breathe include bare brick and lime-rendered or porous masonry surfaces, while painted or sealed non-porous substrates pose compatibility issues. The aim is to restore porosity without inviting moisture into hidden pockets.
Practical compatibility checks cover substrate porosity, moisture regime, and presence of previous coatings or efflorescence. Prepare by removing non-breathable coatings where needed and testing breathability on small areas first. A decision framework guides when to remove incompatible finishes and when to apply breathable primers that do not block vapor flow, with a clear prep and test plan for patch testing and adhesion outcomes.
Best-fit surfaces (lime plaster, earthen render, historic brick)
Older homes often have breathable substrates that work well with clay paints and other natural finishes. These include:
Lime-based plasters: Lime is porous, allowing moisture to pass through. It’s ideal for breathable finishes.
Earthen renders: Made from natural materials like clay and sand, these are also porous and compatible with breathable paints.
Historic brick: Unsealed, bare brick is highly porous and perfect for breathable finishes. It’s often found in older homes.
Surfaces to avoid or prepare (gypsum plaster, modern sealed paints)
Some surfaces in older homes may seem suitable but can cause issues with breathable finishes. Avoid these:
- Gypsum plaster: Gypsum is not porous and traps moisture. It’s incompatible with breathable paints.
- Modern sealed paints: Sealed surfaces don’t allow moisture to escape, leading to trapped moisture and potential problems.
- Cement renders: These are often non-porous and can trap moisture, causing issues over time.
- Painted or sealed concrete: Similar to modern sealed paints, these surfaces don’t allow for proper vapor flow.
If you have these surfaces, consider removing incompatible finishes, stripping or neutralizing them, or applying breathable primers that won’t impede vapor flow. Always test first!
Breathability, Moisture Management, and Climate Considerations
Vapour permeability is best understood as how easily moisture passes through a finish under typical conditions. Look for labels that indicate a finish is open to movement and avoid terms that imply a complete seal. Understanding this helps you avoid misinterpretations that lead to trapped moisture behind historic walls.
Moisture moves by diffusion or bulk flow, so breathable plasters and lime renders keep humidity from concentrating in one spot. Climate zones influence which finishes work best, with moisture openness supporting drying during wet seasons. Use plain decision criteria to choose breathable finishes for damp periods and moisture-blocking paints only when a structure is well prepared for limited evaporation, always checking compatibility with existing lime-based systems.
How to assess moisture sources and risks
Before you start, understand where moisture comes from. It’s key for choosing the right finish.
Rising damp: Check if walls are wet below a certain height. If so, it might be rising damp. You’ll need to fix that first before applying any finish.
Penetrating damp: Look for water stains or patches on walls. These could be from leaks or rainwater ingress. Again, fix the source before applying a finish.
Condensation risk: Check if walls feel cold to touch and have moisture on them. This is likely condensation. You’ll need a breathable finish here.
Also consider internal humidity sources like cooking, bathing, or plants. They can contribute to moisture problems.
Performance in different climates and exposures
Climate plays a big role in choosing the right finish. Here’s what to consider:
Coastal regions: Salt-laden air can damage finishes. You’ll need something resistant, but still breathable.
Humid climates: High humidity means more moisture in the air. You’ll need a finish that allows evaporation to prevent condensation.
Cold climates: In cold regions, walls can stay wet for longer due to slower drying times. A breathable finish is crucial here.
In mixed climates, you might need a finish that performs well in different conditions. Always consider seasonal changes too.

Application, Tools, and Practical Tips for Diyers
Surface prep for breathable plaster and paint starts with moisture assessment and compatible substrate checks. Cleaning, efflorescence removal, and patching should use breathable materials that won’t seal in moisture. Safety steps and scaffold or ladder setup deserve attention before any work begins.
Product and technique guidance emphasizes when to use lime putty, mineral paints, or breathable sealers, plus recommended application methods and thickness. Follow a practical workflow from priming (if required) through layered applications, curing conditions, and proper ventilation. Have a DIYer’s toolkit ready with trowels, brushes, mixing gear, and breathable storage practices.
Surface preparation and priming for breathability
Before applying any breathable plaster or paint, ensure your walls are ready. Here’s how to prep safely and prime right.
Remove incompatible topcoats: If there’s modern paint or sealant on old lime plaster, strip it off. Use a scraper or chemical strippers, but be careful not to damage the underlying lime plaster.
Repair lime plaster: Fill cracks and holes with a compatible breathable filler. Use a putty knife or trowel to apply, then let it dry. Sand lightly if needed.
Priming: For best results, use a sacrificial primer or a lime-based primer. This helps seal dust and provides a good base for your breathable finish. Apply with a brush, following the manufacturer’s instructions.
Application techniques and visual checkpoints
Applying breathable plaster or paint requires careful technique. Here’s your checklist for success.
- Brush application: Use a good quality brush, apply in long, even strokes. Work from top to bottom.
- Trowel application: For plasters, use a trowel. Hold it at a 45-degree angle, spread the plaster in wide, smooth arcs.
- Coat thickness: Follow manufacturer’s guidelines. Too thick can cause cracking; too thin won’t provide coverage or protection.
- Drying time: Let each coat dry as recommended. Rushing can lead to poor adhesion and premature failure.
- Coverage check: Inspect your work after each coat. Look for missed spots, uneven application, or signs of poor adhesion.
- Efflorescence check: After the first few coats, check for efflorescence (white salt deposits). If present, clean off and let the wall dry before proceeding.
- Moisture check: Before applying final coats, ensure no moisture is present. A quick test with a damp meter can save you trouble later.
- Temperature/humidity check: Apply when temperatures are between 50-80°F (10-27°C) and humidity is low to moderate. Extreme conditions can affect curing and performance.
- Ventilation: Ensure good ventilation during application and drying. This helps prevent excess moisture buildup, which can lead to mold or poor adhesion.
Quick rule: Always follow the manufacturer’s guidelines for specific products. They know their stuff!
Colour, Finish Options, and Aesthetic Considerations
Breathable finishes offer a range of natural hues, from earth tones to pale pastels, with pigment loading affecting lightfastness and color stability. Test swatches on representative areas to see how pigments perform on high-pH substrates and to catch any shifts or efflorescence early. Plan maintenance around evolving color and texture needs while preserving breathability.
Finish options include matte, velvety, and textured surfaces, each influencing moisture handling and visual depth. When applying darker hues or dense textures, consider substrate sealing or primer choices that do not compromise vapor flow. Document results from swatches and keep records for long-term maintenance and color consistency across the project.
Colour testing and pigment compatibility
Before diving into your project, test colours to ensure they work well with breathable plasters. Grab tester pots from your supplier.
Patch test on a representative area of your wall. Lime plaster has a high pH, so some pigments may shift or fade over time. Organic pigments can be less lightfast than inorganic ones. Pre-testing helps avoid surprises later.
Note: Some pigments might cause efflorescence – a white salt deposit – on high-pH substrates. Pre-testing helps identify these too.
Achieving decorative effects (washes, layering, Roman clay lookalikes)
Want to create a textured, aged look? Try these simple techniques:
Wash technique: Apply a diluted version of your chosen colour. Let it soak in, then wipe off excess with a damp cloth. This creates a subtle, mottled effect.
Layering: Apply multiple thin coats of different colours, allowing each to dry before the next. Scrape or sand lightly between layers for added texture.
Roman clay lookalikes: Mix fine sand with your plaster and apply in thin layers, letting each cure before the next. This creates a stone-like finish.
Health, Environmental Benefits, and Safety
Health and environmental considerations focus on moisture management and indoor air quality. Breathable finishes typically reduce ongoing off-gassing compared with sealers that trap moisture in the wall assembly. Choosing natural formulations can support lower VOC exposure, but always verify label details and product data sheets for specifics.
Safety during application includes proper PPE, ventilation, and humidity checks, along with careful handling and disposal of materials. Match product porosity to the wall substrate and follow recommended primers or sealers that preserve breathability. A quick risk–benefit check helps homeowners plan safer, healthier updates for older walls.
Indoor air quality and ecological credentials
Breathable paints, like clay, limewash, casein, and linseed-based finishes, are your best bet for maintaining good indoor air quality in older walls. These natural formulations use low-toxicity pigments and binders that emit fewer volatile organic compounds (VOCs) compared to conventional paints.
Lower VOC exposure means less off-gassing after application, creating a healthier environment for you and your family. Plus, these paints are often free from harsh chemicals like formaldehyde and heavy metals, making them an eco-friendly choice.
Tip: Always check product labels or ask the manufacturer to ensure you’re using low-VOC, natural paints that align with your health and environmental goals.
Safe handling, storage, and disposal
While breathable paints are generally less toxic than conventional ones, it’s still crucial to handle them safely. Start by wearing appropriate personal protective equipment (PPE): gloves, a mask, and eye protection.
Ensure proper ventilation during application – open windows or use fans to keep the area well-ventilated. Store leftover paint in tightly sealed containers away from heat sources and direct sunlight. When disposing of materials, follow local regulations for eco-friendly disposal methods.
Note: Lime-based products can cause skin irritation and burns if not handled carefully. Always rinse tools and hands thoroughly after use.
Cost, Lifespan, and Maintenance Compared to Modern Paints
Lifecycle costs should consider initial material and labor for breathable finishes and the long-term maintenance it requires. Expect future touch-ups or re-plastering as part of a typical plan for historic walls, while accounting for how breathability can influence intervention intervals. Avoid assuming short-term savings without factoring in ongoing upkeep.
Durability varies with substrate condition, climate, and interior use, shaping maintenance cadence and re-coat needs. When budgeting, weigh substrate remediation, moisture history, and access for DIY versus pro work. Use a clear decision checklist to decide between historical accuracy and ease of maintenance, and plan phased work accordingly.
Repair and repaint cycles for breathable systems
Breathable finishes like limewash or clay paints are easier to maintain than you might think. They allow for spot repairs, reducing the need for full stripping.
Every 5-7 years, touch up any small cracks or chips. Use a stiff brush and warm water to clean the surface first. Then, apply a thin layer of your breathable finish, matching the existing color as closely as possible.
For larger repairs, you can often just reapply the finish directly over the old one after cleaning and lightly sanding. No need to strip it all off like with modern paints.
Tip: Always test a small area first to ensure color match and compatibility.
When to choose professional help vs. DIY
Most breathable finish jobs are doable by DIYers, but knowing when to call in the pros is crucial.
If your walls have structural moisture issues, it’s time to bring in a professional. They can assess and address any underlying problems before applying new finishes.
Similarly, if your project involves accessible challenges, like high ceilings or tight spaces, consider hiring help for safety reasons.
Lastly, if you’re dealing with historically significant plasterwork, engage a conservator. They have the expertise to preserve and restore these surfaces correctly.
Conclusion
Keep your walls breathing the way they were built for. When you respect substrate compatibility, moisture paths, and careful, small-batch work, you protect safety, durability, and curb appeal in equal measure.
Check these steps in order: confirm the substrate accepts breathable finishes and patch any structural issues first, test a small area for moisture response, choose a natural breathable finish, clean and lightly abrade the surface, apply thin coats with proper drying time, and maintain good ventilation during and after work to help cure. If you see damp patches, efflorescence, or poor adhesion during testing, pause and reassess before proceeding; proceed only with clean, dry conditions and predictable temperature ranges.
Common mistakes to avoid include skipping moisture assessment, using non-breathable paints on breathable layers, and overcoating without proper surface prep. Safety rules are simple: work in a well-ventilated space, wear a mask when dust or fine powders are present, and never seal in moisture or trapped damp—revisit the walls rather than forcing a fast finish. If the project touches structurally suspect walls, active leaks, or you’re unsure about substrate compatibility, call a professional before continuing; the right help prevents costly damage and makes the result last longer. Stay steady, follow the checks, and you’ll finish with a wall that looks good, performs reliably, and stays durable for years to come.
FAQ
What is clay paint and how does it differ from lime plaster?
Clay paint is a mineral finish based on clay and natural binders. It is breathable and typically applied as a thin coat. Lime plaster is a cement-like plaster with lime as the binder and is not the same breathability profile as clay paint.
What substrates are suitable for clay paint?
Clay paint works best on sound, clean, porous surfaces. Common substrates include properly prepared plaster, lime plaster, brick, and clay-based walls. Check manufacturer guidance for any primer or sealer requirements and what to do if the surface is very smooth or dusty.
What is the history and key benefits of clay paint?
Clay paint has roots in traditional earth finishes used for centuries. It is favored for low odor, natural composition, and its breathability, which helps manage moisture in older walls. Look at product labels to confirm ingredients and any mineral additives used.
How do clay paint finishes affect breathability and moisture management?
Clay paint allows moisture vapor to pass through more easily than many modern paints. This helps walls dry out when moisture is present, but you still need to control humidity and surface conditions. Always follow the product instructions and avoid sealing the wall with incompatible coatings.