
Introduction
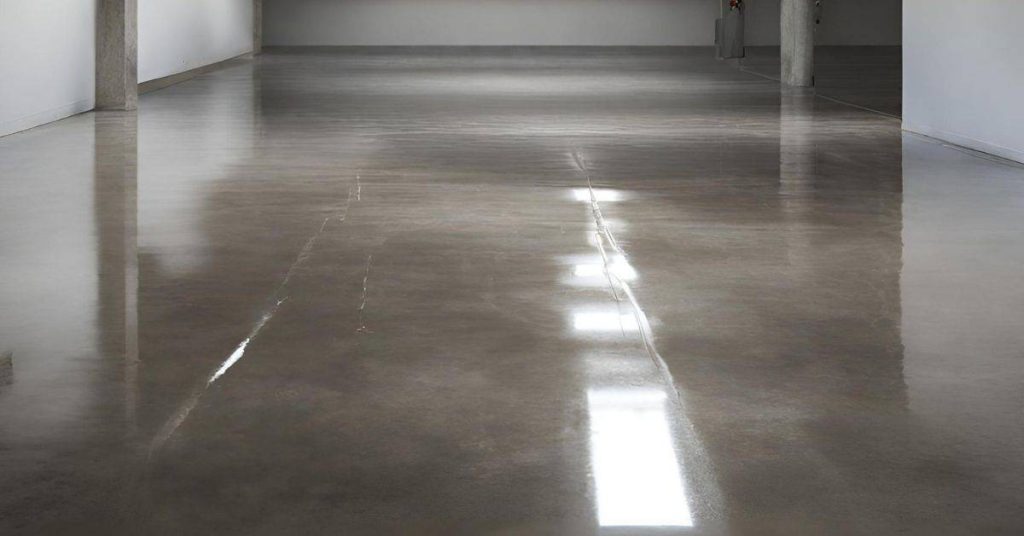
This is a DIY technique to make concrete resemble limestone using washes, rubbed finishes, and sealers.
You’ll work in stages from prepping the surface to applying color washes and texture. This approach aims for a natural, diffused look rather than a glossy finish.
Start by cleaning the surface and addressing any rough spots, then test a small area to gauge color and texture. Follow manufacturer instructions for finishes and sealers, and check local rules if this will be exposed to weather or indoor conditions. If in doubt, use safer, easier options and build the look with layering and rubbing techniques.
Key takeaways
- Test color washes on a hidden panel to dial hues and contrast.
- Patch cracks, clean dust, and remove loose material before washing or sealing.
- Follow manufacturer instructions for all sealers and ensure adequate ventilation.
- Average rubs require steady hand pressure and edge protection to avoid lap.
- Work color washes in light, even coats to reduce streaking.
- Protective coatings may alter sheen; test two coats on scrap pieces.
Table of Contents
- Introduction
- Key takeaways
- Project Overview and Goals
- Tools and Materials Checklist
- Surface Preparation and Repair
- Color Washes and Limewash-Style Techniques
- Rubbed Finishes and Mechanical Texture Work
- Sealers and Protective Coatings
- Simulating Aging, Patina, and Color Matching
- Maintenance, Troubleshooting, and Long-Term Care
- Conclusion
- FAQ
Project Overview and Goals
Start by defining the look you want: color, texture, and patina that read as limestone. Decide where the finish will live: walls, countertops, or patios. Compare limestone look options against real stone based on budget, durability, and location.
Set realistic targets for light reflectance, surface feel, and wear. Consider how the space will actually be used and how moisture or temperature may affect the finish. Check local rules or code guidance for indoor versus outdoor applications.
What distinguishes limestone from concrete
Limestone and concrete are two different materials with distinct characteristics. Understanding these differences will help you create a convincing limestone look-alike.
Firstly, limestone is porous, which means it absorbs water and allows air to pass through. Concrete, on the other hand, is denser and less permeable. To mimic this, your concrete finish should allow some moisture absorption.
Limestone also has natural color variation and a unique grain structure. It typically ranges from light gray to warm beige tones with subtle veining. Replicating these features will give your concrete surface an authentic limestone appearance.
Lastly, limestone weathers differently. Over time, it develops a patina due to exposure to the elements. Your finish should aim to replicate this weathering effect to make it convincing as real limestone.
Selecting the right approach for your project
Before you start, consider your project’s specific needs. Each method has its advantages and best use cases.
For wash layering, start with a clean, sound substrate. This technique is great for achieving a natural, weathered look on exterior surfaces like patios or retaining walls.
Rubbed finishes are ideal for interior applications or when you want to emphasize the limestone’s grain structure. They require a smooth, even surface and can be used on countertops or indoor feature walls.
If your project is in a harsh environment or requires extra protection, consider the sealing-first approach. This involves applying a sealer before any other finishes to protect against moisture and stains. It’s perfect for high-traffic areas like driveways or pool decks.
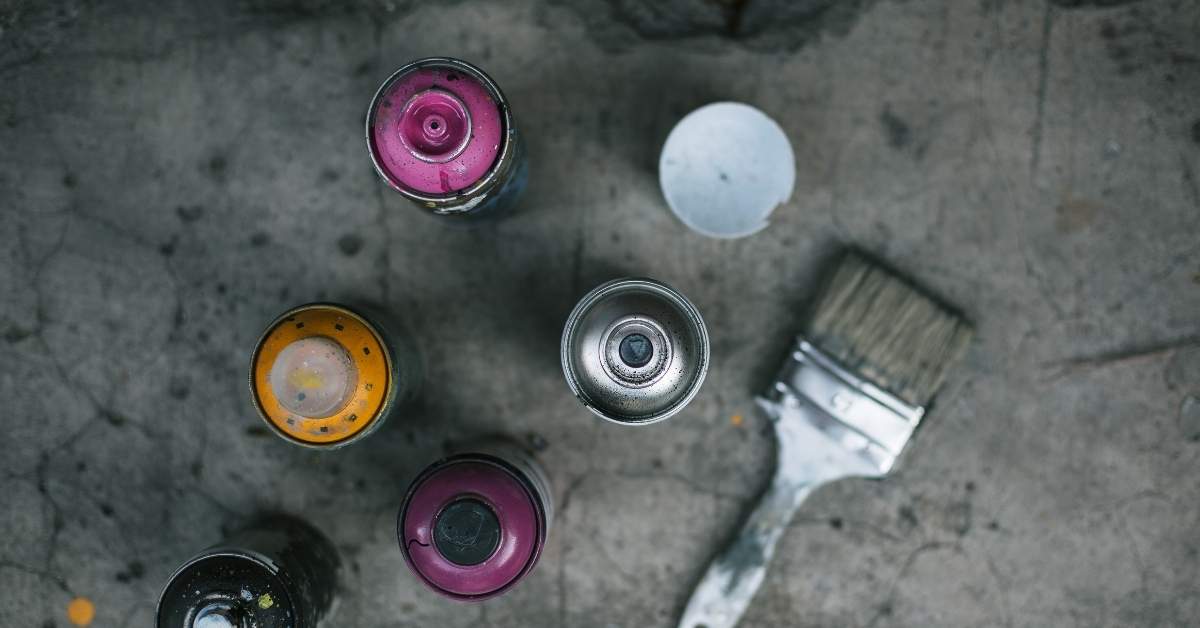
Tools and Materials Checklist
Gather the basics: brushes, sprayers, grinders, and clean rags for prep and application. Include PPE like eye protection, gloves, and a respirator where needed. Keep a bucket and mixing tools nearby.
Stock pigments, binders, sealers, and patching compounds for the washes and textures. Have alternative materials ready for DIY and pro workflows. Always verify product labels and manufacturer instructions for compatibility.
Material specs and standards explained
Before you start, check these on product labels to ensure compatibility and performance.
- Cementitious substrate compatibility: Check if the product is designed for cement-based surfaces like concrete.
- Breathability: Ensure the product allows moisture to escape to prevent trapped water from causing damage.
- VOC level: Low VOCs are healthier and better for the environment. Check the label for this information.
- UV resistance: Important for outdoor surfaces, check if the product can withstand sunlight exposure without fading or degrading.
- Pigment type: Check if the pigment is designed to be mixed with cement or applied as a separate layer.
- Sealer type: Choose between water-based, oil-based, or solvent-based sealers based on your project’s needs and local regulations.
- Coverage rate: Ensure you have enough product to complete the job. Check the coverage rate per square foot or meter.
- Drying time: Consider how long it will take for the product to dry before you can apply the next coat or use the surface.
Quick rule: Always ask manufacturers if unsure about a product’s suitability for your project.
Visual checkpoints for purchase and prep
Inspect materials and tools before starting to ensure quality and consistency.
- Pigment opacity: Check if the pigment provides full coverage or if multiple coats will be needed. Test on a small area first.
- Sealer sheen: Ensure the sealer’s gloss level matches your desired finish. Check samples under different lighting conditions.
- Tool condition: Inspect brushes, sprayers, and grinders for any damage that could affect application quality.
- Material consistency: Check if the material is evenly mixed and consistent in color and texture.
- Patching compounds: Ensure they match the concrete’s color and can be sanded smooth before applying the limestone finish.
- Safety gear: Inspect protective clothing, gloves, goggles, and respiratory protection for any damage or wear.
- Test samples: Always keep test samples to compare with during application and to ensure consistency throughout the project.
Quick rule: If in doubt, ask for a sample to test before committing to a purchase.
Surface Preparation and Repair
Start with a thorough clean to remove oils and dust; degrease as needed. Inspect for cracks, loose patches, and joints that need repair. Profile the surface so the finish grips.
Test a small area before full application and note how long any steps take. Be patient during prep; rushed prep shows up as finish failures.
Cleaning, degreasing, and moisture checks
The first step is to clean your concrete surface. Use a mild detergent and water solution for general cleaning. For tough stains, consider using poultices.
Degrease the surface with a suitable cleaner to remove any oil or grease. This ensures better adhesion of the limestone finish.
Before applying any coatings, check for moisture. Use a simple moisture test kit available at hardware stores. The surface should be dry enough before application.
Repairing cracks, spalls, and joints
Before you start, assess the damage. Cracks can be repaired using concrete crack filler or epoxy-based products. Spalls may require more extensive repair.
For joints, use a flexible joint sealer to prevent water intrusion. Choose a color that matches your limestone finish for a seamless look.
When repairing, ensure the texture of the patch material matches the surrounding concrete. This prevents repaired areas from standing out in your finished limestone surface.
Surface profiling and etching considerations
Profiling is crucial for adhesion. You can use mechanical methods like shot blasting or chemical methods like acid etching.
Shot blasting exposes fresh concrete surfaces, promoting better bonding. Acid etching does the same but also etches the surface, providing a more aggressive profile.
Before you start profiling, do a trial patch. This helps ensure your chosen method works well with your specific concrete and limestone finish.
Color Washes and Limewash-Style Techniques
Apply translucent mineral or acrylic washes in thin layers to build soft tonal variation. Work in passes, allowing each layer to settle before the next. Test color in a hidden spot to gauge effect.
Vary dilution and application method to mimic limestone’s natural variation. Document your layering order and adhesion checks as you go.
Choosing pigments and binders
When it comes to color washes and limewash-style techniques, you’ve got two main players: pigments for the color, and binders to hold it all together. Let’s keep it simple.
Pigments: Stick with earth tones. They’re natural, they age well, and they won’t clash with your outdoor space. Check product labels for color options like umber, ochre, or sienna. Remember, a little goes a long way.
Binders: Now, you’ve got two types to choose from – mineral and acrylic. Both have their uses, so let’s break it down:
- Mineral binders (like lime or clay): These are breathable, meaning they allow your surface to ‘breathe’ and release moisture. That’s good for long-term durability. They’re also translucent, giving you that authentic limewash look. But they might not be as color-stable over time.
- Acrylic binders: These are durable, color-fast, and easy to apply. But they can trap moisture, which isn’t great for long-term use on exterior surfaces. They’re also less translucent, so you might not get that natural look.
Check local rules and manufacturer instructions before you decide. It’s your call based on what you want – natural look or easy maintenance. Just don’t mix binders. That’s a recipe for disaster.
Mixing guidelines and sample patching
Before you start mixing your color wash or limewash-style solution, check your pigment and binder labels. They’ll tell you what you need to know about compatibility and safety. Now, let’s get into the nitty-gritty of mixing.
Start with a small test batch. You can always make more if you need it. Here’s a simple mix ratio to begin: 1 part pigment, 2 parts binder, and 8-10 parts water. Adjust the water amount for desired opacity – less water for darker, more opaque; more water for lighter, more translucent.
Mix well until you get a smooth consistency. If it’s too thick, add more water. Too thin? Add more pigment or binder. Remember, you can always add layers to adjust tone and coverage later on. Don’t go heavy with the first coat. It’s better to build up than to strip down.
Application tools and methods (brush, rag, spray)
Each technique gives a unique look. Choose based on the effect you want.
Brush: Best for tight spaces and detailed work. Use a sturdy, medium-sized brush with natural bristles. Dip it in the wash, then tap off excess. Work in small sections to avoid lap marks.
Ragging (rag-on): Great for textured surfaces and soft transitions. Use a clean, lint-free cloth or cheesecloth. Dip it in the wash, then wring out excess. Rub on surface in circular motions, working in small sections to avoid streaks.
Misting (spray): Ideal for large surfaces and even coverage. Use a pump sprayer or paint sprayer. Adjust nozzle size based on desired droplet size. Spray from a distance, using short, steady bursts. Overlap each pass by about half to avoid lap marks.
Rubbed Finishes and Mechanical Texture Work
Use rubbing and light sanding to create a smooth, worn surface and micro-texture. Focus on edges and high spots to imitate natural limestone. Keep abrasions shallow and controlled.
Plan the sequence so textures align with earlier washes. Test adhesion after each step and adjust pressure as needed.
Wet versus dry rubbing techniques
Rubbing concrete to achieve a limestone look involves two main techniques: wet rubbing and dry sanding/grinding. Both have their uses, so let’s dive into when to use each.
Wet Rubbing: This technique is ideal for blending pigments and smoothing out trowel marks. It’s best done after applying a color wash or limewash. Use a damp cloth or sponge to rub the surface in circular motions. This helps distribute the pigment evenly and creates a smooth, consistent finish.
Dry Sanding/Grinding: For sharper wear patterns that mimic limestone’s micro-texture, use dry sanding or grinding. Start with a coarse grit (e.g., 36-grit) to remove excess material, then follow up with finer grits (e.g., 80-120) for a smoother finish. This technique is best done after the concrete has cured and before applying any sealers.
Achieving natural edges, tooling marks, and joints
Creating authentic limestone features involves softening corners, adding subtle tooling marks, and blending new work into existing masonry.
- Softening Corners: Use a chisel or rented angle grinder with a diamond blade to gently chip away at the edges. This creates a natural, weathered look. Be careful not to overdo it; you don’t want sharp angles.
- Tooling Marks: To mimic tool marks found in limestone, use a wood float or broom to create texture while the concrete is still wet. Alternatively, rent an acid-etched tool for deeper, more defined patterns.
- Blending New Work: For seamless transitions between new and existing masonry, use a matching color wash or limewash on both surfaces before rubbing them in with the same technique.
- Joints: Use a jointing tool to create control joints that mimic those found in natural stone. This helps prevent random cracking due to shrinkage.
- Optional Tools: Consider renting tools like angle grinders, diamond blades, or acid-etched tools for more professional results. Prices vary by location, but expect to pay around $25-$75 per day.
Sealers and Protective Coatings
Choose between breathable sealers that allow moisture movement and film coatings that offer stronger protection. Remember to consider how the sealer interacts with previous layers and the substrate. Check product data sheets for compatibility.
Test adhesion and sheen on a sample area before full use. Note application temperature and curing requirements from the label.
Choosing sealers for outdoor and indoor use
When selecting a sealer, consider the environment where your concrete will be. Outdoor surfaces need extra protection from UV rays and freeze-thaw cycles.
Outdoor: Choose a sealer with good UV protection to prevent discoloration. Slip resistance is crucial for high-traffic areas like patios or driveways. Gloss levels vary, so pick one that fits your desired look.
Indoor: Here, focus on durability and easy maintenance. A sealer with good stain resistance will protect against spills and dirt. Gloss levels can range from matte to high-gloss, depending on your preference.
Application, curing, and compatibility checks
Always follow the manufacturer’s instructions for prep work. This usually involves cleaning, degreasing, and ensuring the surface is dry.
Application: Apply sealers in thin, even coats using a brush, roller, or sprayer. Work in manageable sections to avoid lap marks.
Curing: Allow the sealer to cure according to the manufacturer’s guidelines. This could take anywhere from a few hours to several days.
Compatibility Checks: Before applying, test the sealer on a small, hidden area of your concrete. Check for adhesion and appearance after curing. This ensures the sealer is compatible with your surface and previous layers.
Simulating Aging, Patina, and Color Matching
Add mineral streaks or subtle stains to suggest age and weathering. Use small variations rather than bold changes to keep it natural. Consider lichen-like marks as gentle accents.
Work in iterations, testing each change against the overall look. Compare with photos or a real limestone sample during the process.
Creating mineral streaks, efflorescence, and biological patina
To mimic the natural aging of limestone, we’ll add subtle stains and marks. Remember, less is more here.
Mineral Streaks: Use a dry brush with diluted acrylic paint or stain to gently sweep across the surface. Work in small sections, blending as you go.
Efflorescence: Create salt bloom effects by applying a thin layer of sodium chloride solution. Let it sit briefly before rinsing off excess.
Biological Patina: For lichen-like marks, mix some iron oxide pigment with a clear binder and apply sparingly using an old toothbrush or small paintbrush.
Matching new work to existing stone
Blending repairs into existing limestone can be tricky. Here’s a step-by-step workflow:
1. Color Notes & Photos: Take detailed notes and photos of the existing stone in natural light. This helps you match the color accurately.
2. Test Patches: Make multiple test patches using your chosen pigments and techniques. Let them cure fully before evaluating.
3. Blending Edges: When ready to apply, start at one edge of the repair area. Work your way across, blending into the existing stone with a soft brush or rag. Use gentle, overlapping strokes.
Maintenance, Troubleshooting, and Long-Term Care
Establish a routine cleaning plan and reapply sealer as needed per the product instructions. Look for peeling, discoloration, or efflorescence and address promptly.
Prevent issues by avoiding harsh cleaners and protecting from heavy abuse. Document maintenance steps to extend the finish life.
Routine cleaning and indicators for resealing
Keep your concrete looking like limestone with regular, gentle cleaning. Use a soft-bristled broom or a mild detergent solution to remove dirt.
Here’s how you know it’s time to reapply sealer:
Loss of sheen: If the surface starts to look dull, it’s time for a new coat. The sealer’s protective layer has worn off.
Increased water absorption: Check by sprinkling some water on the surface. If it absorbs quickly or leaves dark spots, resealing is needed.
Troubleshooting common problems
Don’t let minor issues turn into major headaches. Here’s how to diagnose and fix common concrete troubles:
Poor adhesion: If the finish is peeling or flaking, it’s likely due to insufficient profiling before application. To fix, remove the loose material, profile the surface again, and reapply.
Discoloration: This could be due to moisture issues or incompatible products. Check for water problems at the source and ensure you’re using compatible sealers and washes.
Efflorescence: White powdery deposits can appear over time. To remove, use a solution of muriatic acid (1 part acid to 5 parts water) and a stiff brush. Rinse thoroughly afterwards.
Conclusion
Finish that project with confidence by focusing on safety, durability, and a convincing look. Don’t rush the steps, and you’ll avoid costly rework while keeping the concrete surface looking like natural stone.
First, map a simple plan in your head and then in practice: clean and repair the surface, protect edges, test a small patch of wash and finish, choose a compatible sealer, apply thin washes and rub or texture as needed, and finally seal and cure under safe conditions. Keep the workspace ventilated, wear gloves and eye protection, and always follow the product guidelines on mixing, drying times, and recoat windows.
Common mistakes to watch for: applying too thick a wash or sealer, skipping a test patch before full application, and rubbing too aggressively or unevenly which can wear through to bare concrete or create patches that don’t age evenly. Use small, deliberate passes and let each layer dry. Always use products that are compatible with the base material and with each other, and never seal a surface that’s still damp or dirty.
If you encounter structural damage, large areas, or color matching that proves stubborn, it’s wise to call a professional rather than press on. Stay disciplined, take it one step at a time, and you’ll achieve a durable, natural-looking finish that lasts.
FAQ
How do I know which wash or limewash-style technique will look best on my concrete surface?
Test small patches on a hidden area. Compare the color, depth, and how it changes as it dries. Check the product label for recommendations on surface types and finish options.
What should I do if the concrete absorbs moisture or has uneven porosity before applying washes?
Address high-porosity areas with proper surface preparation or acrylic bonding agent if recommended by the manufacturer. Clean and dry the surface first, then apply the chosen wash in a controlled, layered approach rather than one heavy coat.
How can I achieve a rubbed or aged look without overworking the surface?
Work in small sections and use a clean, firm cloth or trowel to lightly drag or rub the finish after it starts to set. Stop once you see the intended depth, and avoid over-brushing or over-tumbling the texture.
What should I consider when picking a sealer for a limestone-look finish on concrete?
Choose a sealer that matches the sheen you want and is compatible with the finish you applied. Read the label for coverage, cure time, and slip resistance, and follow local guidance or manufacturer instructions for surface prep before sealing.