
Introduction
Feathering edges when blending new plaster into old makes the patch disappear.
You’ll learn how to feather edges for a seamless transition, what materials and techniques work best, and practical tips for matching texture and color so repairs look like part of the wall.
Key takeaways
- Assess patch area, feathering only when old plaster shows clean, solid edges.
- Use plaster mix with extended set time for smoother feathering and control.
- Pre-dampen surface and bevel edge to create a seamless transition.
- Apply thin layers, fanning outward to reduce ridge visibility across.
- Sand lightly after each coat to maintain a consistent profile.
- Match texture with subtle stippling or brush strokes before final cure.
Table of Contents
- Introduction
- Key takeaways
- Overview and when to feather a plaster patch
- Tools and materials checklist
- Prep work: surface cleaning and edge beveling
- Mixing plaster for optimal feathering
- Step-by-step feathering technique
- Sanding, profiling, and visual checkpoints
- Matching texture and final finishing
- Common problems, fixes, and preventive tips
- Conclusion
- FAQ
Overview and when to feather a plaster patch
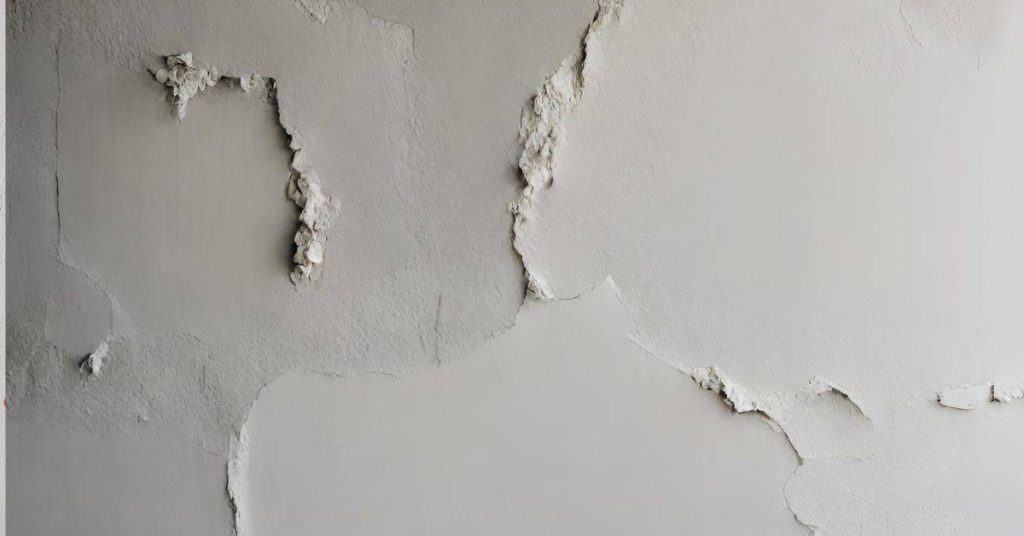
Feathering means thinning the edges of a plaster patch so it blends with the wall. It matters for invisible repairs. Do it on small holes, hairline cracks, and skim patches.
If you skip feathering, you’ll see a ridge or shadow under paint. Feathering lets you sand smooth and hide joints. Keep the patch edges tapered and feathered to prevent cracking.
Safety note: when feathering and sanding, wear a dust mask, eye protection, and a long-sleeve shirt. Contain dust with plastic sheeting and clean up with a vacuum equipped with a HEPA filter. Work in a well-ventilated area and follow local dust-control regulations.
Professional thresholds for when to replaster vs feather: As a rough guide, feather for small repairs where the patch is under roughly 4 inches by 4 inches and the substrate feels solid after testing. If the damaged area is larger than this, or if there’s loose, crumbling, or damp substrate, or you feel any flex or play in the wall, consider full replastering or hiring a professional. If in doubt, err on the side of repairing more thoroughly to prevent future cracking or failure.
Assessing the damage size and depth
Assessing the damage size and depth
Before you decide to feather a plaster patch, take a good look at the extent of the damage. If it’s just a small nick or crack, feathering might be your best bet. But if there’s significant damage—like chunks missing or large cracks running deep into the wall—you’re better off considering full replastering.
Measure the size and depth of the damaged area. A patch that’s more than a few inches wide or has a depth greater than half an inch might not hold up well with just feathering. Also, check the base compaction; if it’s loose or crumbling, you’ll need to address that before applying any new plaster.
Remember, feathering works best on minor repairs where the substrate is still solid and intact. If you’re unsure, err on the side of caution and go for a full repair to avoid future issues.
Substrate types and how they affect feathering
The type of substrate you’re working with—whether it’s gypsum plaster, lime plaster, drywall, or masonry—will dictate your approach to feathering a patch. Gypsum plaster is forgiving; feather edges smoothly for a seamless look. With lime plaster, the key is patience and gradual feathering due to its slower drying time.
Drywall requires careful sanding around the repair area, ensuring no sharp transitions that could crack later. For masonry, feathering isn’t as critical since it’s more about matching texture than blending edges. Always check base compaction and stability before starting any patch work.
Mismatched materials can lead to unsightly repairs or even structural issues down the line, so take your time and match techniques to the substrate for best results.
- Gypsum plaster: use a gypsum-compatible patch compound; feather in 3–4 thin coats, allowing modest drying between passes; seal with a PVA primer before paint.
- Lime plaster: apply in very thin coats with extended dry times; feather gradually to a fine edge; use lime-compatible patch material and pre-wet the substrate if needed; finish with a breathable primer.
- Drywall: use a lightweight joint compound or patch mix designed for drywall; feather with multiple thin coats, sanding lightly between coats; prime thoroughly with a drywall primer before painting.
- Masonry: pre-wet the area and use an acrylic-based patch mortar or mortar skim; feather edges while the mix is workable; seal with a masonry primer or breathable sealer to control suction.
Tools and materials checklist
Here’s your practical tools and materials checklist for feathering. Keep the basics: a sharp utility knife, sanding block or orbital sander, putty knife, a straightedge, and quality joint compound. If you’re on a tight budget, use a generic joint compound, inexpensive sanding sheets, and a reusable scraping blade.
The right tools keep the feathered edge smooth and repeatable. Cheap or dull tools slow you down and pile on touch ups later. With a solid basic kit, you get a professional finish without the fuss.
Essential tools and their purposes
This checklist should be used before starting any feathering work to ensure you have the right tools for a smooth process.
- Trowels (various sizes): Check that they come in different widths. Confirm by holding them next to each other. Smaller trowels are crucial for detailed work; larger ones for spreading concrete.
- Concrete float: Ensure it’s large enough to cover a wide area efficiently. Test by laying it flat on the ground and checking if it feels balanced in your hand.
- Screed board: Measure its length against your project dimensions. A screed board should be long enough to level out concrete across the width of your pour.
- Concrete knife (jointer): Check for a straight edge and sharp blade. Test by running it along a flat surface; it should glide smoothly without catching.
- Sanding block: Confirm its size fits comfortably in your hand. Sanding blocks are essential for smoothing rough edges after feathering.
- Hawk (mud pan): Ensure it’s large enough to hold a significant amount of mortar or concrete mix. Test by filling it with sand and seeing if you can easily carry it without spilling.
- Mixing buckets: Check that they are clean, durable, and come in various sizes for different mixing needs. A quick visual check will suffice.
- Grout float: Confirm its flexibility by bending it slightly; it should flex but not snap. This tool is crucial for filling small gaps after feathering.
- Squeegee: Test the blade’s sharpness and straight edge against a flat surface to ensure smooth application of concrete sealants or coatings.
Quick rule: Always have multiple sizes of each tool on hand for versatility in different feathering tasks.
Best plaster compounds and primers for blending
This checklist helps you pick the right materials to ensure your walls look smooth and professional. Use it when selecting joint compound, setting-type plaster, skim coats, bonding agents, and primers.
- Ready-mix joint compound: Choose a lightweight formula for easy application; confirm by checking if it spreads easily without sagging. Skip this and you’ll struggle with heavy compounds that don’t adhere well.
- Setting-type plaster: Opt for one that sets quickly but allows enough time to work (5-10 minutes); check the manufacturer’s drying time on packaging. Misjudge timing, and your plaster will crack or not set properly.
- Skim coats: Select a fine-grade compound for smooth finishes; verify by applying a small test patch to see if it dries with minimal texture. Skip this step, and you’ll end up with an uneven surface that needs sanding.
- Bonding agent: Use on porous surfaces like drywall or concrete for better adhesion; confirm by testing a small area to see if it sticks well after drying. Missing this can lead to peeling and cracking plaster.
- Primer: Pick one that seals the surface and prepares it for paint; check the label for coverage and drying time. Omitting primer means your paint won’t adhere properly or may show through imperfections.
- Mix consistency: Ensure joint compound is not too thick or thin; test by spreading a small amount to see if it sticks without dripping. Wrong consistency leads to uneven application and wasted material.
- Drying time: Allow adequate drying between coats; check the manufacturer’s recommended times on packaging. Rushing this step can cause layers to lift or crack.
- Sandability: Choose a compound that sands easily without dusting excessively; test by sanding a small area and checking for smoothness. Difficult-to-sand compounds waste time and effort.
- Sealing primer: Apply before painting to seal porous surfaces; verify by testing the surface with water (it should not absorb). Omitting this step can lead to paint peeling or showing through imperfections.
Quick rule: Always test materials on a small area first to ensure they meet your needs before applying them broadly.
Prep work: surface cleaning and edge beveling
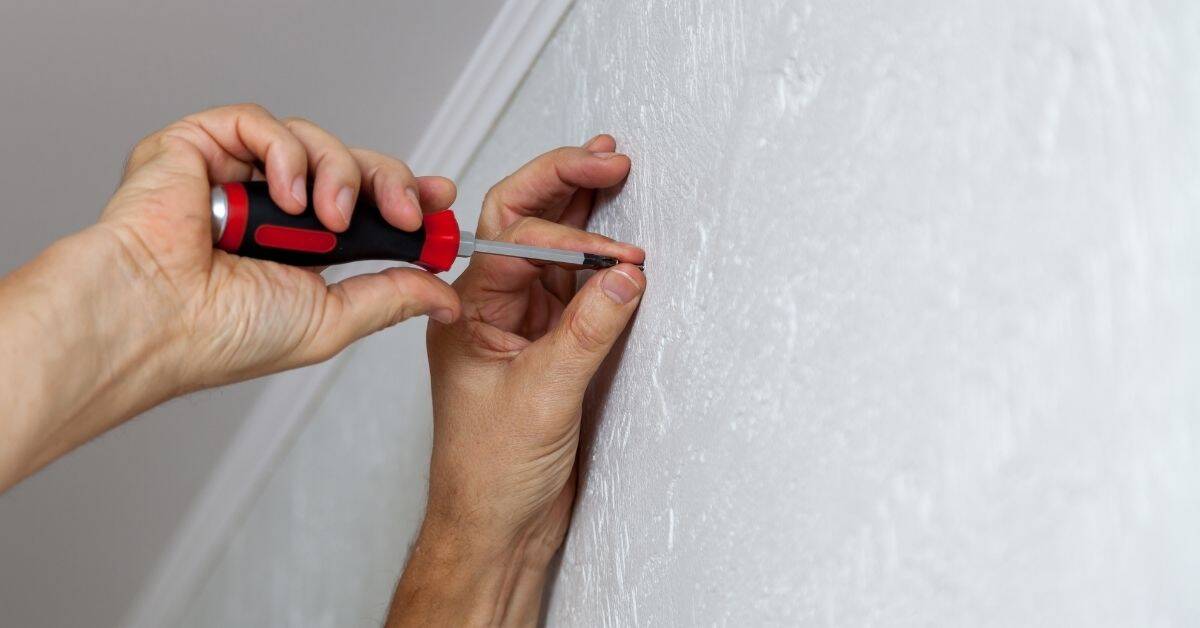
Clean the old plaster thoroughly and remove all loose material. Scrape and wipe until the surface is solid and the edges are feathered. Create a smooth, bevelled edge so new plaster can bind.
Without that prep, patches crack and pop off. A clean, feathered edge means better adhesion and a smoother finish that lasts.
How to feather the existing edge before applying new plaster
Feathering the edge means creating a smooth transition from old to new concrete. Start by undercutting any loose edges with a chisel and hammer or an angle grinder. This prevents delamination later on. Then, use a hand float or trowel to slope down the existing edge gradually over about 4 inches.
Check base compaction before feathering. If the old concrete is weak or cracked, you might need to remove it entirely and start fresh with new forms and rebar. Feathering won’t fix structural issues.
Mist the area lightly so the new plaster bonds better. Don’t soak it; just a light spray will do. This helps prevent shrinkage cracks at the feathered edge when you apply the new plaster.
When to use bonding agents or mesh
Before you start laying new concrete over old, always check base compaction. If the ground isn’t solid, your new work won’t stick. Use PVA spray on porous surfaces like brick or block for a strong bond. For smooth surfaces like concrete, go with a plaster bonding agent.
If you’re dealing with cracks or weak spots in existing concrete, slap down some fiberglass mesh before pouring the new stuff. It’ll give your work extra strength and prevent future cracking. Remember, mesh isn’t just for repairs; it’s great for joining old and new surfaces too.
Mixing plaster for optimal feathering
For feathering, mix a thin plaster with the right ratio, keep it smooth, and work before it sets. Use small batches, follow the label, and aim for a mix that feels like pancake batter. Keep it spreadable, not stiff.
- Prepare the work area and substrate: clear dust, dampen the base slightly if recommended, and verify it’s compact and sound before you start.
- Mix guidance: start with a thin, spreadable consistency and add powder gradually to avoid lumps; aim for a smooth, brushable/trowelable texture that holds its edge without sagging.
- Test batch on a scrap surface: check that the mix spreads evenly, resists sagging, and does not slide off the substrate.
- Working time: plan to apply within the product’s stated pot life or a practical 15–20 minute window, then mix fresh for the next batch.
- Coat sequencing: begin with a base fill, then the first coat, and finish with the ultra-thin finish coat; keep batches small to preserve feathering control.
- Safety and cleanup: wear a dust mask, eye protection, and gloves. Clean tools promptly to prevent plaster from hardening on them; dispose of waste according to local rules.
If you rush the mix or ignore the targets, you’ll see cracks or a rough edge. A consistent thin mix lets you feather the edges without lumps and saves you from fixes later on.
Adjusting mix for first coat vs. finish coat
When you’re feathering plaster, the mix needs to change from your base fill to your ultra-thin finish coat. For the first coat, use a thicker mix with less water. This helps it stick and cover rough spots better.
For the finish coat, you want something much thinner, almost like paint. Add more water or thinners to get that consistency. It should flow smoothly without leaving any ridges when applied.
Don’t skimp on checking your base compaction. If it’s too loose, the finish coat will show all the imperfections and might crack over time. Take a few minutes to ensure everything is solid before moving to the thin stuff.
Troubleshooting common mix problems
If you run into issues while mixing plaster, here are quick fixes:
Lumps in the mix? Make sure to stir thoroughly and break up any lumps right away. If they persist, consider sifting your dry materials before adding water.
Mix too thin? Add more powder gradually until it reaches a spreadable consistency without being runny. Over-thinning can weaken the plaster’s strength.
Sets too fast? Check if you’re using cold water or if your mix is too warm from ambient heat. Adjust by adding cooler water and mixing quickly to slow down setting time.
Curing delayed? Ensure proper base compaction and that the plaster isn’t too wet. A well-compacted base helps with quicker curing times.

Step-by-step feathering technique
The key is to start with a full coat, then gradually feather the edge thinner as you move. Keep the edge tight, watch the tack times, and finish with a light, even final coat. Use a repeatable sequence for consistent results: base fill, feather coats, and a final skim, each timed to prevent setting mid-feather.
Work in small sections, don’t rush the edge and don’t overwork the surface. This technique controls feathered edges, hides joint lines, and saves you from touch-ups later on.
Step-by-Step Process
This sequence will guide you through feathering a concrete surface, ensuring a smooth and professional finish.
- Coat sequence: 1) Base fill — apply a full coat flush with the existing surface, slightly below the patch height. 2) Feather coat — apply a thin layer along the edge (about 1/16 to 1/8 inch). 3) Blend pass — using a clean trowel, smooth the feathered edge while moving away from the seam. 4) Final skim — apply a very light skim to even the surface. Maintain a working time of roughly 15–20 minutes per section to avoid premature setting.
- Action: Start by wetting down the area around your feathering zone with water from a spray bottle. Reason: This prevents the dry edges of the existing concrete from sucking moisture out of the new patch too quickly, which can cause cracking or poor bonding. Check: The surface should feel damp but not overly wet to the touch. Warning: If water pools on the surface, it’s too much and you need to wait for it to evaporate a bit.
- Action: Mix your concrete patch material according to the manufacturer’s instructions. Reason: Properly mixed material ensures good workability and adhesion. Check: The mix should be smooth with no lumps, like thick pudding consistency. Warning: Don’t let it sit too long before using; if it starts to set up in the bucket, discard and remix.
- Action: Begin feathering by applying a thin layer of concrete along the edge where your patch meets existing concrete. Reason: This gradual transition helps blend the new work seamlessly with the old surface. Check: The feathered edge should be barely noticeable, blending smoothly without sharp lines or ridges.
- Action: Use a trowel to smooth out and level the patch area, paying close attention to the feathering edges. Reason: This ensures an even surface that matches the existing concrete’s texture and height. Check: The surface should be flat with no dips or bumps visible.
- Action: Once the initial smoothing is done, let it cure for at least 24 hours before applying any sealers or finishes. Reason: Proper curing time allows the concrete to set and harden properly. Check: The surface should be dry to the touch but still slightly soft when pressed with a fingernail.
Pro tip: Feathering is all about finesse; take your time, especially around edges, for a seamless look that lasts.
Applying the base fill without high edges
Before you start feathering, make sure your base is well-compacted and level. Pour in your concrete mix, keeping it slightly lower than the existing slab edge by about an inch or so. This prevents a high ridge at the seam that can crack over time.
Use a straightedge to smooth out the surface of the new pour. Drag it across from the center towards the edges, feathering down as you approach the old concrete. The goal is to have a gradual slope where the two meet, not a sharp edge.
Check your work frequently by running your hand over the seam. If you feel any bumps or uneven spots, go back and smooth them out with your trowel. This attention to detail now saves headaches later when the concrete cures.
Building and smoothing successive feather coats
After you’ve laid down your base fill, it’s time to start feathering. Use a wide trowel or knife to apply thin layers of concrete, gradually widening the feather as you go. Each coat should be no more than 1/4 inch thick. This helps blend edges seamlessly.
Start from one side and work your way across, making sure each layer is well-compacted before adding another. Use a float to smooth out any rough spots or air pockets as you go. Keep checking the base compaction to avoid weak points in your feathering.
The goal here is consistency. Don’t rush; take your time to ensure each coat blends perfectly with the previous one. This careful approach will give you a clean, professional finish that lasts.
Sanding, profiling, and visual checkpoints
Sanding is about control. Start with the right grit and spend time profiling the surface with light touch and a close eye. When the surface feels smooth and looks even, it’s ready for paint or a texture match.
Use a light hand to check curves, edges, and high spots. If you can see or feel uneven areas, stop and sand more until they disappear. Skipping this step leads to peeling paint or a mismatched finish, and that’s a cheap, ugly mistake.
Sanding tools, grits, and techniques for feathered edges
Use this checklist when you’re ready to sand down high spots or feather out the edges of your concrete work.
- Select Grit 80-120 Sandpaper: Start with a medium-grit paper like 80 for rough areas, then switch to finer grits like 120 for smoothing. Confirm by feeling the surface; it should be smooth but not shiny.
- Avoid Dips and Shiny Spots: Use sanding blocks over orbital sanders in tight corners or edges to avoid creating dips or leaving shiny spots. Check visually for consistency across surfaces.
- Feather Edges Gradually: Sand out sharp transitions between concrete patches or new work and existing surfaces using a light touch with finer grits. Verify by running your hand over the edge; it should feel seamless.
- Check Depth of Cut: Ensure you don’t sand too deep into the substrate, leaving marks that are visible under lighting changes. Measure depth with a ruler or gauge to avoid costly rework.
- Sand in One Direction Only: Sanding back and forth can create swirl patterns and uneven surfaces. Confirm by checking for uniform texture after each pass.
- Use Water as Lubricant: Wet sanding with water helps prevent dust buildup and keeps the surface cooler, reducing wear on tools. Check that your work area is free of dry sanding debris.
- Inspect Sandpaper Regularly: Replace worn or torn sandpaper to maintain consistent results. Feel the paper; it should be firm without loose particles.
- Blend New Work with Old: Feather out new concrete work so that it blends seamlessly into existing surfaces, using finer grits for a smooth transition. Check visually and by touch for uniformity.
Quick rule: Always feather edges gradually to ensure a seamless finish without dips or shiny spots.
Visual and tactile inspection checklist
Use this checklist right after sanding to ensure the patch is invisible before moving on.
- Raking Light Test: Use a raking light to check for any shadowy spots. Confirm by comparing with surrounding concrete. Skip at your peril: shadows mean uneven surface.
- Fingernail Scratch Test: Scrub the patch area with fingernails. Check if it feels smooth and even compared to surroundings. What goes wrong: rough spots will show up later.
- Patch Edge Blend: Look for seamless transition from patch to concrete. Confirm by stepping back and viewing from a distance. Skip at your peril: visible edges mean rework.
- Color Match: Hold paint samples next to the patch to ensure color match. Confirm with natural light conditions. What goes wrong: mismatched colors stand out.
- No Sand Clumps: Check for any remaining sand clumps on surface. Confirm by running hand over area. Skip at your peril: clumps will cause bumps later.
- Surface Texture: Ensure patch matches the texture of surrounding concrete. Confirm with a visual comparison and touch test. What goes wrong: different textures are noticeable.
- No Tool Marks: Look for any marks left by tools during sanding or profiling. Confirm by inspecting closely. Skip at your peril: tool marks will be visible.
- Edge Feathering: Check that edges are feathered well into the concrete. Confirm with a visual inspection and touch test. What goes wrong: sharp edges show up easily.
- No Dust Residue: Ensure no dust residue is left on the patch surface. Confirm by wiping area with a damp cloth. Skip at your peril: dust can cause discoloration.
- Smoothness Check: Run hand over patch to ensure it’s smooth and free of imperfections. Confirm tactilely. What goes wrong: rough patches will be noticeable.
Quick rule: If you can’t feel or see the difference, it’s good to go.
Matching texture and final finishing
Matching texture on walls is about recreating the same finish across all areas and getting smooth paint transitions. Use the right spray or roller technique for orange peel, knockdown, or stipple. Keep your pattern consistent and blend edges to avoid obvious lines.
When you miss texture, patches stick out and paint can wear unevenly. Choosing the right tools and techniques saves time and avoids rework. A little prep and masking goes a long way to a professional look.
Texture Replication Techniques
To match the existing texture, you need to practice your technique before applying it to the repair area. Start by mixing a small batch of concrete and test spraying, rolling, or hand-applying it on a scrap piece of plywood. This way, you can adjust the mix until it matches the original surface’s feel and appearance.
For spraying, use an airless sprayer with adjustable nozzles to control the pattern and texture. Rolling requires selecting the right roller cover that mimics the existing surface’s roughness or smoothness. Hand-texturing tools like trowels, floats, and brushes should be used in a consistent manner across the repair area.
Check base compaction before you start to ensure your texture will stick properly without cracking later on. Also, keep an eye on weather conditions; avoid working in extreme heat or cold as it can affect how well your texture adheres and sets up correctly.
Priming and paint tips to hide seams
To make those concrete seams invisible, start with a good primer. Use an acrylic masonry primer, which sticks well to the surface and seals it up tight. Give it at least 24 hours to dry before you lay down your paint.
When feathering edges where old meets new, make sure to seal those areas with a thin coat of primer first. This helps prevent water from seeping in and causing issues later on. Once sealed, blend the edges carefully so there’s no stark contrast between the old and new concrete when you apply your paint.
Choose a paint that matches your existing texture closely. If you’re not sure about matching colors or textures, it’s best to refer back to earlier sections on replication techniques. Use a high-quality exterior acrylic paint for durability and UV resistance.
Common problems, fixes, and preventive tips
Cracking, edge lift, and visible seams are the typical failures you’ll see. They usually come from a bad substrate, moisture problems, or the wrong adhesive and grout choices. Fixes are simple if you follow a stepwise plan: clean and dry the surface, use the right adhesive, set tiles with proper pressure, then seal or grout and add control joints where needed.
Why it matters: a sloppy job costs time and money when problems reappear. Use proper prep, the right products, and straight edges, and avoid shortcuts that cause movement or moisture problems.
Fixing cracks and edge separations after curing
If you spot cracks or edge separations in your concrete, don’t panic. First, check base compaction. If the ground wasn’t properly compacted before pouring, that’s likely the culprit. For minor cracks, a quick fix is to reapply setting compound over the crack and smooth it out.
If you see edge separations, especially near corners or edges of your slab, use expansion joints or reinforcement mesh to prevent further cracking. A targeted skim with fresh concrete can also help blend in these areas better without redoing the whole job.
Remember, if cracks are deep or widespread, it’s best to consult a professional before attempting any fixes yourself. DIY repairs might look okay at first but could lead to bigger issues down the road.
Maintenance and long-term checks
After your concrete is set, regular maintenance can prevent big headaches down the road. Check for seasonal expansion, especially around spring when temperatures rise. If you notice cracks forming or edges lifting, it’s time to act fast.
Moisture issues are a common culprit for long-term damage. Keep an eye on areas where water tends to pool and address drainage problems early. A simple slope can save you from costly repairs later on.
If you spot small cracks or separations, don’t ignore them. Small fixes now can prevent bigger recoat jobs in the future. Use a concrete sealer every few years to protect against moisture and extend your slab’s life.

Conclusion
Feathering a plaster patch correctly matters because it hides the repair, keeps the surface durable, and preserves the look of the whole wall. Do the work with clean tools, steady hands, and a dry surface you’ve tested first to avoid bigger problems.
To move forward, think of the patch like a thin skin you blend in: clean the area, bevel the edges, mix the plaster to the right consistency, apply in thin layers with light, feathered strokes, blend the edge into the surrounding plaster, let it cure, then sand and texture until it reads as one. Start small, work in a logical order, and check your progress under good light at each step.
Avoid common traps: don’t rush the edge, or you’ll pull the patch and create a ridge; don’t add too much water or you’ll weaken the mix and lose feathering; don’t skip curing time or a proper test spot or you’ll repeat the job. Always wear eye protection and a mask, and work in a well-ventilated area.
If the patch covers a large area, if there’s moisture or staining behind the wall, or if matching texture is critical, call a professional. When you know your limits and the surface is sound, you can finish with confidence and a result that lasts. Stay steady, follow the steps, and the patch will disappear into the wall.