
Introduction
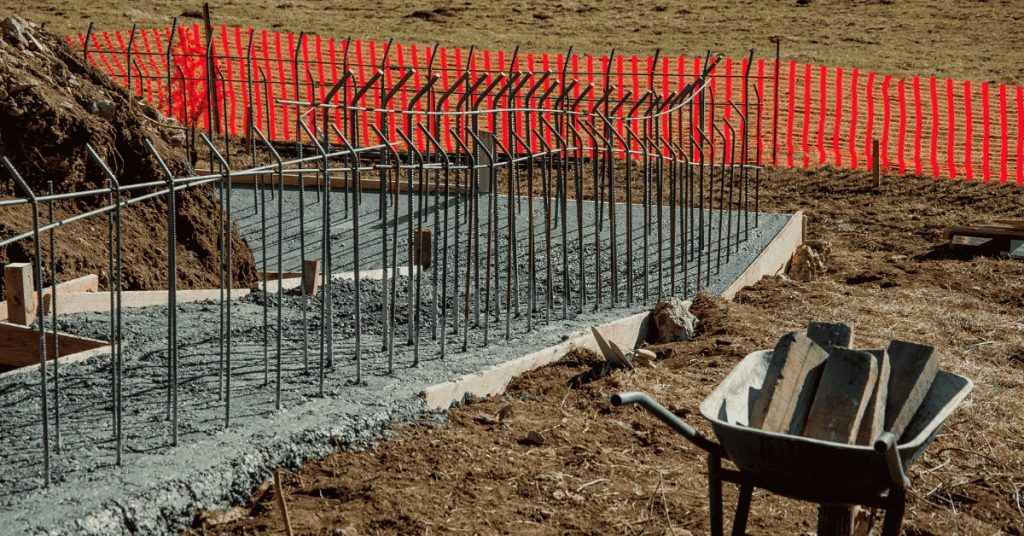
A mudsill below grade is the bottom framing member that sits on or just under the concrete or soil, carrying the load from above. If this sill rots, settles, or is exposed to moisture, you can get cracks, sticking doors, or movement in the framing. Check for soft spots, musty smells, or paint/finish damage near the foundation edge to spot trouble early.
To test, inspect for soft wood, cracks, or doors that don’t close and look for signs of moisture around the sill line. Fixes can include removing damaged wood, drying the area, adding proper flashing or sill sealer, and ensuring a solid, level support; always verify with the product instructions and local rules before starting. If you’re unsure, consult the manufacturer instructions or a local pro to choose safe, appropriate options for your setup.
Key takeaways
- Mudsill below grade anchors framing to foundation; inspect for rot, pests, moisture.
- Common causes include groundwater intrusion, poor flashing, and vented crawlspace moisture.
- Use non-destructive tests first; only excavate if visual checks remain inconclusive.
- Repair options range from applying protective coatings to full mudsill replacement.
- Ensure proper drainage, ventilation, and clean, dry contact between mudsill and soil.
- Follow safety: wear eye protection and masks; soil may contain hazards.
Table of Contents
- Introduction
- Key takeaways
- Common Causes of Mudsill Deterioration Below Grade
- Signs and Inspection Checklist
- Tests to Assess Mudsill Condition (Non-Destructive and Exploratory)
- Structural Impacts of Unaddressed Mudsill Problems
- Repair and Remediation Options
- Materials, Products, and Best Practices for Durable Repairs
- Cost, Planning, Safety, Permits, and Common Mistakes to Avoid
- Long-Term Maintenance to Prevent Future Problems
- Conclusion
- FAQ
Common Causes of Mudsill Deterioration Below Grade
Identify the four primary risk factors that threaten mudsills below grade: chronic moisture intrusion, poor drainage around the foundation, construction errors such as sill height or contact with concrete, and biological attack including rot and insect activity. Explain how each factor accelerates deterioration and what to look for at the mudsill level. Emphasize that these issues often occur together and compound damage over time.
Diagnostic cues for each factor include moisture staining, efflorescence, musty odors, soft or crumbly wood, visible rot, and signs of insect activity. Also check for gaps or cracks between the mudsill and foundation, and evidence of capillary rise or groundwater exposure. Use these signals to guide further testing and planning for remediation.
Water and Drainage Failures
Mudsills below grade are at risk when water can’t drain away properly. This happens due to poor grading, clogged gutters, or blocked drains. Groundwater can also seep in if the soil around your foundation isn’t well-compacted.
Persistent wetting leads to accelerated decay of the mudsill. You might see moisture staining, efflorescence, or a musty odor.
Check your grading – it should slope away from the foundation. Clean out gutters and drains. Ensure soil around the foundation is well-compacted to prevent groundwater seepage.
Termites, Fungal Rot, and Other Biological Factors
Insects like termites and powderpost beetles, along with fungi, can cause significant damage to your mudsill. They thrive in damp, warm environments.
Wood-boring insects leave small holes and sawdust-like frass behind. Fungal rot appears as soft, crumbly wood with a musty smell. Check for these signs during your inspection.
Prevent biological attack by keeping the mudsill dry. Ensure proper ventilation in crawl spaces and basements. If you find infestations or rot, treat the affected area promptly to prevent spread.
Signs and Inspection Checklist
Identify visual distress cues at mudsill level such as cracks or settlement in the concrete slab, gaps between sill plate and foundation, bowing or tilting, and visible wood rot or termite damage. Note these indicators as part of a routine check. Prioritize any items that point to moisture or structural concern.
Detect moisture and staining indicators like efflorescence, musty odors, persistent damp spots, rusted anchors, and moisture intrusion into exterior siding or interior walls. Keep a simple log of what you find and when you checked it for trend tracking.
Visual checkpoints: gaps, staining, sagging, and finish issues
Before you start any inspection, grab a flashlight and walk around your home’s perimeter. This visual checklist helps spot common signs of mudsill distress at the sill-to-foundation joint, rim joist, and adjacent floor framing.
- Gaps between sill plate and foundation: Check for spaces wider than a dime. Gaps can let in water, pests, and cold air.
- Cracking or settlement in concrete slab: Look for hairline cracks or obvious settling. These could indicate soil movement or inadequate support.
- Bowing or tilting of the wall: Check walls for leaning, bulging, or diagonal cracks at the corners. This may signal foundation issues.
- Visible wood rot or termite damage: Inspect the mudsill and nearby framing for soft, crumbling, or discolored wood. Termites leave small holes and sawdust-like droppings.
- Efflorescence on concrete: White, powdery deposits could mean moisture is wicking up from below.
- Musty odor or persistent damp spots: Smell and look for signs of moisture intrusion. Ignoring this can lead to mold growth.
- Rusted anchors or fasteners: Check metal components for rust, which indicates prolonged exposure to moisture.
- Moisture intrusion into siding or interior walls: Inspect above-grade areas for water stains, peeling paint, or warped materials.
Quick rule: If you spot any of these issues, don’t wait. Schedule a professional inspection immediately.
Tools and materials checklist for inspection
Before you start your mudsill inspection, make sure you have the right tools and safety gear. This list ensures you’re prepared.
- Flashlight: Essential for inspecting dark crawlspaces or basements.
- Probe (wooden or plastic): Gently probe the mudsill and surrounding areas to check for softness, voids, or damage.
- Moisture meter: Measure moisture content in wood and concrete. Review your meter’s manual before use.
- Camera: Document findings with photos and notes. This helps track changes over time.
- PPE (Personal Protective Equipment): Include work gloves, safety glasses, and a dust mask for crawlspaces.
- Tape measure: Measure gaps, cracks, or settling to monitor changes.
- Spirit or laser level: Check plumb and level conditions of the walls and mudsill.
- Basic checklist: Create a simple list to ensure you cover all inspection points.
Quick rule: Always review your tools’ manuals before use, and never skip safety precautions.
Tests to Assess Mudsill Condition (Non-Destructive and Exploratory)
Non-destructive tests to screen mudsill condition include moisture meters, infrared scans, surface moisture indicators, and sounding to spot hollow areas. Use these methods first before opening up the structure. They help map where issues may be concentrated.
Visual and surface indicators like staining, efflorescence, cracks, and insect activity guide whether deeper testing is needed. If results are unclear, document findings and plan for a targeted exploratory step with professional guidance.
Non-destructive tests: probing, moisture meters, and borescopes
Before you start poking holes in your foundation, understand what each test does:
- Probing: Checks for voids or weak spots. Use a long, sturdy probe (like a 1/2″ rebar). Push it into the mudsill at an angle, checking for give.
- Moisture meters: Measures moisture content in wood. Stick two probes into the mudsill, read the meter. A reading over 18% could mean trouble.
- Borescopes: Allows visual inspection of hidden areas. Drill a small hole, insert the borescope, and check for rot, pests, or other issues.
Each test has its limits:
- Probing won’t find minor cracks or decay. It’s just a rough check.
- Moisture meters only measure what they touch. They can’t see through concrete or steel.
- Borescopes need a clear line of sight. They’re no good if you can’t see past the first obstacle.
Use all three to get a better picture of your mudsill’s condition. If any test raises red flags, dig deeper (literally) or consult a pro before proceeding.
Destructive testing and exploratory openings
Sometimes, you gotta make a few cuts to see what’s really going on with your mudsill. Here’s how to do it right:
Minimize collateral damage: Keep your cuts small – think 2″ x 4″. Use a reciprocating saw or a sharp utility knife. Work from the top down, so you can see what you’re doing.
Document everything: Take photos before and after. Note the location of each cut. This helps track progress and identify any issues later on.
What to check: Once exposed, look for rot, cracks, or insect damage. Check base compaction – it should be solid, not crumbly. If you’re unsure about anything, consult a pro or your local building department.
Structural Impacts of Unaddressed Mudsill Problems
Explain how a compromised mudsill interrupts load transfer from studs to the foundation, potentially overloading nearby framing members. Discuss how connections and anchors may lose their grip and allow lift or sway. Highlight the risk of progressive damage if moisture or decay continues.
Assess how rot and intrusion in the mudsill can radiate into joists, affect hangers, and cause differential settlement or sealing failures. Link exterior drainage, flashing, and enclosure quality to the rate of deterioration and the need for a proper remediation plan.
Observable distress: settlement, wall rotation, and uneven floors
If your home is showing signs of movement, it could be a red flag for a compromised mudsill. Here’s what to look out for:
Settlement: Uneven or sloping floors, cracks in walls or ceilings at corners, and doors that stick or won’t close properly.
Wall rotation: Walls leaning away from the center of the house, diagonal cracks running from top to bottom of walls, or gaps between walls and ceilings.
Uneven floors: Sagging or bouncy floors, gaps between floorboards, or sloping floors that feel like they’re tilting.
When to consult a structural engineer
Knowing when to call in a pro can save you time and money. Here’s when it’s time:
Significant movement: If you notice any of the signs we mentioned earlier, and they’re more than just minor cracks or slight unevenness.
Unsure about repairs: If you’re not confident in your ability to assess or fix the problem yourself, it’s better to be safe and get an expert opinion.
Before major work: Before you start any significant repair or renovation work, consult with a structural engineer to ensure your plans won’t compromise the structure further.

Repair and Remediation Options
Start with assessing the condition and scope to determine if issues are cosmetic or structural. Confirm whether the mudsill is truly below grade and if water intrusion is ongoing. Use this to guide the sequence of fixes.
Outline temporary shoring and stabilization to protect the structure during work. Then cover minor repair options like sealants or epoxy injections, intermediate steps such as elevating or sealing the mudsill, and the considerations for full sill replacement with proper flashing and drainage. Plan a staged approach with clear steps and safety checks.
Localized repairs: sistering, epoxy, and targeted replacement
If the damage is localized and not structural, consider these repair options:
Sistering: Add a new sill plate alongside the damaged one. Secure them together with corrosion-resistant hardware.
Epoxy injection: For small cracks, use epoxy to fill voids and reinforce the sill. Drill holes, inject epoxy, and allow it to cure before sealing.
Targeted replacement: If a section is rotten or damaged beyond repair, replace just that piece. Ensure proper flashing and sealing at the joints.
Full mudsill replacement and underpinning approaches
When the entire mudsill needs replacing, follow these steps:
Shoring: Before removing the old sill, install temporary supports to maintain structural integrity. Ensure load paths are properly supported.
Coordinate with a foundation specialist for underpinning if necessary. Disconnect utilities and services as needed before starting work.
Replacement: Remove the old sill, ensuring proper disconnects. Install the new sill with proper flashing, sill sealer, and flashing details to prevent future water intrusion. Reconnect utilities and services.
Materials, Products, and Best Practices for Durable Repairs
Discuss material selection criteria for treated lumber versus alternatives, and how flashing and sill seal interact with concrete pours and soil conditions. Emphasize compatibility with existing framing and climate. Avoid overreliance on any single product without checking labels.
Cover moisture-management stack, flashing details, and how to prevent capillary rise. Include durability and compatibility notes for fasteners, termite resistance, and movement tolerance. Outline an inspection and test plan for pre-pour and post-pour checks to catch moisture or movement early.
Material specs and standards explained
Choosing the right materials is key to a durable mudsill repair. Here’s what you need to check on product labels and manufacturer guidance.
- Pressure-treated lumber: Look for ACQ, CBA, or MCA treatment types. Decay resistance rating should be 0.4 or higher. Avoid untreated lumber to prevent rot.
- Flashing: Check compatibility with concrete mixes and soil conditions. Use metal flashing for better durability, but vinyl can work in drier climates.
- Sill seal: Ensure it’s compatible with your chosen lumber treatment type. Look for good adhesion and flexibility to prevent cracking.
- Damp-proofing: Check if it’s suitable for below-grade applications. It should provide a continuous barrier against moisture.
- Corrosion-resistant fasteners: Use hot-dipped galvanized or stainless steel screws to prevent rust and maintain structural integrity.
Common repair products and when to use them
Flashing, sealants, epoxies, and corrosion-resistant fasteners are essential for durable mudsill repairs. Here’s how to use them effectively.
Flashing: Use metal flashing at the base of the foundation wall to direct water away from the mudsill. Overlap flashing pieces properly to maintain a continuous barrier. Terminate flashing at masonry or concrete with proper detailing to prevent water intrusion.
Sealants and epoxies: Apply sealants between the mudsill and foundation wall, and at any cracks or gaps in the mudsill. Use epoxies for larger repairs or when reinforcing sistering pieces. Ensure compatibility with your chosen lumber treatment type and concrete mix.
Corrosion-resistant fasteners: Use these to secure flashing, sill seal, and damp-proofing materials. They prevent rust and maintain a strong bond between materials over time.
Cost, Planning, Safety, Permits, and Common Mistakes to Avoid
Outline cost drivers and budgeting without naming exact prices, focusing on items like lumber, fasteners, drainage, and contingencies. Emphasize the importance of aligning scope with design drawings or code prescriptions. Plan for long-term maintenance in the budget as a separate line item.
List safety precautions and permit considerations, including required inspections and code references. Identify common mistakes to avoid such as undersized mudsill, improper anchorage, poor drainage, or skipping planning and inspections until issues arise.
Cost factors and budgeting guidance
The cost of repairing or replacing a mudsill below grade varies greatly depending on several factors. First, the extent of damage determines labor and material needs.
Access to the damaged area also impacts costs. If you need to dig up concrete or remove walls, expect higher expenses.
Shoring may be necessary to support your home while work is done, adding more cost. Always get multiple estimates from reputable contractors to avoid fixed numbers.
Safety precautions and permit considerations
Safety should always be your top priority when working on a mudsill below grade. Wear appropriate PPE, including gloves, safety glasses, and steel-toed boots.
If you’re working above ground, use proper fall protection. Be aware of trenching and backfilling hazards – ensure someone knows where you are and what you’re doing at all times.
Always locate utilities before digging. Follow OSHA guidelines for proper formwork and shoring. Heavy lifting should be done with help or mechanical assistance.
Permits are usually required when structural work is involved. Check local codes for insulation/moisture-control standards, termite/wood-destroying organism requirements, and inspector notification needs. Ensure bolts, fasteners, and anchorage meet current codes.
Common mistakes to avoid
Even experienced DIYers and contractors make mistakes when it comes to mudsill repairs. Here are some frequent errors to steer clear of:
- Skipping site evaluation: Always assess the foundation grade, frost line depth, load-bearing requirements, and existing framing before starting work.
- Undersized or poorly treated mudsill: Using the wrong size lumber or not treating it properly leaves your home vulnerable to rot and pests.
- Incorrect anchor bolt spacing or depth: Incorrect placement weakens the structure’s integrity. Follow local codes for proper spacing and depth.
- Neglecting weather protection or curing conditions: Concrete needs time to cure properly, and wood should be protected from excessive moisture.
- Ignoring drainage or grading: Poor drainage leads to water damage and rot. Ensure your mudsill is protected from standing water.
- Delaying inspections until issues arise: Regular inspections help catch problems early, saving you time and money in the long run.
Learning from these common mistakes will help ensure a successful repair or replacement of your mudsill below grade.
Long-Term Maintenance to Prevent Future Problems
Define a proactive inspection cadence and what to look for during checks, plus a simple photo-tracking routine to monitor changes over time. Keep the plan practical and repeatable for DIYers. Focus on early detection to avoid costly repairs.
Explain moisture management and drainage improvements that prevent future damage, including grading, downspout extensions, and exterior waterproofing. Include maintenance tasks, escalation points, a quick tool and material list, and guidance on when to hire a pro for complex issues.
Annual visual and moisture-check routine for mudsill
Conduct a thorough inspection of your mudsill annually to catch any issues early. Here’s a step-by-step guide:
Timing: Spring or fall, when the weather is mild and dry.
What to look for: Check for cracks, gaps, moisture intrusion, efflorescence (white powdery substance), wood rot, insect activity, and settlement indicators. Use a level and square to ensure everything is still plumb and level.
Documentation: Take photos from the same angles each year to track changes over time. Mark any areas of concern on the photos for future reference.
Preventative upgrades: sealing, waterproofing, and drainage improvements
Proactive measures can prevent future damage to your mudsill. Here’s how:
Sealing and Waterproofing: Seal concrete-to-wood joints with a flexible, paintable sealant. Apply exterior waterproofing products to the sill plate and any gaps. Use compatible fillers for any cracks.
Drainage Improvements: Ensure proper grading away from the foundation. Extend downspouts and gutters if necessary. Install drainage tiles or French drains around the perimeter, connecting them to a sump pump if needed. Proper ventilation under the sill can also help prevent dampness.
Products and Sequencing: Always follow manufacturer’s instructions for application and sequencing of products. Use corrosion-resistant fasteners and flashing where necessary.
Conclusion
Keep the mudsill issue from creeping into safety problems and costly fixes by acting with clear steps and sound judgment. A solid, well-supported mudsill12 keeps the structure sturdy, controls water, and preserves appearance around the foundation.
First, look for signs of moisture or rot, check flashing and drainage, perform the non-destructive checks and, if needed, a limited exploratory probe to confirm the extent. Then plan the repair in a practical order: stop water intrusion, verify load paths, select durable materials, follow proper installation, secure any required permits, and schedule safety checks as you go. Do it in stages, test as you go, and document what you find for future maintenance.
Common mistakes to avoid are pushing ahead without confirming the scope, skipping tests or protective steps, and ignoring safety rules or permit requirements. Always keep safety first by shutting off power when near wiring, using proper PPE, and not undercutting support while the area is exposed. If the damage is larger than a small section, or load paths are unclear, don’t improvise—call in a professional. You can handle the basics, stay sharp, and move forward with confidence: get it right the first time and keep your home safe and durable.
FAQ
What is a mudsill below grade and why does it matter?
A mudsill below grade sits where the wall framing rests on concrete or masonry at or just below ground level. If it rots or settles, it can twist the wall and let water in, which damages the structure and invites pests. Inspecting it early helps you catch problems before they get worse.
What are the most common signs of mudsill trouble under a wood foundation?
Look for wood rot, soft or crumbly wood, paint peeling near grade, and gaps between the sill and concrete. You may also see cracking in the concrete, bowing studs, or doors and windows sticking. Moisture staining and musty odors are red flags too.
What basic tests can you perform to spot problems without heavy lifting?
Check for elevated moisture with a moisture meter if you have one, focusing on the sill area. Probe gently with a thin screwdriver in a non-desctructive way to test for softness. If you see rot or dampness that won’t dry out after a season, note it for a proper assessment.
What’s the practical approach to fixing mudsill issues once they’re confirmed?
Address moisture first—fix drainage, seal concrete or replace the damaged sill, and provide proper termite and rot treatment according to material labels. Ensure proper ventilation and keep wood off direct soil contact with approved flashing or a treated sill plate, and follow the manufacturer instructions for any repair product. If in doubt, consult local rules and product labels for installation steps and limitations.