

Introduction
Choose reliable local roofing and siding contractors by spotting common problems, red flags, and practical fixes.
You’ll learn how to evaluate bids, verify licenses and insurance, recognize warning signs, and apply practical tips and rules of thumb to make informed hiring decisions.
Key takeaways
- Verify licenses, insurance, and local references before selecting a contractor.
- Get written quotes detailing materials, labor, permits, and cleanup responsibilities.
- Compare warranties for workmanship and material coverage with clear start dates.
- Schedule pre-installation inspections to document existing damage and avoid disputes.
- Confirm site safety plan, debris containment, and access during work hours.
- Research climate-appropriate materials and installation methods for longevity.
Table of Contents
- Introduction
- Key takeaways
- Why Proper Roofing and Siding Matter
- Common Roofing Problems and Their Fixes
- Common Siding Problems and Their Fixes
- How to Choose the Right Materials for Your Climate
- How to Vet and Hire a Reliable Contractor
- Pre-Work Inspections, Quotes, and Budgeting
- Preparing Your Home and Safety Considerations
- Post-Installation Follow-Up and Maintenance
- Conclusion
- FAQ
Why Proper Roofing and Siding Matter
Quality roofing and siding protect the home from weather, structural stress, and mold risk. They contribute to energy efficiency by reducing drafts and heat transfer, which can lower long-term operating costs. A solid install also supports resale value by showing a tight envelope and durable exterior during inspections.
Common consequences of poor installs include leaks that cause water damage, mold growth, buckling, and higher energy bills due to a looser exterior. When selecting contractors, verify materials, proven warranties, proper site preparation, and post-installation inspection plans. Check product labels, data sheets, and manufacturer instructions to confirm climate suitability and installation requirements.
Long-term risks of poor workmanship
Neglecting proper installation can lead to serious long-term issues. Poorly installed roofing and siding can’t protect your home from weather, leading to leaks and water damage.
Mold growth is a common consequence. It thrives in damp environments and can cause health problems. Plus, it’s tough to remove once established.
Structural integrity is at risk too. Water damage weakens timber framing and promotes rot. This can lead to costly repairs or even structural failure.
Insurance and resale value are affected as well. Leaks and water damage claims can increase premiums. Buyers may shy away from homes with signs of poor workmanship, reducing your property’s value.
Benefits of doing it right the first time
Quality installation pays off in lower maintenance. A properly installed roof and siding system needs less frequent repairs and replacements.
Warranty coverage is another benefit. Many manufacturers require proper installation to validate their warranties. So, good workmanship protects your investment.
Extended material lifespan is a significant advantage. Quality materials installed correctly last longer, saving you money in the long run. This includes both roofing and siding materials.
A well-installed system also improves energy efficiency. Proper ventilation, flashing, and expansion/contraction planning keep your home’s envelope tight, lowering utility bills.

Common Roofing Problems and Their Fixes
The most frequent roofing issues are missing shingles, flashing failures, ventilation problems, and underlayment damage. Each problem has a typical cause, such as wind uplift, improper flashing around penetrations, or ventilation imbalances. Understanding these helps guide diagnostics and repairs.
For remediation, plan shingle replacement and resealing, re-sealing or replacing flashing around penetrations, and improving attic ventilation while inspecting soffit and ridge vents. Distinguish contractor work from DIY boundaries and document safety steps. Prioritize a logical repair sequence and gather material and tool lists for a complete, code-conscious fix.
Material- and installation-related failures
The right materials and proper installation are key to a durable roof. Here’s what goes wrong when they’re not:
- Improperly rated shingles: Using shingles with too low a rating for your climate can lead to cracking, curling, and early failure.
- Inadequate underlayment: Skimping on quality or using the wrong type of underlayment can cause leaks, especially in high-wind or wet areas.
- Poor nailing technique: Incorrect nail placement or not driving nails flush can lead to shingles blowing off in windy conditions.
- Insufficient flashing: Not using enough or the wrong type of flashing around penetrations (chimneys, vents) can cause water intrusion and damage.
- Incorrect installation method: Using the wrong nailing pattern or not following manufacturer’s guidelines can result in premature failure.
Ventilation, attic, and underlayment issues
Proper ventilation is crucial to keep your roof and attic in good shape. Here’s what can go wrong:
Inadequate ventilation: Not enough vents or improper placement can lead to excessive heat buildup, causing shingles to age prematurely and promoting mold growth.
Underlayment problems can also cause issues. Damaged underlayment: Tears, punctures, or inadequate overlap can allow water to penetrate the roof deck, leading to rot and structural damage.
The fix? Inspect your attic for signs of moisture or excessive heat. Ensure you have proper intake (soffit) and exhaust (ridge/roof vents) ventilation. Replace damaged underlayment and ensure it’s properly installed.
Common Siding Problems and Their Fixes
Common siding mistakes include fastener errors, misalignment, missing house wrap, improper flashing, and ventilation gaps. These issues impact performance, warranty coverage, and moisture management. Verifying correct installation helps prevent costly follow-ups.
Remediation approaches include correcting flashing, re-seaming or re-fastening, patching or replacing sections, and maintaining a clear punch list with timelines and warranties. Use a practical checklist to document initial assessment, photos, quotes, and final inspection for water tightness.
Fastening, expansion, and alignment issues
Correct fastener practice is crucial for siding performance. Overdriven nails can crack vinyl or dent aluminum, while underdriven ones let water in. Missing fasteners leave panels loose.
Check: Tighten or replace over/under-driven fasteners and secure any missing ones. If panels are damaged, replace them.
Siding expands/contracts with temperature changes. Leave proper spacing for this. Check: Measure gaps at corners and transitions. If too tight, remove a nail, let panel expand, then re-nail.
Misaligned siding looks bad and traps moisture. Check: Verify vertical and horizontal alignment. Re-align or replace misaligned panels.
Moisture management and flashing around openings
Missing/inadequate house wrap lets water in. Check for gaps, tears, or missing sections. Weather barrier continuity is key.
Repair: Apply sealing tape at seams and corners. Install new house wrap if needed.
Improper flashing around windows, doors, and penetrations causes leaks. Check: Ensure flashings are intact, properly installed, and extend under siding.
Repair: Re-flash compromised areas, ensuring proper installation sequence. Seal with caulk if necessary.
How to Choose the Right Materials for Your Climate
Local climate factors such as temperature extremes, humidity, precipitation, wind, and snow load should drive material choices. Look for products with climate-tested performance and documented resistance in your region. Align selections with the home’s structure and ventilation for lasting efficiency.
Assess durability, maintenance needs, and expected lifespans for common materials in relation to weather, freeze-thaw cycles, UV exposure, and moisture risk. Consult local codes and manufacturer guidelines, and seek expert input when in doubt to avoid overpromising or mismatched performance.
Step-by-Step Process
Follow this clear sequence to choose the right materials for your climate.
- Check local building codes and consult with a pro to understand your region’s specific requirements.
Reason: Ensure you’re compliant and get expert guidance. - Gather data on your climate: temperature extremes, precipitation, wind, snow load.
Quick check: Look up historical weather patterns online. - Evaluate roof deck, ventilation, attic insulation, and flashing compatibility with chosen materials.
Reason: Ensure proper installation and moisture management. - Compare long-term costs of ownership for different material options.
Quick check: Consider maintenance needs, expected lifespans, and energy efficiency. - Verify climate-rated classifications and manufacturer warranties.
Reason: Protect your investment with suitable materials and solid guarantees. - Check installer’s experience in your specific climate conditions.
Quick check: Ask for references or certifications proving their expertise. - Inspect the site before installation, ensuring it’s clean and safe.
Reason: A tidy jobsite prevents damage to materials and promotes efficient work. - Do a final walkthrough after installation, checking for any issues.
Quick check: Ensure everything is secure, level, and functioning as expected.
Roof material choices by climate and exposure
Select the right roofing materials based on your climate’s unique challenges.
- Asphalt shingles: Good for moderate climates, but susceptible to extreme heat and hail.
Spec/rating to look for: ASTM D7158 Class 4 impact resistance rating. Avoid in areas with frequent hail storms. - Metal roofing: Excellent for high-wind and fire-resistant needs, but can dent from hail.
Use: Ideal for windy regions and areas prone to wildfires. Spec/rating to look for: UL 580 Class 4 impact resistance rating. - Clay or concrete tiles: Durable in extreme heat and cold, but heavy and can crack in freezing temperatures.
Avoid in areas with frequent freeze-thaw cycles. - Slate roofing: Extremely durable, but heavy and expensive. Not suitable for structures without proper support.
Spec/rating to look for: ASTM C406 or C201 standards for quality and durability. - Wood shakes/shingles: Attractive, but susceptible to rot, insect damage, and fire in certain climates.
Avoid in areas with high humidity or frequent wildfires. Spec/rating to look for: Class A fire resistance rating.
Siding material suitability and maintenance
Choose siding materials that can withstand your climate’s conditions and require minimal upkeep.
- Vinyl siding: Inexpensive, low-maintenance, but can crack in extreme cold or warp in high heat.
Avoid in areas with temperature extremes. Spec/rating to look for: Double-thick or insulated vinyl for better durability and energy efficiency. - Fiber cement siding: Durable, resistant to rot, insects, and fire, but can crack in extreme cold.
Avoid in areas with frequent freeze-thaw cycles. Spec/rating to look for: ASTM C1186 standards for quality and performance. - Wood siding: Attractive, but susceptible to rot, insect damage, and warping in humid climates.
Avoid in areas with high humidity or frequent temperature changes. Spec/rating to look for: Heartwood on the exterior for better durability. - Composite siding: Low-maintenance, but can warp or crack in extreme heat or cold.
Avoid in areas with temperature extremes. Spec/rating to look for: Warranties covering fading, warping, and cracking. - Stucco: Durable, but susceptible to cracks from settling or earthquakes.
Avoid in areas prone to seismic activity. Spec/rating to look for: Quality installation and proper expansion joints.
How to Vet and Hire a Reliable Contractor
Start with essential verifications: licenses and insurance for roofing and siding, plus any manufacturer certifications relevant to the project. Confirm if general liability and workers’ compensation are active and up to date. Certifications can indicate training and adherence to best practices.
Prioritize local experience and references. Request a written plan with scope, material specs, timeline, and warranty terms, and check how changes are handled. Be alert for signs of red flags such as vague estimates or pressure tactics during bids.
Step-by-Step Process
Follow these practical steps to vet and hire a reliable contractor for your roofing and siding project.
- Prepare a list of potential contractors. Ask neighbors, friends, or search online for local options.
- Check licenses and insurance. Ensure they have the necessary permits, liability insurance, and workers’ compensation coverage.
- Evaluate their experience. Look for years in business, familiarity with your climate, and past projects similar to yours.
- Contact references. Ask for 3-5 references and verify their work quality and completed timelines.
- Review estimates and contracts. Compare itemized estimates, scope of work, material specifications, project timeline, payment schedule, and warranties.
- Set up a site visit. Inspect past work, ask about any issues, and ensure they can handle your specific needs.
- Establish communication. Discuss their availability, response time to calls/emails, and how changes will be handled during the project.
- Hire and monitor progress. Once you’ve chosen a contractor, stay involved in the process to ensure everything goes as planned.
Credentials and paperwork to demand
Before hiring any contractor, insist on seeing these essential documents:
Liability Insurance: Protects you from financial responsibility if the contractor damages your property or causes injury.
Workers’ Compensation Insurance: Covers medical expenses and lost wages for workers injured on your job site.
Business License: Ensures they are legally allowed to operate in your area. It’s also a sign of professionalism and commitment to their business.
Written Warranty: Provides assurance that the contractor stands behind their workmanship and will rectify any issues within a specified time frame.
Red flags in estimates and sales tactics
Beware of these warning signs when reviewing estimates or dealing with contractors:
One-line estimates: Vague, incomplete estimates make it difficult to compare offers and understand what’s included.
High-pressure sales: Contractors who pressure you into signing a contract immediately may be hiding something or trying to take advantage of your urgency.
Too-low bids: Extremely low prices could indicate subpar materials, unskilled labor, or hidden fees. It’s often best to choose quality over the lowest price.
Vague warranties: Unclear warranty terms leave you vulnerable and unsure of what’s covered in case something goes wrong.
Requests for large upfront cash: Contractors who demand a significant amount of money before starting work may be untrustworthy or fly-by-night operators.
Pre-Work Inspections, Quotes, and Budgeting
A professional pre-work inspection is essential to assess structural integrity, moisture levels, and hidden damage that could affect both roofing and siding. The inspection should cover exterior components and any potential ventilation or access concerns. Use findings to guide the scope of work.
When comparing quotes, look for detailed, itemized scopes, material specs, warranties, and clear timelines. Build a budgeting framework that includes permits, disposal, and contingency funds, and note any red flags such as vague scope or unusually low bids.
What a thorough inspection should include
Before signing any contract, conduct or hire a professional to perform an in-depth inspection of your roof and siding. This helps identify hidden damage and ensures the project’s success.
- Roof Deck Condition: Check for warping, rotting, or sagging. Skip this and you might face costly repairs later.
- Flashing Around Vents and Chimneys: Ensure it’s intact to prevent water intrusion. Damaged flashing can lead to leaks and moisture issues.
- Attic Ventilation: Verify proper airflow to prevent moisture buildup. Poor ventilation can cause mold growth and structural damage.
- Siding Substrate: Inspect for rot, warping, or gaps. Ignoring these can result in further damage and higher repair costs.
- Moisture Barrier: Ensure it’s intact to prevent water penetration. A compromised barrier can lead to mold and mildew growth.
- Trim and Fascia: Check for rot, warping, or damage. Neglecting these can cause siding to fail and water intrusion.
- Gutter System: Inspect for leaks, clogs, or improper pitch. Faulty gutters can cause water damage to your home’s exterior.
- Moss or Algae Growth: Check for signs of organic growth. These can indicate moisture issues and may require professional treatment.
Quick rule: Always prioritize a thorough inspection before starting any work.
Building a realistic budget and getting multiple bids
To ensure you’re getting the best value, obtain at least three detailed estimates from reputable contractors. Here’s how to compare them effectively.
- Base Estimate: Compare the total cost of materials, labor, and overhead. This should be similar across bids.
- Materials: Check if they’re of equal quality. Cheaper materials may lead to future repairs.
- Labor: Ensure each bid includes a detailed breakdown of labor costs. Inconsistencies could indicate hidden fees.
- Timeline: Compare project timelines to ensure they’re realistic and align with your needs.
- Permits: Verify that permit fees are included in the estimate. These can vary by location.
- Disposal Costs: Check if these are included. Improper disposal can lead to additional charges.
- Contingency Fund: Allocate 10-15% for unexpected costs. Skipping this can leave you financially vulnerable.
- Additional Charges: Consider potential extra costs like asbestos removal, mold remediation, or ventilation upgrades.
Quick rule: Never accept the first bid without comparing at least three detailed estimates.
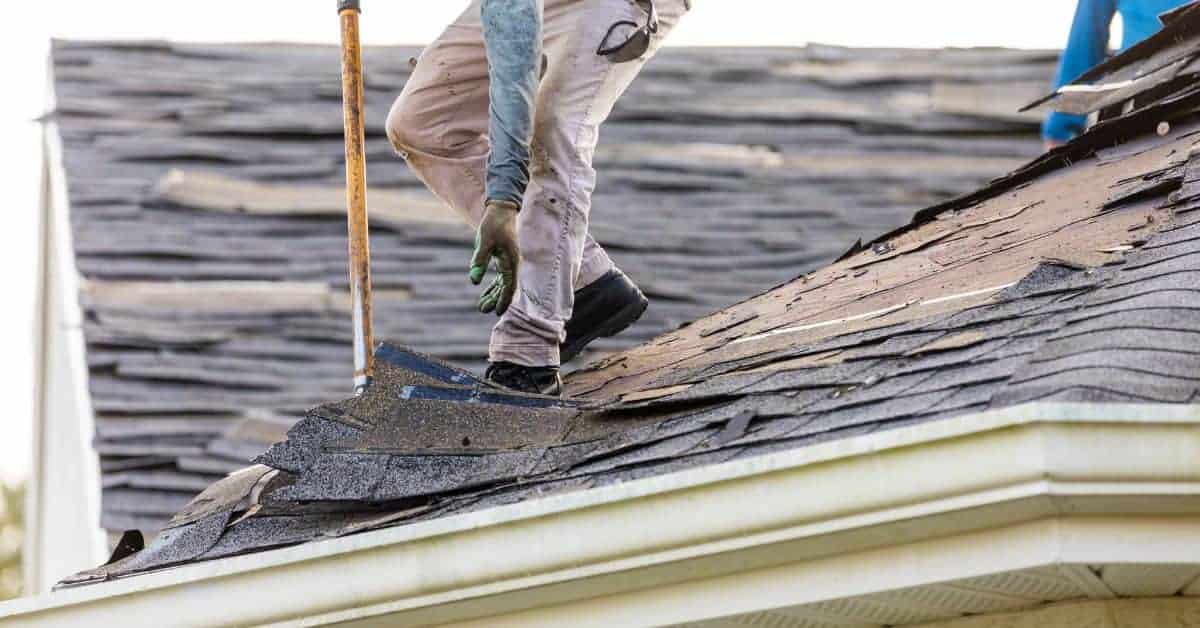
Preparing Your Home and Safety Considerations
Before work begins, move vehicles, secure valuables, prune landscaping, and create a clear access path for equipment. Establish a plan to protect driveways, gutters, and windows from debris. Communicate weather contingencies and site access rules with the crew.
On safety, ensure PPE is used and that fall protection is in place where needed. Coordinate utility shutoffs and overhead line risks, and plan for dust, noise, and vibration control. Prepare for post-work cleanup and on-site inspections to verify safety and performance.
Site protection and minimizing damage
Before any work begins, it’s crucial to protect your property from potential damages. Here are some steps you can take:
Plywood Drop Zones: Have contractors install plywood drop zones on the ground where they’ll be working. This protects your lawn and landscaping from damage.
Roofers’ Walk Pads: These are temporary walkways that protect your roof’s surface and ensure workers have a safe path to follow.
Additionally, gutter guards can be installed to prevent debris from clogging your gutters. And remember to discuss debris containment with your contractor to keep the site clean and minimize damage.
Worker and homeowner safety protocols
Safety should always be a top priority. Here are some key safety protocols to follow:
Fall Protection: Ensure that all workers have proper fall protection equipment, especially when working at heights.
Secure Ladders: Make sure ladders are secure and in good condition before use. They should extend at least 3 feet above the landing.
Clear communication is also vital. Establish working hours with your contractor to avoid any misunderstandings, and ensure you have a plan for access during work hours.
Post-Installation Follow-Up and Maintenance
Immediately after installation, perform an inspection focused on flashing, seals, fasteners, and alignment. Look for exposed gaps or damaged components and note any concerns for the installer to address. Keep a record of photos from the final walk-through.
Understand warranties by distinguishing manufacturer coverage from workmanship terms, including timeframes and claim steps. Establish a routine maintenance plan with seasonal tasks and know when to call a pro for checks that affect warranty eligibility.
What to Inspect Right After Completion
Congratulations, your new roof and siding are installed! Before you kick back and enjoy the fruits of your labor, take a moment to perform a quick inspection. This will ensure everything is up to par and help catch any issues early.
Check Flashing: Make sure all flashing around chimneys, vents, and skylights is secure and properly sealed. Flashing prevents water from seeping in where these components meet the roof or walls.
Inspect Seams: Ensure all seams are tightly sealed. This includes not just your siding but also any joints on your roof. A proper seal will prevent water intrusion and keep your home’s interior dry.
Verify Materials: Double-check that the materials used match what was agreed upon in your contract. If you’re unsure, don’t hesitate to ask your contractor for clarification or confirmation.
Ongoing Maintenance and When to Call a Pro
Maintaining your roof and siding isn’t a set-it-and-forget-it task. Regular upkeep will extend their lifespan and keep your home looking its best.
Seasonal Checks: Inspect your roof and siding at least twice a year – once in spring before the rainy season, and again in fall after leaves have dropped. Look for signs of wear, damage, or debris buildup.
Debris Removal: Keep your gutters clean and free of debris. Clogged gutters can cause water to back up under your shingles or behind your siding, leading to leaks and rot.
Professional Assessment: If you notice new leaks, peeling paint or siding, mold growth, or sagging in your roof or walls, don’t wait – call a professional. These signs could indicate serious underlying issues that require immediate attention.
Conclusion
You’ve got to protect the home you live in. Safety matters first, and a durable roof and siding keep water out, hold its value, and look right for years to come.
Now move with a plan: assess current damage and climate needs, lock a budget, get pre-work inspections, collect and compare quotes, confirm material choices and warranties, line up permits and a clear safety plan, choose a weather window, protect landscaping, and then check the work as it unfolds and after it’s finished.
A few mistakes to avoid are common but easy to prevent: climb only on stable, dry surfaces and never on damaged decking or wet roofs; don’t skip testing materials in a small, visible area before committing; never mix old flashing with new without proper detailing; and never sign a contract that leaves surprise charges or vague work boundaries—clarity now saves headaches later. Always wear the right safety gear, and if you’re unsure about any step, pause and reassess.
If you encounter signs of structural trouble, uncertain estimates, or flashing and waterproofing work beyond your comfort level, call in a qualified professional. The right contractor will protect your home, stay within budget, and keep you informed every step of the way—and you’ll finish knowing the job is done right, with lasting results.
FAQ
How can I tell a contractor is licensed and insured?
Ask for proof of license and current insurance. Call the issuing board and the insurer to verify active status. Don’t take a glance at a flyer and call it good.
What red flags should I look for during bids?
Bids that are unusually low, rush to sign, or only cover the basics are warning signs. Warranties, scope of work, and materials should be clear in writing. If it feels sloppy, it probably is.
How long should roofing or siding take, and what affects the schedule?
Most jobs stretch from a few days to a couple of weeks, depending on weather and materials. Delays due to backorder parts or poor planning will blow the schedule. Ask for a dated plan and a realistic timeline.
What fixes should I avoid doing myself?
Don’t mess with roof or structural work if you lack experience. Electrical, flashing, and significant water damage need a pro. Improper fixes can cause leaks and code trouble later.