
Introduction
The timeline and duration of chimney stucco repairs can vary greatly depending on the extent of heat damage. Understanding this timeline helps you plan your project effectively.
In this guide, we’ll walk you through the step-by-step process of repairing heat-damaged chimney stucco, focusing on how long each stage takes and what affects the overall duration.
The Step-by-Step Timeline for Chimney Stucco Repair
Repairing heat-damaged chimney stucco involves several stages. Here’s a detailed timeline to help you understand how long each step takes:
- Inspection and Diagnosis (1-3 days): Begin by inspecting the chimney for signs of heat damage, such as cracks or spalling. Use our inspection checklist to ensure you cover all areas.
- Preparation (1-2 days): Before starting repairs, prepare the area by removing loose stucco and cleaning the surface. This step may take longer if there’s extensive damage.
- Repair (2-5 days): Apply repair materials according to manufacturer guidelines. The duration depends on the size of the damaged areas and weather conditions.
- Finishing Touches (1 day): Once the repairs have cured, apply a final coat of stucco or paint to match the surrounding area.
The total timeline for chimney stucco repair can range from 5 to 10 days, depending on the extent of heat damage and weather conditions. Keep in mind that these are rough estimates, and your project may take longer if you encounter unexpected issues.
Key takeaways
Proper preparation is crucial as it directly affects the overall repair timeline. Taking the time to clean and prepare the surface ensures better adhesion of the repair materials, reducing the likelihood of future failures.
- Heat expands and cracks stucco; inspect flashing and coping for gaps and leaks.
- Weather cycles cause spalling; check for loose masonry and edge delamination.
- Delayed repairs raise moisture risk, mold, and structural damage to chimney.
- Start with safe assessment: avoid removal beyond visible damage without support.
- Use manufacturer guidance and local code requirements for patch materials.
- Document damage with photos and notes to guide repairs and timelines.
Table of Contents
- Introduction
- Key takeaways
- How Heat Affects Stucco on Chimneys
- Common Heat-Related Chimney Stucco Failures and Early Signs
- Safety Risks and Structural Concerns from Heat Damage
- Diagnosing Heat-Related Stucco Failures: Inspection Checklist
- Repair and Restoration Options for Heat-Damaged Chimney Stucco
- Preventive Measures and Heat-Resistant Best Practices
- Costs, Timelines, and Common Mistakes in DIY Repairs
- Case Studies and Visual Checkpoints
- Conclusion
- FAQ
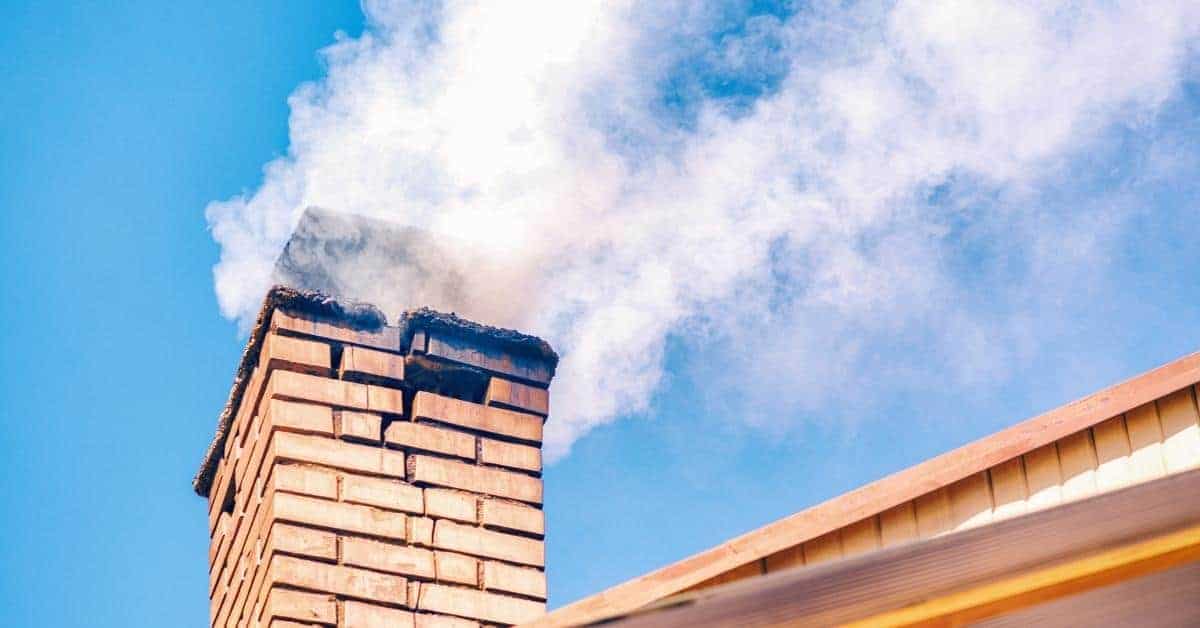
How Heat Affects Stucco on Chimneys
Heat moves through a chimney in several ways: by radiation from hot surfaces, by conduction through the material itself, and by convection in the air around the stack. Look for gaps in insulation, missing flashing, and sun-exposed surfaces that add extra heat load. These conditions set the stage for accelerated damage over time.
In order, stucco first shows stress cracking and crazing, then mortar joints may spall while lath and the underlying substrate react to heat and moisture. You can also see efflorescence and bond failure as the system ages or heats unevenly. Distinguish steady heat, thermal cycling, and acute heat events by the damage pattern and timeline you observe on the wall.
Thermal expansion and contraction
Heat causes materials to expand. When it cools, they contract. Stucco, mesh, and masonry have different expansion rates. This differential movement creates cracks and delamination over time.
Steady heat: Slow, gradual cracking along joints and surfaces.
Thermal cycling: Repeated heating and cooling cause wider cracks and deeper delamination.
To minimize this, use compatible materials with similar expansion rates. Regularly inspect for early signs of cracking.
Material breakdown and efflorescence
Heat accelerates moisture migration in stucco. This leads to salt deposits (efflorescence) and weakening of cementitious binders.
- Type S mortar: High early strength, but can crack under heat cycling. Look for ASTM C270 Type S with high heat resistance.
- EIFS adhesive: Heat degrades adhesion over time. Choose high-temperature resistant adhesives like silicone or modified polymers.
- Stucco mix design: High cement content can lead to cracking under heat. Opt for balanced mixes with appropriate aggregates and additives.
- Waterproofing: Heat can break down waterproofing layers, allowing moisture intrusion. Use high-temperature resistant membranes and sealants.
- Avoid: Using low-quality materials or improper mix designs that lack heat resistance.
Heat-related bond failure at interfaces
High temperatures weaken adhesion at critical joints: stucco-to-flashing, stucco-to-vent, and stucco-to-brick. This can lead to water intrusion and further damage.
Flashing: Heat causes flashing to degrade, leading to seal failures. Use high-temperature resistant flashings like stainless steel or copper.
Venting: Heat can cause vents to warp or delaminate from stucco. Ensure proper venting and use heat-resistant materials.
Brick joints: High temperatures can cause brick mortar to crack, leading to bond failure. Use high-temperature resistant mortars and ensure proper curing.
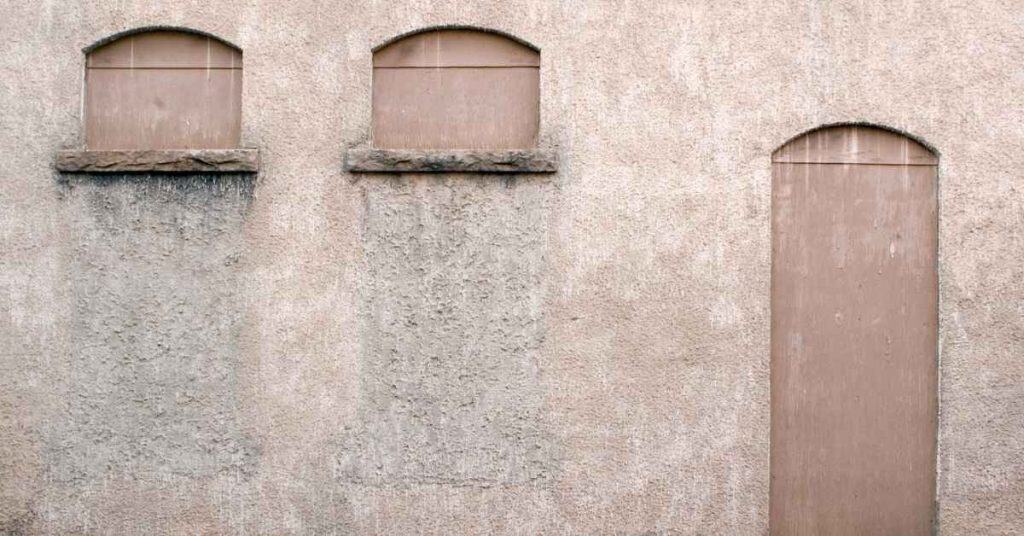
Common Heat-Related Chimney Stucco Failures and Early Signs
Dominant failure modes driven by heat include thermal cracking from expansion and contraction, delamination at the stucco-to-masonry interface, surface spalling, and crown or flashing failures that concentrate heat. Relate each mode to how heat exposure speeds movement of materials.
Early indicators homeowners can spot include hairline cracks, surface crazing, peeling or blistering, rust stains from metal work, and efflorescence where moisture and heat interact. Also watch for staining or discoloration near flashing or the cap as clues to hidden moisture issues.
Cracks, bulging, and hairline separation
Heat-induced cracks around your chimney often start small – hairline to map-sized. They’re usually random, not straight like settlement or impact cracks. Look for these signs:
Hairline cracks around the crown and base suggest repeated expansion/contraction from heat.
Bulging stucco panels indicate delamination at the stucco-to-masonry interface. Press gently; if it feels soft or gives, that’s a red flag.
Discoloration, chalking, and powdering
Heat exposure can cause discoloration and chalking on your stucco. Here’s what to look for:
Irregular staining or discoloration near the flashing or cap indicates heat concentration.
Chalky residue or powdering on the surface signals binder degradation, as heat breaks down the cement in the stucco mix.
If you see these signs, it’s time to take action before the problem worsens.
Loose stucco, delamination, and falling fragments
Delamination is serious. It means your stucco is separating from the masonry beneath. Here’s how to check:
Gently tap the stucco with a hammer or handle of a trowel. A dull thud instead of a solid sound indicates delamination.
Use a flathead screwdriver or probe to gently probe suspect areas. If it goes in easily, that’s another warning sign.
Safety first: Wear safety glasses and be careful not to cause further damage. If you find delamination, call a pro immediately.
Safety Risks and Structural Concerns from Heat Damage
Immediate safety hazards include fire risk and potential smoke or gas exposure if the system is compromised. If you notice unusual heat effects, shut off the appliance until you assess the situation safely. Do not use the fireplace or stove until a professional signs it off.
Functional risks involve impaired venting, drafts, and possible creosote buildup that worsens with continued use. Structural concerns include visible cracks, movement, or leaning, and water intrusion that can lead to rot or spalling behind the stucco.
Fire and Flue Performance Hazards
The stucco on your chimney might look okay, but heat damage can hide serious issues inside. Here’s what to watch out for:
Flue Damage: Heat can crack or break the flue liner, letting smoke and gases leak into your home.
Compromised stucco lets heat escape too, increasing the risk of nearby combustibles catching fire. Embers could also escape through cracks, posing a serious hazard.
Draft Issues: Heat damage can block or restrict airflow up the chimney, causing smoke to back up into your home. This increases the risk of carbon monoxide poisoning and other health hazards.
Water Intrusion and Freeze-Thaw After Heat Damage
Heat-weakened stucco lets water in, leading to bigger problems. Here’s why:
Moisture Penetration: Cracks and holes let water seep into the masonry, causing damage over time.
In colder climates, freezing and thawing cycles can widen these cracks, making the problem worse each season. This leads to further structural deterioration and potential collapse.
Rot and Spalling: Water intrusion can cause rot in wood framing and spalling (flaking) of masonry, weakening your chimney’s structure.
When to Evacuate or Shut Down Heating Appliances
Safety first! If you notice any of these signs, stop using your appliance immediately and call a professional:
Visible Structural Separation: Large cracks, leaning structure, or movement indicate serious instability.
Heavy cracking near the flue, discoloration, or moisture stains are also red flags. Don’t ignore them!
Persistent Leaks or Odors: If you smell gas, smoke, or other unusual odors, or notice persistent leaks around your chimney, stop using your appliance right away.
Safety is paramount. Don’t risk a fire or carbon monoxide poisoning. Always err on the side of caution.
Diagnosing Heat-Related Stucco Failures: Inspection Checklist
Start with clear visual indicators of heat-related damage: blistering, fading, chalking, and cracking patterns around flashing, plus warped edges near heat sources. Note air gaps or hollow-sounding areas during tapping checks.
Exterior checks should cover flashing integrity, mortar joints, stucco finish, expansion joints, and signs of water intrusion like stains or efflorescence. Interior checks should include moisture indicators and access to walls adjacent to the chimney for condensation signs and insulation gaps.
Exterior visual checkpoints
Before you grab any tools, use this checklist to visually inspect your chimney’s exterior. It’s best done on a dry day with good lighting.
- Chimney crown: Check for cracks or crumbling. A damaged crown can let water into the chimney.
- Flashing: Ensure it’s securely attached and not rusted. Flashing keeps water out where the chimney meets the roof.
- Cap: Inspect for gaps or damage. A proper cap protects the flue from debris and rain.
- Throat area: Look for cracks around the smoke chamber. This can cause drafting issues and let in water.
- Stucco-masonry interfaces: Check for separation or cracking at joints. This indicates bond failure due to heat expansion.
- Mortar joints: Inspect for missing or crumbling mortar. Repointing may be needed to prevent water intrusion.
- Expansion joints: Ensure they’re intact and not cracked. These help prevent stucco from cracking due to heat expansion.
- Water stains/efflorescence: Look for signs of water intrusion. Efflorescence is a white, powdery substance left behind when water evaporates.
Quick rule: If you spot any of these issues, document them with photos and notes. They could worsen over time or indicate underlying problems.
Interior and flue inspection cues
Head inside to check for signs of heat-related issues in your fireplace and flue. It’s best done when the chimney is cool.
- Fireplace interior: Look for discoloration, cracks, or warping. These could indicate heat damage or water intrusion.
- Soot patterns: Check for excessive soot buildup. This can indicate drafting issues due to chimney damage.
- Heat discoloration: Inspect for black, brown, or yellow stains. These can indicate heat-related problems in the flue.
- Flue liner cracks: Use a flashlight and mirror to check for cracks. A damaged flue liner can cause drafting issues and carbon monoxide backdrafting.
- Attic/crawlspace access: Check for signs of water intrusion, mold, or insulation gaps near the chimney.
Quick rule: If you find any of these issues, note them down and compare with your exterior findings. They might indicate a bigger problem that needs professional attention.
Tools and tests for preliminary diagnosis
Before you call in the pros, use these non-invasive tools and tests to diagnose heat-related stucco failures on your chimney.
- Moisture meter: Use it to detect hidden moisture behind stucco. High readings could indicate water intrusion or efflorescence.
- Infrared/thermal imaging camera: Scan for hot spots or moisture anomalies. These can help pinpoint problem areas.
- Hammer/tap test: Gently tap stucco with a hammer. A hollow sound indicates delamination, where the stucco has separated from the substrate.
- Crack patterns: Examine crack patterns to determine their cause. Stair-step cracks often indicate heat-related issues.
Quick rule: If your tests reveal significant moisture, extensive cracking, or other severe issues, it’s time to call a masonry specialist. They can provide a thorough inspection and recommend repairs.
Repair and Restoration Options for Heat-Damaged Chimney Stucco
Repair choices range from targeted patching and color-matched work to full recoat or re-stucco, chosen based on damage severity, crack patterns, and moisture intrusion. Use your judgment after comparing the visible damage to the moisture data you collect or have measured.
Look for indications that masonry repair or flue liner work is needed, such as cracked load-bearing joints or water behind stucco. Have a plan for when to call a structural mason or flue specialist based on the observed conditions.
Patch repairs and texture matching
For minor heat damage, targeted patching is your best bet. First, prep the area by removing loose stucco and brushing off dust.
Use a compatible repair mortar, matching the original stucco’s composition and color. Mix it well to avoid lumps. Apply the mortar with a trowel, pressing firmly to ensure good adhesion.
Pro tip: To blend the patch, use a texture comb or brush while the mortar is still wet. Let it cure according to the manufacturer’s instructions before applying a thin layer of matching stucco finish.
Partial re-stucco vs. full recoat
If cracks are widespread or moisture has infiltrated, consider partial re-stuccoing or a full recoat. Start by assessing the damage: if it’s localized and not too severe, partial re-stucco might suffice.
A full recoat is necessary when there’s extensive substrate damage, multiple cracks, or signs of recurring heat-related issues. It ensures even coverage and better thermal performance.
Remember, partial re-stucco is a band-aid. If the underlying problem isn’t addressed, you’ll likely face repeat repairs. Always consider your chimney’s heat history when deciding between partial and full reapply.
When to replace flashing, cap, or flue liner
Ancillary components play a big role in preventing heat damage. Inspect your chimney’s crown, flashing, and flue liner for signs of wear.
Replace the flashing if it’s rusted, damaged, or no longer seals properly at the roof intersection. A bad cap can let water in, so replace it if it’s cracked, missing pieces, or shows signs of deterioration. As for the flue liner, if it’s compromised – crumbling, cracked, or has a white powdery residue (indicating heat damage) – replace it immediately. A faulty flue liner is a fire hazard.
These components protect your chimney and home from heat and water intrusion. Don’t skimp on their maintenance or replacement when needed.
Preventive Measures and Heat-Resistant Best Practices
Identify heat-related risk factors for chimneys with stucco, including high flue temperatures, solar gain, and local climate. Material choices like high-heat resistant finishes and breathable substrates influence long-term performance and crack resistance. Plan with these factors in mind.
Clearances, ignition sources, and proper flashing are essential. Ventilation, moisture management, and insulation behind stucco help minimize heat buildup and condensation. Establish seasonal inspection checklists to catch issues early.
Material specs and standards explained
The right materials make all the difference. They’ll stand up to heat, moisture, and time.
- High-heat resistant stucco: Look for mixes rated for 200°F or higher. Avoid cement-based ones that crack under heat.
- Breathable substrates: Use open-cell foam or plywood to let moisture escape. Not doing so traps water, leading to cracks and stains.
- Appropriate lath: Galvanized steel or aluminum mesh works best. Avoid plastic, it deforms under heat.
- Sealants: Use high-temperature silicone caulks around openings. Low-quality ones fail quickly.
- Check codes and limits: Always follow local building codes. Respect manufacturer temperature limits to avoid voiding warranties.
Correct flashing, crown, and cap detailing
Proper installation keeps heat and moisture out. Here’s how:
Flashing: Install it under stucco, lapping up onto walls. This directs water away from the chimney.
Crown: Make it sloped to shed water. A flat crown holds water, leading to damage.
Cap: Seal it with a durable, high-temperature sealant. A poorly sealed cap lets in moisture and heat.
Maintenance schedule and seasonal checks
Regular upkeep extends your chimney’s life:
Spring: Inspect for cracks. Re-seal any gaps around openings. Clean out debris from the cap.
Fall: Before heating season, check mortar joints (tuckpointing). Ensure flashing is secure and in good condition.
Annually: Inspect for signs of heat damage – cracks, stains, or loose stucco. Address any issues promptly to prevent further deterioration.
Costs, Timelines, and Common Mistakes in DIY Repairs
Cost drivers include material type, labor, access, scaffolding, permits, and weather delays. Rather than exact prices, prepare a local range by contacting several contractors and comparing your scope to theirs. Document your assumptions to share with estimators.
Typical timelines span assessment, prep, repair, and curing, with seasonal limits often affecting outdoor work. Common DIY mistakes include improper flashing, ignoring thermal expansion, incompatible patches, moisture sealing under stucco, and rushing cure times. When in doubt, bring in a pro for critical areas like flue connections and flashing.
Cost drivers and what to expect
The cost of heat-related chimney stucco repairs varies greatly depending on several factors. First, the extent of damage determines material needs and labor hours.
Structural or flue work, if required, significantly increases costs. Accessibility also plays a role – scaffolding or lift tickets may be needed for high chimneys, adding to expenses.
Permits might be necessary, and weather delays can extend timelines and increase costs. To get an accurate estimate, ask contractors for itemized quotes breaking down materials, labor, permits, and any additional fees.
Typical DIY mistakes to avoid
While it’s tempting to tackle repairs yourself, certain mistakes can exacerbate heat-related issues. Here are common pitfalls:
- Improper flashing/waterproofing: Inadequate protection allows water intrusion, leading to further damage.
- Ignoring thermal expansion: Stucco expands and contracts with temperature changes; ignoring this can cause cracking.
- Using incompatible patches: Incorrect materials can’t withstand heat fluctuations, leading to repeat failures.
- Sealing moisture under stucco: Trapping moisture promotes mold growth and further damage.
- Rushing cure times: Allowing insufficient drying time weakens the repair.
Proper preparation, compatible materials, and patience are key to successful repairs.
Choosing a qualified contractor
When hiring a professional, look for specific credentials and experience in heat-related chimney stucco repairs. Here’s what to consider:
Licenses: Ensure they hold valid licenses for masonry or related work in your area.
References: Ask for references from past clients, especially those with similar repair needs. Contact them to inquire about the contractor’s work quality and professionalism.
Warranties and insurance: Verify they offer warranties on their work and carry liability insurance to protect you and your property.
Case Studies and Visual Checkpoints
Two concise case templates show heat cycling cracks and delamination near vents, followed by a successful repair narrative highlighting outcome checks. Each example emphasizes the visible cues you should compare with your own chimney.
Use a visual checkpoints list: crack patterns, color fading, texture changes, efflorescence, substrate exposure, edge joints, and proximity to heat sources. Include a simple diagnostic workflow and a contractor-friendly photo documentation plan to support repairs.
Short case: localized thermal cracking
Use this checklist when you notice cracks on your chimney’s stucco, especially around heat sources.
- Crack pattern: Look for hairline or wide cracks. Hairlines may indicate early stage issues.
- Heat source proximity: Check if cracks are near fireboxes, vents, or other heat sources.
- Crack direction: Note if cracks run vertically or horizontally. Verticals often suggest thermal expansion/contraction.
- Crack width: Measure crack widths with a ruler or feeler gauge. Wider cracks need immediate attention.
- Crack depth: Try to determine if cracks are superficial or deep. Deep cracks may indicate structural issues.
- Crack frequency: Count the number of cracks in a given area. More cracks mean greater damage.
- Crack movement: Monitor crack movement over time. Growing cracks worsen over time.
- Flashing and cap junctions: Inspect where stucco meets flashing and cap for cracking or separation.
Quick rule: If cracks are wide, deep, numerous, growing, or near heat sources, call a pro immediately.
Short case: severe delamination requiring re-stucco
Use this checklist when you suspect underlying issues causing stucco to peel or flake off.
- Peeling areas: Locate and mark any peeling sections. They may indicate moisture or heat damage beneath.
- Flaking texture: Check if the stucco’s texture is flaking off. This suggests a weak bond with the substrate.
- Gypsum exposure: Look for exposed gypsum or other substrates under peeling stucco. This indicates severe damage.
- Efflorescence: Inspect for white, powdery deposits on or around cracks. Efflorescence signals moisture issues.
- Joint gaps: Check if joints between stucco and chimney edges are open or cracked. Gaps allow water intrusion.
- Masonry condition: Examine the masonry beneath the stucco for damage, cracks, or missing mortar.
- Flue liner condition: Inspect the flue liner for cracks, gaps, or corrosion that could cause heat transfer issues.
- Structural concerns: Look for bulging, leaning, or other signs of structural damage. These require immediate professional attention.
Quick rule: If you find exposed substrates, efflorescence, joint gaps, or structural concerns, call a pro right away.
Visual checkpoints for homeowner photos
Use this checklist to ensure you capture the right shots of your chimney’s stucco issues for professional assessment.
- Wide shot: Take a photo from a distance to show the entire chimney and its context (roof, walls, etc.).
- Close-up of cracks: Get close to capture detailed images of cracks. Use a ruler or coin for scale.
- Junctions at flashing and cap: Photograph where stucco meets flashing and cap to check for gaps, cracking, or separation.
- Crack direction and width: Take photos showing crack directions and widths clearly. Use a straight edge or level for reference.
- Peeling areas: If there’s delamination, photograph peeling sections from various angles.
- Efflorescence or moisture: Capture images of any white deposits, water stains, or other signs of moisture.
- Structural concerns: Photograph any bulging, leaning, or other structural issues from multiple angles.
- Heat sources: Include photos showing heat sources (fireboxes, vents) and their proximity to damaged areas.
Quick rule: Good lighting, clear focus, and scale references in your photos help pros diagnose issues faster.
Conclusion
Heat-related stucco failures on chimneys are a safety and durability issue—and they can be fixed with careful, small steps and the right checks. Start by confirming you understand where heat is stressing the surface and then follow a simple plan to inspect, repair, and prevent future damage.
First, check in a sensible order: look for obvious cracking or loose stucco, test for moisture behind the skin, note any staining or spalling, and compare the area to surrounding sections. Do repairs in small patches, use compatible materials, and wait for dry, calm weather. If you’re unsure, test a tiny area first and keep it simple: dry out, clean, patch, and cure before moving on to larger sections.
Common mistakes to avoid are overloading the wall with patch materials, skipping a moisture check, and ignoring heat sources or cracking that keeps returning. Always work with proper safety gear, avoid leaning ladders or reaching over active heat zones, and work in daylight or good light so you don’t miss signs. If in doubt about structure, support, or chimney flue heat, stop and call a pro—fast, targeted help can prevent costly damage later.
When it makes sense to call in a professional, do so if you discover major cracks, moisture behind the stucco, or any signs of structural movement. Use this as a guide to keep the job within your reach, stay safe, and move forward with small, controlled repairs that protect both appearance and function. You can get this done with confidence—steady, deliberate steps win over haste every time.
FAQ
What are common causes of chimney stucco damage related to heat?
Heat from the sun, poor ventilation, and rapid temperature changes all stress stucco. Improper flashing or gaps where the chimney meets the roof can trap heat and moisture, speeding damage. Look for areas where heat concentrates or moisture sneaks in, and check manufacturer guidance for any product-specific limitations.
How can I identify signs of deterioration from heat damage?
Watch for cracks that widen with temperature swings, blistering or peeling, and a powdery or chalky surface. Discoloration, staining, or powdery dust under the finish are red flags. If stucco feels soft behind the surface or rocks loose with a tap, stop and inspect the underlying structure.
How does weather affect chimney stucco, and when should I act?
Sun exposure, freezing and thawing cycles, and wind-driven rain all accelerate wear. Hot spells can dry and crack material quickly, while moisture behind cracks worsens damage. Delay can turn a small issue into structural risk, so inspect after severe weather and repair promptly per product instructions.
When should I call a professional, and what will the repair process look like?
If you see large cracks, loose stucco, visible steel lath rust, or signs of water intrusion, hire a pro. A typical repair involves assessment, removing damaged material, repairing backing, applying new stucco with proper mixing and curing, and addressing flashing and moisture barriers. Ask for a written plan that cites manufacturer instructions and local practices. If in doubt, prioritize safety and moisture control.