
Introduction
Heat pump water heaters are an efficient way to heat water by using ambient heat and reducing energy use. You’ll learn practical steps, tips, and rules of thumb to install, size, optimize performance, and troubleshoot common issues for better results.
Key takeaways
- Verify space for proper ventilation and draft-free location near water heater.
- Match solar or electrical compatibility to ensure efficient heat pump operation.
- Leave refrigerant work and electrical connections to licensed professionals when required.
- Schedule pre-installation checks: space, drainage, electrical supply, and refrigerant line routing.
- Perform regular maintenance: filter clean, coil free of dust, and drain valve checks.
- Understand total cost versus savings, including rebates, tax credits, and energy impact.
Table of Contents
- Introduction
- Key takeaways
- What is a Heat Pump Water Heater (HPWH)?
- Sizing and Selection: Choose the Right Unit for Your Home
- Tools, Materials, and Pre-installation Checklist
- DIY Installation Basics (what a competent DIYer can do)
- Maintenance, Seasonal Tuning, and Performance Optimization
- Troubleshooting, Repairs, and When to Call a Pro
- Cost, Savings, and Rebates: Financials Made Practical
- Safety, Codes, and Best Practices for DIYers
- Conclusion
- FAQ
What is a Heat Pump Water Heater (HPWH)?
A heat pump water heater uses ambient warmth from the surrounding air or ground to heat water, rather than relying on electric resistance or gas to do the job. Inside, it relies on a refrigerant cycle with a compressor, evaporator, condenser, and an insulated tank, so heat is moved from where it’s available into the tank rather than generated in the tank.
Air-source units pull heat from the air and sit indoors or outdoors where enough airflow is available, while ground-source (or geothermal) units borrow heat from the earth via buried loops, with different space, noise, and efficiency considerations. For DIY folks, plan placement with clearance for airflow and service access, consider noise impact and vibration, and note that sizing and mounting choices affect efficiency and longevity. Always check the label and manufacturer instructions for installation limits, and follow local rules; if in doubt, talk to a professional and focus on safe wiring, proper venting if required, and regular maintenance.
How HPWHs compare to conventional water heaters
A heat pump water heater (HPWH) is a game-changer compared to traditional electric resistance or gas models. It works by moving heat from the surrounding air into your water tank, rather than generating heat directly like an electric element does. This makes it much more energy-efficient—up to 60% savings over conventional heaters.
HPWHs have longer recovery times because they rely on ambient temperatures and can be slower in cold climates. However, their efficiency means you’ll see lower utility bills year-round. They’re especially effective for homes with high water usage or where electricity is the primary heating source.
In contrast to tankless heaters that heat water on demand but have limited flow rates, HPWHs offer a balance of efficiency and capacity. For DIY homeowners looking to cut costs while maintaining hot water supply, an HPWH is often the best choice.
Types of HPWHs and hybrid models
There are several types of heat pump water heaters to choose from. Integrated tank-style units come with a built-in heat pump, making installation straightforward but requiring space for both the compressor and tank.
Add-on modules can be retrofitted onto existing electric tanks, offering flexibility without replacing your current system entirely. These modules sit on top or next to the tank and connect via plumbing lines.
Hybrid models combine a heat pump with an electric element, providing backup heating when needed. This dual-element approach ensures reliable hot water even in extreme weather conditions. While hybrids are more expensive upfront, they offer better performance across different climates.

Sizing and Selection: Choose the Right Unit for Your Home
Sizing starts with estimating peak hot-water demand—think how many showers, loads of laundry, and dishwashing runs at the same time and roughly how fast you need hot water to flow. Use the unit’s first-hour rating or recovery guidance on the manufacturer charts to map that demand to a practical size, and pick a safe range by household size (rough targets you’ll confirm with the label: around 40–50 gal for 1–2 people, 50–80 gal for 3–4, larger homes may need more). Also understand EF/UEF and COP in plain terms: better ratings mean more efficient operation and real-world energy savings over time; verify what the specific model claims and how climate affects performance.
This matters because the wrong size wastes energy or runs out of hot water, and climate or placement can swing efficiency. Check the unit’s charts for your climate and the electrical basics—voltage, amperage, breaker size—and ensure you have space, proper clearances, and accessible service points. Local considerations and installation details drive how well a unit performs, so plan placement to minimize heat gain or loss and keep noise in check. For DIY sizing, have a clear checklist: confirm compatibility with existing connections, and know when to call a pro for sizing, electrical, or venting questions.
Reading efficiency specs (UEF, COP, energy factor)
When sizing a heat pump water heater, you need to understand the efficiency ratings. The Energy Factor (EF), Uniform Energy Factor (UEF), and Coefficient of Performance (COP) are key metrics that tell you how much hot water your unit can produce per unit of energy.
The EF measures the overall efficiency, while UEF is a more precise rating for heat pump models. COP tells you how many units of heat output you get from one unit of electricity input. Higher numbers mean better performance and lower operating costs over time.
For example, if your HPWH has an EF of 2.0, it means the heater uses twice as much energy to produce hot water compared to a conventional electric model with an EF around 1.0. A COP of 3.5 or higher is ideal for maximizing savings and reducing environmental impact.
Check these ratings before you buy to ensure your HPWH will meet your household’s needs without breaking the bank in energy costs.
Making the right choice: Unit type for your space
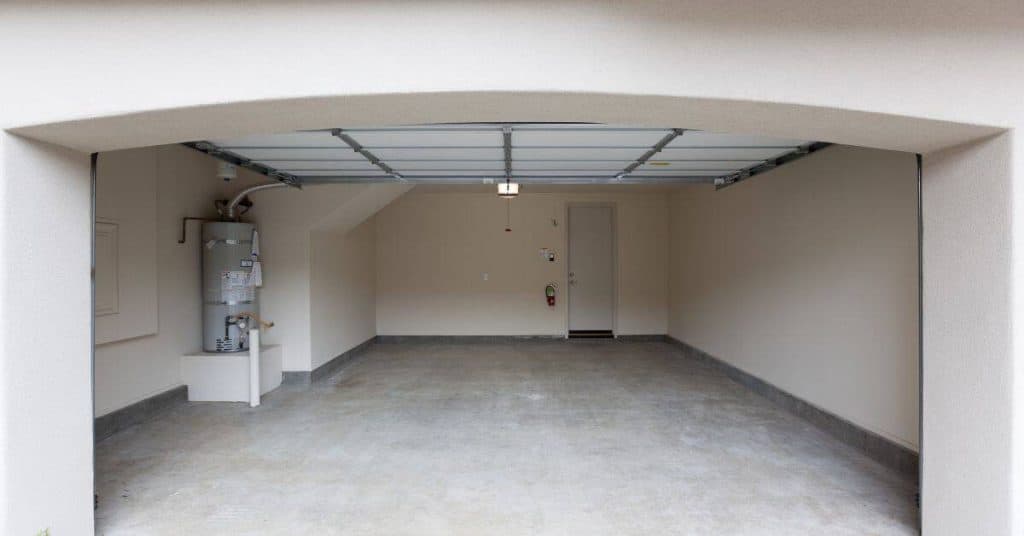
The placement of your heat pump water heater is crucial. For a garage or basement, choose an insulated model that can handle colder temperatures and has enough clearance around it.
In utility closets or other small spaces, ensure there’s ample room for air circulation and maintenance access. A compact unit might be best if space is tight.
For unconditioned areas like a garage, look for units designed to operate efficiently in cooler environments. In conditioned spaces, standard models will work well but make sure the area isn’t too small or crowded.
Always check local codes and manufacturer guidelines on clearances and ventilation requirements before installing your HPWH. This ensures safety and optimal performance.
Tools, Materials, and Pre-installation Checklist
This section gives you a DIY-friendly checklist of tools, safety gear, and materials, plus the permits, utility requirements, and rebates you should verify before starting. You’ll want to confirm local codes and permit offices if you’re unsure, and gather receipts, model numbers, and installation dates for rebates or inspections. Keep the focus on planning and safety so you don’t get trapped mid‑job.
Doing the upfront work matters because space, power, drainage, and ventilation all affect whether the installation will run smoothly. Knowing what to check helps you avoid misfits, code issues, or call‑backs for revisions. It also makes it easier to decide when you should bring in a pro for refrigerant work or electrical upgrades.
Material specs and standards to verify
Before you start, review the manufacturer’s documentation for your heat pump water heater.
- Pressure relief valve rating: Check it matches unit capacity. Ensure proper installation or risk overpressure damage.
- Electrical circuit requirements: Confirm breaker size and wire gauge meet specs to prevent overheating or tripping issues.
- Expansion tank sizing: Verify correct expansion tank for your system to avoid water hammering and pipe bursts.
- Refrigerant type: Ensure you have the right refrigerant for your unit. Incorrect refrigerant can damage components.
- Mounting brackets: Confirm they are rated for load capacity of the heater. Improper mounting leads to instability and safety risks.
- Pipe insulation: Check it meets R-value requirements for energy efficiency. Poor insulation reduces performance.
- Condensate drainage provisions: Verify proper fittings and slope to avoid water pooling or leaks.
- Drain pan: Ensure the drain pan is correctly sized and positioned to catch condensation overflow.
Quick rule: Always double-check material specs against manufacturer guidelines before installation.
Visual checkpoints before you start
Before beginning your heat pump water heater installation, conduct a thorough visual inspection of the site.
- Floor load capacity: Check if floor can support unit weight. Weak floors may collapse under load.
- Ventilation adequacy: Ensure adequate air circulation around unit to prevent overheating and poor performance.
- Condensate drainage path: Confirm proper slope for condensate drain line to avoid pooling or leaks.
- Nearby heat sources: Avoid placing heater near direct heat, which can reduce efficiency and cause malfunctions.
- Existing electrical service capacity: Verify existing circuits can handle additional load. Overloading circuits risks fire hazards.
- Water supply compatibility: Ensure water pressure and flow meet unit requirements to prevent damage or poor performance.
- Freeze protection: Check for freeze protection measures if heater is in unheated space, preventing freezing damage.
- Maintenance access: Confirm easy access for future servicing. Restricted access complicates maintenance and repairs.
Quick rule: Always visually inspect the installation site to ensure a safe and efficient setup.
DIY Installation Basics (what a competent DIYer can do)
DIY installation basics cover the steps you can handle: site prep and placement, simple mounting planning, basic plumbing shutoff checks, an initial fill and vent setup. You’ll separate tasks you can do from ones that usually need a pro, like final electrical hookups or refrigerant work. Keep expectations realistic and double-check fittings, labels, and clearance before you start.
Understanding what you can do helps you plan the project so you’re not stuck waiting on a pro at the last minute. It also keeps safety, reliability, and warranty intact by guiding you to follow labeling, manufacturer instructions, and local rules. If something feels uncertain, verify requirements on the product label and with the installer or manufacturer before proceeding.
Electrical and refrigerant safety boundaries
When it comes to installing a heat pump water heater, there are certain tasks that you should leave to the professionals. For instance, handling electrical connections like 240V circuits or disconnects requires an electrician due to the risk of shock or fire. Similarly, dealing with refrigerant lines and charging the system is best left to certified HVAC technicians because it involves working with sealed systems under pressure.
Local building codes often mandate that certain installations must be performed by licensed professionals. This includes ensuring proper electrical grounding and conduit routing for safety compliance. Ignoring these requirements can lead to fines or voiding your warranty, so always check local regulations before starting any work.
To stay on the right side of the law and ensure a safe installation, consult with an electrician for wiring and an HVAC tech for refrigerant handling. This way, you avoid legal issues and keep your home’s systems running smoothly without risking personal injury or property damage.
Common installation mistakes to avoid
When installing a heat pump water heater, there are several common pitfalls that can lead to inefficiency and even safety hazards. Here’s what you need to watch out for:
- Poor condensate routing: Ensure the drain line is properly connected and sloped to prevent water from backing up.
- Inadequate airflow clearance: Maintain at least 12 inches of space around all sides of the unit for proper heat exchange.
- Incorrect dip tube placement: Make sure the cold-water inlet is correctly positioned to avoid mixing hot and cold water.
- Undersized circuit protection: Use the correct breaker size as specified by the manufacturer to prevent overheating or tripping.
Avoiding these mistakes will ensure your heat pump operates efficiently, safely, and within warranty guidelines. Take your time during installation and double-check each step for optimal performance.
Maintenance, Seasonal Tuning, and Performance Optimization
This section covers the core routine maintenance and seasonal tweaks you need to keep your hot water system efficient. Expect tasks like cleaning or replacing the filter, cleaning outdoor coils, checking refrigerant line insulation, and verifying electrical connections and the disconnect switch. It also covers inspecting the anode rod and tank interior, performing a drain-and-flush, and adjusting thermostatic valve settings if present.
Seasonal checks help you maintain airflow, manage heat gains, and prevent freezing or overheating risks so the unit stays ready when it matters. Staying on top of these steps cuts surprises, gives you clear signs to watch for, and tells you when to bring in a pro for refrigerant, electrical, or other hazards.
Pro tips for squeezing out more efficiency
Start by setting your water heater‘s thermostat to the sweet spot, typically around 120°F. This not only saves energy but also reduces the risk of scalding hot water.
Next, consider using a smart timer or programmable thermostat to schedule heating during off-peak hours when electricity rates are lower. This can cut costs significantly without compromising your comfort.
If you’re feeling ambitious, upgrade insulation around your tank and pipes. A well-insulated system will retain heat better, reducing the need for frequent reheating.
Lastly, take advantage of load-shifting strategies by using less hot water during peak demand times. This helps balance grid loads and can sometimes earn you incentives from utility companies.
Visual and simple performance checks
First, check for any blockages or debris around the outdoor unit’s air intake to ensure proper airflow. Restricted airflow means your heat pump has to work harder, reducing efficiency.
Listen carefully for unusual noises like rattling or humming that could indicate worn parts or electrical issues. Addressing these early can prevent bigger problems down the line.
To test temperature differential, measure the incoming and outgoing water temperatures. A large difference suggests your heat pump is working efficiently; a small gap might mean it’s time to investigate for leaks or other inefficiencies.
Finally, keep track of your energy usage over time. Recording baseline data helps you spot trends and identify when performance starts slipping. This way, you can catch issues early before they become major headaches.
Troubleshooting, Repairs, and When to Call a Pro
Start with the user’s symptoms—no heat, frequent cycling, leaks, or odd noises—and map each to likely causes like electrical issues, refrigerant problems, water leaks, pump or motor faults, or thermostat/controls. For each, note a quick, safe DIY check and flag a condition that should prompt a licensed technician. Keep power disconnected during inspections, and reserve tests to what you can see, feel, and reach safely. Use clear steps: check accessible fuses, tighten loose connections, inspect visible plumbing for leaks, and ensure proper airflow around units.
This matters because a structured flow helps you separate simple fixes from repairs that require training and licensed tools. A calm, documented approach protects you from making things worse and helps the technician diagnose faster. Keep a maintenance log, snap photos of connections before touching anything, and note warranty implications of any DIY work so you can decide when to call a pro with confidence.
Quick diagnostic steps and likely causes
When your heat pump water heater isn’t heating, starts cycling frequently, leaks, or makes unusual noises, start with these basic checks:
First, check the power supply. Ensure the circuit breaker is on and that there’s voltage at accessible terminals. If no power, reset the breaker or check for tripped fuses.
If it’s heating but not as expected, inspect the thermostat settings and ensure they match your needs. A clogged condensate line can also cause frequent cycling; clear any blockages to restore normal operation.
For leaks, look around plumbing connections and the unit itself for signs of water damage or corrosion. Tighten loose connections and clean coils and filters to prevent further issues. If you see refrigerant oil traces or significant rust, shut off power immediately and call a pro.
Parts, warranties, and replacement considerations
Understanding your unit’s warranty is key to knowing what repairs you can handle yourself versus those that need professional intervention. Typically, manufacturers cover major components like the compressor for several years.
You can usually replace parts like filters, air cleaners, or simple electrical connections without voiding warranties. However, any work involving refrigerant handling should be left to certified technicians to avoid damaging your unit and risking personal safety.
When sourcing replacement parts, ensure they are compatible with your model number. Check the manufacturer’s website for genuine components or authorized service centers that can supply them. Keep a record of all maintenance and repairs in case warranty issues arise later.
Cost, Savings, and Rebates: Financials Made Practical
Cost, savings, and rebates for heat pump water heaters can be evaluated by weighing upfront installed price ranges against electric resistance, gas, and tankless options, while noting typical rebate eligibility and regional incentives. Look at how operating costs shift with efficiency ratings, local electricity rates, climate, and expected annual kWh usage to gauge cost-per-gallon equivalents. Use simple payback ideas and total cost of ownership by pairing local utility rates with rough maintenance expectations and available rebates. For installation, check space, ventilation, electrical service, and any plumbing retrofits that could affect warranties or future fixes.
This matters to a DIY homeowner because it frames what you can actually save and how fast it stacks up against the out‑of‑pocket cost. Real-world tips focus on sizing correctly, testing performance, locating the heat pump for best efficiency, and using setbacks or smart controls to lean on cheaper rates when possible. Always verify product labels or datasheets for efficiency figures and installation prerequisites, and consult local rules or utility guidance for rebates and incentives before committing to a purchase.
How to calculate simple payback and ROI
To figure out how long it’ll take for your heat pump water heater to pay for itself, start by comparing the upfront cost with the annual savings. First, look at your current electric bill or gas statement to estimate your baseline energy usage in kilowatt-hours (kWh) or therms.
Next, use the efficiency ratings provided by manufacturers—look for UEF (Uniform Energy Factor) for heat pumps and EF (Energy Factor) for conventional units. Multiply these factors by your annual usage to get a rough estimate of how much energy you’d save with a new unit. Then, calculate the cost savings using local electricity rates or gas prices.
For example, if you’re saving 500 kWh annually at $0.12 per kWh, that’s an annual savings of $60. Divide your upfront investment by this number to find out how many years it’ll take for the savings to cover the cost. Don’t forget to factor in any rebates or incentives you might qualify for.
Remember, actual results can vary based on usage patterns and local conditions. For a more accurate calculation, check your utility bills over several months to get an average rate of energy consumption and costs.
Incentives, rebates, and tax credits to look for
To maximize your savings with a heat pump water heater, check out available incentives. Start by visiting the Database of State Incentives for Renewables & Efficiency (DSIRE), which lists federal, state, and local programs.
Also, contact your utility company directly—they often have rebate programs specifically for energy-efficient appliances like heat pump water heaters. Make sure to gather all necessary documentation such as proof of purchase, installation receipts, and model specifications before applying.
In addition to rebates, there are federal tax credits you might qualify for under the Energy Policy Act. These can significantly reduce your out-of-pocket costs. Check the IRS website or consult with a tax professional to see if you’re eligible.
To stay updated on changing incentives and programs, sign up for newsletters from energy agencies and utility companies in your area. This way, you won’t miss out on opportunities to save money while improving your home’s efficiency.
Safety, Codes, and Best Practices for DIYers
Key safety rules include lockout/tagout procedures, electrical shutoffs, wearing PPE, and safe handling of hot water. Always plan to test pressure relief devices and verify venting paths before work, and keep burns or scald hazards in mind.
Understanding when permits and inspections are needed helps you stay compliant. Use a clear DIY workflow: document pre-install checks, perform installations with caution, and run post-install tests; know what you can do safely and what requires a licensed pro, while keeping records of code references and testing each step.
Condensate and Drainage Safety
Proper condensate routing is critical to avoid water damage. Ensure your heat pump has a dedicated drain line that connects directly to the building’s waste system or an external discharge point. Use a P-trap at the end of this line to prevent sewer gases from entering your home.
In colder climates, protect your condensate lines from freezing by insulating them and installing freeze protection devices like heat tape or thermostatically controlled valves. This prevents blockages that could lead to overflow and damage.
Regularly inspect the condensate line for any signs of leaks or clogs. A blocked drain can cause water to back up into your unit, leading to serious issues such as mold growth or system failure. Keep a clear path for drainage at all times.
Electrical and Plumbing Code Highlights
When installing a heat pump water heater, adhere strictly to local electrical codes regarding circuit sizing and disconnect requirements. Typically, you’ll need a dedicated 240-volt circuit with sufficient amperage for your unit’s specifications.
The plumbing code also mandates specific backflow protection measures to prevent contaminated water from entering the potable supply system. Install an approved check valve or other anti-backflow device as required by local regulations.
Pressure relief valves must discharge safely, often requiring a dedicated vent line that directs hot water away from combustible materials and into a safe drainage area. Verify these requirements with your local building department to ensure compliance and avoid costly retrofits later on.

Conclusion
With the right unit, careful planning, and solid on-site checks, you can get reliable hot water without compromising safety or your home’s finish. Stay focused on durability, proper wiring, and quiet operation, and you’ll avoid costly mistakes and look like you meant to do this all along.
First, confirm the unit size and location, verify the electrical supply and water connections, gather the tools and materials, and walk through the pre-installation checklist. Then shut off power and water, install per the manual, make the connections in a controlled sequence, test a small area first, and finally run the system and tune it for your climate and usage. Do all of this in that order and document any settings for future reference; Safety first and deliberate steps beat luck every time.
Common mistakes to avoid are overtightening fittings, skipping a dedicated load-test or small-area test, and neglecting proper venting and drainage; always double-check clearances and shutoff points, and wear appropriate PPE. A simple rule is never work on live electrical or pressurized water lines—lock out, tag out, and drain before you touch anything, and never force components or skip the manufacturer’s instructions.
If you encounter uncertainty, or you hit a barrier with wiring, venting, or code compliance, it’s time to call a pro rather than push ahead. When in doubt, defer to a licensed electrician or plumber to finish safely and to code. You’ve got this—steady, methodical work now pays off in reliable heat and long appliance life.
FAQ
How does a heat pump water heater work?
It uses ambient heat from the air to warm the water. It runs like a mini air conditioner in reverse and is highly efficient when the room isn’t freezing cold.
Is a heat pump water heater right for my home?
If your climate isn’t freezing and you have space to vent, it can cut your energy bills. It’s most effective when you have a roomy, moderately heated area. If your hot water needs are high, size it correctly to avoid short cycling.
What about installation and safety?
Follow local codes and use a licensed pro for electrical and refrigerant work. Keep the unit in a dry, ventilated spot and avoid blocking the intake or exhaust. Don’t hack the refrigerant lines or skip a proper pressure test.
How do I maintain it for best results?
Keep the filter clean and check the drain regularly to prevent clogs. Make sure the thermostat is set to an efficient but safe temperature and listen for unusual noises. Schedule annual checks to catch issues early.