

Table of Contents
- What is acid staining and how it reacts with tiles
- Which tile materials work (and which don’t)
- Safety and PPE for small-scale acid work
- Tools and supplies you’ll need
- Preparing a practice workspace
- Surface preparation for small tiles
- Preliminary patch testing protocol
- Choosing colors and planning a marbled palette
- Mixing and dilution ratios for small batches
- Applicator types: brush, sponge, spray, and droppers
- Step-by-step marbling technique — base coat
- Step-by-step marbling technique — veining & layering
- Creating specific marble looks (Carrara, Calacatta, Travertine)
- Timing and dwell periods for best color development
- Neutralization: when, how, and what to use
- Rinsing and drying best practices
- Sealing: product options and application
- Slip resistance and additives
- Troubleshooting color issues (pale, blotchy, oversaturated)
- Adhesion and sealer compatibility troubleshooting
- Common mistakes and how to avoid them
- Cleanup and disposal for small-scale practice
- Storage, shelf life, and handling of acid stains
- Cost estimate for a tile practice session
- How many tiles to practice on and planning timeline
- Creating repeatable recipes for consistent results
- Photographic documentation and color charts
- Video and demo checklist for filming your practice
- Scaling techniques from small tiles to floors or counters
- Environmental limitations and seasonal considerations
- Legal and warranty considerations
- Frequently asked questions (tile-focused)
- Recommended product kits for practicing marbling
- Green alternatives and safer stains
- Case studies: successful tile marbling examples
- Troubleshooting flowchart for on-the-spot fixes
- Checklist: planning your first marbling practice session
- Next steps after successful practice
- Resources, downloads, and further learning
- Maintenance tips for marbled tile surfaces
- Final summary and best-practice checklist
Introduction
Acid-stain marbling on small tiles is a practical method for creating variegated, marble-like patterns on small ceramic or concrete tiles.
The guide walks you through surface prep, stain application techniques, color blending, and basic troubleshooting so you can practice and develop consistent results. Downloadable one-page cheatsheets (mixing charts, printable test-matrix, a 10-step quick checklist, and a troubleshooting flowchart) and a short how‑to PDF/video bundle are referenced in the Resources section to give you ready-to-print assets you can use at the workbench.
You’ll learn what to expect in terms of results, how to control contrast, and tips to avoid common mistakes during practice runs.
What is acid staining and how it reacts with tiles
Reactive acid stains use mineral components that interact with calcium-bearing substrates to produce color through selective dissolution and precipitation, creating varied, kiln-like tones as the stain chemistry unfolds. On tiles, the presence of glaze, porosity differences, surface density, and any existing sealers or coatings can either block or alter the reaction compared with poured concrete, leading to distinct color outcomes. The chemistry hinges on how calcium-bearing material in the substrate participates in the dissolution of minerals and subsequent re-precipitation of color-bearing compounds under controlled moisture and pH conditions.
For DIY projects, this matters because it guides substrate prep and compatibility checks: identify tile type (ceramic, porcelain, natural stone), inspect finishes, perform porosity tests, and decide whether etching or neutralizing is needed before staining. Controlling pH, moisture, and ambient conditions during application and cure influences the reaction and final color, while safe handling and ventilation reduce exposure risk. After staining, neutralization, thorough cleaning, and thoughtful sealing options help manage blotching or uneven aging unique to tile substrates and support more predictable, scalable results.
Chemical reaction basics
Acid stain doesn’t sit on top like paint. It soaks into cement-based surfaces and chemically reacts with minerals to create the color. If the tile or mortar has the right mineral content the stain bonds and becomes permanent. If not, you’ll get little to no color change.
Before you commit, test a small area. Try a discreet patch on the tile and on grout. You’ll see within minutes whether the surface reacts, how deep the color goes, and whether the look matches your plan. This saves a lot of wasted time and money. (Use the printable test-matrix from Resources for a standardized record.)
Know your materials. Porcelain, fully glazed ceramic, and many natural stones are often non-reactive surfaces and won’t take acid stain. Remove any sealer or topical finish first, neutralize the acid after staining, and then seal with a compatible sealer. If a surface won’t react, don’t keep dumping stain on it — choose a dye, paint, or a different finish instead. 
Which tile materials work (and which don’t)
Acid stain works best on porosity-rich, cementitious tiles such as unglazed terracotta, quarry, and cementitious pavers, which absorb color more evenly and develop longer-lasting tone when the surface is properly prepped. Cementitious tiles with a natural, matte finish generally accept stain reliably, while dense or glazed surfaces resist penetration and can produce blotchy, uneven results that are hard to repair. Avoid glazed ceramic, glazed porcelain, or polished natural stones, which block absorption and often yield inconsistent coloration or require extensive prep to even out.
Knowing which tiles to select and how porosity affects color helps you plan essential prep, testing, and potential sealing for predictable results on a real project. Use a quick water absorption test and test stain on a spare tile or inconspicuous spot, then adjust technique, penetrant choice, or sealer according to the outcome before proceeding on the full area. This matters for DIY work because material and finish variability drives final color, long-term durability, and the effort required to clean up and maintain the stained surface.
Testing alternatives for non-reactive tiles
If your tile doesn’t react to color methods mentioned earlier, don’t panic. Test a small area first. Clean the tile, let it dry, and try your chosen method — acid-dye, water-based stain, paint, or a faux finish — on a hidden spot or scrap. That tells you adhesion, color payoff, and how grout and edges will behave before you wreck the whole wall.
Prep matters. Lightly scuff or etch glossy tiles to give a tooth, wipe away dust, and use a primer or bonding agent when switching to paints or water-based stains. For acid-dye alternatives, use products designed for low-porosity surfaces or switch to a penetrating water-based stain. If the surface is sealed, you’ll need to remove or abrade the sealer first; otherwise the new color won’t stick.
Apply a small sample coat, let it cure the full recommended time, then check wear and rinse resistance. If it holds up, finish the rest the same way and protect with a compatible sealer. If it flakes or fades, stop — don’t keep layering hope on a bad bond. And remember: grout reacts differently, so test edges and grout lines too before committing.
Safety and PPE for small-scale acid work
Safe small-scale acid work starts with proper ventilation, a well-organized workspace, and clear PPE and handling protocols, including setup, airflow testing, and routine inspection of ventilation effectiveness. Ventilation should provide adequate air exchange, avoid cramped spaces, and use local exhaust or portable fans, with temporary barriers to limit fumes during mixing. For indoor work aim for at least 4–6 air changes per hour (ACH) in the workspace when using concentrated acid stains — use a portable exhaust fan rated for the room volume or a window fan exhausting directly outdoors. For small garages or rooms, a 300–500 CFM inline or box fan positioned to create cross-flow is a practical benchmark.
PPE should include chemical-resistant gloves (nitrile minimum; neoprene or butyl for prolonged contact), splash goggles, a face shield if splashing risk exists, and a respirator with NIOSH-approved organic vapor cartridges (e.g., cartridge class OV) for concentrated work or poor ventilation. Upgrade to a full-face respirator if you cannot guarantee a reliable cartridge seal or if you expect heavy fumes. Keep an eyewash bottle or plumbed eyewash station within 10 seconds (about 1–1.5 m) of the work area and ensure it is accessible and functional.
Eye, skin, and lung protection rely on immediate eyewash, skin decontamination steps, and a policy to stop work if PPE is compromised or irritation occurs, plus quick checks of glove integrity and respirator seal, and routine PPE checks before every task. Safe handling, storage, and spill response use color-coded containers, cap replacement, separate storage away from combustibles, spill kits, and a step-by-step cleanup with neutralizing agents. SDS access, basic PPE and procedure training, clear first-aid actions, and emergency contacts help DIY projects stay safe and compliant in real jobsite conditions. Keep a small written emergency plan near the workspace and post emergency numbers.
Emergency neutralization & first aid
If acid touches skin, stop the job and strip off contaminated clothing and jewelry right away. Flush with water for at least 15–20 minutes while running cool water over the area. After thorough flushing, you can sprinkle a small amount of baking soda (sodium bicarbonate) to help neutralize leftover acid on the skin for common lab/household acids. Do not try to neutralize large or deep burns—just keep flushing and get professional help.
If the substance is alkaline (lye, drain cleaner), use vinegar or diluted acetic acid to neutralize only after an initial water rinse; vinegar is not a remedy for acid burns. For eyes, hold lids open and irrigate with water for 15–30 minutes, remove contact lenses if present, and avoid putting anything but water in the eye. If pain, vision change, chemical inhalation, continuous bleeding, large-area burns, deep tissue damage, or any swallowed chemical occurs, seek immediate medical attention or call poison control. If you were wearing PPE and still got exposed, stop and fix your protection before returning to work.
Tools and supplies you’ll need
This section helps you assemble a complete kit of tools and supplies for practice sessions, including acid stain kits suitable for small tiles, a CitrusEtch or equivalent neutralizer, and the right applicators such as brushes, sponges, or spray bottles. It also covers masking materials, personal protective equipment (respirator, chemical goggles, gloves, and long sleeves), pH strips, water for dilution, and rinse gear like buckets and siphon or squeeze bottles. Plan for workflow and safety by confirming ventilation, proper respirator fit, edge protection, surface masking, and disposal rules for rinse water and neutralizers before you start.
Having a dedicated staging area and a tested setup lets you dial in color on spare tiles, document expected coverage, and keep tools within reach during a session. This preparation reduces surprises, speeds cleanup, and supports consistent results on real tiles through controlled color transport, timing, and edge protection. Understanding kit contents and workflow helps you stay compliant, protect nearby surfaces, and learn the technique more safely and efficiently.
Recommended brands and small-kit options
Don’t buy a gallon of everything on your first try. For marbling on tiles, look for trial-size or sampler packs from makers who are consistent and easy to replace. Good places to find these are Blick Art Materials, Marbling.com, and large craft retailers like Michaels or Hobby Lobby — they sell small bottles of acrylic inks (Liquitex, Daler-Rowney) and marbling inks that work well on tile surfaces.
If you prefer a packaged option, pick a beginner marbling kit from Marbling.com or independent Ebru/marbled-paper sellers; those kits include small tubs of float medium, a basic tool, and a few ink colors so you can practice without wasting supplies. For stronger pigments try small bottles of acrylic ink or alcohol ink from Liquitex, Jacquard, or Ranger; buy the 10–30 ml sizes so you can test how they behave on glazed tile before committing.
Local pottery studios, ceramic suppliers, and online marketplaces will sell small quantities of tile primer, alum, or sealers if you need them. My advice: start with a small trial kit and buy small quantities from retailers that let you reorder colors individually. That way you learn what works for your tiles without wasting money on full-size tubs you won’t use.
Preparing a practice workspace
Prepare a dedicated, ventilated work area with an acid-safe bench and containment measures to keep spills from reaching stone or concrete surfaces. Choose an indoor space with cross-ventilation or a shaded outdoor spot with access to water, drainage, and a defined waste path, and install a dedicated exhaust or a portable fan-and-filter setup. Plan drip pans, sealant mats, drop cloths, and a residue-receiving area, plus a clear sequence from measuring and mixing to application and cleanup, with a specific spot for PPE and cleaning supplies.
This layout reduces accidents and simplifies responsible handling of rinse water and acids, meeting safety and local regulatory expectations. A well-planned workflow minimizes backtracking, prevents cross-contamination, and protects surrounding floors, walls, and cabinetry. In practice, it means cleaner, safer work sessions and less time spent managing spills and waste while you complete tasks efficiently and consistently.
Containment and environmental precautions
Work on a flat, stable spot and keep tools and materials inside a temporary berm or tray. If you expect spills or wash-off, contain runoff with plastic sheeting, sandbags, or a shallow basin so nothing reaches storm drains or soil you care about.
Plan ahead for cleanup water. Collect rinse water and treat it before disposal: let solids settle, neutralize acidic or alkaline solutions to near neutral, then decant clear water for appropriate disposal. If chemicals are involved, don’t just pour that water down the yard or storm drain — neutralize rinse water and handle it as required. Typical on-site target before legal disposal is pH 6.5–8.5; use pH strips or a handheld meter. Hold neutralized waste in clearly labeled, sealed containers and call your local hazardous waste authority if you exceed small-quantity thresholds (commonly >5 gallons or local equivalent) or if pH cannot be brought into the acceptable range after neutralization.
Call your local municipality or waste authority and confirm rules for disposal of contaminated water, solvents, and solids. Follow their directions or hire a licensed hauler if required. It’s cheaper to contain and manage waste on-site than to deal with a fine or a cleanup later.
Surface preparation for small tiles
Surface prep for small tiles varies by tile type—small ceramic, porcelain, and natural stone each present different porosity, glaze presence, and absorption challenges that affect how you clean, degrease, remove sealers, and optionally light-etch for better stain uptake; choose non-residual cleaners, perform a thorough dust and grime removal, and confirm tack-free drying with moisture considerations before any stain or finish is applied. For each tile type, identify existing sealers or finishes, strip them safely, and note indicators that removal is complete, then proceed with controlled light etching if needed, followed by careful drying requirements and, for moisture‑sensitive tiles, a moisture barrier plan as part of readiness.
This matters on the jobsite because proper prep ensures consistent color absorption, prevents streaks or blotching, and reduces the risk of lift or failure later, especially on glaze challenges or highly porous surfaces. Following a clear sequence—cleaning, degreasing, sealer removal, optional etching, then moisture testing and priming—helps you forecast timing, select compatible products, and protect adjacent surfaces, while a quick pre‑application safety checklist (ventilation, PPE, spill containment) keeps the workspace safe and minimizes rework from common prep issues.
Removing existing coatings and grout considerations
Start by testing a small area. If coatings come off with a solvent or light sanding, you can usually proceed. If the finish is baked-on or rubbery, plan for mechanical removal. Wear a respirator and use a vacuum attachment. Also check base compaction under the tile before you decide your next step.
For sealers and thin coatings, try a commercial stripper first and follow label times. For epoxy or heavy urethane, grinders or shot blasting are the fast way. After stripping, wipe and vacuum until no residue remains. A quick adhesion test with a dab of thinset tells you whether the cleaned tile will bond to new material.
Decide whether to work with tiles in place or pull them out. If tiles are well bonded and grout is intact, you can mask the grout and plane or level the tile in place. If tiles are hollow-sounding, cracked, or the substrate is suspect, remove tiles and fix the base. Don’t waste time leaving bad tiles “for practice” — you’ll pay for it later.
Preliminary patch testing protocol
Preliminary patch testing uses 2–4 representative tiles to verify stain compatibility and observe color and marbling behavior before full application. A standardized protocol applies small, uniform swatches with controlled quantities and dwell times, checks multiple intervals (e.g., 5, 15, 30, 60 minutes), and captures photos to document results and any adverse reactions. Record keeping tracks surface condition, porosity, pre-treatments, dilution, and neutralization steps to decide workable colors and patterns.
This approach helps you catch issues early on a few tiles, establish a consistent test area, and set objective criteria for success or remediation. By documenting baseline, interval images, ambient conditions, and stain specifics, you gain actionable feedback to adjust dilution, masking patterns, or stain choices before scaling to the full tile set.
Test matrix template
Keep a simple table in your notebook or on a sheet. For each patch write: tile type, stain color, dilution, dwell time, neutralizer time, and final finish. Don’t overthink it—this is just to compare results side by side. Record everything so you can reproduce the winning mix on the whole job.
Use a single line per patch with those fields separated by commas or tabs: for example, “Porcelain, Warm Taupe, 1:4, 5 min, 1 min neutralizer, Satin sealer.” Put the exact timing you used and any notes about ambient conditions or surface prep. If a patch fails, jot why: too blotchy, too dark, no adhesion.
After you run the patches, let them cure and then inspect the look and durability. Compare side by side and choose the patch that meets color and wear expectations. Refer back to the Preliminary patch testing protocol for the test steps, but for the matrix itself focus on clear, repeatable entries and check final finish before approving a formula for the full job. The Resources section includes a downloadable test-matrix PDF you can print and use to keep records consistent.
Choosing colors and planning a marbled palette
Choosing colors and planning a marbled palette means defining a dominant color family (warm vs cool), selecting base hues with appropriate undertones for small tiles, and planning accent colors that pop without overpowering the marbled pattern. It also accounts for post-reaction hue shifts so you know how the palette will evolve under acid exposure.
A practical approach is to build a palette grid or swatch matrix that mirrors tile size, test it on similar substrate and lighting, and document how each hue interacts with finish and texture. Anticipate shifts by selecting mid-tone bases and deciding on high-contrast versus soft transitions to maintain legibility of the pattern after reaction. Finally, coordinate the palette with surrounding elements like grout, cabinetry, and walls to create a cohesive look and avoid clashes when viewed from a distance.
Understanding color shift and layering strategies
Think of layers like thin veils. Each coat changes the color beneath it. If you skipped the palette planning earlier, go back and glance at your chosen hues before you start. Do a small test patch on the same substrate and let it dry fully. That single step tells you more than guesses about how the colors will shift when stacked.
Start with the palest or least-saturated tone and build toward the stronger ones. Transparent stains deepen and tint; opaque ones cover. Watch undertones carefully: a warm base will push every layer warmer. Apply thin coats, wipe excess, and wait the recommended dry time between layers. Rushing or piling on wet stain is the fastest way to get dull, muddy results.
Avoid opposing strong complements directly over each other unless you want gray-brown. If two colors look like they might clash, either separate them with a neutral wash or reduce saturation. When in doubt, add contrast with a transparent top layer rather than another heavy pigment. Final rule: test, wait, and err on the side of light layers. You can always add more, but you can’t reliably undo a muddy mess.
Mixing and dilution ratios for small batches
For small projects, this section defines target batch sizes and exact mix ratios for acid stain concentrate and its diluents, with practical equivalents for 4 oz, 8 oz, and 1-gallon-scale work. It walks you through the required mixing order, from measuring with accurate cups or syringes to selecting appropriate vessels and safe handling steps, and it specifies whether you mix with water, activator, or other diluents for each ratio. You’ll also learn how to keep concentrations suitable for small areas, how to document your recipe, and how to avoid common mistakes that lead to weak or uneven color.
Key starting ratios (examples for many common acid-stain concentrates — always confirm with product label):
- Strong/Full strength: use undiluted concentrate (0–5% water) for maximum color depth on porous cementitious tiles.
- Medium: 1 part concentrate to 1–3 parts water (1:1–1:3) for moderate depth and better blending control on small tiles.
- Light wash: 1 part concentrate to 4–8 parts water (1:4–1:8) for subtle tinting or layering effects.
Practical small-batch examples:
- 4 oz batch (for one tile or a small panel): 1:3 medium mix — 1 oz concentrate + 3 oz water (use a calibrated syringe or marked cup).
- 8 oz batch: 2 oz concentrate + 6 oz water (1:3 mix).
- 1-gallon equivalent (128 oz): 32 oz concentrate + 96 oz water (1:3 mix).
Mixing order: measure water first, then add concentrate while stirring slowly to avoid splashing and to control fumes. Record batch ID, date/time, ratio, and ambient conditions on the label. Test a small sample panel before committing to a series of tiles. Store leftover mixed solution only briefly (most mixes lose reactivity after a few hours).
Measuring and labeling practice batches
Measure every ingredient the same way every time. Use a digital scale or marked measuring cup and write down weights or volumes immediately. Don’t eyeball. If you changed the mix order or temperature, note that too. This keeps your numbers repeatable when you refer back to the mixing and dilution ratios covered earlier.
Give each trial a clear batch ID and label the container with date, time, and who mixed it. Stick a spare label on your notebook or phone photo so the recipe isn’t lost when the bottle gets messy. Include cure time and any visible issues observed during or after mixing.
Always make a small test panel or sample strip and keep it with the batch notes. Let it cure under the same conditions you expect in use. If the result is off, compare measurements and the test panel photo to find the tweak. Repeatable records beat guessing every time.
Applicator types: brush, sponge, spray, and droppers
Choosing between brush, sponge, spray, and droppers changes how acid stain mingles on small tiles, shaping marbling depth, vein patterns, and edge bleed while offering distinct beginner-friendly pros and cons. You’ll get different results depending on tool speed, saturation, and motion, so anticipate patterns like bold veins with brushing, soft halos with sponging, misty veining with light spraying, or crisp accents from droppers. Practical guidance covers ideal tile sizes, surface prep, portioning stain, and how to balance saturation to prevent blotching, pooling, or feathering with each tool.
Understanding these nuances matters on a jobsite or DIY project because it helps you predict texture, control, and consistency before you commit glaze to the tile. It also supports safer, cleaner work and faster troubleshooting—knowing which tool to grab for fine lines versus broad washes, how to layer colors in sequence, and how tempo and technique reduce waste and cleanup while keeping color even.
Specialty tools for marbling effects
- Feathering brush — A soft, long-bristle brush used to pull thin veins and wispy transitions across wet paint. Look for natural or soft synthetic bristles about 1–2″ wide so you don’t mush the layer.
- Stiff toothbrush — Flicks tiny splatter and textured speckles for stone-like grain.
- Glass dropper — Place beads of color precisely for cells and blooms.
- Silicone stylus — Drag and open cells without absorbing paint.
- Mini palette knife — Scooping, lifting and smoothing small areas.
- Disposable pipettes — Plastic transfer pipettes for single-use color drops and mixing small ratios.
- Mini spray bottle — Fine-mist bottle to mist water or solvent to revive tacky paint for dragging effects.
Pro tip: Combine tools — use a dropper to place beads, a stylus to pull veins, then feather with the soft brush for a natural look. Keep one dedicated set for each color family so you don’t cross-contaminate and ruin delicate effects.
Step-by-step marbling technique — base coat
The base coat sets an even, unified tone across tile porosity, establishing a stable substrate for marbling while defining color options such as neutral gray, tan, or a tinted base that will subtly influence the appearance of veining once marbling begins. Prepare the surface by confirming tile type, cleaning and drying thoroughly, removing efflorescence or release agents, checking moisture content and porosity, and deciding if a primer or stain sealer is needed before applying the base stain to ensure even uptake and adhesion.
Choose a compatible cementitious or water-based base stain, calculate yield for small tiles, factor in incidental waste, mix to a smooth, lump-free consistency, and aim for a base color that harmonizes with the anticipated marble palette, while keeping tools and workspace ready, clean, and free of contaminants. Apply with foam brush, sponge, or lint-free roller in an even, overlapping pattern, feathering edges, avoiding pooling or lap lines, and targeting a uniform layer of the specified thickness to prevent streaking or uneven absorption across different tile areas. Between coats observe drying times, perform a scuff resistance test, record environmental conditions and product details, and confirm readiness to marble when the surface is dry to the touch, free of tackiness, and swatch samples demonstrate consistent color and texture for replicability, safety, and future reference.
Step-by-Step Process
This sequence gets the marbling base coat applied cleanly and ready for the veining layers. Follow each short action, check the sign it’s right, and respect the wait times before moving on.
- Do a final surface and masking check. Make sure previous prep is dry, dust-free and edges are masked so paint won’t run; this prevents trapped dust and ragged lines. Check by wiping a small area with a tack cloth — it should pick up no grit. If you see delamination, large cracks, or moisture return, stop and call a pro; don’t paint over a failing substrate.
- Mix the base coat to a uniform consistency. Stir until no streaks remain so color and binder are even and the finish lays down predictably. Test with a small sample strip on scrap or an unseen corner; it should flow but not sag. If the mix separates or won’t emulsify, stop and call the supplier — you’ve got bad material or wrong reducer.
- Apply the first thin, even coat with a roller and light brush-cutting. Thin coats dry smoothly and reduce brush marks, which is crucial for a believable marble look later. Check for full, even coverage and no runs; the surface should be wet-looking but not dripping. Let it become tack-free per product directions (usually 30–60 minutes) before touching up.
- Lightly inspect and sand any defects after the first coat cures to the touch. Sanding removes dust nibs and leveling ridges so the next coat sits flat. Run your hand across the surface; it should feel smooth with no raised specks. If you find hard-to-remove defects or blistering, call a pro — that indicates adhesion or moisture issues.
- Apply a second coat to build uniform opacity and depth. This is where the base becomes the canvas for veins, so evenness matters. Check coverage by viewing at an angle under good light; you should see consistent color and no thin spots. Respect the recoat window (usually 2–4 hours or as product states) or wait full cure (24–48 hours) before heavy sanding or subsequent marbling steps.
- Feather and soften edges where the base meets trim or different surfaces. Clean transitions keep veins from stopping abruptly and look professional. Run your finger along masked edges (after tack-free) to feel for ridges; they should be minimal. If tape pulls paint or leaves jagged edges, remove tape slowly and call a pro if trim is too delicate to salvage.
- Final cure and inspection before beginning veining. Allow the full recommended cure time so your base won’t lift when you apply glaze or colors. Check by rubbing a hidden spot; no color should transfer and the surface should resist light fingernail pressure. If the base still marks or reflows, extend cure time — do not proceed until fully stable (commonly 24–72 hours depending on product).
Pro tip: Keep a small, labeled test panel from your final mix to compare color and sheen before each coat; it saves time and avoids redoing large areas when lighting or humidity shifts the look.
Speed, dwell time, and blending of base coat
Work at a steady, deliberate pace. Don’t race the surface—move the roller or brush fast enough to lay an even film but slow enough to leave a slight wet trail. The goal is a partially reacted base when you add veins, not a fully cured skin. If you go too fast you’ll get streaks; too slow and the base skins over before you can marble.
Control the dwell time by pausing briefly at problem spots and feathering the edges with light strokes. Watch how the base starts to dull or tack up. That tackiness is your cue. If the surface still looks glossy, wait; if it’s dry to the touch, you’ve missed the window. A small test patch on an out-of-the-way board tells you exactly when to start veining.
Blend with long, confident strokes and avoid scrubbing. Smooth transitions at panel joins and corners keep veins from locking into hard lines. Adjust speed for temperature and humidity—hot rooms shorten your window, cool rooms lengthen it. When in doubt, stop and check rather than pushing on and ruining the marbling effect.
Step-by-step marbling technique — veining & layering
The practical context helps you plan, test, and troubleshoot on a jobsite: prepare surfaces, maintain consistent stain density, and use drop sizes and placement grids to map the design before committing. A focused color planning approach—selecting 2–3 harmonious hues and testing compatibility on a sample tile—reduces rework and scale-wide smearing. Finishing choices, timing windows between layers, and quick-retouch steps protect veining during curing and keep the overall marbling crisp and resilient.
Step-by-Step Process
This sequence takes you from a prepped surface to finished veining and layered marbling ready for sealing. Follow each task in order, check the simple signs, and respect the short cure times between coats.
- Do a final prep and safety check before starting your first coat. Wipe the surface, remove dust, and confirm ventilation and PPE — you want a clean, dry substrate so layers bond. Check: surface looks uniformly matte and feels dry to the touch. Call a pro if you see substrate damage, loose plaster, or moisture; don’t proceed. Wait: no extra curing time if surface was already prepped.
- Mix paints and thin glazes to workable consistency. Thinner glazes let you build translucent layers and control feathering of veins. Check: glaze should flow easily but not run off a vertical sample; do a quick brush test. Call a pro if you can’t get stable consistency after several attempts. Wait: mix only what you’ll use in 30–60 minutes to avoid skinning.
- Apply the base coat evenly and let it level. The base gives your marble depth and determines how veins will read against it. Check: uniform color with no visible brush strokes or thin spots under normal light. Call a pro if you get patchy coverage after two coats. Wait: cure to touch per paint label (usually 1–2 hours) before next layer.
- Sketch primary veins with a fine brush or feathered tool. Establish the main lines first so secondary veins can support them. Check: veins look natural in rhythm and direction and are darker or lighter than the base. Call a pro if you can’t control the flow and veins spread uncontrollably. Wait: allow the veins to set to a dull tack (15–45 minutes depending on glaze) before blending.
- Soften and feather veins with a dry brush or soft rag to blend edges. This creates the soft transitions seen in real marble. Check: edges should blur without losing the main line; test by touching with a clean finger (no tack, no smearing). Call a pro if solvents or heavy blending remove too much paint. Wait: let blended areas dry to touch (30–60 minutes) before adding overlays.
- Build translucent layers and secondary veining for depth. Alternate thin glazes and fine veins to create inner depth and variation. Check: step back — you should see depth, not flat color; a flashlight at a low angle helps reveal layering. Call a pro if colors keep muddling or you need structural color correction. Wait: allow each glaze to dry per product instructions (typically 1–2 hours) before the next thin layer.
- Finish with final glazes, tiny highlights, and a protective sealer. Final glazes unify the surface and the sealer protects your workmanship. Check: surface looks cohesive, highlights read naturally, and the sealer has an even sheen. Call a pro if you see bubbles, runs, or solvent blush under the sealer. Wait: cure the sealer fully before heavy use — follow label (often 24–72 hours).
Pro tip: Work in small zones, step back often, and let each thin layer behave before adding the next; heavy-handed corrections create mud and waste time. If the surface starts to look overly worked, stop and let it dry — you’ll fix it easier after it cures than while it’s wet.
Creating depth with translucent layers
Work thin and slow. Apply a translucent wash, let it settle just until tacky, then add the next wash. If you let the first layer fully dry you lose that soft overlap. Keep layers semi-wet so the pigments feather into each other and create real depth.
Mix your paints with more medium than pigment. You want sheer color, not puddles. Drag veins with a fine brush or feather with a damp brush while the layer is tacky. Stop early—overworking flattens the effect.
Always do a quick test patch on scrap. Check how it dries and how the next wash sits. If the layers bead or lift, reduce binder or wait longer between coats. Test a sample and blend with a light touch—that’s how you get believable marble without redoing the whole slab.
Creating specific marble looks (Carrara, Calacatta, Travertine)
Create convincing marble looks for small tiles by outlining a recipe-style workflow for Carrara, Calacatta, and Travertine-inspired patterns. Start with a base coat to set a bright white or soft white ground, then layer veins in gray, charcoal, or warm brown with controlled density to match the look (soft, airy veins for Carrara; bold, dramatic veins for Calacatta; texture-driven hints for Travertine). Include vein geometry such as hairlines, branching, and Y splits, and note how to place veins to avoid repetition. Provide quick mixes and timing for translucent versus opaque veining and finish with a sealer suitable for 1″–2″ tile formats.
This approach gives DIYers tangible guidance on color choices, vein placement, and layering that translate into realistic patterns without overloading the project. It emphasizes patch testing, addresses common issues like blotching or color bleed, and offers practical tips for consistent results across small tile sets. By understanding vein density, contrast, and finish selection, you can achieve durable, salon-grade marble looks that complement grout choices and enhance a tiled surface’s visual depth.
Scaling patterns from tile to larger surfaces
Tiles that look great as samples can read very different across a whole countertop or floor. Do a full dry mockup before you set anything—layout whole sheets or tiles where they’ll sit and step back. That lets you spot bad seams, awkward vein breaks, and places where small cut pieces will ruin the flow. If you can, photograph the mockup from the same viewing angle as the final space.
Think in runs, not pieces. Keep veining direction consistent across seams and plan where bookmatched or mirrored tiles will land. Avoid placing narrow filler strips in high-visibility areas; move seams to low-traffic edges or corners. Check transitions at edges and upstands so the pattern continues naturally rather than truncating with a blunt cut.
Check substrate flatness, joint layout, and lighting before final installation. Small slope or uneven grout color can kill a large pattern. Coordinate with your fabricator or installer on slab cuts and seam placement and order extra material to allow for pattern matching. Finally, remember the marble type you chose (Carrara/Calacatta/Travertine) has different vein scale — adjust tile orientation and seam spacing to keep the look consistent across the whole surface.
Timing and dwell periods for best color development
Dwell times for color development vary by tile type and porosity, so plan around glazed, unglazed, porcelain, and ceramic distinctions and establish minimum and maximum windows for color depth. Consider target atmosphere ranges—temperature and relative humidity—since heat and moisture accelerate or slow dye diffusion and influence depth and evenness. Use clear testing cues (evenness, marbling depth, edge saturation) to decide when to move to neutralization and avoid over- or under-staining.
A practical workflow helps DIYers reproduce results: set a timing plan with visible timers, document each batch, and adjust future runs based on observed outcomes. Understanding the criteria for neutralization (color criteria met, elapsed time, uniformity checks) reduces guesswork and improves consistency across small tiles. Emphasizing safety, PPE, spill containment, and post-dwell cleanups supports repeatable quality and confident near-site color work.
How to read reaction progress visually
Watch the stain change, not the clock. The color will deepen and then level off. If you see an even, consistent color across the test area, edges included, the reaction is mostly done. If one patch is darker and another is pale, the stain hasn’t fully reacted or wasn’t applied evenly.
Do a quick touch and wipe test. When dry to the touch and not tacky, the chemical reaction is mostly finished. A damp, glossy, or sticky feel means give it more time. If the scent of the product is still strong after the normal dwell, it’s another sign the reaction or evaporation isn’t complete.
Only add more product when a clear need shows: persistent pale spots, streaks, or uneven penetration after the usual timing. Don’t keep slathering on because you think more equals better. Excess causes clouding or runoff. Refer back to the timing and dwell guidance earlier for how long to wait the full dwell before deciding to reapply.
Neutralization: when, how, and what to use
Neutralization should follow stain dwell and rinse, applied promptly to small tiles to halt acid activity and prevent grout etching. Use either a baking soda solution (about 1 cup per gallon of water) or a proprietary CitrusEtch/Citrus-based neutralizer, following label instructions and concentrations for small tiles. Apply as a uniform layer over the stained area, test pH before and after to confirm near-neutral conditions and stop the reaction before any color shift.
Concrete neutralizer recipe for practice: dissolve 1 cup (≈240 g) sodium bicarbonate in 1 US gallon (≈3.8 L) of clean water for a standard neutralizing rinse on small tiles. Apply evenly, agitate lightly with a soft brush, wait 1–2 minutes, then rinse. Target pH after neutralization: 6.5–8.5 (use pH strips or a handheld meter). If pH remains acidic (<6.5), reapply neutralizer in 10–15% incremental doses and retest after 10–15 minutes. If neutralization fails repeatedly or the final pH remains outside the 6.5–8.5 window, segregate the waste and contact a licensed hazardous-waste hauler; do not discharge.
Rinse thoroughly with multiple passes, avoid saturating grout joints, and allow a dry-down period to ensure no residual alkaline film remains on tile. Check pH to stay in an acceptable range (around 6.5–8.5), and if it lingers outside target, re-neutralize or re-rinse as needed. After neutralization, verify even color, plan for re-cleaning or resealing, dispose of spent solutions properly, and proceed to sealer only when the surface is completely dry and residue-free.
pH testing and verification
After you’ve neutralized per the earlier steps, let the reaction finish and cool. Take a small sample of the liquid or a slurry from the treated area, wet a pH strip and compare it to the chart. Your goal is target pH 6.5–8.5 — that tells you the acid has been neutralized without swinging to strong alkaline.
If the strip still reads acidic, add neutralizer slowly in small doses, stir or agitate, wait 10–15 minutes, then retest. Don’t dump a big dose all at once. Repeat dosing and testing until you hit the range. If you’ve tried several times and it stays acidic, stop and call a pro — something else is binding the acid or you need a stronger treatment.
Wear protective gear — gloves and eye protection — while testing and handling waste. Once pH is in range, rinse the area with water if appropriate and dispose of rinse water according to local rules. Keep a quick log of tests and amounts added. It saves headaches if inspectors or contractors ask later.
Rinsing and drying best practices
Gentle rinsing techniques for small tiles and delicate stains should emphasize a light mist spray for fragile marbling areas and a soft sponge dab when residues cling, while avoiding vigorous scrubbing that could lift color or disrupt the pattern. Plan the rinse sequence to use a minimal number of passes after application and again after any neutralization, watching for clear residue-free tiles as a cue that rinsing is complete. Use clean water, ideally filtered or distilled for the final rinse, and employ controlled drying methods—air or towel blotting with a gentle touch—to prevent blotching and surface water spots between checks of the tile surface.
This matters because minerals, cleaner residues, and uneven drying are common blotch causes, especially with delicate textures. A consistent rinse and drying workflow reduces rework, speeds up sealing prep, and yields a uniform finish across the tile field. By integrating timing cues and surface checks into the jobsite routine, DIYers can spot issues early and adjust rinse frequency, drying technique, and water quality before sealing.
Using towels vs air-dry for optimal finish
After you neutralize and give a final rinse (see the rinsing and drying best practices above), decide based on the tile look you want and the tile type. For marbled tiles, blotting with a clean, lint-free towel gives faster control over streaks and mineral spots. Pat dry—don’t drag—so you don’t smear residue into the veins.
If you prefer a perfectly natural sheen, let the surface air-dry in a dust-free area. Air-dry reduces the risk of micro-scratches from towels and keeps polish lines even. But expect slower drying and possible water spots if your water is hard or there’s any leftover residue.
My rule as a foreman: use a quick towel blot for speed and touch-up with air-dry for final inspection. If you see any haze, re-rinse and blot it away; never rub aggressively. Also check for residue before leaving the job—marble hides streaks and looks worse once fully dry.
Sealing: product options and application
Sealing options split into solvent-based vs water-based and penetrating (breathable) vs film-forming (epoxy/urethane), each affecting color retention, crack-bridging, and gloss on stained small tiles. Gloss choices—from matte to high-gloss—shape color depth, residue visibility, and how grout lines read on marbled tiles, while prep and substrate compatibility ensure adhesion and long-term performance. Application guidance covers temperature and humidity ranges, coverage rates for small tiles, coats, recoat windows, and drying and curing times, with safety and maintenance considerations for ventilation and post-sealing care.
Quick decision guide:
- Low-traffic decorative wall tiles or small accent pieces: water-based film-forming sealer (satin) — easy cleanup, lower VOC, preserves subtle look.
- Countertops or high-traffic horizontal surfaces: two-component urethane or epoxy (film-forming) — superior wear resistance, chemical resistance; expect higher cost and longer cure times.
- Porous tiles where breathability matters (e.g., outdoor or moisture-prone substrates): penetrating silane/siloxane or acrylic penetrant — preserves natural feel and reduces surface sheen while offering water repellency.
For small tiles I usually aim for two thin coats. One heavy coat looks good at first, then sags in grout and leaves a tacky mess. Apply the first coat, let it flash until tacky but not dry, then lay the second coat for full coverage. Choose penetrating sealers for outdoor or moisture-exposed areas; choose film-forming when abrasion resistance is a priority.
Sealer application methods and coat counts
Tool choice matters. Use a low-lint pad or microfiber applicator for tight joints and textured faces. A short-nap roller works on flat mosaics. Spray if you want speed, but only if you can control overspray and back-roll or wipe immediately so the sealer doesn’t puddle.
Flash times vary by product and weather—usually 20–60 minutes. Cooler or humid conditions push times longer. If you’re unsure, test a small area and wait until the surface is tacky before recoating. And don’t skip the product directions you read earlier; they beat guesswork every time.

Slip resistance and additives
Slip-resistant additives can be mixed into sealers used on small porcelain and stone tiles to boost traction in high-traffic areas, while staying compatible with the acid-stain finish. They should integrate into the topcoat without dulling, mottling, or altering the distinctive marbling, preserving the color depth and subtle texture of the surface. Micro-additives influence color, sheen, and uniformity depending on particle size, dispersion, and dosage, so choosing the right blend is essential to avoid visible aggregates or an uneven appearance.
For a DIY job, understanding the practical steps and testing methods matters because surface safety hinges on both product choice and application conditions, including timing with stain cure, sealer type, and ambient temperature. Clear guidelines on mixing ratios, coverage, and re-testing after maintenance help maintain slip resistance over time and reduce the risk of finish changes after re-sealing. The right approach trades some extra planning for long-term performance, enabling easier cleaning routines, predictable appearance, and a safer, more durable floor that continues to resist slips without compromising the acid-stain look.
Maintaining aesthetics while increasing traction
Don’t ruin the look by dumping coarse grit over the whole floor. Start with a small area and test a sample patch so you can see how the marble pattern and gloss react. Use fine additives or microbeads when you want to keep the wet look. Coarser aggregates will increase traction, but they also scatter light and dull the finish.
Decide where you actually need grip. High traffic and wet zones get the rougher treatment. Less-used areas keep the glossy marbled finish. Apply additives by mixing into the topcoat or broadcasting lightly, but don’t go heavy—avoid overloading the surface or you’ll get a gritty, dirty-looking floor.
Pick a sealer and topcoat that match your visual goals. Satin or gloss polymer-modified topcoats can hide small additives better than matte coats. Time the topcoat right: sealers that cure fully trap the aggregate and preserve sheen. And remember to clean and maintain—dirt fills the texture and kills both grip and sheen faster than you think.
Troubleshooting color issues (pale, blotchy, oversaturated)
Troubleshooting color issues means accurately diagnosing pale areas, blotchy patches, or oversaturated spots and applying targeted fixes such as re-staining, spot-neutralizing, light sanding, or using a tinted sealer to restore even color across the surface. Start by distinguishing whether uneven penetration, surface residue, or sealer interference is causing the problem, and note if the issue spans across tiles or appears in isolated zones to guide targeted fixes. This structured approach keeps repairs controlled and repeatable, reducing guesswork and helping you achieve consistent results across the project.
Running a quick diagnostic on a test tile—apply a small amount of stain, observe the drying color, perform a wipe-off test, and check moisture—helps rule out water, efflorescence, or sealer-related issues before touching the full surface. Plan corrective steps from pale areas to blotchy or oversaturated spots, re-applying thin, even coats, targeting patches, neutralizing or diluting as needed, and ensuring complete drying before resealing. Following compatibility checks and standardizing application methods on future tiles minimizes repeat problems, saves time, and improves final color uniformity on the jobsite.
Fixes for non-reactive spots and patchy reactions
If parts of the slab won’t react or you see blotchy patches, start simple: test a small area first. Clean the spot with a degreaser, rinse, and let it dry. Old sealers, curing compounds, or grease are often the culprit. If you find a film, strip it—don’t just rinse and hope.
When cleaning and stripping don’t work, use mechanical methods. Light grinding, shot blasting, or surface abrasion will open the pore structure so stains can penetrate. Etching with acid can help on masonry, but don’t overdo it—too deep and you’ll change the texture or weaken the surface. Wear proper PPE and neutralize after etching.
If the area still refuses to take color, change the approach rather than keep hammering at it. Convert to a different system—use a bonded concrete dye, a topical stain, or a pigmented sealer for those spots. Blend carefully and feather the edges so repairs don’t look like patches. Final tip: always fix the cause (contaminant, sealer, or density) first, not just the symptom.
Adhesion and sealer compatibility troubleshooting
It explains how adhesion failures look (peel, whitening bloom, delamination) and how to tell bloom from mechanical issues. It outlines practical test steps on scrap and real tiles, including moisture exposure and cure times, plus prep, porosity, and substrate considerations. A simple, stepwise protocol covers initial stain tests, sealer tests, cross-cut or tape tests, and a basic peel test with pass/fail criteria.
Understanding these checks helps DIYers avoid costly surprises and provides a clear path to compatible sealer choices before a full project. By following the flow from prep to testing to troubleshooting, you can reduce failures from improper cleaning, incompatible sealer, or insufficient cure time and know when re-etching, recleaning, or switching products is needed.
When to strip and restart
If the sealer or stain is flaking, bubbling, showing large delaminated patches, or you see the substrate softening underneath, strip it and start over. Small blemishes or thin adhesion spots can be spot-repaired, but once failure is widespread or the finish refuses to bond after a proper clean, you’re wasting time trying patches. Test a small area first—if a test strip still leaves residue or damaged tile, full removal is the only safe route.
Start with the least aggressive method that works. Try solvent or low‑odor chemical stripper on a small patch. If that fails, use a floor buffer with stripping pads or a grinder with appropriate discs for tile—don’t go straight to aggressive grinding unless the coating won’t come off. Use a heat gun only on small spots; it’s easy to scorch tile or underlayment. Always wear respirator, gloves, and eye protection and ventilate the space.
After removal, clean thoroughly: neutralize any chemical stripper, rinse, vacuum, and wipe with a tack cloth. Check for surface damage, old adhesive residue, or grout contamination. Repair or replace compromised substrate, regrout if needed, and confirm the surface is dry and dust‑free before applying primer or a new sealer. If you doubt compatibility between products, stop and get a manufacturer’s recommendation—mixing incompatible systems is how you end up back at square one.
Common mistakes and how to avoid them
Common mistakes in acid-stain marbling on small tiles typically come from over-application, poor neutralization, and inadequate testing. For each pitfall, pair a concrete preventive action: keep coats thinner and allow proper tack time to avoid flooding color; neutralize at the recommended pH, monitor for a consistent color shift, and rinse thoroughly to stop ongoing reactions; and run small test patches to validate color, texture, and sealer compatibility before committing to the full project. Also address surface prep errors—dust, oils, and moisture—by a thorough, mist-free wipe-down, a clean, oil-free surface, and a simple moisture check before staining to promote uniform color and edge-to-edge consistency.
Understanding these details matters because surface and chemical missteps ripple into uneven marbling, blotching, or streaks that force rework and extend the job. The guidance helps you detect issues early, plan corrective steps, and keep the work predictable from small test tiles to the final installation, saving time and materials. A quick pre-job checklist and a post-application routine (cleanup, neutralization, rinse, dry times, and sealing) keeps you on track and reduces surprises, especially for DIY projects where you’re managing workflow and expectations on your own.
Visual examples and corrective workflows
If you see uneven color or peeling across a panel, first check base compaction. Lift a corner or cut a small inspection slit. If the substrate is loose, compact or replace that section, then sand edges smooth before you reapply finish. For simple adhesion failures, sand back to a firm edge, clean thoroughly, and reapply sealer and topcoat.
Blisters or bubbles mean trapped moisture or poor prep. Pry a blister, let the area dry, then flatten and sand the perimeter. For wide areas, remove the failed layer, dry and re-neutralize the surface, then re-neutralize and reseal before recoating. Don’t coat over damp spots — you’re only making more work.
Tacky or soft cures are usually short cure time or contamination. Remove the soft material, wipe with suitable solvent, let solvent flash off, then sand and reapply. If staining or discoloration persists after cleaning, do a light grinding or sanding and apply a stain-blocking primer before finishing. Always allow recommended cure times between steps; skipping them causes repeat fixes.
Cleanup and disposal for small-scale practice
This section walks you through safely neutralizing leftover acid, verifying pH levels to prevent fumes or skin contact, and then thoroughly cleaning tools such as brushes, spatulas, trays, and tiles with recommended cleaners and prescribed contact times; it also covers how to collect, test, and responsibly transfer rinse water to appropriate containers, when it is safe to reuse or must be discarded, and how to label, store, and dispose of used etchant containers, rags, and solid residues according to local hazardous-waste rules, with clear emphasis on preventing spills and leaks.
Cleanup workflow (practical):
- Collect rinse water in sealable containers; let solids settle for 24–48 hours.
- Test the supernatant pH. If pH is within 6.5–8.5 and no hazardous constituents are present, decant the clear water for authorized municipal disposal per local rules.
- If pH is outside the acceptable range or the solution volume exceeds local “household” thresholds (commonly >5 gallons; check local rules), label the container clearly (contents, date, pH) and call a licensed hazardous-waste hauler.
- Contaminated rags and absorbents: store in sealed, labeled metal cans or approved containers and follow local hazardous-waste instructions—do not leave them in the open.
- Tools: neutralize with baking soda solution if used with acid, rinse, then clean with soap and water and allow to dry. Dispose of disposable tools per local guidance.
These practices matter on every DIY project because they protect workers, surfaces, and the surrounding environment while helping you stay compliant and avoid costly cleanup or fines; following the guidelines reduces exposure risk, prevents contamination of drains, and supports a tidy, routinized workflow with practical steps for documentation, labeling, and future waste-minimization efforts—all while maintaining proper ventilation and posted safety reminders, including PPE use and spill response procedures.
Reusing and storing practice materials
Pick materials that match the job and you won’t be doing a second fix. The right bag or chemical makes the job last, look right, and saves you from redoing work later.
- General-purpose mortar Used for bedding bricks or blocks in practice walls. Look for strength class (N or S) and water retention on the bag; Type N is fine for most DIY work, Type S for heavier loads. Cheap generic mortar will shrink and crack; expect a 20–40 lb bag to cost $8–15.
- Polymer-modified thinset For bonding tile or facing materials to practice panels. Check for “polymer-modified” and ANSI A118.4/118.11 or equivalent on the bag for better adhesion and flexibility. Don’t use basic cement as a thinset — tiles will pop or crack; a 25 lb bag runs $10–25.
- Sanded grout For joints and simulating real finishes on practice pieces. Pick the grain size and compressive strength on the label; sanded for wider joints, unsanded for narrow. Cheap grout stains and fades; a small tub costs $6–20 depending on color.
- Cement-sand mix For mortar that needs bulk and texture. Look at the cement-to-sand ratio printed or use pre-bagged mixes (e.g., 1:3) for consistent strength and reduced cracking. Mixing it yourself saves money ($5–10 per bag of mix), but wrong ratios mean weak joints and spalling later.
- Epoxy anchoring resin For fixing bolts or making durable small repairs on practice rigs. Check pot life and tensile strength on the cartridge; short pot life (5–20 minutes) needs quick work. Don’t substitute with regular glue — load-bearing anchors will fail; cartridges run $20–60 depending on size.
- Plastic mixing buckets Basic tool for mixing and storing small leftovers. Choose rigid, food-grade buckets with airtight lids and volume markings if possible. Cheap thin buckets tear and spill; buy 5–10 gallon buckets for $5–15 each and reuse them.
- Airtight storage pails For keeping leftover dry mixes or partially used bags viable longer. Look for screw-top or gamma-seal lids and UV-stable plastic to keep moisture out. Store dry mix wrong and it sets in the bag; a decent storage pail costs $10–25 and protects material quality.
- Disposable mixing liners Use for one-off mixes or to keep buckets clean. Look for heavy-gauge liners that fit your bucket size to avoid splits. They’re cheap ($0.50–$2 each) and save hours of cleanup; skipping them means cured waste stuck to your bucket.
Pro tip: Buy only what you’ll use in a couple of days, keep dry bags sealed in a cool spot, label leftover mixes with date and pot-life, and toss any chemical or cementitious mix past its working time — you’ll save money and avoid weak, flaky repairs. For disposal and cleanup specifics, refer back to the earlier cleanup and disposal section.
Storage, shelf life, and handling of acid stains
Store acid stains in their original containers with tight closures, in a stable ambient range (for example cool, dry conditions) and away from direct sun, heat, or humidity to minimize chemical changes and prevent contamination. Keep unopened products clearly labeled with opening dates and batch numbers, follow SDS and manufacturer guidelines for shelf life, and monitor for degradation indicators such as unusual odor, separation, or color drift. Avoid mixing with incompatible chemicals, and reference the container recommendations for disposal and post-use handling to support ongoing product performance and safety.
On site, wear the required PPE—gloves, goggles, and a respirator if advised—and ensure proper ventilation, spill containment readiness, and storage away from incompatible coatings or cleaners. Perform pre-use checks by inspecting seal integrity, testing color consistency, looking for sediment or separation, and using any recommended agitation or mixing steps before applying to a full surface. Dispose of expired or unused stain according to local regulations, recycle containers where permitted, follow clean-out procedures, and recognize that poor storage or handling can affect warranty eligibility.
Transport and small-quantity shipping considerations
Keep it simple and safe. For short moves or DIY drops to a shop, leave acids in their original bottles with caps tight. Put each bottle inside a sealed plastic bag, then into a rigid container with padding. Use secondary containment — a plastic tub or metal box — so a leak stays contained.
Before you hand it to a carrier, check their rules. Some couriers allow small-quantity shipments under limited rules. Others ban household acids entirely. Call or check the carrier website and follow any packing and paperwork steps they list. Use absorbent material around bottles and tape lids if the carrier requires tamper-proof seals.
Labeling matters. Always include a clear description and any required hazard marking or paperwork. If local rules let you ship small quantities without full hazmat forms, still use proper labeling and keep the package upright. Don’t pack acids with solvents, bases, or foodstuffs. Wear gloves and eye protection when packing and loading. If in doubt, drive it yourself to avoid surprises or fines.
Cost estimate for a tile practice session
This section breaks down the cost of a 6–12 tile practice session into per-tile figures and total session expenses, covering not only the trial kits, single-color bottles, neutralizer, and sealer, but also essential accessories such as gloves, brushes, mixing containers, and any small consumables that commonly accompany a starter set. You’ll also see how tax, shipping, and small add-ons influence the bottom line, and how bundle options (trial or Mega bundles) compare with purchasing items individually, including notes on where bundles typically deliver savings.
Worked example (ballpark figures for a 6–tile practice session):
- Starter stain sampler (3 colors, 30–60 ml each): $20–35
- Neutralizer (baking soda or small CitrusEtch bottle): $8–15
- Sealer sample (8–16 oz water-based sealer): $12–25
- PPE (disposable nitrile gloves, goggles, basic OV cartridges): $25–50 (one-time)
- Tools & consumables (brushes, droppers, pipettes, towels): $10–25
- Tiles (6 practice tiles or scrap pieces): $6–30 depending on type
Total (6 tiles): approximately $81–180. Per-tile cost: $13.50–$30 (start-up PPE and tools spread across sessions; repeat sessions cost less). For 12 tiles double the materials but note that starter tool and PPE costs are one-time and reduce the marginal per-tile price.
Ways to save: buy sample sizes, join local co-ops, share a kit with another DIYer, and reuse tools after proper cleaning. See the Resources section for direct links to sample kits and sealer samples referenced above.
Ways to save when practicing
Start small. Buy sample sizes or single tiles for colour and grout trials instead of full boxes. You’ll spend a few dollars up front and avoid wasting full packs on the wrong choice. If you already read the cost breakdown earlier, treat this as the practical follow-up.
Reuse what works. Old grout, leftover thinset from another job, or plain household vinegar for light cleaning can serve in practice runs. Don’t use these shortcuts for the final installation, but they’ll cut waste while you learn the motions. Keep one or two tiles for repeated tests rather than grabbing new ones each time.
Batch-test your approach. Mix enough material for several tiles and practice the whole sequence—laying, leveling, cleaning—so you don’t restart the mix every time. That saves materials and time. If something goes wrong, adjust and repeat on the saved samples before you touch the real floor. If you’re unsure about a step, test it first rather than guessing on the finished area.
How many tiles to practice on and planning timeline
Define a practical practice set by testing a balanced number of tiles per substrate, color, and dilution so you can clearly see the key variations that affect finish performance in real use. Aiming for about 6–12 tiles total helps cover porcelain, ceramic, natural stone, and concrete, with a simple labeling system to track each sample and make quick side‑by‑side comparisons. Include surface prep steps so results are comparable, such as consistent cleaning, etching if needed, priming, and documented surface condition notes across all samples to ensure a fair baseline.
Plan a multi-day timeline from prep to seal, for example Day 1 prep and stain application, Day 2 neutralization and cleanup, Day 3 gloss and color stability checks, Day 4 seal coat, with realistic dry times between steps and a contingency for longer cure periods. Map exact color mixes and dilutions to span light, medium, and strong intensities, and document ratios, technique, and expected outcomes to guide reproducibility and future batch decisions. Use a simple scoring rubric for uniformity, blotching, color depth, sheen, and adhesion, and decide how many samples must meet criteria before scaling to a final tile set, with practical tips on safety, clean-up, waste disposal, and re-creating successful samples to support consistent results across tile types.
Practice progression from simple to complex patterns
Start where mistakes cost the least. Begin with base coats—get color, coverage and curing times right on one tile before adding veining. Once the base behaves predictably, move to single-vein work. Practice a few straight, controlled strokes until you can reproduce the thickness and contrast you want.
After single veins, step up to layered marbling. Build veins over a cured base, let each layer dry enough to avoid muddying, then add softer veins and feathering. Watch how pigments sink or sit on your chosen product. If a layer drags or blobs, back up a step and tighten your technique.
Only attempt advanced veining when you can repeat the earlier steps reliably. Advanced work mixes branching, washes and highlights all in one pass. Keep one or two spare tiles for trial runs and reference pieces. And remember, as covered above about planning and tile counts, don’t overcommit to a big run until your practice pieces look right.
Creating repeatable recipes for consistent results
Create a standardized recipe template that documents precise mix ratios (stains, water, modifiers), substrate preparation, and cure times in both metric and imperial units, then capture environmental controls such as target temperature, humidity, and ventilation along with allowable ranges and how to adjust for deviations. Establish a repeatable workflow that specifies the order of operations, mixing procedure, dwell times, application technique, and drying or curing steps to minimize variability, while pairing this with a data logging system—whether a printable sheet or concise microcopy—that records batch ID, tile size, batch notes, weather, equipment used, residue removal, neutralization, sealing, and observed results, plus a validation protocol with small test plots and predefined success criteria for color uniformity, pattern clarity, and edge control. Include straightforward troubleshooting and iteration guidance that identifies common drift causes such as contamination, inconsistent mixing, or substrate porosity, and outlines how to adjust formulas or procedures along with version control for updated recipes.
This approach gives DIY and jobsite readers a clear, repeatable path to reproduce successful outcomes across batches, reducing guesswork and waste while improving consistency and quality. By documenting controls, steps, and results upfront, you can quickly diagnose variances on future jobs, scale from test tiles to full batches with confidence, and maintain an auditable record that supports continuous improvement on-site.
Using photos and notation for quality control
Take photos at every key stage: raw mix, pour, initial set, and final cure. Use the same phone or camera, the same lighting, and the same distance each time. If the marble effect varies, the image will show whether the fault happened in mixing, pouring, or during cure.
Write a short note with each photo. Jot down batch numbers, the timestamp and mix ratio, air temperature, and which tool you used. Keep notes brief. A one-line entry is fine as long as it tells you what changed compared to the last successful run.
When you review photos, compare angles and close-ups of problem areas. Keep a folder for “favorites” that nailed the marble look. Reproduce those exact steps and settings next time. If you skip this, you’ll be guessing instead of fixing.
Photographic documentation and color charts
Photographic documentation relies on a consistent setup to compare tiles before and after staining, using color-corrected LEDs, a fixed camera distance, a standard lens, a neutral white background, and a visible scale for reference. The capture protocol is standardized: identical framing for each tile, making it possible to document both dry and wet states, and a dedicated before shot that enables direct comparison across sessions. Include a calibrated color reference and a small set of wet/dry swatches that map to the stain’s palette, and explicitly note the chart’s placement and distance from the tiles to ensure repeatability.
Following a repeatable workflow—prep, photograph, annotate, upload—keeps projects organized on the jobsite and reduces guesswork about color and finish when daylight shifts or lighting conditions change. Accurate captions and metadata should note product used, dilution, application method, surface texture, ambient conditions, and any deviations, while color notes document wet versus dry transitions for later review. This disciplined approach matters for DIY projects and professional work alike, because consistent imagery speeds reviews, supports accountability, and makes it easier to track improvements or regressions across sessions and projects.
Building a visual gallery for client approval
Pick the shots you need and shoot them the same way every time. Take at least one wide shot for context, a few mid shots for detail, and close-ups for finish and edges. Aim for consistent lighting and a neutral background so the work reads true to life. Use the color chart and one reference photo from earlier stages so everyone sees the starting point and the final colors together.
Name and sort images so the client can follow the sequence. Use clear filenames with date, location, and stage (for example: 2025-06-14_kitchen_paint-final.jpg). Add a short caption for each photo: what was done, any known issues, and the ask (approve, change, or comment). Send low-resolution proofs fast, then provide full-res files once they approve.
Include a visible reference scale in at least one shot so clients understand size. Check white balance and exposure before sending anything—bad color or blown highlights will kill trust. If a client asks for changes, mark the photo and return a corrected set. Don’t overproduce images; clarity beats theatrics.
Video and demo checklist for filming your practice
Define a clear, step-by-step video plan for a marbling demo that takes viewers from prep to final seal, with a precise shot list, timestamps, and safety reminders embedded at the start and reinforced during the demonstration. Include two camera angles, macro detail shots of mixing stain, tile prep, application technique, marbling motion, and post-application steps like neutralizing and sealing, plus safety-focused B-roll such as gloves, PPE, and ventilation practices. Use on-screen prompts and lower thirds to label steps, highlight color and finish notes, and cue built-in jump cuts to maintain pace without sacrificing clarity.
This checklist helps DIY viewers reproduce the process safely and accurately, delivering a reliable blueprint they can follow in real spaces with their own materials and equipment. It emphasizes practical planning—lighting that avoids glare, stable audio, and explicit PPE and spill procedures—so the result is consistent across jobsites and reduces missteps, rework, and frustration. The result is a engaging, educational demonstration that communicates craft details, safety, and best practices in a manageable, repeatable format.
Script bullets for instructional clips
Think of each clip as a single, sharp instruction. Film one action, one sentence, one close-up. Reference the main checklist from the parent section and then move fast—keep clips under 60 seconds.
Prep: show the surface, tools, and protective gear; call out any condition that would stop the job (loose material, oil). Application: show product, nozzle or brush angle, and coverage rate; film the technique from start to finish so viewers can copy it. Dwell time: say the exact wait, set the timer on camera, and show a close-up when the time starts and ends.
Neutralize: show the neutralizer, the mix or rinse method, and the result you want. Seal: demonstrate sealer type, spread pattern, and how thin coats dry between passes. End each clip with the quick result—no long chit-chat, just the proof that the step worked or what to fix if it didn’t.
Scaling techniques from small tiles to floors or counters
Scaling patterns from small practice tiles to large floors or counters relies on preserving proportion, repeatability, and edge alignment so seams stay invisible. Use the same basic layout rules, but adjust tools and mixes for bigger areas without creating color hotspots or uneven saturation. Plan the project in sections, set open times, and coordinate rinse steps to keep tone consistent across the entire surface.
That approach matters on a jobsite because it translates to fewer misfires, consistent color, and a smoother finish from center to edge. Building test boards that mimic real dimensions helps you verify color development and technique before full-scale work, then adjust accordingly. A thoughtful finishing plan—neutralizing, sealing, cure times, and slip-resistance—creates uniform appearance and performance on floors and counters.
Layout planning and transition areas
Start by standing where people will mostly see the floor or counter and plan the main sightline. Snap a few chalk lines to mark the focal run of tiles so the marbling veins keep flowing toward that view. If you already used the small-to-large scaling rules earlier, use those same reference points here so the pattern scale doesn’t feel chopped at the edge.
Decide where the tile meets other materials and make the seam a deliberate design move, not an afterthought. Shift the tile pattern slightly to meet stone, wood, or painted drywall so veining looks continuous or intentionally stops; abrupt mismatches scream cheap work. For awkward offsets, accept a thin reveal or use a thin metal or stone transition — but only after you test a mock-up to see how light plays on the join.
Before you set a single tile, walk the transitions and check heights, expansion needs, and how grout lines line up with joints in adjacent surfaces. If the substrate heights don’t match, fix them now — cosmetic trim won’t hide a tripping edge. Finally, mark and photograph your plan so installers follow the intended flow; don’t rely on memory when pattern alignment matters.
Environmental limitations and seasonal considerations
Optimal application weather for acid stain on small tiles means targeting a specific substrate temperature, accounting for surface versus ambient temperatures, and keeping humidity in check to minimize blotching and color shifts. High humidity, dew point, and surface moisture slow chemical reactions, extend wash-out and curing times, and require practical checks such as a moisture meter or a simple touch test before staining. Seasonal constraints and outdoor caveats—summer heat, winter cold, rain, UV exposure, wind and dust—shape when you can stain and how you time drying and resealing.
Understanding these limits helps you plan safer, more consistent results and avoid uneven marbling or efflorescence. The guidance matters for DIY jobs because it translates to fewer re-stains, less wasted product, and a smoother workflow with predictable color development. A concise pre-staining routine—acclimation, ventilation, readings, surface protection, and clear post-stain timing—keeps small tile layouts reliable even when conditions shift from day to day.
Best practices for indoor vs outdoor projects
For indoor work, focus on air movement and moisture control. Open windows, run fans, or rent a dehumidifier to keep air moving and monitor humidity. If a product needs 24–72 hours to cure, don’t assume walls and roofs will allow that—make a plan for continuous ventilation until the surface is fully dry.
Outside, watch the weather and sun exposure. Direct sun speeds surface drying but can cause skinning and poor adhesion; wind dries fast but can blow dust into wet work. Stop work if rain is forecast within the cure window or if temperatures are outside the product’s rated range. Protect fresh work with tarps or temporary covers rather than trying to “touch up” after damage.
Prep and sequencing matter more than tricks. Check substrate condition, match materials to indoor vs outdoor use, and schedule jobs when conditions suit the product—not your convenience. If you’re unsure about drying times or ventilation needs, err on the side of extra drying time and continuous airflow. It saves rework and keeps your warranty intact.
Legal and warranty considerations
Legal and warranty considerations for DIY work with commercial products require clear understanding of local codes, consumer protections, and contract obligations, plus knowing when a licensed professional should be involved. It is essential to review product SDS, warranty language, and exclusions, and to note safety requirements, shelf life, and disposal guidance for acid-stain and sealants. A thorough documentation checklist should capture lot numbers, batch dates, receipts, surface condition, prep steps, mix ratios, application dates, and milestones photographed for accountability.
This matters on the jobsite because it frames proper use, coverage, and maintenance expectations, helping protect both you and the client. By organizing a client-facing plan with a written scope of work, approved methods, and signed consent, you set realistic performance expectations and transparency about limitations. Keeping SDS on-site, sourcing reputable products, ensuring compatibility, and outlining disposal and cleanup procedures reduces risk, clarifies warranty implications, and supports a professional, compliant finish that can withstand the test of time.
When to involve a professional
If the substrate is unknown, soft, or you see cracks and settling, call a pro. Small cosmetic fixes you can handle, but anything that affects structural support, drainage, or covers a large area needs testing and specialist tools. Expect contractors to recommend core samples, compaction testing, and moisture checks—things most DIYers can’t or shouldn’t do safely.
Objective triggers to call a professional (use these measurable thresholds):
- Substrate moisture readings >4% (use a moisture meter) before sealing or staining.
- More than 15–20% of tiles show delamination, hollow sound, or repeated adhesion failures.
- Project area >50 sq ft (scaling complexity increases logistics and risk).
- Unknown slab chemistry or visible efflorescence after cleaning that won’t resolve with standard prep.
- Required color matching across seams where a client demands exact replication (bookmatching or mirror effects).
When you call someone, ask for references, a clear scope, and a timeline. Get a written quote that spells out testing, remediation, and the finish standard. Don’t hire on price alone—ask for proof of insurance and a guarantee. If you want confidence and fewer headaches, bring in a pro early rather than trying to fix it later.
Frequently asked questions (tile-focused)
Tile compatibility and etching risk: this section answers common tile-specific questions about whether acid stain will etch glazed, unglazed, porcelain, or ceramic surfaces, and when sealers or glaze coatings might resist or be etched. It also covers a simple test patch protocol to determine compatibility before full application, including color changes to expect and how to document results. You’ll find guidance on what dilutions work for small tiles, how to test color uniformity, any required dwell times for shade stability, and the best practices to minimize risk while achieving even results.
Immediate sealing, neutralization, and application tips: it explains whether you can seal immediately after staining on small tiles, the neutralizers you may need, and recommended wait times between staining, neutralizing, and sealing, along with how to neutralize residual acid safely. Grout lines and sealers: we cover whether grout lines require special handling, and which sealers tend to perform best with stained surfaces, plus notes on compatibility with common grout materials and color-fastness. For DIY jobs, practical steps include tool choices (spray bottle, foam brush, microfiber pad), how to avoid pooling in grout lines, post‑application drying conditions in typical indoor settings, and essential safety and cleanup steps like ventilation, PPE, neutralizer disposal, and long-term maintenance with compatible sealers.
Quick-reference troubleshooting FAQ
If tiles look lighter than expected, don’t panic. First, check base compaction and surface cleanliness — thin-set on dusty or damp backer will change color. Wipe a tile with a damp rag and let it dry to see true color. If the shade still bothers you, try a small sealed patch in an out‑of‑the‑way spot before treating the whole area.
Want to seal but unsure when? Follow the product label, but a good rule: wait for full mortar cure and no moisture bleed. For cement-based mortars that’s usually 48–72 hours. Do a quick moisture test: press clear tape over the floor for an hour and check for condensation. If you see any, wait longer.
Loose tiles, grout haze, or lippage? For loose tiles, pull one and inspect the bond — bad bond = relayout with correct adhesive. Grout haze wipes off with a damp sponge or a neutral cleaner; don’t scrub with acid unless the tile calls for it. If edges are uneven, don’t force wedges—remove the tile and reset correctly. When in doubt, test a small area before scaling up.
Recommended product kits for practicing marbling
A concise set of practice kits helps you build marbling skills on tile without committing to large orders. Look for small or sample-sized options that are affordable, easy to use, and come with essential tools such as gloves, brushes, fixatives, and compatible acid-stain guidance for tile marbling. This intro highlights EverStain or acid-stain trial kits, starter bundles, neutralizer bundles, sealant sample packs, and slip-resistant additive demos, with quick notes on practical pros and cons for each in a tile-practice context.
Understanding tile types (porcelain, ceramic, concrete), surface prep needs, and whether practice tiles are included is key to choosing a kit that fits your workspace and budget. The goal is to find kits that offer clear instructions, a workable color range, predictable drying times, easy cleanup, and realistic marbling results at small scale, along with a practical quick-reference checklist and links to related how-to steps to guide you through selection and use without extra friction.
DIY vs professional kit decision guide
If you want to try a few patterns on small items—book covers, coasters, test swatches—grab an economy sample kit. They cost less, give you enough paint and medium to learn the basics, and let you fail a few times without crying over wasted materials. Expect to reorder sooner and don’t plan big projects with them.
Pick a professional kit when you have a clear plan for many finished pieces or larger surfaces. Pro bundles include bigger bottles, stronger stabilizers, and usually better tools. That saves time and reduces surprises on the job site. If your timeline or finished quality matters, spend more up front.
Decide by checking three things before you buy: intended project scale, how often you’ll work, and tolerance for material waste. If you’re on a budget but serious, buy a small pro kit for the core supplies and supplement with economy samples for color experiments. If you just want to mess around once, keep it cheap and simple. Don’t overbuy tools you won’t use.
Green alternatives and safer stains
Safer, low-VOC water-based reactive dyes and stains offer a less aggressive option than traditional acid stains for tile marbling, reducing fumes, skin irritation, and odor while still delivering rich, mineral-like veining that can be dialed in with dilution and application technique. They are particularly useful on small tiles when you want controlled color shifts, predictable outcomes, and the option to stage multiple passes without harsh chemistries, although color may shift with moisture exposure, temperature, or substrate porosity. These products generally work on glazed ceramic, porcelain, and cement, but surface prep and porosity considerations—such as dust-free cleaning, uniform porosity, and careful sealing or pre-wetting—are essential to prevent blotching and to achieve a consistent marble look across the pattern.
Plan for compatibility, appropriate prep, tools, dilution, and technique before you begin, because the same stain can behave very differently across substrates, tile patterns, and edge conditions, and missteps show up as streaks or uneven veining. A small test grid on similar tile scraps lets you confirm color, veining, adhesion, and finish choice, and the notes you collect—recording ambient conditions, PPE, ventilation, and observed changes—will guide the main install, help with future touch-ups, and reduce costly retries.
Pros and cons compared to acid stains
Pros
- Lower health risk: fewer fumes and toxic chemicals, so you can work without full hazmat gear.
- Easier cleanup and handling: water-based products clean with soap and water, not harsh neutralizers.
- Faster return-to-service: many eco stains dry and cure quicker than acid stains, so finish work is faster.
- More consistent color: less chance of surprise blotches—good for uniform looks and matching batches.
- Often better for indoor projects: safer for enclosed spaces and around pets or kids.
Cons
- Less permanent color: colors can fade faster and may need reapplication sooner than acid stains.
- Less depth and variegation: you lose that mottled, mineral-reactive look acid stains give.
- Higher material cost: some green products are pricier per square foot.
- May require more coats or sealers: to match the same visual impact or durability you might add time and materials.
- Different substrate prep: some eco products need tighter surface profiles or cleaners, so prep time can go up.
Choose green alternatives when safety, indoor work, and predictable color matter more than the deep, permanent patina of acid stains. If you need long-lasting, mineral-reactive color on high-traffic outdoor slabs, acid stains still earn their keep.
Case studies: successful tile marbling examples
This section highlights 2–3 real practice sessions on small tiles, walking you through before, during, and after results and pointing out what learned patterns emerged across each run. It emphasizes documenting tile type, planned acid stain, surface prep, application method, dilution, and technique, then comparing pattern, intensity, and any unexpected marbling effects. Visual snapshots and a tiny timeline for initial swatch, midway check, and final sealed sample are included, with quick-score notes on contrast, uniformity, and edge behavior to help gauge transferability.
For DIY readers, the point is practical: you gain concrete tweaks to reproduce favorable marbling while avoiding common pitfalls, and you learn how control choices influence consistency on tiny surfaces. The notes cover handling grout lines, corner effects, sealer choices, and how these factors shape the final look, so you can plan efficient, cost- and time-conscious practice runs and implement reliable results on real projects.
Lessons learned and reproducible recipes
Quick recap from the case studies: most failures came from poor prep and slow workflows. Test a sample on a spare tile first. Clean and degrease, sand glossy tiles lightly, and tack off dust. Work in small batches so each tile gets the same timing and the same look.
Recipe A — water‑based faux marble for walls or low‑traffic floors: mix 1 part acrylic latex paint (color A) with 3 parts glazing medium and thin 5–10% with clean water. Load a natural sea sponge or soft brush, apply thin mottled layers, then feather with a dry brush or paper towel within 30–60 seconds to blend. Let tack 2–4 hours, add a second thin glaze layer if needed, then cure 24 hours before a satin water‑based polyurethane topcoat. Key notes: keep strokes light, avoid pooling, and always let each glaze skin before reworking.
Recipe B — durable epoxy marbling for countertops or high‑traffic floors: mix a 2‑part epoxy per manufacturer directions. Stir in 2‑3% liquid pigment by weight for your base wash and 0.5–1% for veins. Pour a thin base coat (about 300–500 microns), blow out tiny bubbles with a heat gun quickly, then add veins with a fine brush and swirl with a stir stick. Flash time between pours is roughly 10–20 minutes at room temp; wait 12–24 hours for initial cure before light sanding and a final 300–500 micron sealing coat. Key notes: work fast, control dust, and plan for at least 72 hours full cure before heavy use.
Troubleshooting flowchart for on-the-spot fixes
The troubleshooting flowchart is a concise, prioritized path designed to diagnose common surface issues on the spot and guide immediate actions such as testing a patch, neutralizing, resealing, reapplying, or scrubbing. It groups problems by symptoms—color variation, blotching, mottling, dull finish, residue, pitting, and edge discrepancies—and links each sign to a clear, time-efficient fix. This approach helps DIYers quickly decide what to test first and how to proceed without delaying the project.
In practice, this method emphasizes practical checks during a session—surface prep status, stain compatibility with the tile, porosity, dilution/working time, and ambient conditions that influence color and cure rate. It provides explicit thresholds and corresponding actions while prioritizing safety with PPE reminders, a small test patch first, and time-limited observations to avoid over-processing. Documenting outcomes in real time supports future sessions, reducing repeat mistakes and keeping future projects faster, calmer, and more predictable. A printable one-page flowchart PDF is available in Resources for quick reference on the job.
Quick fixes vs full redo criteria
If the problem is surface-only—small cracks, thin spots, or isolated adhesion failures—try a spot correction first. Cut out damaged areas, clean loose material, and patch with matching mix. If repairs take less time than stripping and don’t change the overall level or drainage, a quick fix usually wins.
Walk the whole job before you start. Check base compaction, slope, and any ongoing moisture source. If the base is soft, uneven, or wet, or if more than about 15–20% of the surface is compromised, plan to strip and rebuild. Temporary patches on a bad base just buy you more work later.
Measure the risk versus the effort. Small aesthetic or functional fixes are fine for wear-and-tear. Structural issues, persistent movement, or recurring failures mean a full redo. When in doubt, follow the troubleshooting flowchart above and don’t gamble on a patch that’ll fail under traffic.
Checklist: planning your first marbling practice session
This checklist guides you through a focused first marbling practice, outlining clear goals, a compact materials and safety list, a simple prep timeline, and a straightforward application protocol tailored for small tiles. You’ll define a small set of targets, choose 1–2 stain colors, establish a quick evaluation method, and use a printable or copyable form to track color, texture, and adhesion during a single session. Its content covers workspace setup, waste handling, step order, expected cure times, and a brief post‑session review to capture what worked and what to adjust next time.
Using this structured plan reduces waste, increases safety, and makes it easier to replicate results across sessions, so you can steadily progress toward a reliable marbling pattern. By documenting color outcomes, timing, and technique choices, you build a practical reference that guides future sessions, minimizes backtracking, and supports quick decisions on tile prep, rinsing, neutralization, and drying steps. This kind of organized approach is especially valuable on DIY projects or busy studios where clear expectations and a tested workflow keep beginners confident and projects moving forward.
Pre-session checklist for tile batches
Before you start a batch, walk the table once. Confirm your pH strips are on hand and readable. Make sure the neutralizer is mixed and labeled so you don’t grab water by mistake. If a tile needs a quick test, do it first — better to fail one than ruin a dozen.
Gear up. Put on your PPE and gloves. Have extra rags and a trash bin within arm’s reach. Camera or phone should be charged, mounted, and aimed where you work. If you want a usable record, don’t rely on a last-minute tripod scramble.
Batch control matters. Mark which tiles belong to each batch, note the marbling recipe, and keep the workspace clear between batches. Briefly review the main planning checklist above if anything feels fuzzy. Start only when you can answer “yes” to those points — otherwise stop and sort it out first.
Next steps after successful practice
Next steps after successful practice involve validating color, pattern, and depth on additional tiles using a repeatable testing protocol, defining acceptable variance (color shift, marbling fidelity, depth of stain), and keeping a quick checklist for color, edge behavior, and grout line visibility, while also outlining how to scale the pigment/acid stain and sealer for larger runs and ensuring batch traceability. It also translates findings into a full-surface preparation plan with step-by-step surface cleaning, etching or neutralizing, masking of surrounding profiles, environmental controls (temperature, humidity, airflow), and a practical method for estimating materials, waste, lead times, and contingency stock to set a realistic production path.
This matters on the jobsite because consistent results reduce callbacks, warranty risks, and client dissatisfaction, while budgeting becomes predictable as you document material takeoffs, lead times, and waste factors with simple notes and photos. Following these steps gives you a practical framework for quality control, batch management, calibration of mixes, and contingency planning that helps you scale confidently from a small test area to a complete installation, with a repeatable timeline and a forward plan for resealing, touch-ups, and documentation.
Transitioning from samples to client proposals
Take the practice results and turn them into a clean sample board for the client. Pin down final colors, materials, and edge details. Don’t guess sizes—measure twice on site and call out any fixed constraints that affect labor or materials.
Build your pricing template from the practice numbers. Break out labor, materials, allowances, and a small contingency so the client sees where money goes. Set clear start and finish windows and state what changes will trigger extra charges. If a mock-up will be required, note who approves it and when payment is due.
Write a tight scope of work that matches the sample board and pricing. List what you will do, what you won’t do, and any client responsibilities like access or removals. Add one short line about quality checks—e.g., have the client sign off after the mock-up—so there’s no arguing later.
Resources, downloads, and further learning
Resources, downloads, and further learning come into sharp focus with clearly labeled, versioned assets that cover Safety Data Sheets for acids and neutralizers, recommended neutralizer recipes, and a printable test matrix organized by tile type, stain color, dilution, and application method. Each item is presented with explicit labeling and version dates to help you track updates as products evolve, and additional safety and handling references reinforce proper PPE, storage, disposal, and compatibility with sealers and grout. These resources also point to video demos and supplier options suitable for small quantities, with notes on SDS paperwork and product data sheets to aid quick, on-site decision-making.
Using the test matrix involves guided steps for small-scale trials on sample tiles, recording observations such as adhesion, color uniformity, and efflorescence risk, and interpreting results to inform both modest and larger projects. Quick-reference tools like a one-page pre-application checklist, a post-application neutralization and rinsing checklist, and a simple troubleshooting guide help keep work-flow efficient and consistent, even for DIY jobs. Accessibility and update cadence are built in: formats are clearly indicated (PDF, XLSX), version dates are visible, and a periodic schedule is set to reflect changes in products or safety guidelines.
Suggested reading and video playlists
Start with a short playlist of step-by-step how-to videos from trade schools and manufacturer channels. Pick 3–5 videos that show the whole process from setup to final checks, not just the pretty shots. Watch full runs so you catch the common mistakes they edit out.
Pair those videos with two solid articles: one that explains tool selection and one that covers safety checks. You’ve already seen the core methods above, so use these pieces to fill gaps—measurements, tolerances, and quick troubleshooting tips. If a source contradicts what you learned here, re-check the measurements on site.
When choosing resources, favor recent uploads and known brands. Ignore flashy DIY influencers who skip prep work. Practical items to verify before starting: tool condition, material dimensions, and permit or code notes. A little prep saved me hours; trust but verify.
Maintenance tips for marbled tile surfaces
Keep marble tile surfaces looking even and bright by establishing a regular, mild cleaning regimen that uses pH-neutral, non-abrasive cleaners and by avoiding acidic solvents or harsh cleaners that can dull the marbled finish, with a simple weekly rhythm and a quick daily wipe for high-traffic areas. Plan a practical sealing cadence based on porosity and traffic, starting with a test seal to gauge wear and choosing a resealing method that is simple enough for small tiles and marble surfaces, so you can confidently refresh protection before it becomes noticeable. Protect the surface from spills and wear with immediate blotting, coasters, mats in busy zones, and furniture pads, while using soft cloths and non-scratch applicators to minimize edge and grout dulling and to preserve the finish over time.
For DIY readers, this approach reduces surprises and keeps maintenance predictable. You gain clarity on when to re-clean, reseal, or refurbish based on actual use. Regular checks for dull spots, discoloration, or gloss changes help determine reseal timing and whether touch-ups will suffice.
Repairing wear spots and reconditioning
Start by identifying the high-traffic wear spots. Run your hand over the floor and look for dull patches, scratches, or grout breakdown. For small scuffs, buff gently with a fine abrasive pad. For deeper wear, grind or hone only the damaged area until the surface is even with the surrounding tile.
After leveling, clean thoroughly and test a small area with your chosen polish or sealer to make sure it matches. If color or sheen still looks off, apply a light color-matching touch-up compound or a micro-fill and re-hone that spot. Don’t try to hide big damage with just a topcoat—fix the substrate first or you’ll be back here in months.
When the repairs blend in, let the surface cure and then reapply sealer to protect the whole run. High-traffic zones usually need re-sealing every 1–3 years; check those spots more often and follow the routine cleaning tips mentioned earlier. If water soaks in or dirt clings, seal now—don’t wait for the floor to show obvious damage.
Final summary and best-practice checklist
This section matters for DIYers and job-site readers because it translates a potentially complex process into a clear, actionable workflow that minimizes mistakes and waste. By keeping safety front and center and following the 10-step sequence, you reduce common pitfalls like uneven tint, blotches, or grout-line concerns, and you’ll know when to adjust application or sealant choices. The practical focus on troubleshooting, quick QA checks, and post-practice maintenance helps ensure color consistency under lighting, proper cure, and long-term results that resist wear and plan for future upkeep.
Quick reference: Do’s and don’ts
Do measure twice and mark once. Do a final walk and check base compaction before you pour or lay materials. Do confirm materials and tools are on site and staged in the order you’ll use them. Do allow proper cure and settle time; rushing is the fastest way to waste work.
Don’t skip permits or inspections — cutting that corner costs more later. Don’t ignore drainage and slope; water is the job killer. Don’t mix shortcuts with cheap materials. If a step feels beyond your skill, stop and call a pro.
Make quick pass/fail calls: surface flat? edges secure? no standing water? If all green, proceed. If any red, fix the problem now. Safety: gloves, eye protection, and clear access for helpers. Keep this checklist handy during the practice run.
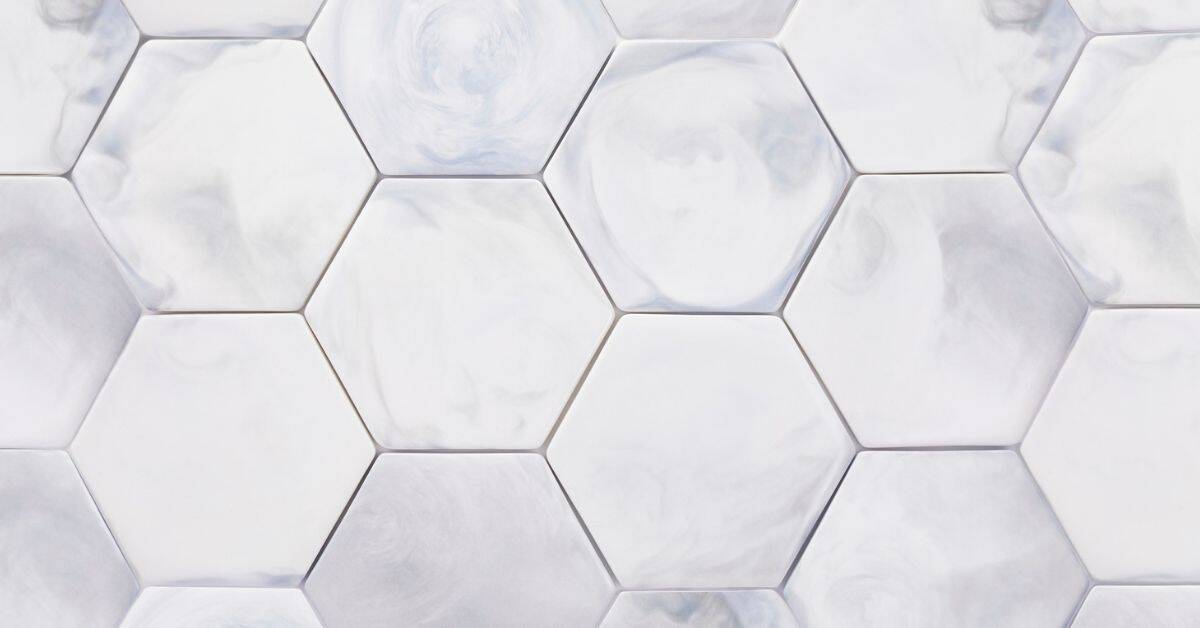
Conclusion
You’ve got a practical method to practice acid marbling on small tiles. The key is safety, deliberate testing, and disciplined steps so you get durable results that look intentional rather than accidental.
Begin with a simple, repeatable routine: ensure your tile material is suitable, set up your PPE and a clean workspace, mix small batches by the exact ratios you planned, run a patch test, decide your palette, apply the base, add veining and layering, observe the color development, neutralize and rinse, dry thoroughly, and seal with a compatible product. Keep a strict log of your colors, dwell times, and sealer choices, and photograph each variation to build a clear color chart you can reuse. This makes the jump from practice to real projects smoother and less guesswork.
Common mistakes to avoid are pale or washed-out results, blotchy or uneven patterns, and oversaturated colors that creep into adjacent grout lines or edges. Don’t rush the base or the drying times, never skip neutralization or rinsing, and always work in a ventilated area with eye and skin protection. If something looks off, stop, reassess the patch, and adjust dilution, timing, or application technique before proceeding.
If the project involves large areas, glossy or irregular tiles, or you’re unsure about compatibility with sealer or grout, consider calling a professional. For most home practice sessions, a clear plan and careful testing will carry you through to reliable, repeatable results. Stay disciplined, stay safety-minded, and you’ll turn practice into confident, durable marbling that looks great and holds up over time.
FAQ
What tiles work best for acid-stain marbling on small tiles?
Small ceramic or porcelain tiles work well. Make sure they are clean, dry, and free of wax or gloss glaze. If in doubt, test a tiny area first.
Do I need a practice run before the real job?
Yes. Do a small batch on a loose tile or scrap piece. This shows you how the stain reacts and helps you plan your pattern. Don’t skip practice on unfamiliar colors.
What safety steps should I follow?
Wear gloves, eye protection, and a respirator if you’re in a tight space. Work in a well-ventilated area. Dispose of excess stain and cleaning rags properly. Refer to the PPE and ventilation specifics earlier for respirator cartridge class and ACH guidance.
How long does it take to see the marbling effect?
You’ll see color changes as the stain dries. Don’t rush the dry time. If you’re not happy with the pattern, you can wipe and reapply on a test tile before touching the real batch.