

Introduction
Grout haze is a thin film of cement residue that dries on tile surfaces after grouting. It can make the tile look cloudy and dull if not cleaned promptly. Timing matters—start cleaning within the window recommended by your grout product and tool manufacturer, or ask in-store if unsure.
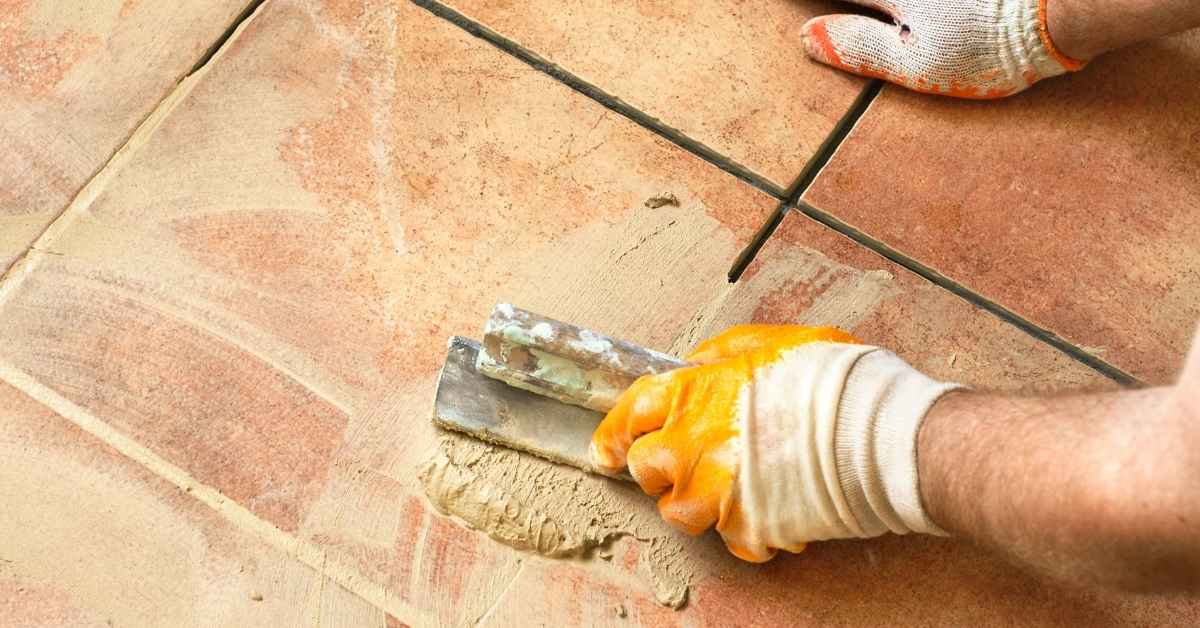
You’ll need basic tools like a clean sponge, a bucket of clean water, and a towel for drying. Use a damp, not dripping, sponge and wipe diagonally across the grout lines to remove haze without pulling grout from joints. Work in small sections, and check the product label and local rules for any wait times or finishing tips.
Key takeaways
- Grout haze is a cloudy film left on tile after grouting process.
- Start cleaning promptly per grout manufacturer’s guidance to avoid stubborn haze.
- Use a clean, damp sponge with consistent pressure for effective haze removal.
- Rinse sponge often and work small sections to prevent re-deposits.
- Tools: grout float, clean bucket, sprayer or spray bottle, microfiber cloth.
- Safety: wear eye protection and gloves; ensure ventilation and proper slurry disposal.
Table of Contents
- Introduction
- Key takeaways
- What Is Grout Haze?
- Tools and Materials Checklist
- Timing: When to Clean After Grouting
- Proper Sponge Technique Step-by-Step
- Cleaning Solutions and Product Comparison
- Polishing, Finishing, and Visual Checkpoints
- Maintenance and Post-Installation Care
- Safety Precautions and Common Beginner Mistakes
- Conclusion
- FAQ
What Is Grout Haze?
Grout haze is a milky, translucent film that can settle on tile surfaces after grouting. It is not the same as grout residue, which is crusty and might wipe away with effort, or staining, which appears as colored spots that set into the tile finish. The key visual cues are a soft, cloudy look versus a distinct crust or color mark.
Haze forms for different tile types in distinct ways: glazed ceramic and porcelain can trap grout particles on the surface; natural stone may absorb moisture and release a film if sealers aren’t compatible; glass and large-format tiles can show a delicate haze that hides textures. It shows up at various stages—during cleanup, as grout begins to set, or when cleaners interact with the cementitious mix—so beginners should watch for changes as work progresses. Consider porosity, sealant compatibility, and whether you’re using cementitious grout or epoxy to estimate risk and plan cleanup strategies. A simple decision framework helps: assess tile type, check cleaners for pH compatibility, and avoid over-wetting porous stones to curb haze formation.
Difference between haze, residue, and stain
Grout haze, residue, and staining are common issues but they’re not the same. Here’s how to tell them apart:
Haze is a milky film that appears on tile surfaces after grouting. It’s caused by excess grout left behind during installation.
Residue, on the other hand, is a crusty buildup that forms when grout dries too quickly or isn’t cleaned properly. It’s usually tougher to remove than haze.
Staining refers to colored spots or streaks on tiles. This can happen due to improper cleaning, using harsh chemicals, or not rinsing thoroughly after installation.
How grout chemistry affects haze
Grout type and additives play a big role in haze formation:
Cementitious grouts, common for ceramic and porcelain tiles, can cause more haze due to their cement content. This haze appears within 15-30 minutes after installation.
Epoxy grouts, used with natural stone or glass tiles, create less haze but are harder to clean up once set. They start setting in about an hour and fully cure in 24 hours.
Additives like latex or polymers can also affect haze formation. Some reduce haze while others may increase it, depending on the tile type and grout used.
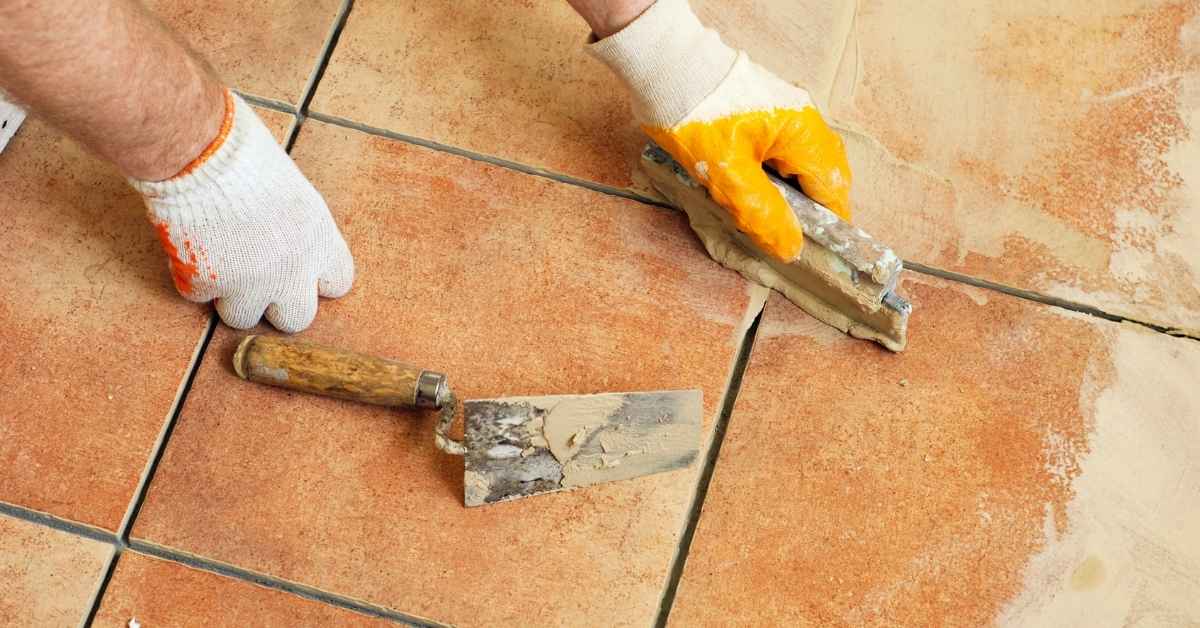
Tools and Materials Checklist
Start with the basics: a grout float, a compatible sponge for haze removal, and sturdy buckets for rinsing. Keep a few microfiber cloths on hand to wipe smooth and dry surfaces as you go. Have a basic PPE setup ready for comfort and protection during cleanup.
Choose a pH-neutral cleaner and plain water for most jobs, and avoid strong acids or abrasives on fresh grout. Use the sponge in a damp state and change water often to prevent redepositing haze. For tougher haze, consider stiffer scrubs or specialty haze removers only if the label says safe for your grout type.
What sponge to choose and why
Selecting the right sponge is crucial for effective grout haze removal without damaging tiles or joints.
- Soft cellulose sponges: Ideal for initial haze removal. They’re gentle on surfaces, absorb well, and won’t scratch.
- Avoid abrasive sponges: These can scratch tile surfaces and damage grout.
- Microfiber sponges: Good for buffing and final cleaning. They don’t leave lint behind.
- Size matters: Medium to large-sized sponges (around 8×6 inches) are easiest to handle.
- Moisture level: Slightly damp sponges work best for haze removal, not soaking wet.
Quick rule: Always start with a soft cellulose sponge. If haze persists, switch to a microfiber sponge for buffing.
Safe cleaners and when to use them
Using the right cleaner ensures you remove haze without damaging your tile or grout work.
- Water: Suitable for light haze on most tiles. Use within 15-30 minutes after grouting.
- pH-neutral cleaner: Ideal for tougher haze and all tile types. Test first to ensure no discoloration.
- Mild acid (for cement haze): Use on unsealed, cement-based grout only. Never use on sealed or colored grout.
- Commercial haze removers: Effective but strong. Always test first and follow manufacturer’s instructions.
Quick rule: Start with water, then pH-neutral cleaner. If haze persists, consider a commercial haze remover or mild acid (only on unsealed cement grout).
Timing: When to Clean After Grouting
Think in stages: an initial flush, a careful wipe, then a final polish as the grout begins to set. The exact hours depend on the grout type, tile porosity, and room conditions, so use safe range guidelines rather than fixed times. If you are unsure, test a small area to gauge how quickly the grout surfaces dry and set.
Stage 1 is the flush to remove loose particles, followed by a gentle wipe while the grout is still workable. Stage 2 is the initial wipe within a practical window, working in small sections with a clean damp sponge. Stage 3 is the final polish once haze starts to form but before full cure, avoiding aggressive scrubbing that could abrade the grout.
Immediate post-grout window (first pass)
The first cleaning pass should happen as soon as possible after grouting, but not so soon that you’re just spreading the haze around. This is your chance to remove loose particles and lift any initial haze before it sets.
Think of this like mopping a floor right after washing it. You want to catch it while it’s still wet and workable. For cementitious grouts, aim for within the first 15-60 minutes. Epoxy grouts can be a bit more forgiving, giving you up to an hour.
Use a clean, damp sponge in small sections. Gently wipe, don’t scrub. You’re not trying to remove set grout, just lift off the loose stuff and haze. Remember, prompt action prevents hardened haze.
Secondary and final cleaning passes
After your initial pass, you’ll need to follow up with secondary and final cleaning. These are typically done at 24 hours and 72 hours post-grout, but conditions can alter this timeline.
At 24 hours, check for any remaining haze or residue. If present, perform a gentle wipe using a clean, damp sponge. Be careful not to agitate the grout too much as it continues to cure.
At 72 hours, do a final polish or light buff. The grout should be hard enough that haze is starting to form but not fully cured yet. Look for a matte, haze-free finish on test spots. If all looks good, you’re done. If not, wait another day and check again.
Remember, these are just guidelines. Curing times can vary based on grout type, tile porosity, room temperature, humidity, and air circulation. Always do a touch-test and visual inspection to determine when it’s time for your final pass.
Proper Sponge Technique Step-by-Step
The goal is a repeatable, low-haze routine that controls moisture, timing, and pressure. Prepare a damp sponge, not dripping, and plan a sequence of light passes that gradually cover each tile in small sections. Keep the sponge clean and move steadily to avoid staining or smearing haze.
Manage water carefully: rinse the sponge, wring it well, and refresh the water frequently to prevent re-depositing grime. Apply gentle pressure with steady contact along grout lines, avoiding heavy scrubbing at corners or edges. If haze appears, re-dampen and continue with a systematic pass pattern to maintain consistency.
Step-by-Step Process
The following sequence ensures a consistent, haze-minimizing sponge-wiping routine. Follow these steps to maintain control over moisture, timing, and pressure.
- Prepare the Sponge: Wet it lightly, squeeze out excess water. It should be damp, not dripping.
- Start at Top or Furthest Point: Begin wiping from the highest point or furthest corner of your work area to avoid stepping in grout.
- Use Small Strokes: Hold the sponge like a brush and use small strokes along grout lines. Avoid circular wipes which can spread grout.
- Progressive Passes: Make 2-3 passes over each section, spacing them out to let grout set slightly between passes.
- Check for Haze: After the final pass, check if haze appears. If so, re-dampen and wipe again. If not, move on to the next area.
Rinse-and-wring method
Keeping your sponge clean is key to preventing haze. Rinse and wring it at regular intervals to avoid redepositing grout.
After each pass, rinse the sponge thoroughly in clean water. Squeeze out excess water by pressing the sponge against a hard surface or using a sponge wringer.
Change water frequently – every 2-3 passes or when the water becomes murky. This prevents redepositing grout and staining.
Never wring the sponge so dry that it stops absorbing water. It should always be damp, not bone-dry.
Edge and Grout Joint Handling
Navigating corners and grout joints requires a light touch to avoid digging out grout or leaving ridges.
At corners, use a soft, gentle motion. Avoid pressing too hard as this can dislodge grout. Use a damp sponge to wipe away any excess grout that oozes out.
For grout joints, follow the same small stroke technique used on flat surfaces. Be consistent with pressure and avoid over-wetting, which can cause grout to lift or haze to form.
If you notice haze forming at edges or corners, re-dampen your sponge and wipe again. If it persists, consider using a cleaner designed for haze removal.
Cleaning Solutions and Product Comparison
Set clear testing criteria before choosing a cleaner: effectiveness on haze, safety for occupants, and compatibility with common tile types. Consider cost per use and per project, and balance DIY options with ready-made products based on your tile and grout type. Always consult product data sheets for proper usage guidance.
Compare DIY options like baking soda paste, mild hydrogen peroxide, or lemon-based cleaners against commercial grout haze removers. Note typical contact times and dilution needs, and perform a small patch test first. Wear PPE, ensure ventilation, and avoid combining cleaners that could react with epoxy or cementitious grouts.
DIY Cleaners vs Commercial Haze Removers
When it comes to grout haze removal, you’ve got two main options: DIY cleaners and commercial products.
DIY Cleaners, like baking soda paste or vinegar, are cheap and easy to find. They’re great for light haze on small areas. But they might not cut through tougher haze, and some can damage certain tile types if left on too long.
Commercial Haze Removers are designed specifically for this job. They’re usually more expensive but also more effective. They work faster and won’t damage tiles if used correctly. They’re your best bet for heavy haze or large areas.
Cost and Effectiveness Considerations
Choosing a cleaner depends on your budget and the job at hand. Here’s what to expect:
DIY cleaners cost next to nothing, but their effectiveness varies. Baking soda is gentle and cheap, while vinegar can be harsh and damaging if not used carefully.
Commercial haze removers usually range from $10-$30 per bottle. They’re more effective and safer for your tiles, but they’ll cost you more upfront. However, since they work faster, you might use less product overall.
For small jobs or tight budgets, DIY cleaners can be a good start. But for larger areas or tougher haze, it’s worth investing in a commercial cleaner to save time and ensure your tiles stay in good condition.
Polishing, Finishing, and Visual Checkpoints
Plan the final polish while the grout is still within a workable window, using clean water, microfiber cloths, and a soft sponge or polishing pad. Light circular buffing or cross-hatch passes can lift faint residue without scratching the tile. Switch from damp to a dry buff as you approach a uniform sheen on the grout lines.
After polishing, perform a quick ritual of cleaning and inspection: wipe with damp cloth, then dry to reveal true color. Look for uniform gloss, consistent grout line color, and no oily patches or footprints. If you see trouble spots, re-wipe targeted areas and re-polish as needed before the grout fully cures.
How to buff and dry for best finish
Once you’ve completed your initial cleaning passes, it’s time to buff and dry the tiles for a smooth, uniform finish. Here’s how:
- Light circular buffing: Use a microfiber cloth or dry sponge in gentle, circular motions to lift any remaining haze.
- Cross-hatch passes: Change direction for your next set of passes to ensure even buffing and no missed spots.
- Switch to damp sponge: After initial dry buffing, use a damp (not wet) sponge to lift any remaining residue.
- Avoid over-wetting: Too much water can create new haze or cause tiles to lose their sheen.
- Dry buff again: After using the damp sponge, dry buff once more to restore the tile’s gloss.
- Allow final cure undisturbed: Once you’re satisfied with the finish, let the grout cure without disturbance for best results.
Quick rule: Be patient and thorough. Buffing is key to a professional-looking finish.
Visual and tactile inspection checklist
Before you declare the job done, perform this visual and tactile inspection to ensure all haze is gone. Here’s what to check:
- Uniform gloss: Check each tile for an even sheen. Any variation may indicate missed haze.
- Consistent grout line color: Grout lines should look uniform, with no white film or cloudiness.
- No oily patches: Feel the surface for any slick spots that could indicate remaining residue.
- Smooth grout joints: Run your fingers along grout lines to ensure they’re smooth and even.
- No cradle or footprints: Check for indentations on the tile surface, which could indicate missed haze or improper buffing.
- Edges free of residue: Inspect tile edges and corners to ensure no grout residue remains.
Quick rule: A thorough inspection now saves you rework later. Don’t rush this step.
Maintenance and Post-Installation Care
Set a simple routine for cleaning with pH-neutral products and a light touch that protects the grout. A regular cadence, from weekly to monthly, keeps haze at bay and preserves color and texture. Avoid harsh acids or bleach on stained or sensitive grout surfaces.
Plan sealing timing after the grout has cured and the surface is dry, then re-seal high-traffic areas as needed. Use microfiber cloths and grout-safe brushes for maintenance, and store spares of cleaners and sponges to avoid cross-contamination between jobs. Document any signs of wear to guide future repairs.
When and how to seal grout
Sealing your grout is crucial for protecting it from moisture, stains, and haze. But timing is key.
Wait at least 72 hours after installation before sealing. This gives the grout time to cure properly. Sealing too early can trap moisture and cause issues.
Re-seal high-traffic areas every 2-3 years. Signs that your sealant is diminishing include water no longer beading on the surface, or if you notice increased staining.
Weekly and monthly care tips
Regular cleaning keeps grout looking fresh and prevents haze. Here’s a simple schedule:
Weekly: Use a damp microfiber cloth with a pH-neutral cleaner to wipe down grout lines. Avoid harsh acids or bleach.
Monthly: Give your grout a deeper clean. Use a soft-bristled brush and grout-safe scrubber for tougher spots. Rinse thoroughly afterwards.
Safety Precautions and Common Beginner Mistakes
Prioritize ventilation, wear gloves and eye protection, and keep a breathable workspace to limit exposure during cleanup. A simple setup helps you manage dust, fumes, and splashes in typical bathrooms or kitchens. Start with the least aggressive approach and expand only if needed.
Common mistakes include overly aggressive scrubbing, using acidic cleaners on cementitious grout, and employing metal tools that scratch tiles. Conduct a small test on an inconspicuous area, observe results for a short period, and document outcomes before treating the entire area. If damage occurs, pause, rinse, and re-evaluate your cleaner choice before proceeding further.
What not to do (damage prevention)
First off, let’s talk about what not to do when dealing with grout haze. You’re working with delicate surfaces here – tile and grout – so you’ve got to be gentle.
Don’t go scrubbing too hard. Overly abrasive scrubbing can damage the grout or even scratch the tile glaze. Use a soft-bristled brush or a sponge for light, even strokes.
Stay away from harsh cleaners too. Acidic cleaners are a big no-no on cementitious grout. They can eat into the grout and leave you with a bigger mess than before. Stick to mild, pH-neutral cleaners.
And whatever you do, don’t use metal tools. They’ll scratch your tile or gouge your grout in no time. Go for plastic or wooden tools instead.
Emergency fixes for misuse
Mistakes happen, even to the best of us. But when they do, you’ve got to act fast to minimize damage.
If you’ve used a cleaner that’s too harsh, rinse immediately and thoroughly. The longer it sits, the more damage it can cause. If it’s an acidic cleaner, try to neutralize it with a base – like baking soda mixed with water.
If you’ve scrubbed too hard or used a metal tool, don’t panic. Rinse the area with clean water and take a break. Let your grout rest for a bit before trying again with a gentler touch.
But if the damage is bad – like deep scratches or discoloration – it might be time to call in the pros. Don’t hesitate to seek help when you need it.
Conclusion
One core idea matters: grout haze is preventable and the right timing plus a steady sponge technique protect your work from damage, keep the look clean, and make your install durable. Treat safety as a visible step, not an afterthought, and you’ll avoid costly fixes later.
Start by following a simple, real-world checklist in order: gather your tools and materials, mix and apply grout as directed, wait the recommended time before cleaning, begin cleaning with a damp sponge using controlled strokes, rinse the sponge often and wipe surfaces with consistent pressure, check for haze with a dry cloth, polish exposed surfaces after haze is removed, seal or finish if the project calls for it, then visually inspect and maintain the joints over time.
Two or three common mistakes to avoid are cleaning too soon or too late, using a dirty or overly soaked sponge, and using harsh cleaners or guessing on timing. Safety rules are simple: test cleaners on a small area first, wear gloves and eye protection when handling products, keep water and slurry from spreading to unintended surfaces, and never push through a stain or haze you can’t remove—back off and reassess rather than forcing a fix.
If you’re unsure after these steps, don’t push on alone: a pro can verify grout hardness, check for improper sealing, and prevent irreversible damage. With the right approach, you built a strong, clean grout line that lasts; stay confident, stay steady, and finish with pride.
FAQ
What is grout haze and why does it show up after grouting?
Grout haze is a thin film of grout residue left on tile surfaces. It makes the tiles look dull and scuffed. It’s normal if you don’t wipe soon enough, but it’s easier to remove before it cures.
What tools do I need to remove grout haze?
Keep a damp sponge, a stiff nylon scrub brush, and clean water ready. You’ll also want a microfiber cloth for final polishing. Don’t forget a bucket and a grout float for the main grouting step if you haven’t already.
When is the right time to start cleaning after grouting?
Begin cleaning as soon as the grout has set enough to resist smearing. Don’t wait until the grout is fully cured, or haze will be harder to remove. Check the manufacturer’s guidance on initial set and cure times, then proceed cautiously.
What sponge technique and products help prevent or remove grout haze?
Wipe with a damp, not soaking wet, sponge at a 45-degree angle to remove excess grout. Rinse the sponge frequently to avoid pushing haze around. After initial wipe-down, use a clean microfiber cloth to buff the tiles lightly; avoid abrasive scrubbing on delicate tiles. If haze remains, follow the product label for haze-remover or use a gentle, tile-safe cleaner compatible with your grout and tile type.