
Introduction
Sleeves are used to seal and protect pipe penetrations when pouring around pipes.
You’ll learn how to position sleeves, choose compatible materials, and apply practical steps to prevent leaks and achieve a neat finish.
The article walks through common scenarios, tips, and rules of thumb for installing sleeves in concrete pours.
Key takeaways
- Prevent leaks and accommodate movement by sleeves during concrete pours.
- Different sleeve materials affect seal quality and installation ease.
- Plan placement before pouring by marking offsets and embedment depth.
- Gather sleeves, compatible sealant, primer, caulk, and proper PPE.
- Align sleeves, seal joints, grout edges, and perform leak test.
- Choose complex penetrations or code requirements to hire proven professionals.
Table of Contents
- Introduction
- Key takeaways
- Why pipe sleeves matter in concrete pours
- Types of sleeves and pros/cons
- Planning sleeve placement before the pour
- Tools and materials checklist
- Step-by-step installation process
- Preventing leaks and achieving watertight penetrations
- DIY vs professional installation: when to hire help
- Costs and budgeting for sleeve installations
- Conclusion
- FAQ
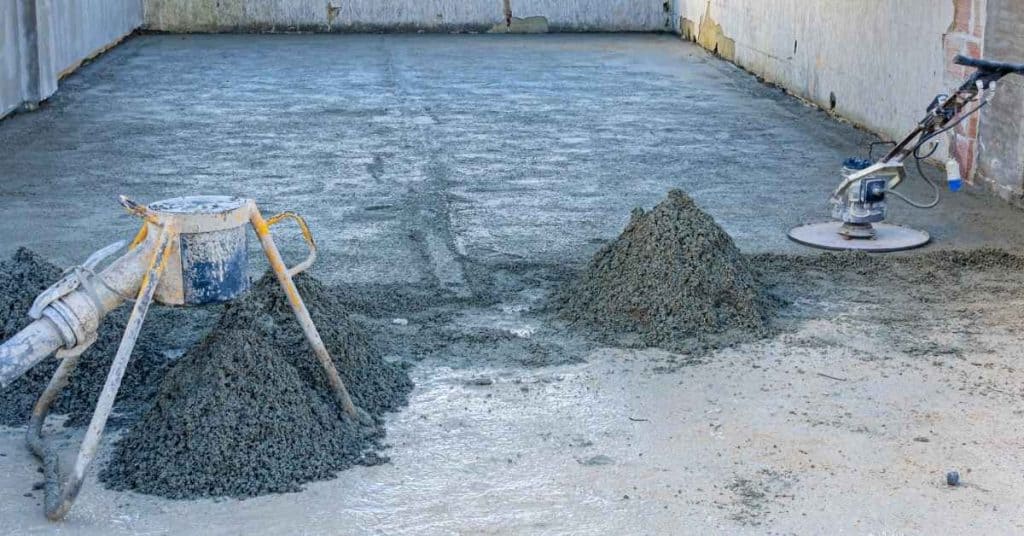
Why pipe sleeves matter in concrete pours
Pipe sleeves are your first line of protection for any pipe running through a concrete pour. They keep concrete from pressing into the pipe and allow controlled movement from heat, settlement, or seismic shifts. Proper sleeving helps avoid leaks and service interruptions down the road.
Different sleeve types and sizes affect fits around insulation or coatings, so check the label or data sheet for compatibility. Plan sleeve placement to align with your intended routes and avoid clashes with rebar or embeds. Ensure sleeves are plumb and oriented correctly before the pour begins, and note any end caps or grout barriers you’ll need for a clean boundary.
Structural integrity and load transfer
Pipe sleeves play a crucial role in maintaining the structural integrity of your concrete pour. Here’s why:
Sleeves preserve concrete continuity around pipes, preventing stress concentrations that could lead to cracking or weakening. They distribute loads evenly across the concrete, reducing pressure on the pipe itself.
Properly installed sleeves help transfer loads from the pipe to the surrounding concrete, ensuring the entire structure works together as a single unit.
Without sleeves, pipes can act like weak points in your concrete. They might crack under load or allow water intrusion, compromising your pour’s strength and longevity.
Service life and maintenance benefits
Sleeves aren’t just about protecting pipes during the pour. They also extend the service life of your concrete and make maintenance easier:
With sleeves, you can replace pipes without breaking up concrete. This means less disruption to your structure and lower long-term maintenance costs.
Sleeves allow for thermal expansion and contraction of pipes, reducing strain on both the pipe and the surrounding concrete. This helps prevent cracking and other damage over time.
Well-installed sleeves also make it easier to access and work on pipes in the future. They provide a clear path for tools and equipment, speeding up repairs and retrofits.
Types of sleeves and pros/cons
Common sleeve types include PVC, metal, corrugated, extruded, and temporary form sleeves. Each has different durability, chemical resistance, and ease of installation, so match them to the job at hand. Think about the pipe material and expected movement when choosing a sleeve.
For installation, consider how easy it is to place and align with the pipe, and how it will interact with formwork and the pour. Evaluate performance factors like thermal expansion and movement tolerance, and review any relevant codes or recommendations before you commit. Use a simple decision approach to link sleeve type to environment and permanence requirements, and avoid common formwork or sealing pitfalls.
PVC and Plastic Sleeves
PVC and other plastic sleeves are popular for their low cost and corrosion resistance. They’re ideal for non-load bearing applications like water lines or electrical conduits.
Pros: Inexpensive, easy to install, resistant to most chemicals.
Cons: Not suitable for high loads or extreme temperatures. Avoid in areas with shifting soils as they can crack under movement.
Use them where you need a budget-friendly, corrosion-resistant option that won’t bear heavy loads.
Metal and Steel Sleeves
Metal sleeves are preferred when high load-bearing capacity is needed. They’re also great for fire resistance and mechanical protection.
Pros: High strength, durable, fire-resistant. Can be treated to prevent corrosion.
Cons: More expensive than plastic options. Require proper treatment to prevent rusting.
Use metal sleeves for high-load applications like structural supports or in areas prone to fires. Ensure they’re properly treated to prevent corrosion from concrete chemicals.
Specialty Sleeves and Inserts
For specific needs, consider specialty sleeves like compression grommets for easy pipe insertion, removable cores for future modifications, or waterstop-integrated sleeves for watertight requirements.
Pros: Tailored to specific needs, offer unique benefits not found in standard sleeves.
Cons: Often more expensive and complex to install than standard options.
Use these when you need a specific feature like easy pipe insertion or watertight integrity. They’re worth the extra cost for their targeted benefits.
Planning sleeve placement before the pour
Identify sleeve locations in relation to reinforcement so they don’t conflict with rebar or joints. Mark exact spots on the forms or substrate and account for concrete cover and potential rim blocks. Coordination with the full set of plans helps prevent clashes later.
Confirm sleeve diameter, orientation, and length to fit planned conduits or pipes and to accommodate required clearances. Plan routes around existing services and future access points to avoid future headaches. Document tolerances for install depth and alignment and prepare for adjustments during form setup.
Coordination with structural drawings and trades
Before you start marking sleeve locations, grab the structural drawings. These show rebar spacing and tie-in points. Mark sleeves relative to these to avoid conflicts.
Next, schedule a meeting with your plumbing, electrical, and concrete crews. They need to know where you’re placing sleeves to prevent clashes with their work. Good communication keeps everyone on track.
Pro tip: Use different colored markers for each trade to keep things organized.
Sizing and clearance rules
First, figure out the sleeve size. It needs to accommodate your pipe or conduit plus any required clearances for expansion and settlement.
Now, consider insulation or conduit bundles. They add thickness, so you might need larger sleeves. Check with the trades involved to be sure.
Clearance is key: Sleeves should overlap pipes by at least 2 inches on each side. This ensures a strong bond and helps prevent cracking. Also, leave some annular space – that’s the gap between pipe and sleeve – for grout to flow through.
Tools and materials checklist
Core items include sleeves, spacers or chairs, sealants, tape for marking, supports, cutting tools, and PPE. Each item plays a role in keeping sleeves aligned and the concrete intact. Have a plan for where each goes on the job site.
Check sleeve locations, depths, and overlaps with rebar or plumbing, and note any code requirements for sleeves. Ensure tools match sleeve sizes and surfaces are prepared to receive sleeves. Plan for cleaning, lint removal, and keeping work areas dry and tidy during the install.
Installation hardware and accessories
Before you pour, make sure you’ve got the right materials to finish your sleeve openings.
- Grout: Check compatibility with sleeves and concrete mix. Wrong grout can cause cracking.
- Waterstops: Ensure they’re installed at every sleeve opening to prevent water intrusion.
- Firestopping materials: Confirm they meet code requirements for fire resistance.
- Anchors: Check if needed for securing sleeves or other elements. Incorrect anchors can lead to structural issues.
- Temporary plugs: Use to keep sleeves clean and debris-free before pouring.
Quick rule: Always check local codes and manufacturer recommendations for these materials.
Safety and PPE items
Protect yourself and your team with the right safety gear before starting any work.
- Gloves: Wear appropriate gloves for handling sleeves, sealants, and concrete.
- Eye protection: Use safety glasses or goggles to protect from debris and chemicals.
- Respirator (if cutting): Wear a respirator when cutting sleeves or other materials to avoid inhaling dust.
- Fall protection: Use harnesses, lanyards, and anchors in high-risk areas.
- Concrete-handling safety gear: Include boots, hard hats, and high-visibility vests for working around concrete pours.
Quick rule: Always follow OSHA guidelines for jobsite safety and PPE.

Step-by-step installation process
Start with a sizing and placement plan that confirms pipe diameters, wall thickness, and clearances. Mark locations on the form or substrate, accounting for concrete cover and future fixtures. Keep your plan visible for field checks.
Prepare sleeves by choosing material and pre-fitting stakes or spacers. Make sure sleeves are clean, dry, and true, and fix them temporarily to prevent movement. Use vertical and concentric alignment checks throughout the setup until the pour is complete.
Step-by-Step Installation Process
Follow this clear, numbered sequence to install sleeves safely and efficiently from preparation to final checks.
- Preparation: Gather tools, materials, and safety gear. Check drawings for sleeve locations and sizes.
- Measure and Mark: Confirm pipe diameters, wall thickness, and clearances. Mark exact locations on the form or substrate.
- Prepare Sleeves: Choose material, pre-fit stakes/spacers, ensure sleeves are clean, dry, and true. Temporarily fix with non-shrink grout or brackets.
- Align and Support: Verify verticality and concentricity using plumb lines or lasers. Set two-point supports to hold sleeves plumb while pouring.
- Pour Sequencing: Integrate sleeves into the concrete pour, guard against debris entry, use form-release methods, plan pour breaks if needed.
- Post-pour Checks: Remove temporary plugs, seal annular spaces, inspect for voids or infiltration after formwork removal.
- Cleanup and Final Inspections: Clean up work area, conduct leak-test and cure checks once concrete sets.
Pre-pour setup and securing sleeves
Position sleeves accurately before pouring. Attach them to formwork or rebar, ensuring verticality/alignment, and checking clearances.
Marking: Use a pencil and measuring tape to mark exact locations on the form or substrate. Account for concrete cover, rim blocks, and fixture alignment.
Securing: Fix sleeves temporarily with non-shrink grout or adjustable brackets. Ensure they’re secure but can be removed after pouring.
Checking clearances: Verify there’s enough space around the sleeve for concrete to flow and fill properly, without impeding pipe installation later on.
Pour-time checks and protection
Protect sleeve openings during pouring, monitor displacement, and maintain alignment while vibrating concrete.
Protecting openings: Use plugs or caps to prevent debris from entering the sleeve. Remove them once concrete reaches the desired level.
Monitoring displacement: Keep an eye on sleeves during pouring. If they shift, adjust supports as needed to maintain verticality and alignment with the pipe.
Maintaining alignment: Use a laser guide or plumb line to ensure sleeves remain concentric with the pipe. Vibrate concrete carefully around sleeves to avoid displacing them.
Post-pour finishing and inspections
After pouring, finish by removing temporary plugs, sealing annular spaces, and inspecting for any issues before formwork removal.
- Remove Plugs: Once concrete has set enough (usually 24-48 hours), remove temporary plugs carefully to avoid damaging the sleeve or surrounding concrete.
- Seal Annular Spaces: Apply approved concrete-compatible sealant or grout around sleeves to prevent water ingress and maintain a tight seal.
- Inspect for Voids/Infiltration: Check for any voids, cracks, or signs of infiltration around the sleeve. If present, repair immediately to prevent further damage.
- Conduct Leak Test: After sealing, perform a leak test by applying pressure to the pipe and checking for leaks around the sleeve.
- Check Cure Progress: Monitor concrete cure progress using a moisture meter or other appropriate method. Ensure it’s cured enough before proceeding with further work.
- Remove Formwork: Once concrete is fully cured, remove formwork carefully to avoid damaging sleeves or the surrounding structure.
Quick rule: Always inspect and test after pouring to ensure a successful sleeve installation and prevent costly repairs later on.
Preventing leaks and achieving watertight penetrations
Waterstop sleeve options vary, so choose one that suits pipe size and movement. Integrated waterstops or sleeve-within-sleeve designs can help, but verify compatibility with your system. Always verify the chosen method fits the specific penetration path.
Detail sealant and bonding strategies, including surface prep and curing times, and consider mechanical seals for irregular penetrations. Plan annular grout placement to avoid voids and ensure a tight, watertight boundary. Include inspection steps and mock-ups to catch misalignments early.
Choosing the right sealant and waterstop
Selecting the right sealant and waterstop is crucial for preventing leaks around pipe penetrations. Here’s what you need to consider:
Exposure Conditions: Choose a sealant that can handle the expected hydrostatic pressure. For non-hydrostatic conditions, silicone or polyurethane may suffice. For high hydrostatic pressure, consider epoxy-based sealants.
Substrate Compatibility: Ensure the chosen sealant is compatible with both the concrete and pipe materials to prevent bonding issues or chemical reactions that could compromise the seal.
Always follow the manufacturer’s guidelines for surface preparation, application, and curing times. Adhesion testing can be done using a simple tape pull test to ensure proper bonding.
Grouting and annular space techniques
Properly grouting the annulus around pipes is vital for preventing voids, ensuring load transfer, and maintaining pipe alignment. Here’s how to do it right:
Grout Mix: Use a flowable, non-shrink grout with a water-to-cement ratio suitable for your pipe size and movement conditions. Follow the manufacturer’s guidelines for mixing.
Placement Methods: For small pipes, you can use a grout bag or injection ports. For larger pipes, consider pressure grouting to avoid voids. Always ensure the grout reaches the top of the annulus to prevent water entrapment.
Curing Considerations: Keep the grouted area moist and covered for at least 7 days to allow proper curing. This helps maintain the grout’s strength and prevents cracking, which could compromise the seal.
DIY vs professional installation: when to hire help
Some small, non-structural pours can be tackled by DIY enthusiasts, but critical penetrations or systems with potential water intrusion usually need a pro. Use common-sense criteria to decide when to call in a contractor or engineer. Consider the structural impact and the quality of the finish you require.
Keep a checklist for hiring: permits, sleeve clearance, waterproofing strategy, proper forms and rebar if needed, curing and sealing plans, and final inspections. Ask about licenses, insurance, and experience with sleeve penetrations. Let experience guide the choice between a general contractor and a specialist concrete contractor.
Cost, time, and risk trade-offs
DIY pours can save you money, but they’re not always the cheapest option. Consider:
Time: DIY takes more time upfront to learn and execute. Pros are faster.
Risk: If something goes wrong, you’re liable. Pros carry insurance and warranties.
Cost: Small pours might be cheaper DIY. Large or complex jobs often need pros due to materials and labor costs.
What to expect from a professional scope of work
A pro’s job includes:
Layout: They’ll mark out and prep the area, ensuring sleeves are level and aligned.
Installation: Pros install sleeves, secure them, and ensure they’re waterproofed properly.
Documentation: They’ll provide as-built drawings and records for future reference and inspections.
Inspection coordination: Pros will coordinate with local inspectors to ensure your pour meets code.
Costs and budgeting for sleeve installations
Outline the full cost map: materials like sleeves and formwork, labor for prep and finishing, and any specialty seals or coatings. Don’t forget inspection fees and permit costs that can come up. Build a simple budget range based on your project scope.
Understand price drivers such as sleeve diameter, depth, material, accessibility, and any required changes to the concrete mix. Gather quotes by detailing sleeve size, quantity, overlaps with pipes, and curing or inspection needs. Include contingencies for surprises and plan a straightforward bid evaluation checklist focusing on scope, materials, and code compliance.
Material cost comparisons
Choosing the right sleeve material is crucial for a successful installation. It affects durability, maintenance, and overall project costs.
- PVC Sleeves: Inexpensive, lightweight, easy to install. Look for UV-stabilized sleeves for outdoor use. Avoid thin-walled sleeves that can crack under pressure.
- Metal Sleeves: Durable, long-lasting, but more expensive. Galvanized or stainless steel for corrosion resistance. Avoid uncoated metal in harsh environments to prevent rusting.
- Specialty Sleeves: High-performance, specialized materials like fiberglass or composite. Ideal for unique applications, but pricey. Ensure they meet your specific needs before investing.
- Waterstops: Essential add-ons for preventing water ingress. Look for compatible materials with sleeves and concrete. Avoid cheap alternatives that may not bond well.
- Grout: Fills annular space, provides support, and enhances watertightness. Choose a high-quality grout suitable for your sleeve material. Avoid low-grade grouts that can weaken the installation over time.
Labor and contingency factors
Labor costs vary greatly by region. In general, expect to pay more for complex installations or hard-to-reach areas.
Complexity Premiums: Expect higher labor costs for deep sleeves, tight spaces, or when concrete mix changes are needed.
Contingencies are crucial in any budget. I recommend including the following percentages:
10-15%: For unexpected delays, additional sealing, or corrosion protection needs.
5-10%: For waterproofing and inspection rechecks to ensure a watertight penetration.
Conclusion
Getting sleeve work right is about safety, durability, and a clean finish. Do the planning, verify every sleeve stays in place, and seal penetrations so concrete can pour without creating leaks or damage later on.
First, confirm you’ve picked the right sleeve type and size for each opening, mark each location accurately, and verify there is clear room around every sleeve for insertion and inspection. Check plumb and level references, dry-fit the pieces, and then seal or waterproof as the plan calls for. Keep sleeves protected during the pour, and test the assembly with a quick mock pour or water test in a small area to catch leaks before the real pour happens. Budget enough time for inspection and a clean finish after the concrete sets.
Avoid these common mistakes: skipping the planning step and guessing sleeve placement, using the wrong size or type, and failing to seal or waterproof penetrations. Do not move sleeves once the pour starts, and don’t neglect proper support or backfill. Follow basic safety rules: wear eye protection and gloves, keep the work area clear, and respect concrete as a heavy, hard-setting material. If you’re unsure about alignment, sealing details, or any high-risk penetration, pause and double-check or call for help.
When the project involves complex penetrations, multiple sleeves, or a critical watertight requirement, it makes sense to hire a pro. If the layout is unclear, you’re unsure about how to achieve watertight joints, or the pour is large and visible on finishes, step back and get expert help. Stay focused, work methodically, and you’ll finish strong with a solid, leak-free result.
FAQ
What is a pipe sleeve and why do I need it?
A pipe sleeve is a protected hole or tube that lets a pipe pass through a concrete wall or floor. It keeps the pipe from rubbing on concrete and helps seal against leaks. It also speeds up future replacements without breaking the whole wall.
Do I need to pour around the sleeve, or just install it?
You need to pour around the sleeve if you want a solid, leak-free wall. Leave a proper gap and use grout or concrete around the sleeve as specified by the plan. Skipping this step leads to cracks and leaks later.
How should I prepare the trench or form before pouring around the sleeve?
Set the sleeve plumb and level, with the correct depth and clearance. Tie in rebar or support as required and secure the form so the concrete can settle evenly. Clean the area and keep debris out of the sleeve openings.
What are common mistakes to avoid here?
Avoid misplacing the sleeve, which causes alignment problems. Don’t pour without sealing the sleeve ends or without proper reinforcement. Don’t leave gaps or voids around the sleeve that will crack under pressure.