
Introduction
Epoxy grout is a two-part, resin-based grout that resists stains and water better than cement grout. Cement grout is a lime- or cement-based mix that can be easier to work with but may need sealing. This piece will help you decide when epoxy is worth the extra effort.
Epoxy grout tends to be more waterproof and durable, which matters in showers and high-use floors. For DIY, consider the area, tile type, and how much time you’re willing to spend on mixing and cleanup; always check product labels and manufacturer instructions for guidance. If you’re unsure, weigh the extra steps and potential mess against the benefits and check local rules and recommendations from suppliers.
Key takeaways
- Cement grout is cement-and-sand mixture; porous, easier to chip, easier resealing.
- Epoxy grout is resin-based, non-porous, and highly water resistant.
- Epoxy offers superior stain resistance and durability in wet areas.
- Cement grout needs sealing and frequent cleaning to prevent staining.
- Follow manufacturer PPE and ventilation guidelines; epoxy fumes can irritate.
- For pools, verify water exposure and warranty eligibility before choosing.
Table of Contents
- Introduction
- Key takeaways
- Quick Overview and When to Choose Each
- What Is Cement Grout?
- What Is Epoxy Grout?
- Direct Performance Comparison: Durability, Maintenance, and Appearance
- Cost Analysis: Upfront Vs Long-Term Costs
- Safety, Tools, and Installation Best Practices
- Common Mistakes and How to Avoid Them
- Decision Checklist & Planning Guide for Pool Projects
- Conclusion
- FAQ
Quick Overview and When to Choose Each
Epoxy grout and cement grout are the two main options you’ll see for tiled areas, and they each have distinct strengths. In general, epoxy grout offers superior durability, chemical resistance, and stain resistance, especially in wet or high-use environments. Cement grout remains a go-to for simpler installations where lower cost and easier repair are priorities.
This section targets pool owners, DIY remodelers, and bathroom or kitchen renovators working with tile, backsplashes, showers, or pool surrounds. Consider how often you clean, what chemicals you use, and whether substrate movement or sealing needs matter to your project. For pools and other wet areas, epoxy often wins the longevity game, while cement grout suits straightforward, budget-conscious installs. Use this roadmap to guide definitions, pros/cons, maintenance, installation notes, and cost expectations, with internal links to tutorials and product guidance as you plan.
Who this comparison is for
This article’s aimed at DIY homeowners, pool contractors, and tile installers. Why? Because you’re the ones making decisions on grout types for your projects.
DIY Homeowners: You want a durable, low-maintenance solution for your bathroom, kitchen, or pool tiling project.
Pool Contractors & Tile Installers: You need to recommend the right grout for your clients’ wet environments, ensuring longevity and minimal upkeep.
Quick takeaway table (text summary)
Here’s a quick rundown of epoxy vs cement grout to help you decide:
Epoxy Grout:
- Pros: High durability, excellent chemical resistance, low maintenance.
- Cons: More expensive, requires proper ventilation during installation.
Cement Grout:
- Pros: Affordable, easy to mix and apply, suitable for most dry areas.
- Cons: Less durable, poor chemical resistance, high maintenance in wet environments.

What Is Cement Grout?
Cement grout is a cement-based mix used to fill tile joints and bind tiles together. It differs from epoxy grout in composition and performance, making it a staple for many tiling jobs. Core components include cement binder, sand aggregate, water, and optional lime or pozzolanic additives in some mixes.
Standard compositions vary, but common ratios and water content affect strength, workability, and shrinkage. Admixtures like plasticizers or water reducers are typical, varying indoor versus wet-area formulations. For pool tiling, polymer-modified and anti-shrink variants are common, while indoor tiling may use hydrated lime or non-sanded versus sanded options depending on joint width and moisture exposure. Always verify surface prep, curing needs, and maintenance expectations with the product label or manufacturer data sheet to choose correctly.
Typical properties and standards
Cement grout’s strength is what holds your tiles in place. It typically ranges from 1500 to 2500 psi, so check the product label for specifics.
Grout isn’t waterproof, it’s permeable. That means it can absorb moisture, which is why you should use a sealer after installation. Check the manufacturer’s instructions to see if their grout needs sealing.
Sand and polymers are common additives in grout. Sand makes up about half of the mix by volume, so check your sand-to-grout ratio before mixing. Polymers can improve flexibility and durability, but they might not be necessary for small jobs. Always follow the product’s instructions when using additives.
Typical use cases and limitations
Cement grout’s strength lies in dry areas. It performs best where you’ve got large joints to fill, like between tiles or masonry blocks.
Dry areas are its sweet spot – it sets well and stays strong. But remember, grout ain’t no miracle worker. If your base isn’t solid, check base compaction, ’cause grout won’t fix a bad foundation.
Now, where water’s concerned, grout starts to struggle. It’s not the best in wet environments. Sure, you can use it in showers or pools, but you’ll need to add special additives to make it water-resistant. And even then, it’s still got its limits.
So, if you’re working on a job where water’s gonna be a regular visitor, consider other options like epoxy or urethane grouts. They’re pricier, but they’ll give you better protection against moisture.
What Is Epoxy Grout?
Epoxy grout is a two-component system typically used where high traffic, staining, and moisture are concerns. It differs structurally from cement grout by forming a rigid, chemical-resistant matrix that resists dyes and many cleaners. You’ll find standard two-component epoxy, 100% solids variants, and epoxy-urethane hybrids on the market.
In practice, epoxy grout offers excellent stain and water resistance, with sealing often not required. Types vary in finish and color options, and some formulations are more UV-stable or easier to clean than others. Installation realities include precise mixing ratios, shorter pot life, temperature sensitivity, and specific curing times; maintenance may still call for routine cleaning and occasional resealing if applicable per product instructions.
Waterproofing and chemical resistance
Epoxy grout is effectively waterproof due to its chemical structure. It’s a two-component system that reacts to form a rigid, chemical-resistant matrix.
This makes it ideal for areas exposed to constant moisture or chemicals. Think pools, spas, or shower floors.
Water can’t seep in and cause damage. And chemicals, like chlorine or cleaning agents, won’t break it down.
But remember, while epoxy grout is resistant to most chemicals, it’s not immune to all. Always check compatibility before use.
Handling and cure behavior
Epoxy grout has a specific workability window. It comes as two parts – resin and hardener – that you mix together.
The pot life, or working time, varies by product but is typically around 20-45 minutes. After that, the grout starts to thicken and becomes unworkable.
Cure time also depends on the product and conditions. Generally, it takes 24-72 hours for epoxy grout to fully cure at normal room temperature (70°F/21°C).
Temperature and humidity affect installation performance. Too cold or too hot can slow down curing. Always follow the manufacturer’s guidelines for optimal results.
Direct Performance Comparison: Durability, Maintenance, and Appearance
Durability-wise, epoxy typically handles harsher chemical exposure and wear in wet areas better than cement grout, reducing the chance of surface damage. Cement grout can be quite durable with proper sealing and maintenance, but it generally shows more vulnerability to staining and chemical attack over time. Your environment largely drives the choice, especially in pools and showers.
In terms of maintenance, epoxy grout usually simplifies cleaning and may not require resealing, depending on the product. Cement grout often benefits from periodic sealing and more frequent cleaning to maintain color and texture. Appearance-wise, epoxy tends to retain color and resist efflorescence better, while cement grout can show color changes if not properly protected. Consider these tradeoffs across your use case, installation constraints, and long-term upkeep when deciding.
Longevity and lifecycle expectations
Epoxy grout typically outlasts cement grout, with a realistic service life of 10-25 years compared to 5-10 for cement. Epoxy’s superior bond strength and resistance to chemicals, abrasion, and freeze-thaw cycles contribute to its longevity.
Cement grout can fail due to cracking from shrinkage or stress, staining from spills, or bond loss caused by moisture intrusion. Epoxy is less prone to these issues but can still crack if not installed properly or if the substrate moves.
Key takeaway: While both grouts have varying lifespans based on conditions, epoxy’s durability makes it a better choice for high-traffic, harsh environments.
Maintenance and cleaning requirements
Cement grout requires regular sealing to maintain stain resistance. Re-sealing is needed every 1-2 years, adding to maintenance costs over time. Cleaning involves mild detergents and a soft brush, but harsh chemicals can damage it.
Epoxy grout needs less frequent cleaning due to its stain resistance. Common pool chemicals won’t harm it, making it ideal for wet areas. Algae and mildew can grow on both types if not properly maintained, but epoxy’s smooth surface makes removal easier.
Key takeaway: Epoxy grout simplifies maintenance with less frequent cleaning and no re-sealing needed, saving time and money in the long run.
Cost Analysis: Upfront Vs Long-Term Costs
Upfront costs hinge on material price per unit and the scope of work. Cement grout generally has lower per-unit cost and simpler mixing, while epoxy grout adds premium for its chemistry and performance. Don’t overlook tools, sealers (if applicable), and potential waste; these factors influence total material spend.
Labor and time impact the bottom line too. Mixing, surface prep, and joint filling for epoxy can be more demanding, especially with shorter pot lives and stricter application conditions. Long-term maintenance costs vary: cement grout may require more frequent cleaning or sealing, while epoxy’s durability can lower ongoing maintenance. Verify coverage, waste allowances, and compatibility with existing tile and substrate with suppliers to refine the total cost picture.
Installation labor and time differences
Epoxy grout installation is typically more time-consuming than cement grout due to its longer mixing and curing times. Here’s why:
Mixing Ratio and Pot Life: Epoxy requires a precise 1:1 or 2:1 mix ratio, while cement grout can be mixed by eye. Epoxy also has a shorter pot life (30-60 minutes) compared to cement’s hours-long workability.
Surface Preparation: Epoxy demands a clean, dry surface with no contaminants, unlike cement which can tolerate some moisture. This extra prep time adds to the overall installation duration.
Skilled labor is often required for epoxy installations due to its sensitive nature and strict mixing guidelines. This increases labor costs compared to cement grout, which can be installed by most DIY enthusiasts.
Long-term value and lifecycle costing
To estimate the total cost of ownership over 5-15 years, consider these factors:
Maintenance Frequency: Epoxy grout’s superior stain resistance and durability reduce maintenance needs. While cement grout may need annual cleaning and sealing, epoxy might only require periodic washing.
Lifespan and Replacement Costs: Epoxy grout lasts 2-3 times longer than cement grout before needing replacement. Although the upfront cost is higher, potential savings from reduced maintenance and fewer regrouts can offset this difference over time.
Warranty Terms: Many epoxy products come with extended warranties (up to 25 years), providing peace of mind and further reducing lifecycle costs. Cement grout typically has shorter warranty periods.
Safety, Tools, and Installation Best Practices
Safety comes first: epoxy components carry chemical exposure risks, and cement grout generates respirable dust. Ensure good ventilation, use appropriate PPE (gloves, goggles, respirator as needed), and have spill procedures in place. Establish a clean workflow to minimize cross-contamination between epoxy and cement work.
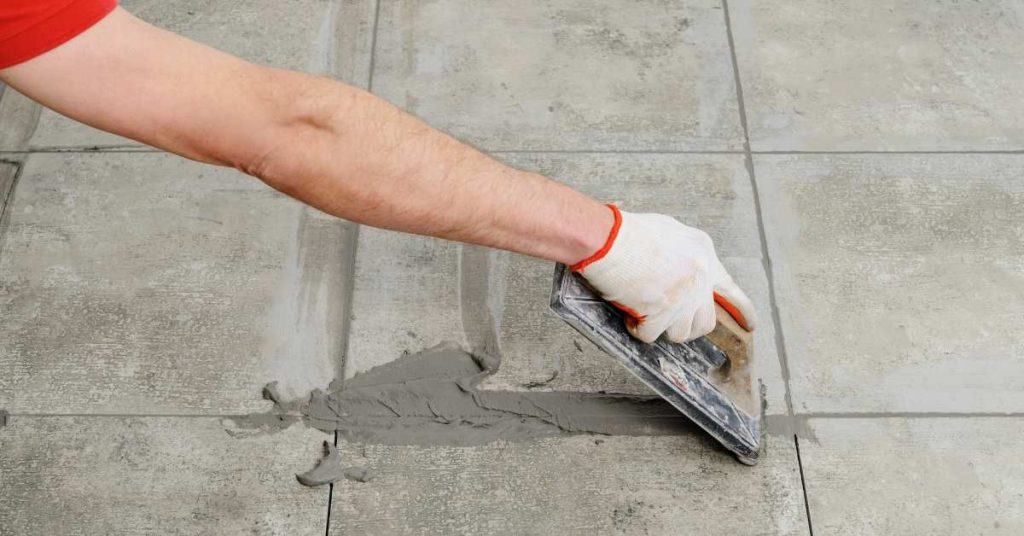
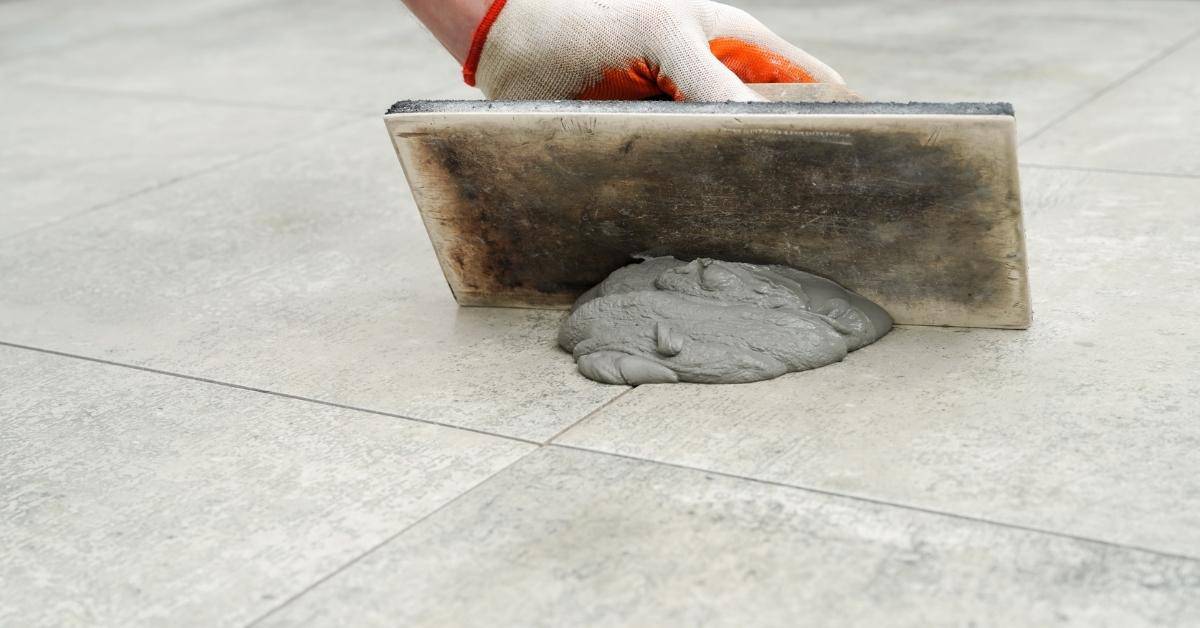
From tools to techniques, prepare your workspace with surface prep tools, mixing containers, trowels, grout floats, sealers, and the correct hardener/part A and resin/part B. Practical tips include strict adherence to mixing ratios, managing pot life, and avoiding temperature extremes. Plan a clean, staged process and perform a final inspection after curing to confirm a solid install.
Personal protective equipment and ventilation
Before you start mixing and applying epoxy, gear up right. It’s your body on the line here, so don’t be a hero.
PPE must-haves:
- Respirator – Epoxy fumes are nasty. Use a respirator rated for organic vapors (like P100). Check the manufacturer’s instructions to ensure it’s suitable for epoxy.
- Gloves – Get some heavy-duty, chemical-resistant gloves. Your hands will thank you later.
- Eye protection – Safety glasses or goggles are a must. If you’re working overhead, go with goggles to keep those nasty droplets out of your eyes.
Ventilation:
- Open windows and doors if possible. Fresh air is your friend here.
- Use fans – If you’ve got access to exhaust fans, set them up to blow the fumes out of the work area. Just make sure they’re not blowing dust or debris around while you’re working.
Tools, materials checklist and prep steps
Before you start mixing or applying concrete, use this checklist to ensure you have everything you need and that your surface is well-prepared. This will help prevent common mistakes and save you time and money.
- Concrete Mixer: Check it’s in good working condition. Test the motor by running it empty for a minute. What goes wrong if you skip this: Incorrect mixing can lead to weak, inconsistent concrete.
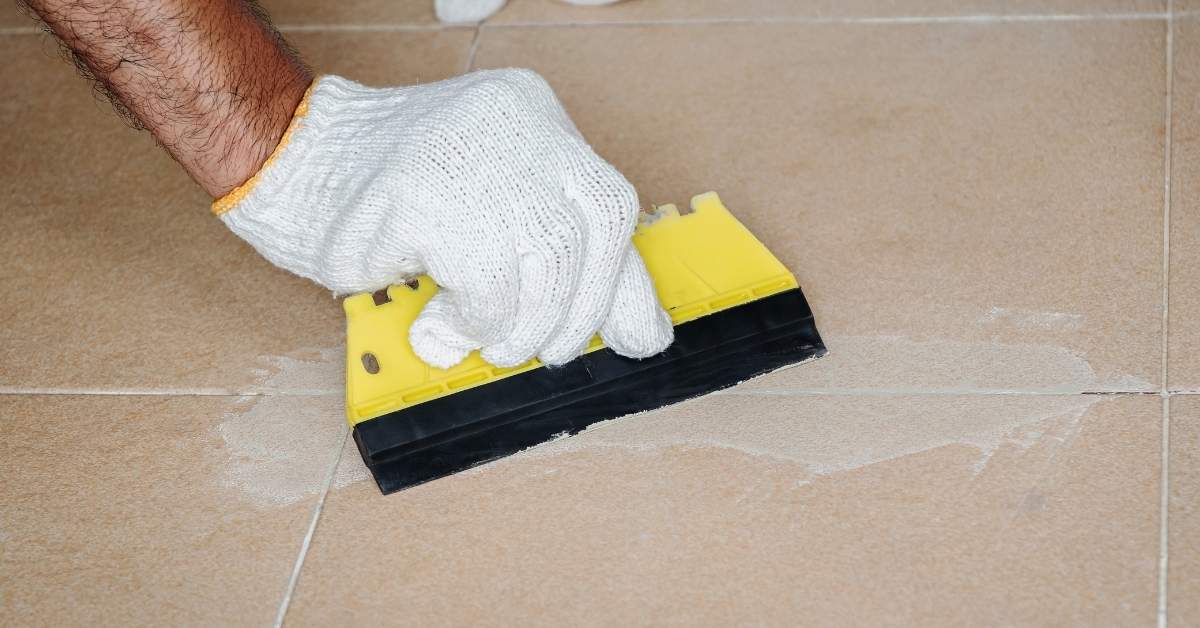
- Grout Float: Ensure it’s clean and undamaged. A damaged float can leave marks on your finished surface. Check manufacturer instructions for size recommendations based on your slab thickness.
- Concrete Mix: Verify you have the correct type (e.g., ready-mix, fast-setting) and amount needed. Recheck calculations to avoid running short or wasting material.
- Water: Check water quality. Hard water can cause concrete to set improperly. Use a pH test kit if unsure. Soft water is best for mixing.
- Admixtures: If using, ensure they’re compatible with your mix and follow manufacturer guidelines for addition and mixing times.
- Concrete Cleaner: Ensure it’s suitable for your surface type (e.g., concrete, brick). Check the label to confirm it won’t damage or stain your surface. What goes wrong if you skip this: Inadequate cleaning can lead to poor adhesion and weakened bond.
- Sealer: Choose one appropriate for your climate and surface type. Check manufacturer instructions for application methods and safety precautions.
- Surface Preparation Tools: Verify you have a broom, shovel, trowel, and any other tools needed for your specific project. What goes wrong if you skip this: Inadequate preparation can result in weak, uneven surfaces prone to cracking or delamination.
Quick rule: Always check local rules and manufacturer instructions before starting any task. This ensures you’re using the right materials and following safe practices for your specific project.
Common Mistakes and How to Avoid Them
Substrate prep is critical: skip dust removal or oil and you’ll trap contaminants under grout. Thorough cleaning, priming if required, and verifying porosity compatibility pay off with fewer callbacks.
Mixing and pot-life mismanagement are frequent culprits: avoid large batches, follow manufacturer times, and check for uniform color and consistency. Joint width errors for epoxy and cement grout can lead to cracking or aesthetic issues, so use spacers and confirm joint guidance from a tested grout guide. Always respect curing, sealing timing, and proper maintenance steps to prevent long-term problems.
Problems specific to epoxy grout
Epoxy grouts have a short pot life, usually around 30-60 minutes. Rushing mixing and application can lead to poor results. Always follow the manufacturer’s recommended time for each batch. Finger-printing is another common issue due to epoxy’s sticky nature. To avoid this, wear gloves and keep your hands clean during grouting.
Adhesion failure can occur if the substrate isn’t properly prepared. Epoxy requires a clean, dry, and porous surface to bond effectively. If you notice any signs of poor adhesion, stop work immediately, identify the cause, and address it before proceeding.
Epoxy grouts are sensitive to moisture during curing. Avoid exposing fresh epoxy grout to water or high humidity for at least 72 hours after application. If you must expose it to moisture, use a moisture barrier to protect the grout.
Problems specific to cement grout
Cement grouts can shrink as they cure, leading to cracks and gaps. To minimize this, ensure proper water content during mixing and allow the grout to cure slowly in a controlled environment. If shrinkage occurs, you may need to re-grout the affected area.
Efflorescence is a common problem with cement grouts, where white salt deposits appear on the surface over time. This happens when water evaporates from the grout and leaves behind salts. To prevent this, seal the grout after it has fully cured, and ensure proper drainage to keep water away from the grout.
Color inconsistency can occur due to improper mixing or using old cement. Always mix small batches at a time and discard any leftover cement to maintain consistency in color. If you notice color inconsistencies, remove the affected grout and re-grout with fresh, properly mixed material.
Decision Checklist & Planning Guide for Pool Projects
Start with project scope: pool type, size, and nearby features to determine material compatibility and labor needs. Consider how the tilework will interact with waterline fittings and decking during planning.
Next, assess maintenance capacity and life-cycle costs: weigh epoxy’s chemical resistance against cement grout’s simpler repair path, factoring in long-term cleaning and potential regrouting. Establish aesthetic and performance criteria, including color permanence, grout translucency with pool finishes, and slip resistance. Use these criteria to guide a practical plan, whether you lean toward epoxy for durability or cement grout for simplicity.
Questions to ask your contractor or supplier
Before making a decision, get clarity on these points. Ask these questions when discussing your project with contractors or suppliers.
- What are the product specifications? Ensure the grout meets your pool’s requirements in terms of chemical resistance and durability.
- What warranties come with the product? Check for coverage on defects, labor, and performance.
- What is the expected service life? Understand how long each option should last under your pool’s conditions.
- What maintenance is required? Inquire about cleaning, sealing, and other upkeep needed for both options.
- Are there any special installation requirements? Ask about surface preparation, mixing, application techniques, and curing times.
- How do they handle color matching? Ensure the grout’s color will match your pool’s finish and tiles.
- What are the potential issues with each option? Learn about common problems to anticipate and address them proactively.
- Can they provide references or case studies? Ask for examples of similar projects they’ve worked on to assess their expertise.
Quick rule: The more you know upfront, the smoother your project will go.
Visual checkpoints and acceptance criteria
Inspect the completed work using this checklist to ensure it meets your expectations and quality standards.
- Joint finish: Check for smooth, even grout lines without voids or gaps. Inconsistencies may lead to water penetration and damage.
- Bonding: Ensure the grout adheres well to the tiles and surrounding surfaces. Poor bonding can result in delamination and cracking.
- Color uniformity: Verify that the grout color is consistent throughout. Inconsistencies may be noticeable over time, especially with lighter colors.
- Cleanup: Inspect for any residual grout haze or smears on tiles and surrounding surfaces. Leftover residue can trap dirt and make cleaning difficult.
- Grout lines: Ensure grout lines are of uniform width and depth. Irregularities may affect the pool’s appearance and performance.
- Edges and corners: Check for proper grouting in edges, corners, and hard-to-reach areas. Inadequate grouting can lead to water damage and mold growth.
- Curing: Confirm that the grout has cured properly. Under-cured grout may be soft or crumbly, leading to premature failure.
Quick rule: Thorough inspection helps prevent disputes and ensures your pool’s longevity.
Conclusion
Choosing the right grout matters for safety, durability, and how your pool looks years from now. If you’re up against chemical exposure and constant wet conditions, epoxy grout can outperform cement grout, but it’s not always the easiest path. Decide based on risk, effort, and long-term maintenance, and you’ll avoid costly fixes later.
First, assess the area and plan the workflow: check substrate condition, determine porosity, decide between epoxy or cement, gather the right tools, test a small patch if you’re unsure, and map out mixing, curing times, and ventilation. Move in a natural order: prep, mix, apply, clean, cure, and seal or finish as appropriate. Keep the work area dry and well-ventilated, and protect nearby surfaces from splashes and spills.
Common mistakes to avoid are clear: don’t rush the mix or skip surface prep, never mix products outside their stated ratios or cure times, and avoid sloppy cleanup or incomplete sealing. Follow basic safety rules: wear eye protection and gloves, keep spills contained, ventilate well, and don’t mix or store chemicals in closed spaces or near heat. If you’re unsure, test in a small area first and don’t force a result that could trap moisture or cause cracking.
If the project is large, complex, or involves structural issues, or you’re unsure about moisture barriers and pool chemistry, call a professional. When you can handle the prep, mixing, and sealing confidently, you’ll finish with a durable, good-looking surface. Stay focused, plan carefully, and you’ll get solid, lasting results.
FAQ
What exactly is cement grout, and how does it differ from epoxy grout?
Cement grout is a mix of cement, water, and sometimes sand. It cures hard but is porous, which can lead to staining and moisture absorption if not sealed properly.
Is epoxy grout truly waterproof, and what does that mean for my project?
Epoxy grout forms a dense, non-porous bond when set. It resists water intrusion better than cement grout, but proper mixing and sealing of joints, plus tight installation, are still essential for long-term performance.
How should I weigh durability and maintenance when choosing grout?
Epoxy grout lasts longer and resists stains and chemical damage better than cement grout. Cement grout is easier to work with and repair, but it requires sealing and more frequent maintenance to keep it looking good.
What are the cost considerations I should factor in for each type?
Epoxy grout generally costs more upfront and takes a bit more labor, but it can save time on cleaning and maintenance. Cement grout is cheaper to buy and install, but cleaning and resealing can add ongoing costs over time.