
Introduction
Removing composition tiles means safely lifting old flooring tiles and their adhesive without damaging the subfloor. This article walks you through a practical, hands-on plan with steps and safety cutoffs you can use on a DIY job. Stick to basic tools, check the tile condition, and work in small sections to avoid surprises.
Start by reading the tile and adhesive labels for any safety notes before you begin. Follow safe cutoffs and wear eye protection, gloves, and a dust mask; stop if you encounter hazardous materials and consult local guidelines. This intro sets up practical steps you can follow with common tools and careful testing of the floor.
Key takeaways
- Wear PPE and seal off the work area to contain dust and debris.
- Test for asbestos with a certified lab and follow local removal guidelines.
- Label and safely store removed tiles and waste for compliant disposal.
- Keep a clearly defined plan for subfloor inspection before any repair.
- Use proper cutting techniques to minimize dust when removing glued tiles.
- Inspect and repair subfloor joints and crown issues prior to new flooring.
Table of Contents
- Introduction
- Key takeaways
- Overview: What Composition Tiles Are and Why Removal Matters
- Legal and Safety Prep Before You Start
- Tools and Materials Checklist
- Step-by-Step Removal Process (Preparation and Execution)
- Special Cases: Asbestos-Era and Glued-Down Tiles
- Inspecting and Repairing the Subfloor After Removal
- Cleanup, Disposal, and Post-Removal Safety Checks
- Preventive Tips and Maintenance After New Flooring Is Installed
- Conclusion
- FAQ
Overview: What Composition Tiles Are and Why Removal Matters
Composition tiles cover a range of old flooring styles made from mixtures like vinyl, asbestos-containing materials, and other binders. They’re common in mid-century spaces and often show up as sheet goods cut into squares or as raised tiles. Age, wear, and installation practices influence how safely they come up.
Removing them correctly avoids releasing dust and fibers that could harm health and helps protect the subfloor from damage. Decide between a DIY approach or hiring a pro based on tile type, condition, and local rules; when in doubt, verify product labels or manufacturer instructions before starting.
Composition Tile Types and Identification
Composition tiles come in various materials, but the most common are asphalt, vinyl-composition, and older composite tiles.
Asphalt tiles have a rough, sandpaper-like texture. They’re usually black or dark gray, with visible aggregate particles.
Vinyl-composition tiles are smooth and often resemble natural stone. They can be various colors but typically have a uniform appearance.
Older composite tiles may contain asbestos. If your home was built before 1980, test for asbestos before removal to ensure safety.
Health and Structural Risks of Improper Removal
Improperly removing composition tiles can pose significant health and structural risks.
Dust from the tiles and underlying materials can cause respiratory irritation. In older homes, tiles may contain asbestos, leading to serious health issues like mesothelioma if inhaled.
Ripping off tiles without proper precautions can damage the subfloor, leading to costly repairs. It can also disturb any existing mold growth, spreading it further and exacerbating the problem.
Always wear appropriate safety gear, including a respirator, gloves, and eye protection. Wet down the area before removal to minimize dust and use gentle scraping techniques to avoid subfloor damage.
Legal and Safety Prep Before You Start
Check local regulations for permits, disposal rules, and any required asbestos or hazardous-material abatement. Some jurisdictions require licensed professionals for certain tiles or moisture situations. Review whether your project triggers any mandatory inspections or air-quality tests.
Set safety cutoffs to protect health and compliance: if you encounter unknown fibers, strong odors, or excessive dust, stop work and reassess. Always verify the tile’s labeling, data sheets, and manufacturer instructions before continuing.
When to stop and call a professional
Safety’s your top priority. Know when you’re in over your head.
Stop immediately if:
– You find asbestos. A positive test means it’s time to call a licensed abatement pro.
– Water damage is extensive. Structural integrity could be compromised.
– You suspect hidden contamination or unknown materials.
– You’re unsure about structural stability.
Permits, notifications, and disposal rules
Before you start, check what’s needed in your area.
Typical needs:
– Permits: Check with your local building department. You might need a permit for tile removal.
– Notifications: If asbestos is present, notify the EPA and your state’s asbestos NESHAP authority.
– Disposal rules: Hazardous waste like asbestos needs special handling. Contact your local waste management department.
Tools and Materials Checklist
Assemble a practical, DIY-friendly kit: pry bars, putty knives, a wide scraper, a hammer, utility knife, and a oscillating tool for adhesive. Include a respirator or dust mask, safety glasses, gloves, and protective clothing. Have plastic sheeting, tape, and heavy-duty trash bags ready for containment.
Also gather a household broom, a HEPA vacuum, and adhesive removers or solvent alternatives as recommended. Note what to rent (large tools or specialty equipment) versus buy, and always follow product labels and local guidelines for disposal and ventilation.
Personal protective equipment and containment supplies
Before you start removing composition tiles, ensure you have the right gear to protect yourself and contain dust.
- Respirator: Use a half-face or full-face respirator with P100 filters for proper protection against tile dust.
- Protective clothing: Wear long sleeves, long pants, and work boots to protect your skin from debris.
- Gloves: Use heavy-duty gloves to protect your hands from sharp edges and chemicals.
- Eye protection: Wear safety glasses or goggles to shield your eyes from dust and debris.
- Hearing protection: Use earplugs or earmuffs if you’re using power tools.
- Head protection: Wear a hard hat to protect against falling debris.
- Plastic sheeting: Lay down plastic sheets in the work area to contain dust and make cleanup easier.
- Duct tape: Seal any gaps between the plastic sheeting and walls or doors to prevent dust from spreading.
Quick rule: Always prioritize safety gear. Don’t start work without it.
Tools for tile removal and subfloor work
Having the right tools makes tile removal easier and safer. Here’s what you’ll need.
- Scrapers: Use 4-in-1 or 5-in-1 scrapers to remove old adhesive and prepare the subfloor.
- Floor stripper: Apply a floor stripper solution to soften old adhesive before scraping. Follow manufacturer’s instructions for safe use.
- Pry bar: Use a pry bar to lift tiles and break their bond with the subfloor.
- Oscillating tool: An oscillating tool with a scraper blade can help remove stubborn adhesive and clean up edges.
- Heat gun or solvent: For tough adhesives, use a heat gun to soften them or apply a solvent like denatured alcohol. Always test on a small area first.
- Crowbar: A crowbar can help pry up large tiles or sections of tile.
- Safety glasses: Wear safety glasses when using power tools to protect your eyes from debris.
- Work gloves: Use work gloves to protect your hands from sharp edges and hot surfaces.
Quick rule: Always follow manufacturer’s instructions for tool use and maintenance. Safety first!
Step-by-Step Removal Process (Preparation and Execution)
Begin with room-by-room prep: seal off the area with plastic, turn off HVAC to minimize dust, and post signs if needed. Cover nearby surfaces and create a contained workspace that’s easy to clean.
Proceed to lift tiles and pry up sections, then remove adhesive in manageable areas. After each stage, do a quick cleanup, check for damage, and move room by room at a steady pace, noting any time-sensitive steps on your own schedule.
Step-by-Step Cleaning Process
The following steps guide you through the removal process, from preparation to final cleanup.
- Inspect tiles for any weak points or cracks. Start removing from these areas to minimize damage.
- Score the grout lines using a utility knife to break the seal between tiles and make lifting easier.
- Use a flat pry bar to lift tiles, starting at one corner and working your way across.
- Once lifted, use a hammer to tap the tile gently and break it into smaller pieces for easy disposal.
- Remove any remaining adhesive or mastic using appropriate techniques (see below). Check subfloor for damage; if severe, consult a professional.
Setting up containment and work zones
Containment is crucial to prevent dust migration. Seal all vents with plastic sheeting and turn off HVAC systems.
Create a negative-pressure zone using a HEPA vacuum or fans blowing air out of the room. Set up safe entry/exit paths with drop cloths or runners.
Establish a designated work area, keeping tools and materials organized for efficient removal.
Removing tiles without damaging the subfloor
Proper technique prevents subfloor damage. Start at a corner or edge, scoring grout lines first.
Use a flat pry bar, wedging it under tiles and applying even pressure to lift them. Angle the bar towards you for better control.
If tiles are stubborn, test adhesive strength by lifting one tile slightly; if it’s hard to lift, use heat or solvents (see below) before proceeding.
Adhesive and mastic removal techniques
Remove adhesive using mechanical methods, heat application, or approved solvents. Choose based on the type of adhesive present.
Mechanical removal involves scraping with a floor scraper or chisel. Use a hammer to tap the tool gently for better control.
For heat application, use a heat gun set at medium temperature, moving it back and forth over the adhesive until soft. Scrape off immediately.
Solvents like thinset remover can be used, following manufacturer’s instructions. Avoid subfloor damage by not leaving solvents on too long.

Special Cases: Asbestos-Era and Glued-Down Tiles
Older tiles may contain asbestos or other hazardous materials. Do not disturb suspected asbestos-containing tile or adhesive without testing and proper containment. When in doubt, arrange professional testing and follow local abatement requirements.
Fully glued-down installations require careful strategy: you may need specialty removal methods, chemical softeners, or mechanical detachment while maintaining containment. Intensify containment if you encounter unexpected fibers or dust, and consult manufacturer guidance or code authorities as needed.
How to handle suspected asbestos-containing tiles
If your home was built before the 1980s, there’s a chance that composition tiles may contain asbestos. Don’t panic, but don’t start hacking away either. Here’s how to proceed:
First, don’t disturb any tiles until you’ve taken samples for testing. Use a damp cloth to wipe the tile surface, then seal it in a plastic bag. Send it to a certified lab.
While waiting for results, keep kids and pets away. Don’t sweep or vacuum – that could release fibers into the air. If asbestos is confirmed, stop work immediately. You’ll need professional abatement.
Contact your local health department and follow their guidelines. They can provide a list of licensed contractors. Always ensure proper disposal and follow all regulations.
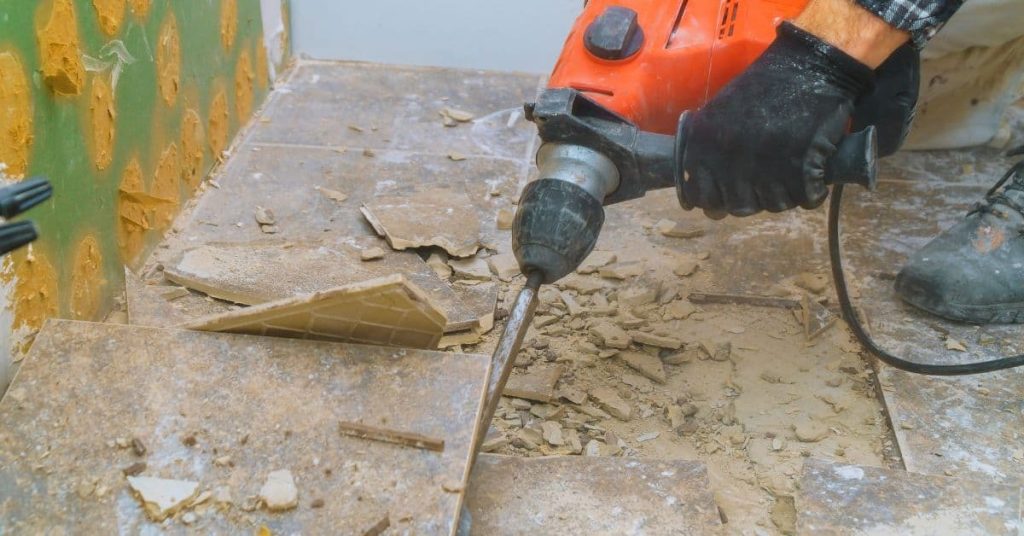
Tackling tiles bonded with tough mastics
Some old tiles are glued down so well, they’re a nightmare to remove. Here’s how to tackle them:
Start mechanically. Use a chisel and hammer or an oscillating multitool to chip away at the tile. Work from one corner, breaking up the tile into smaller pieces.
If that doesn’t work, try heat. Rent a heat gun and apply it to the mastic. This can soften it, making removal easier. Be careful not to overheat – you don’t want to damage the subfloor.
For really stubborn tiles, consider using a chemical remover. These are available at hardware stores. Follow instructions carefully and always wear appropriate PPE. If all else fails, it’s time to call in professionals.
Inspecting and Repairing the Subfloor After Removal
Look for signs of damage, moisture, or rot across the exposed subfloor. Tap test for hollowness, check for staining, and use a moisture meter if available. Note any warped sections or soft spots you’ll need to address.
Plan basic repairs: replace damaged patches, clean and dry the surface, and consider leveling or patching to prepare for new flooring. Keep repairs simple and compatible with your replacement material’s requirements.
Identifying and repairing common subfloor damage
After removing your composition tiles, take a close look at the subfloor. You’re looking for three main types of damage:
Delamination: This is when the subfloor layers separate. Tap it with a hammer; if it sounds hollow, you’ve got delamination.
Gouges: These are deep scratches or cuts in the surface. If they’re small, you can fill them. Big ones might need replacing parts of the subfloor.
For water damage, look for discoloration, warping, or soft spots. If it’s minor, you can patch and sand. Severe water damage needs professional help.
Moisture testing and mold prevention
Before installing new flooring, test for moisture. Here’s how:
Use a moisture meter. Set it to the type of subfloor you have (wood or concrete). Acceptable ranges are typically 12-15% for wood and 4-6% for concrete.
If readings are high, dry out the area with fans and dehumidifiers. Once dry, disinfect with a mold-killing solution to prevent mold growth. Then seal with a suitable primer or sealer.
Cleanup, Disposal, and Post-Removal Safety Checks
Contain and bag debris carefully, especially if there’s potential fiber material. Use damp cleaning methods to minimize airborne dust and avoid sweeping dry materials. Label waste bags clearly and follow local disposal rules for flooring debris.
Perform a final safety check: re-seal the work area, re-check ventilation, and inspect for any residue or damage. If asbestos or unknown fibers were present, consider a clearance check or air-quality verification per local guidance.
Waste handling and disposal options
Sort your waste into two piles: hazardous and non-hazardous. Asbestos, if present, is hazardous. Contact local authorities for safe disposal.
Check community recycling centers or local drop-off programs for non-hazardous debris like tiles and mastic. Some may accept it for free or a small fee.
Transporting debris: Use sealed bags or containers to prevent spills. Secure loads properly to avoid accidents during transit.
Final inspection checklist before new flooring
Before installing new flooring, ensure your subfloor is ready. Use this checklist after cleanup and before starting any new work.
- Check flatness: Subfloor should be level within 3/16 inch in a 10-foot span. Uneven surfaces cause issues with new flooring.
- Inspect cleanliness: Ensure subfloor is free of dust, debris, and residue. Any remaining can affect adhesion of new materials.
- Test for moisture: Use a moisture meter to check for excess dampness. High moisture levels can lead to mold growth or flooring failure.
- Check structural soundness: Ensure subfloor is solid and free from major cracks, delamination, or rot. Weak spots need repair before installation.
- Verify subfloor material: Confirm you’re working with a suitable subfloor material for your new flooring type.
- Check vapor barrier: Ensure an intact vapor barrier is present to prevent moisture from rising into the room above.
- Inspect joists and beams: Check they are level, plumb, and in good condition. Sagging or damaged framing needs repair.
- Verify building codes: Ensure your subfloor meets local building codes for thickness, material, and support spacing.
Quick rule: If any issues arise during inspection, address them before proceeding with new flooring installation.
Preventive Tips and Maintenance After New Flooring Is Installed
Choose replacement materials with suitability for your space, underlayment needs, and future maintenance requirements in mind. Plan a subfloor prep method that matches the new flooring’s needs and any moisture protections.
Then establish a simple maintenance routine to extend life and ease future removals if needed. Keep surfaces clean, address water issues promptly, and document installation details for future reference.
Selecting replacement flooring and underlayment
When choosing new flooring, consider durability and moisture resistance. Porcelain or ceramic tiles, for instance, are tough and waterproof. For a warmer feel, opt for luxury vinyl planks (LVP) or engineered hardwood. They’re durable and can handle moisture better than solid wood.
For underlayment, use cement backer board if you’re reinstalling tiles. It’s moisture-resistant and provides a stable base. If you’re installing LVP or hardwood, consider using oriented strand board (OSB) or plywood. They provide a solid foundation but aren’t as moisture-resistant, so ensure your subfloor is well-sealed.
Fiber cement boards are another option. They’re durable and moisture-resistant, making them suitable for both tiles and hard flooring. However, they’re heavier and more expensive.
Long-term care to avoid costly removals
Preventing tile removal in the future is all about regular care and prompt repairs. Here’s what you should do:
- Inspect regularly: Check your floor every few months for any signs of damage or moisture.
- Maintain proper grout: Keep grout clean and sealed to prevent water intrusion.
- Control humidity: Maintain a consistent indoor humidity level (between 30-50%) to prevent expansion and contraction of your floor.
- Repair promptly: Address any damage immediately to prevent it from spreading or causing further issues.
- Avoid excessive heat: Keep your home’s temperature consistent. Sudden changes can cause tiles to crack.
By following these steps, you’ll minimize the risk of tile failure and repeated removal, saving you time, money, and effort in the long run.
Conclusion
Removing composition tiles correctly protects your subfloor, keeps you safe, and makes the new floor look right from day one. Do it right and you reduce costly repairs and future headaches.
Now, move with purpose: verify safety and legal prep, gather tools, test a small area, shut off power where needed, remove tiles in the prepared, cautious steps, inspect the subfloor for damage, clean and dry, dispose properly, and plan the next flooring layer with repair or leveling if required—then seal the space and finish with a safe, clean surface.
Common mistakes to avoid are pushing tiles off with brute force, skipping asbestos checks or safe handling for glued or asbestos-era tiles, and ignoring subfloor problems or moisture before installing anything new. Keep safety first, test small areas, and pause if you see unexpected material or damage. If the tile shows asbestos, if the glue is stubbornly bonded, or if the subfloor is obviously damaged, call a professional rather than pushing ahead. Stay steady, follow the plan, and you’ll finish strong with a durable, safe floor.
FAQ
Is it safe to remove composition tiles yourself, and how do I know when to stop?
You can remove many composition tiles yourself if you’re careful and follow safety steps. If you see feathered edges, loose asbestos labeling, or you’re in an older home, treat it as potentially hazardous and check local guidance or a lab test before disturbing it.
What should I do if the tiles might contain asbestos or you find glue-down tiles?
Never sand, grind, or dry-cut them. If asbestos is possible, pause and get a professional assessment before proceeding.
How do I deal with glued-down or asbestos-era tiles without creating a mess?
Work in small sections, use minimal water to dampen and soften the adhesive, and keep all debris contained. Follow the manufacturer’s instructions for any remover products and wear proper PPE at all times.
How should I dispose of old tiles and protect the subfloor during removal?
Contain waste in sealed bags or approved containers and follow local disposal rules. Protect the subfloor by removing debris carefully and avoiding excessive moisture or impact that could damage the surface below.