
Introduction
Cleaning grout with household products is using common items to remove grime from the grout lines between tiles. The goal is to lift dirt without damaging the grout or tiles. This article covers prep, common cleaners (commercial and homemade), and simple test methods so you know what works.
Start with basic prep like sweeping, damp cleaning, and laying out protective gear. Then pick cleaners you can safely test in a small area and follow the manufacturer or label guidance. Finally, observe results, compare methods, and choose a safe approach that you can repeat with similar results on other sections.
Key takeaways
- Prepare with rubber gloves, eye protection, ventilation, and labeled cleaning containers.
- Test cleaners on inconspicuous grout patch before broad application to avoid staining or damage.
- Commercial vs homemade: start with mild options; save harsher for tough stains.
- Do not mix cleaners; follow labels and rinse thoroughly after cleaning.
- Avoid excessive scrubbing; use appropriate brushes to prevent grout wear.
- Seal grout after it dries to protect clean results and simplify maintenance.
Table of Contents
- Introduction
- Key takeaways
- Preparation: Tools, Materials, and Safety Checklist
- How Grout and Tile Types Affect Cleaning Choices
- Commercial Grout Cleaners — Types, Effectiveness, and When to Use Them
- Homemade Cleaners That Actually Work (and Those That Don’t)
- Cleaning Techniques and Tools That Reduce Damage
- Safety, Damage-Avoidance, and Method-Specific Precautions
- Sealing and Post-Cleaning Maintenance for Long-Term Results
- Cost, Time Expectations, Troubleshooting, and When to Call a Pro
- Conclusion
- FAQ
Preparation: Tools, Materials, and Safety Checklist
Start by defining your goals: protect surfaces from cleaner runoff, prevent slip hazards, and stay organized with a clear workflow. Use labels, checklists, and a defined cleaning sequence to guide the work.
Gather essential PPE and tools: gloves, goggles, mask, painter’s tape, scrub brushes, grout sponge, microfiber cloths, spray bottle, bucket, putty knife, old towels, and a damp-dry vacuum if available. Have pH-neutral or grout-safe cleaners and a gentle baking-soda paste ready, plus hydrogen peroxide for white grout and a steam option only if approved by the tile and grout specs. Protect edges and ventilate the area well before starting.
Tools and materials checklist
Before you start cleaning, make sure you have the right tools for the job. This checklist helps you gather everything you need based on your tile type and grout width.
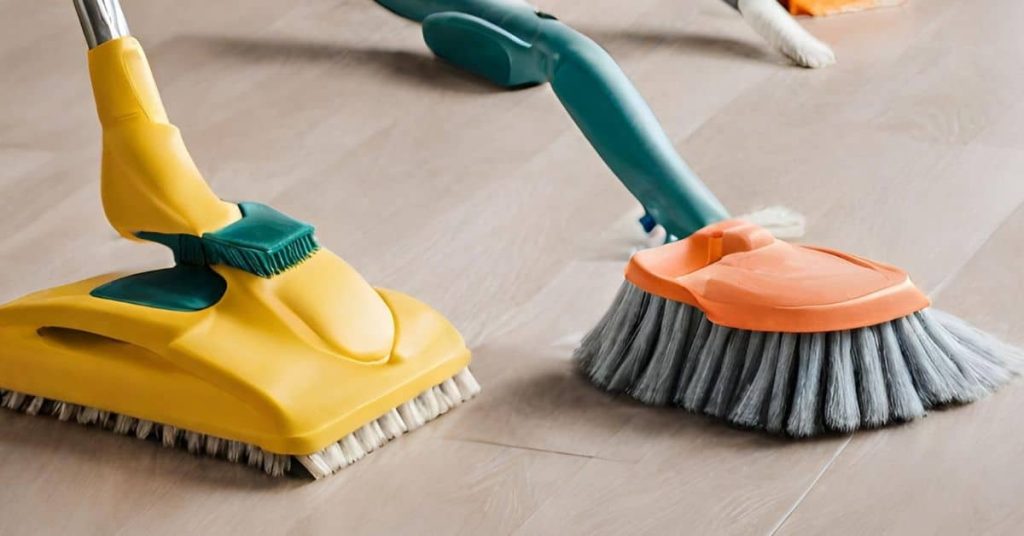
- Brushes: Choose stiff-bristled brushes for wide joints and soft-bristled ones for narrow joints. Natural bristles are gentler on tiles.
- Applicators: Use a grout sponge or microfiber cloth to apply cleaner and rinse.
- Rags: Old towels come in handy for blotting up excess water.
- Buckets: You’ll need one for the cleaning solution and another for rinsing.
- Spray bottle: For applying cleaner directly to grout lines.
- Putty knife: To scrape off debris before cleaning.
- Damp-dry vacuum (optional): If available, use it to suck up water after rinsing for faster drying.
- Grout colorant or sealer (post-clean): Have these ready if you plan to touch up colors or seal the grout after cleaning.
Quick rule: Always test cleaners on a small, inconspicuous area first to ensure they won’t damage your tiles or grout.
Personal protective equipment and ventilation
Safety comes first when dealing with chemicals or steam. Here’s what you need to protect yourself and others.
- Gloves: Wear rubber gloves to protect your hands from harsh cleaners.
- Goggles: Protect your eyes from splashes with safety goggles.
- Mask: Use a dust mask or respirator when dealing with dry, powdered cleaners or strong fumes.
- Ventilation: Open windows and use fans to ensure proper airflow in the work area.
- Evacuate sensitive occupants: Keep pets and infants away from the cleaning area due to potential irritation from fumes or water spills.
Quick rule: Always prioritize safety. If you’re unsure about a cleaner’s strength, wear full PPE and ventilate well.
How Grout and Tile Types Affect Cleaning Choices
Different grout types react differently to cleaners: cementitious grout behaves differently from epoxy, with varying porosity and vulnerability. Porosity and color influence staining risk and potential for etching or whitening.
Consider tile substrates like ceramic, porcelain, or natural stone, as backing materials and moisture behavior affect method choice. Sealed versus unsealed grout changes which cleaners are safe and how deep cleaners can penetrate.
Sealed vs unsealed grout—how to tell
Grout can be sealed or unsealed. Knowing which is crucial for choosing the right cleaner.
Unsealed grout: Looks porous, feels rough. Water may darken it briefly.
Sealed grout: Feels smooth, water beads up and doesn’t darken. Test with a drop of water: if it stays beaded, it’s sealed.
Grout color, age, and porosity impacts
Grout color, age, and porosity affect cleaning. Dark grout hides dirt but stains easily. Light grout shows everything.
Porous grout: Absorbs liquids, stains quickly. Needs stronger cleaners but risks etching or darkening.
Older grout may be worn, porous. Test with a drop of water: if it soaks in fast, consider regrouting.
Sensitive surfaces (marble, natural stone, polished tiles)
Marble, natural stone, and polished tiles need special care. They’re acid-sensitive or easily etched.
Acidic cleaners: Avoid on marble, limestone, travertine. They’ll dull or etch surfaces.
Use stone-safe cleaners. Test in an inconspicuous area first. Be gentle to avoid scratches.
Commercial Grout Cleaners — Types, Effectiveness, and When to Use Them
Know the four main cleaner categories: alkaline, acidic, oxygen-based, and bleach-based, and how each acts on grout and stains. Identify typical targets like minerals, mold, soap scum, and organic soils to guide your choice.
Match cleaners to settings: ceramic/porcelain vs natural stone, and adjust for sealed or epoxy grout. Expect variations in contact time, agitation, and dilution that affect results on different porosity and age of grout.
What ingredients do and when they work
Understanding the cleaning mechanism of grout cleaners helps you choose the right one for your job. Here’s a quick rundown:
- Alkaline cleaners: These use surfactants to lift dirt and grime. They’re great for soap scum, grease, but may not tackle tough mineral stains.
- Acidic cleaners: Acids dissolve minerals and hard water deposits. They’re your best bet for mineral stains, rust, but can damage certain surfaces if left on too long.
- Oxygen-based cleaners: These use oxygenating agents to break down organic soils. They’re good for mold, mildew, but may not work as well on tougher stains.
- Bleach-based cleaners: Bleach kills bacteria and breaks down organic matter. It’s strong against mold, mildew, soap scum, but can damage some surfaces and has a strong odor.
- Enzymatic cleaners: These use enzymes to break down specific types of stains. They’re great for protein-based stains like food, pet messes, but may not work on mineral or mold stains.
Pros, cons, and safety notes for each cleaner category
Each cleaner type has its own strengths and weaknesses. Here’s a quick comparison:
Alkaline cleaners are mild, safe on most surfaces, but may not tackle tough stains. They’re user-friendly, with no harsh fumes or strong odors.
Acidic cleaners are powerful, but can damage certain surfaces if left on too long. They have a strong smell and require proper ventilation and PPE.
Oxygen-based cleaners are eco-friendly, but may not work as well on tough stains. They’re safe to use, with no harsh chemicals or strong odors.
Bleach-based cleaners are powerful disinfectants, but can damage some surfaces and have a strong odor. They require proper ventilation and PPE.
Cost and convenience considerations
The cost of grout cleaners varies, but you often get what you pay for. Stronger cleaners may be more expensive, but they might save you time in the long run.
Single-application strong cleaners can be convenient, but may not be eco-friendly or wallet-friendly if you have a lot of cleaning to do. Milder, repeat-use options are often cheaper and better for the environment.
Convenience is key too. If you’re short on time, a ready-to-use cleaner might be worth the extra cost. But if you’ve got time to spare, a concentrate that you mix yourself could save you money.
Remember, it’s not just about the initial cost. Consider how often you’ll need to clean and what kind of results you want. Sometimes, spending a little more upfront can save you time and effort in the long run.
Homemade Cleaners That Actually Work (and Those That Don’t)
Here’s a map of tested household options: baking soda paste, hydrogen peroxide, dish soap, lemon juice, and vinegar, with notes on effectiveness and safety for colored grout. Pair each option with the grout type to avoid damage.
Clearly state what works, what doesn’t, and why, debunking common myths and identifying harmful combos. Follow a step-by-step framework: prep, test patch, correct concentrations, agitation, and thorough rinsing to avoid residue.
Baking soda + peroxide paste (how and why it works)
The combination of baking soda and hydrogen peroxide is a powerful yet gentle grout cleaner. Here’s how to use it:
Mix equal parts baking soda with 3% hydrogen peroxide in a bowl until you get a spreadable paste. Apply the paste onto your grout using an old toothbrush or soft brush, working it into the grout lines.
Let it sit for about 15-20 minutes to allow the cleaning action to take place. Then, scrub gently and rinse thoroughly with warm water. This combination works because baking soda is mildly abrasive and lifts stains while hydrogen peroxide acts as a bleaching agent, breaking down organic matter.
This paste is an excellent first-line option for cementitious grout, especially when dealing with mineral stains or light mold. However, it’s not recommended for epoxy grout as it may discolor or damage the surface.
Oxygen bleach solutions (safe alternative to chlorine)
Oxygen bleach, also known as color-safe bleach, is a safer and more eco-friendly option compared to traditional chlorine bleach. It’s an excellent choice for cleaning grout, especially when dealing with organic stains like mold or mildew.
The active ingredient in oxygen bleach is hydrogen peroxide, which breaks down into oxygen and water, making it less harsh than chlorine bleach. To use, mix the powder according to package instructions with warm water. Apply the solution onto your grout using a soft brush, let it sit for about 15-20 minutes, then scrub gently and rinse thoroughly.
Oxygen bleach is effective on both cementitious and epoxy grout, making it a versatile option. It’s also safe to use on colored grout as it won’t cause discoloration like chlorine bleach can. However, always perform a spot test before applying to a large area.
Vinegar, toilet cleaners, and other agents to avoid
While vinegar is often recommended as a natural cleaner, it’s not suitable for grout cleaning due to its acidity. Here are some common DIY staples that can damage your grout or stone:
- Vinegar: Its acidity can eat away at the grout, causing discoloration and damage over time.
- Toilet cleaners with harsh chemicals: These often contain strong acids or bleach that can damage grout and stone surfaces.
- Ammonia: When combined with chlorine products, it creates a harmful gas. Avoid using ammonia on any surface where you’ve used chlorine bleach.
- Rubbing alcohol: While it may seem like a good idea to use alcohol to clean grout, it can actually dry out and damage the grout over time.
- Steel wool or harsh brushes: These can scratch and damage your grout, especially if it’s epoxy-based.
Instead of these risky choices, opt for gentle, pH-neutral cleaners specifically designed for grout cleaning. Always remember to spot test any cleaner before applying it to a large area.

Cleaning Techniques and Tools That Reduce Damage
Assess grout type and condition, and test cleaners in an inconspicuous area before full use. Note any historical sealing or epoxy cement differences that affect technique.
Use a low-abrasion scrubbing protocol with soft brushes or non-scratch pads, gentle circular motions, and brief contact times. Target spots with appropriate treatments and avoid acidic cleaners on cement grout and avoid bleach on colored grout unless approved by manufacturer.
Manual scrubbing technique and brush selection
Start by assessing your grout. It’s crucial to know its type, condition, and if it’s sealed or not. Test any cleaner in an inconspicuous area first.
Use a soft-bristle brush or non-scratch pad for low-abrasion scrubbing. The bristles should be stiff enough to clean but gentle on the grout. For deep grout lines, use a narrow-headed brush.
Apply gentle pressure and use circular motions. Don’t scrub too hard or for too long to avoid damaging the grout.
Steam cleaning: when it helps and when to skip it
Steam cleaning can help sanitize surfaces and lift grime. It’s great for unsealed grout that’s not too deep, as the heat won’t damage the tile.
However, do not use steam on unsealed grout or heat-sensitive tiles, like natural stone or polished ones. The heat can cause cracks or discoloration.
Before steaming, ensure your surface is clean and dry. After steaming, let it air-dry completely to prevent mold growth.
Spot treatments, poultices, and repeating cycles
For tough stains, use targeted spot treatments. A baking soda paste can help with general grime, while hydrogen peroxide tackles organic stains.
Poultices are another option for stubborn stains. Apply the paste, let it sit (usually 24-48 hours), then gently remove it. Be sure to follow safety guidelines when handling chemicals.
Sometimes, repeated treatments are better than stronger chemicals. If a stain persists after multiple attempts, consider consulting a professional before causing further damage.
Safety, Damage-Avoidance, and Method-Specific Precautions
Perform safety checks for each method: PPE, ventilation, and any contraindications like marble or delicate grout. Avoid mixing cleaners and follow manufacturer guidance for compatibility.
Protect surrounding surfaces with tape or drop cloths, manage temperature and moisture, and test first to prevent etching or color change. Summarize cautions for bottled cleaners, homemade solutions, steam, and specialty cleaners, including dilution, contact time, and rinse needs.
Chemical Safety and Neutralization Steps
Safety first. Always wear gloves, eye protection, and a mask when handling chemicals.
Avoid mixing cleaners like bleach with ammonia or vinegar. It creates toxic gases.
If you spill something, rinse immediately with plenty of water. Neutralize acids (like lemon juice) with baking soda, and bases (like ammonia) with white vinegar.
For skin/eye exposure, rinse for 15 minutes under running water. If symptoms persist, seek medical advice.
Protecting Tiles, Fixtures, and Grout Edges
Mask off surrounding surfaces with tape and plastic sheeting to prevent damage.
Before cleaning, test in an inconspicuous spot. Some cleaners can discolor grout or harm tiles.
Be gentle around edges. Aggressive scrubbing can wear down grout.
Keep the area dry and cool while cleaning to prevent moisture damage.
Disposal and Environmental Considerations
Dispose of leftover cleaner according to local regulations. Never pour down drains.
Rinse water can be poured into your garden or lawn, but avoid overwatering. If unsure, contact your local waste management department.
For homemade cleaners, dispose of ingredients separately in regular trash.
Never mix chemicals before disposal to prevent harmful reactions.
Sealing and Post-Cleaning Maintenance for Long-Term Results
Seal timing after cleaning matters: ensure grout is dry and follow conditions that affect cure. Plan for a sealant type that matches your grout and tile combination.
Discuss penetrating, topical, and epoxy sealers and which to choose for cementitious vs epoxy grout, and for glazed vs unglazed tiles. Prepare the area by removing residues, drying, and testing a patch for compatibility before full sealing.
How and when to apply grout sealer
Sealing your grout is crucial for long-term protection. Here’s how:
Wait until grout is fully cured. This takes 72 hours minimum, but humidity and temperature can extend it. Check manufacturer guidelines.
Ensure the surface is clean and dry. Remove all cleaning residues. Let it sit for at least 24 hours to ensure no moisture remains.
Apply sealer using a brush, roller, or spray. Follow manufacturer’s instructions for number of coats and drying times between coats. Avoid over-applying to prevent film formation or discoloration.
Routine maintenance schedule and quick daily habits
Regular upkeep keeps your grout looking fresh. Here’s a simple plan:
Daily: Wipe down tile surfaces with a damp cloth to remove dirt and grime.
Weekly: Use a mild, pH-neutral cleaner to mop floors. For walls, use a sponge or soft brush with the same cleaner.
Avoid: Using harsh chemicals like bleach, vinegar, or abrasive scrubbers that can damage sealers and tiles.
Refreshing color vs regrouting—how to decide
When grout looks tired, you have options. Here’s how to choose:
If staining is minor and adhesion is good, refreshing the color might be enough. Use a grout renewal product or stain remover followed by recoloring.
However, if there’s significant damage, adhesion loss, or persistent stains, regrouting may be necessary. This involves removing old grout, cleaning the surface, and applying new grout.
Consider hiring a professional for regrouting to ensure proper installation and longevity of your tiles.
Cost, Time Expectations, Troubleshooting, and When to Call a Pro
Outline qualitative cost ranges for DIY products versus professional services, and note the typical time implications for each scenario. Provide a rough sense of effort without committing to exact figures.
Offer troubleshooting paths for common failures like persistent stains, crumbling grout, or mold behind grout. Provide clear indicators for when to call a pro, such as extensive damage or substrate issues, and give guidance on possible next steps like regrouting or colorant needs.
Cost/time trade-offs and decision guide
Cleaning grout at home can save you money, but it’s not always the quickest or easiest route. Let’s break down your options.
DIY with household products: Cheapest option ($0-$20), time-consuming (1-4 hours per zone). Best for minor stains and discoloration.
Commercial cleaners: Moderate cost ($15-$30 per product), moderate time (1-3 hours per zone). Good for tougher stains, but may require multiple applications.
Professional service: Most expensive ($200-$600), quickest (2-8 hours total). Ideal for extensive damage or when you lack the right tools/knowledge.
Common mistakes and fixes
Steer clear of these common pitfalls to keep your grout clean and intact.
- Using the wrong product: Always test on a small area first. Wrong products can damage grout or tiles.
- Over-scrubbing: Be gentle! Harsh scrubbing can wear down grout over time.
- Skipping test spots: Always do a test spot to ensure the product won’t discolor your grout.
- Not sealing after cleaning: Sealing protects grout from future stains and moisture damage.
Remember, patience and careful selection of products are key to successful grout cleaning.
Signs you should hire a pro or regrout
Know when to call in the experts. Your safety and home’s integrity are at stake.
Extensive cracking: Cracks under tiles may signal structural issues. A pro can assess and fix these.
Water intrusion: Water damage can lead to mold, mildew, or even structural decay. If you notice water seeping through grout, call a pro immediately.
Efflorescence: White, powdery deposits on grout may indicate deeper substrate issues. A professional can diagnose and address these problems.
Conclusion
Finish with confidence by sticking to safer methods that protect tile, grout, and your property’s integrity while keeping things clean and affordable.
First, confirm you’ve tested cleaners and methods in a inconspicuous area, gathered the right tools, and followed the safety checklist. Next, choose a cleaning plan based on your grout and tile type, start with the mildest option, apply or scrub in small sections, rinse thoroughly, dry completely, and seal when appropriate to lock in the results. Finally, schedule ongoing maintenance so dirt doesn’t build up again and your grout stays protected.
Common mistakes to avoid are mixing cleaners that can react, using aggressive brushes or high-pressure tools on delicate grout, and skipping a test spot or a sealant after cleaning. Safety rules to follow are wear gloves and eye protection, work in a well-ventilated area, never combine products, and always rinse and dry after cleaning. If you’re questioning whether a product or method is safe for your exact grout or tile, err on the side of caution or consult a professional.
If the grout is severely stained, damaged, or widespread, or you’re unsure about tile compatibility, it makes sense to call a pro instead of pushing ahead. With careful prep, small-test checks, and a disciplined approach, you can restore and maintain a clean, durable grout line that looks good for years to come.
FAQ
What tools and gear should I have on hand before cleaning grout?
Grab a stiff nylon brush, a sponge, a bucket, and old towels. Wear eye protection and gloves, and keep a fan running if you’re indoors. Check labels for any product-specific PPE or ventilation tips.
What are the best grout cleaners—commercial vs. homemade—and when should I choose each?
Commercial cleaners can be stronger for tough stains, but read the label for safe use on your grout type. Homemade options are gentler and cheaper, but may take longer and work best on mild discoloration. If in doubt, test a small area and follow manufacturer instructions or product labels.
What homemade cleaning methods are safest and most effective for grout?
Plain baking soda with water paste can tackle mild staining. Vinegar is not always safe on cementitious grout; test on a hidden area first and avoid acidic cleaners on unsealed porous grout. Never mix cleaners unless the label says it’s safe; some combos release harmful fumes.
How can I test cleaners and prevent damage during cleaning?
Test any cleaner on a small, inconspicuous grout area first. Watch for color change, softness, or effervescence that indicates trouble. If you see damage, stop and switch to a milder method or consult the product’s instructions.