
Introduction
Cracks around slab penetrations happen when the concrete around pipes or openings isn’t managed during pour.
Key takeaways
- Use pipe sleeves fully encased in concrete, with proper clearance for movement.
- Apply bond breakers on form faces and sleeves to minimize three-sided adhesion.
- Plan joint layout early to align joints with penetrations and expected movement.
- Use appropriate expansion joints and compatible sealants to accommodate growth.
- Inspect sleeves and bond-breaker application before pour; correct any gaps.
- Wear PPE, follow local codes, and verify manufacturer guidance for materials.
Table of Contents
- Introduction
- Key takeaways
- Why Cracks Form Around Slab Penetrations
- Pipe Sleeves for Slab Penetrations — Types and Proper Use
- Bond Breakers and Backer Rods — Preventing Three-Sided Adhesion
- Joint Layout and Spacing Strategies for Slabs with Penetrations
- Expansion Joints, Materials, and Sealant Compatibility
- Installation Step-by-Step: Pre-Pour to Finish
- Inspection, Common Mistakes, and Repair Strategies
- Safety, Cost Comparison, and Project Planning Checklist
- Conclusion
- FAQ
Why Cracks Form Around Slab Penetrations
Cracks around penetrations start with how the concrete cures and how moisture moves at the surface and around openings. Plastic shrinkage and longer term drying shrinkage concentrate stresses where pipes and sleeves interrupt the slab. These moisture losses set up weak points that crack first near penetrations.
Thermal movement and temperature cycling drive differential expansion between embedded sleeves or piping and the surrounding concrete. That mismatch creates micro-cracks that can propagate around openings over time. The openings also interrupt stiffness paths, concentrating bending and shear stresses at the cut edges where penetrations intersect the slab plane.
Common crack mechanisms
Cracks around slab penetrations are driven by several forces. First, there’s shrinkage. Concrete loses moisture as it cures and dries. This causes the surface to contract, pulling on the edges of openings like pipes or sleeves.
Temperature changes also play a role. As concrete expands and contracts with heat and cold, it can pull away from embedded items, creating tiny cracks that grow over time.
Differential settlement happens when the soil beneath the slab moves more than the slab itself. This can twist or bend the slab, causing cracks near openings.
Mechanical loading is another culprit. When heavy loads press down on the slab, they create bending and shear stresses that focus around penetrations.
How penetrations amplify stress
Penetrations like pipes and sleeves can act as stress risers. They interrupt the slab’s continuity, changing how forces are distributed. This focuses tensile strains – pulling forces – around the openings.
Annular gaps between the pipe and concrete allow for movement but also create a weak point where cracks can start. Rigid pipes don’t flex with the slab, so they transfer stress to the surrounding concrete, increasing the risk of cracking.
Restraint from sleeves or other embedded items can also cause problems. If the sleeve is too tight, it restrains the concrete’s natural movement, building up tension that eventually leads to cracks.
Misaligned or oversized sleeves can pin the slab, preventing it from moving freely and concentrating stress where the penetration intersects the slab’s plane.
Role of sequencing and curing
Poor sequencing can increase cracking risk. If you pour concrete over a pipe that’s not properly supported, it can sag or deflect under the weight, causing cracks.
Inadequate curing also plays a part. Concrete needs time to gain strength as it cures. If it dries out too quickly, it won’t reach its full potential and will be more prone to cracking.
Early loading is another no-no. Before the concrete has fully cured, heavy loads can cause it to deform or crack. Always follow recommended curing times before applying any significant load.
To reduce these risks on-site, check that pipes are properly supported before pouring, ensure adequate curing measures are in place, and avoid loading the slab until it’s had enough time to gain strength.
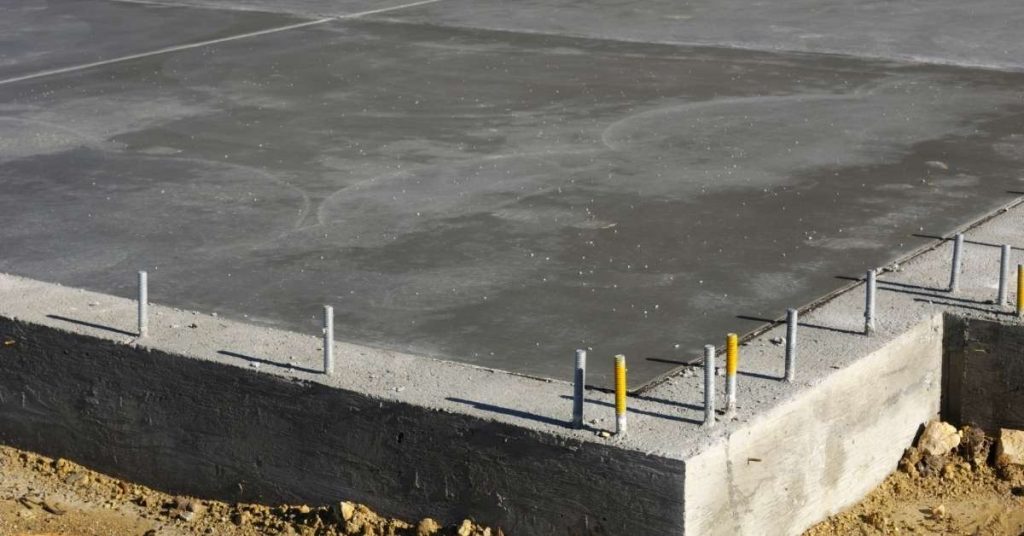
Pipe Sleeves for Slab Penetrations — Types and Proper Use
A sleeve family serves three jobs: it allows movement, provides a clean form for sealing, and helps with waterproofing around the penetration. The sleeve choice should map to the pipe type, expected load, and exterior exposure. Correct sizing and alignment matter for long term performance.
Materials vary from PVC and stainless to HDPE and urethane-coated options. Each has different corrosion resistance, abrasion wear, and compatibility with common pipe materials. Decide based on the actual pipe material, diameter, and the expected service conditions before pouring.
Sleeve materials and forms
The material of your pipe sleeve directly impacts its performance. Here are common options:
- Metal sleeves (galvanized iron, stainless steel): Durable, resist corrosion, but can rust if not properly protected. Use for larger pipes, avoid in high-traffic areas to prevent damage.
- Plastic sleeves (PVC, HDPE): Inexpensive, lightweight, and easy to install. Resist chemicals but can degrade under UV exposure. Ideal for smaller pipes, use UV-stabilized types outdoors.
- Removable core sleeves: Allow for easy pipe removal or replacement. Use when access is needed post-pour, but they may increase the risk of cracking if not properly sealed.
- Corrugated sleeves: Flexible, allow for movement. Ideal for areas with anticipated settlement or expansion. Avoid in high-traffic zones to prevent flattening.
- Urethane-coated sleeves: Provide extra protection against corrosion and abrasion. Use where exposure to chemicals or heavy traffic is expected.
Sizing and annular gap guidance
The sleeve’s size relative to the pipe is crucial for allowing movement without excessive gap. Here’s how to determine the right size:
Check manufacturer specs: Follow the sleeve manufacturer’s guidelines for sizing based on your pipe diameter.
Allow for movement: Ensure the sleeve is large enough to accommodate anticipated expansion and contraction of the pipe due to temperature changes or loading.
Local code and clearances: Verify that your chosen size meets local building codes and provides adequate clearance around the pipe to prevent stress buildup. A general rule is to have an annular gap of 1-2 inches for most applications, but this can vary based on pipe size and movement expectations.
Sleeve installation best practices
Proper sleeve installation is key to preventing cracks. Follow these steps:
Align with reinforcement: Ensure the sleeve is properly aligned with the slab’s reinforcement to distribute loads evenly and prevent stress concentrations.
Maintain edge clearance: Keep sleeves at least 2 inches from the slab’s edges to avoid cracking due to edge settlement or loading.
Secure during pour: Use temporary bracing or weights to keep the sleeve in place during concrete pouring and vibrating. This prevents displacement and ensures proper embedment.
Seal temporarily: If the pipe is not being installed immediately, use a temporary sealant or waterstop to prevent concrete from entering the sleeve and causing blockages or damage to the pipe.
Bond Breakers and Backer Rods — Preventing Three-Sided Adhesion
Bond breakers and backer rods come in foam, polyethylene, rubber, or waxed and unwaxed varieties. They interact with curing concrete and finishability and influence how the joint moves over time. The right choice depends on the joint location and anticipated movement.
The danger is three-sided adhesion, where concrete on two sides bonds to a rigid sleeve or penetrant on the third side. That bonding restricts movement and can cause cracks, spalling, or joint blow-out if a gap is not kept open.
Types of bond breakers and when to use them
Bond breakers come in three main types: tapes, liquids, and backer rods. Each has its place, so choose wisely.
Tapes are your go-to for most joints. They’re easy to apply and work well on straight, flat surfaces like walls and floors. Use them where you want a clean, defined line. Check the tape’s label for suitable joint widths before applying.
Liquid bond breakers are great for irregular shapes or hard-to-reach spots. They’re flexible but need time to cure, so plan ahead. Don’t use them in joints wider than their recommended range (usually 1/4″ to 3/8″).
Backer rods come open- or closed-cell. Open-cell are spongy and good for wide joints (1/2″ and up). Closed-cell are firm, ideal for narrower gaps (1/4″ to 1/2″). Both need a bit of muscle to push in, so wear gloves. Check local rules on backer rod use, as some areas have specific requirements.
Selecting backer rod type and compatibility
Alright, listen up. You’ve got two types of backer rods: closed cell and open cell. Both have their uses, but you gotta pick the right one for your job.
Closed cell is like a foam tube with tiny air pockets. It’s great when you’re dealing with high moisture exposure. Why? ‘Cause it won’t soak up water and mess with your sealant. But here’s the thing, it’s not as flexible as open cell. So, if your joint’s gonna move a lot, closed cell might crack.
Open cell, on the other hand, is like a sponge. It’s super flexible and can handle movement like nobody’s business. But, and this is a big but, it’ll soak up moisture like a thirsty dog at a water bowl. So, if you’re working in a damp area, open cell might not be your best bet.
Now, here’s where things get real. You’ve picked your backer rod, but now you gotta make sure it plays nice with your sealant. Check the sealant manufacturer’s instructions or give them a call. Ask about chemical compatibility. You don’t want your backer rod and sealant having a nasty reaction that ruins your joint.
Proper placement and joint depth control
Backer rods are your secret weapon for controlling sealant depth and preventing three-sided adhesion. Here’s how to use ’em right:
First, check your sealant manufacturer’s guidelines. They’ll tell you the ideal width and depth for their product. Ignore this at your peril – wrong dimensions mean a seal that won’t last.
Now, place those backer rods. Start by cleaning and prepping your joint. No dirt, no dust, no grease. Then, insert the rod into the joint. It should fit snugly – not too tight, not too loose. You want it to hold its shape but still let you press sealant against it.
Once in place, use a straight edge or level to ensure your backer rod is at the right depth. You’re aiming for that sweet spot between too shallow (where water can pool) and too deep (where the sealant can’t bond properly). Keep checking as you work – joints can vary.
Joint Layout and Spacing Strategies for Slabs with Penetrations
The joint layout should control crack development and isolate penetrations while aligning with structural grids and MEP routing. Emphasize design intent and performance criteria over fixed spacing. Layouts should adapt to site conditions and movement expectations.
Isolate penetrations by placing sleeves or bond-breakers where they cross slabs and align joint lines with mechanical runs. This reduces restraint and spalling risk around openings and keeps routes clear for services.
Types of joints and their functions
In slab assemblies, different types of joints serve specific purposes to control cracking. Here’s what each does:
Control (Contraction) Joints: These are saw cuts made at regular intervals to direct where the concrete will crack as it shrinks during curing.
Isolation Joints: Placed around high-stress areas like penetrations, these joints separate and protect critical zones from excessive cracking.
Expansion Joints: These allow for movement due to temperature changes or building settlement. They’re filled with a compressible material to accommodate slab expansion.
Planning joint locations around penetrations
To isolate clusters of penetrations and avoid random cracking, consider these strategies:
Place control joints to encircle groups of pipes or ducts. This helps to contain stress and prevents cracks from spreading.
Align joint lines with doorways or equipment loads. This minimizes restraint and spalling risk around high-stress areas.
Avoid placing joints haphazardly. Plan them systematically, based on the layout of penetrations and other structural elements.
Factors affecting joint spacing
Several factors influence joint spacing decisions:
Slab Thickness: Thicker slabs have more movement capacity, allowing for wider joint spacings.
Mix Design and Reinforcement: Stronger mixes and increased reinforcement reduce the need for frequent joints. However, they don’t eliminate the need entirely.
Exposure Conditions: Harsh environments may require closer joint spacing to accommodate additional movement.
Referencing industry standards like ACI 302 provides guidance on appropriate joint spacings based on these factors and more.
Expansion Joints, Materials, and Sealant Compatibility
Expansion joints around penetrations accommodate larger movements, help keep water out, and protect sleeve integrity. Joint choices should consider how they interact with sleeves and bond-breaker systems. The goal is reliable, long-term performance.
Materials include backer rods, flexible sealants, and preformed fillers. Each option has its own temperature range and chemical resistance profile. Check compatibility with surrounding concrete and installed sleeves before selecting a system.
Common expansion joint materials
Choosing the right material for your expansion joints is crucial to prevent cracking and maintain waterproofing. Here are some common options:
- Compressible Foam: Used in thin slabs, provides good compression but may not be durable enough for heavy loads.
- Neoprene: Offers excellent flexibility and durability, ideal for high-movement areas. Avoid using in extreme temperatures as it can stiffen or degrade.
- Asphaltic Fillers: Inexpensive, but not suitable for heavy loads or where waterproofing is critical due to potential cracking.
- Preformed Rubber: Provides good durability and flexibility. Ensure it’s compatible with your slab’s movement range to prevent tearing.
- Silicone/Polyurethane Seals: Offer excellent adhesion, but may not provide enough compression for heavy loads. Check their UV resistance if exposed to sunlight.
Sealant selection and adhesion
Selecting the right sealant is vital for a durable, waterproof joint. Key properties to consider are:
Elasticity: The sealant must stretch and compress with the slab’s movement without cracking.
Adhesion: Ensure the sealant adheres well to both concrete and the joint filler material.
UV Resistance: If exposed to sunlight, choose a sealant that can withstand UV degradation. Always check product technical data for compatibility with your chosen joint materials and sleeve coatings.
Durability and maintenance considerations
The expected service life of your expansion joints depends on several factors:
Traffic: Heavier traffic loads can reduce joint durability. Regularly inspect joints under heavy traffic areas for signs of wear.
Chemicals: Exposure to chemicals can degrade joint materials over time. If possible, use resistant materials and consider additional protective coatings.
UV Exposure: Prolonged exposure to sunlight can degrade some sealants. Use UV-resistant materials or apply a protective coating if joints are exposed.
Maintenance involves regular inspections for signs of cracking, staining, or weak bonds. Address any issues promptly to extend the joint system’s durability and prevent costly repairs.
Installation Step-by-Step: Pre-Pour to Finish
Start with sleeve placement and bond-breaker installation, ensuring sleeves are centered and labeled. Plan the joint layout to work with future access and drainage. Verify clearances before forms go up.
Then document the readiness for pour, including alignment checks and edge treatments. Follow concrete placement and consolidation steps to avoid shifting sleeves. End with curing and early joint treatment plans to keep cracks in check.
Step-by-Step Installation Process
The following is a clear, numbered sequence of practical steps for installing sleeves, bond breakers, joints, pouring, and finishing your concrete slab with penetrations. This process focuses on realistic DIY/home-improvement actions and jobsite habits.
- Prepare the site: Ensure safety by clearing debris, marking out the area, and setting up barriers.
- Place sleeves: Install penetration sleeves at marked locations, ensuring they’re sized, centered, labeled, and plumb. Verify clearance for future utility access and clean drainage paths.
- Install bond breakers: Place bond breakers along control joints, isolation joints, and expansion joints as planned. Use compatible materials with sleeves and penetrations.
- Set up forms: Install formwork around the slab area, checking for integrity, proper slope/grade, and secure fit.
- Position reinforcement: Lay out reinforcing bars according to design, ensuring they’re properly spaced and supported.
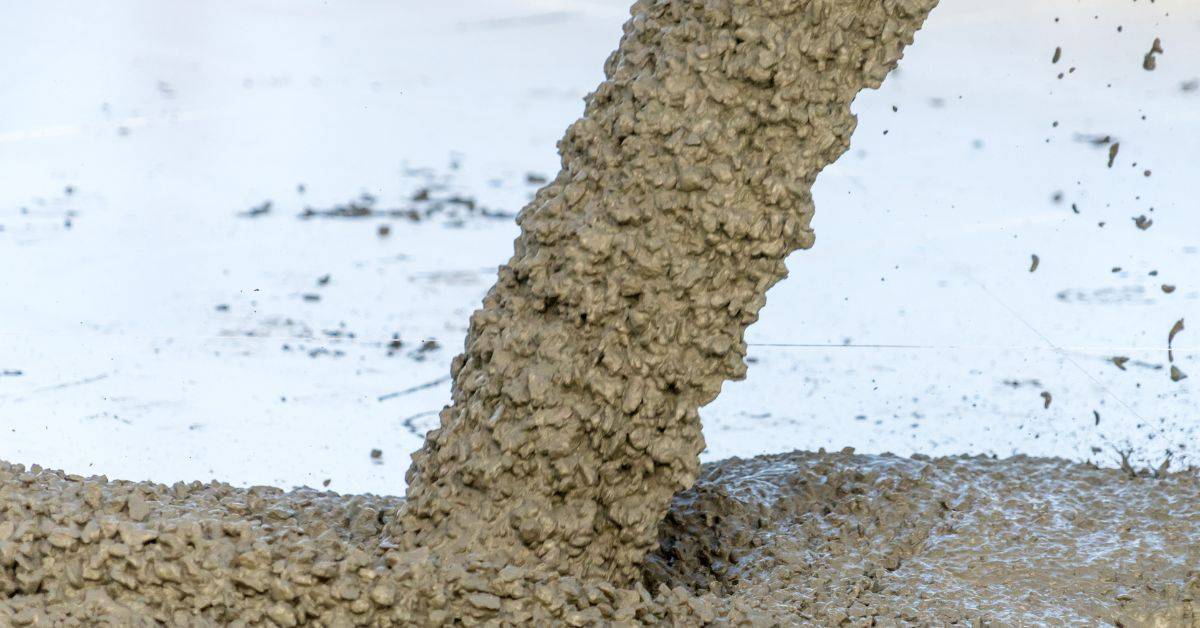
- Prepare concrete: Order or mix concrete based on your approved mix design. Ensure it’s fresh and ready for pouring.
- Pour and consolidate: Pour concrete in sections, avoiding displacing sleeves. Control the pour rate, use proper vibration technique, and finish edges carefully to minimize cold joints and segregation.
- Cure and protect: Implement curing methods (spray, mist, or coverings) as planned, manage temperature, and apply initial joint treatments (bond breakers, temporary seals).
- Perform QA checks: After concrete sets, check sleeve and joint alignment, record cure cycles, monitor for early cracks, and capture photos and notes.
Pre-pour setup and QA
Before pouring concrete, ensure sleeves are securely placed, plumb, and at the right elevation. This step is crucial for preventing cracks around slab penetrations.
First, secure sleeves temporarily using nails or screws to keep them in place during pouring. Ensure they’re properly chamfered to facilitate concrete flow and prevent stress concentrations.
Next, check that sleeves are plumb using a level. If necessary, adjust their position until they’re perfectly vertical. Also, ensure sleeves protrude the correct amount from the formwork based on your design.
Do not forget to verify that temporary seals around sleeves are intact and will prevent concrete washout during pouring.
Concrete placement and consolidation around penetrations
Proper consolidation and vibration methods around penetration sleeves help reduce voids, prevent washout, and maintain the structural integrity of your concrete slab.
When pouring, start at one end of the formwork and work towards the other. This helps minimize cold joints and ensures even curing throughout the slab.
Use a vibrating screed to consolidate concrete around sleeves. Vibrate both vertically and horizontally to eliminate air pockets and ensure proper compaction. Be careful not to dislodge sleeves during this process.
Remember, maintaining acceptable slump, lift height, and joint alignment during placement is crucial for crack control. Follow your approved concrete mix design and placement plan to achieve these goals.
Post-pour joint forming, sawing, and sealing
Timing is critical when it comes to forming, sawing, and sealing joints in your concrete slab. Follow product and local timing guidance for the best results.
After concrete has gained sufficient strength (typically 24-72 hours), use a diamond-blade wet saw to cut control, isolation, and expansion joints as planned. Ensure cuts are straight, deep enough, and follow the intended joint layout.
Once cuts are made, install backer rod along joint edges according to your design. Use compatible materials with your chosen sealant and sleeve penetrations.
Before applying sealant, clean joints thoroughly using a suitable cleaner or solvent. Allow joints to dry completely before applying sealant. Follow the manufacturer’s instructions for application, tooling, and curing times. Regularly inspect and maintain sealed joints to ensure their longevity and effectiveness in preventing cracks.
Inspection, Common Mistakes, and Repair Strategies
Frequent failures involve sleeve misalignment, omitted bond-breakers, and improper sealants. These issues translate into movement and cracking around penetrations. Identify symptoms early and plan corrective steps.
Use a practical inspection checklist that covers cracks near penetrations, sleeve condition, and sealant integrity. Have a tiered repair approach for cosmetic sealing, injections, or more involved sleeve adjustments as needed.
Visual checkpoints and testing
Before any repair, use this checklist to identify issues around slab penetrations.
- Sleeve alignment: Check if sleeves are straight. Misaligned sleeves cause stress, leading to cracks.
- Annular gap uniformity: Ensure the space between sleeve and concrete is even. Irregular gaps lead to uneven curing and cracking.
- Bond-breaker presence: Verify bond-breakers are intact. Omissions cause three-sided adhesion, leading to cracks.
- Early cracks: Inspect for hairline cracks near penetrations. Early detection helps prevent further damage.
- Sealant integrity: Check sealants for signs of deterioration or movement. Poor sealants allow water intrusion and cracking.
- Drainage/water intrusion: Look for standing water, indicating poor drainage. Water intrusion weakens concrete and causes cracks.
- Displacement at penetration: Check if penetrations are moving or displaced. Movement indicates structural issues that may cause cracking.
- Substrate movement: Inspect for signs of substrate movement, like diagonal cracks. Movement signals a need for structural repair.
Quick rule: Regular visual checks help catch problems early, preventing costly repairs.
Common mistakes to avoid
Learn from these common errors to prevent cracking around slab penetrations.
- Three-sided adhesion: Skipping bond-breakers causes concrete to stick to sleeves, leading to cracks when the slab moves.
- Inadequate sleeve anchorage: Poorly anchored sleeves move or displace under load, causing stress and cracking.
- Wrong backer rod type: Using incompatible backer rods with sealants leads to poor adhesion and seal failure, allowing water intrusion and cracking.
- Poor joint location: Incorrectly placed joints don’t control cracks effectively. Improper spacing can lead to excessive cracking.
- Premature loading: Loading the slab too soon prevents proper curing, leading to weak concrete and increased risk of cracking.
- Incorrect sleeve sizing: Using sleeves that are too small or large causes stress concentrations, leading to cracking around penetrations.
- Misaligned penetrations: Off-center penetrations cause uneven stress distribution, leading to cracking.
- Poor sealing/backer rod behavior: Inadequate sealing allows water intrusion, weakening concrete and causing cracks. Poorly placed backer rods lead to sealant failure.
- Mixing incompatible materials: Using incompatible materials for sleeves, sealants, or concrete can cause adhesion issues, leading to cracking around penetrations.
Quick rule: Understanding and avoiding these common mistakes helps ensure a durable, crack-free slab.
Repair methods for cracks around penetrations
Choose the right repair method based on crack severity and exposure.
- Cosmetic sealing: For hairline cracks, use a flexible sealant to prevent water intrusion and further cracking. Not addressing these can lead to more extensive damage.
- Epoxy/polyurethane injections: For active cracks, inject epoxy or polyurethane resin to fill voids and stabilize the crack. This prevents further movement and cracking.
- Re-sealing joints: If sealants have failed, remove old material, clean the joint, and reapply a compatible sealant to prevent water intrusion and cracking.
- Saw-cut and reseal: For wider cracks, saw-cut the crack, clean it out, and install a new, flexible sealant. This method is suitable for non-structural cracks.
- Structural repair with engineer input: If cracking indicates structural movement, consult an engineer. They may recommend re-sleeving, adjusting joint layout, or other structural repairs to address the underlying cause of the cracking.
Quick rule: Choose repairs based on crack severity and exposure. Always address cosmetic cracks to prevent further damage.
Safety, Cost Comparison, and Project Planning Checklist
On-site safety for handling sleeves and sealants includes standard PPE and ventilation. Manage slips, trips, fumes, and proper storage to keep crews safe. Keep safety as a daily priority on site.
Compare upfront material and labor costs with the longer term value of preventing cracks and extending slab life. Include coordination steps, inspection milestones, and a practical pre-project checklist to keep the plan clear.
Safety and environmental precautions
Before you start any work, review this checklist to ensure a safe and clean jobsite.
- PPE: Wear appropriate personal protective equipment (gloves, safety glasses, etc.).
- Sealant handling: Follow manufacturer’s guidelines for safe handling of sealants and adhesives. Keep them away from heat sources.
- Storage: Store materials in a cool, dry place to maintain their shelf life.
- Dust control: Use wet sawing techniques to minimize dust when cutting joints.
- Waste disposal: Follow local regulations for disposing of construction waste. Keep hazardous materials separate.
- Ventilation: Ensure adequate ventilation when using sealants and adhesives to prevent fume buildup.
- Slip/trip hazards: Keep walkways clear of debris and spills. Use non-slip mats where needed.
- Material compatibility: Check that all materials are compatible with each other and the concrete to prevent reactions.
Quick rule: Always prioritize safety over speed. A safe jobsite is a productive one.
Cost and lifecycle tradeoffs
Consider these factors to make informed decisions about your joint system’s upfront cost and long-term value.
- Initial cost: Durable systems may have a higher initial cost but can save money in the long run by reducing maintenance and repair needs.
- Maintenance frequency: Frequent maintenance indicates a low-quality joint system. Plan for more frequent repairs if using cheaper materials.
- Potential repair costs: Estimate potential repair costs over the slab’s lifespan to compare with initial costs.
- High-use areas: Budget for durable joints in high-traffic or heavy-duty areas to minimize future repairs.
- Sealant lifespan: Consider how long the sealant is expected to last before needing replacement.
- Concrete movement: Account for potential concrete expansion and contraction, which can affect joint performance over time.
Quick rule: While it’s tempting to go with the cheapest option upfront, investing in durable joints can save you money and headaches in the long run.
Tools, materials, and coordination checklist
Use this checklist to ensure you have all necessary tools, materials, and coordination items before starting your project.
- Pipe sleeves: Ensure they are the correct size and type for your pipes. Check that they are compatible with your concrete mix.
- Backer rods: Have them ready to create a proper seal around the sleeve.
- Sealant: Choose a compatible, high-quality sealant suitable for your joint type and expected movement.
- Joint filler: Use a compatible filler to complete the joint after sealant application.
- Anchors: If needed, have anchors ready for securing sleeves or other penetrations.
- Timing with trades: Coordinate with utilities and structural teams before pouring concrete. Ensure all penetrations are accounted for.
- Inspections: Schedule inspections at key milestones to catch any issues early.
- Product submittals: Submit product data sheets and other required information to comply with building codes and regulations.
Quick rule: Proper planning and coordination are crucial for a successful project. Don’t skip these steps to save time; you’ll only waste more time fixing mistakes later.
Conclusion
Protecting slab penetrations is about durability and safety. When you get the details right, you prevent cracks, leaks, and ugly patches that cost more than the job itself.
First, verify your plan aligns with sleeve types, bond breakers, backer rods, and the joint layout; then measure and mark the spacing, install sleeves, place the bond breakers and backer rods correctly, pour and finish with proper control joints, and finally inspect for gaps and movement while checking sealant compatibility and curing practices. Do everything in a logical order, test small areas first, and wear the right safety gear at every step.
Avoid these common mistakes: skipping bond breakers or backer rods, using the wrong sealant or incompatible materials, and rushing the pour or finish without proper curing time; always use the recommended materials and confirm compatibility, and keep the work area clean and dry to prevent trouble later. For safety, never work without eye protection and gloves, and never force a joint or sleeve placement that conflicts with the slab layout.
If you’re unsure about sleeve fit, complex joint layouts, or expanding joints near critical loads, call in a pro before you commit to a finish. With careful planning and deliberate steps, you’ll finish clean, safe, and lasting—and you’ll see the payoff in the long run. Stay steady, follow the plan, and push forward with confidence.
FAQ
How should I use pipe sleeves to prevent cracks around penetrations?
Install sleeves that pass through the slab edge without binding or pulling tight against the pipe. Center the sleeve so the pipe can slide as the concrete moves, and seal any gap between the pipe and sleeve with a flexible material per the sleeve manufacturer’s instructions. Check that the sleeve is rated for the pipe size and soil conditions at your site.
What are bond breakers and backer rods, and how do I use them?
A bond breaker keeps one side of the concrete from sticking to the other and helps control cracking. Place a backer rod in joints to fill the space before sealant, so the sealant can handle movement rather than being compressed. Use the right combination for your joint width and the sealant you plan to install, following product guidance.
How do I plan joint layout to accommodate penetrations and movement?
Plan control joints to interrupt crack paths around penetrations, keeping them away from pipe sleeves where possible. Space joints to suit expected expansion and contraction movement and avoid creating tight corners at penetrations. If you’re unsure, sketch the slab and mark likely movement directions and sleeves before pouring.
Which sealants and backer rods work best with slab penetrations?
Choose sealants compatible with concrete and exposure in your environment, and use a backer rod that fits snugly but can compress under sealant. Follow the sealant manufacturer instructions for surface prep, curing, and cure time, and avoid products that trap moisture near penetrations. If in doubt, check the product label and local recommendations.