

Introduction
Internal curing with lightweight aggregate is a method that uses porous, low-density aggregate inside the mix to keep moisture available for hardening. This approach helps manage moisture in thin slabs and countertops as they cure, especially when you’re working with limited thickness. Always follow the material instructions and local rules to ensure proper use.
Choose a lightweight aggregate designed for concrete and follow the label for mixing and curing. Plan to keep moisture in during curing by methods like sealing, plastic, or other moisture-retaining measures, and check local guidance for what works best in your climate. Always verify with product instructions and local code requirements for your project.
Key takeaways
- Internal curing with LWA reduces cement paste shrinkage during moisture migration in slabs.
- Use LWA selection based on gradation, saturation, and compatibility with mix design.
- Plan curing method: keep embedded moisture via pre-wetted aggregate and sealed surfaces.
- Do not neglect ventilation and PPE when handling LWAs and curing agents.
- Monitor finish quality by avoiding premature drying; cover and maintain moisture as needed.
- Choose products for curing/sealing that are compatible with LWAs and toppings.
- Budget time and plan maintenance for shrinkage-related repairs and re-sealing.
Table of Contents
- Introduction
- Key takeaways
- What Is Internal Curing and How Lightweight Aggregate (LWA) Works
- Benefits of Using LWA for Shrinkage Reduction and Finish Quality
- Types of Lightweight Aggregates and Selection Criteria
- Mix Design and Mixing Techniques for LWA Internal Curing
- Admixtures, Curing Procedures, and Timelines
- Application, Finishing, Tools, and Visual Checkpoints
- Safety, Common Mistakes, and Troubleshooting
- Cost, Planning Considerations, and Maintenance
- Conclusion
- FAQ
What Is Internal Curing and How Lightweight Aggregate (LWA) Works
Internal curing is a method that uses stored water in lightweight aggregate to keep the cement paste hydrated as it sets. It differs from traditional surface curing, which relies on moisture at the exterior surface. This approach is especially relevant for thin, low-slump mixes used in slabs and countertops.
The basic mechanism involves prewetted LWA absorbing mix water during placement and slowly releasing it to sustain hydration. The goal is to reduce capillary stresses that cause shrinkage in early ages. LWA properties such as pore structure and absorbency control how fast and how much water is released.
Mechanism of internal curing with lightweight aggregates
Internal curing uses prewetted lightweight aggregate (LWA) to store water, which is then released into the cement paste during hydration. Here’s how it works:
First, LWA absorbs mix water during placing and setting. Its porous structure soaks up excess moisture like a sponge.
As concrete hydrates, capillary stresses draw water from the LWA pores. This gradual release sustains cement hydration, reducing self-desiccation and autogenous shrinkage.
Key point: LWA’s role is to supplement mix water, keeping the concrete moist longer and reducing early-age cracking.
Why thin slabs and countertops specifically benefit
Thin sections like slabs and countertops face unique challenges that make internal curing particularly useful:
High surface-area-to-volume ratio means rapid moisture loss. Without internal curing, these elements can dry out quickly, leading to early cracking.
Finishing demands require low-slump mixes, which are prone to shrinkage. Internal curing helps mitigate this by keeping the concrete moist longer.
Key point: For thin sections, internal curing is crucial for reducing early-age cracking and improving surface quality.
Benefits of Using LWA for Shrinkage Reduction and Finish Quality
Internal curing with LWA keeps the paste hydrated by releasing absorbed moisture during curing. This helps reduce capillary shrinkage in thin slabs and countertops. The result is better dimensional stability and fewer contractions that lead to cracks.
Finish quality benefits include smoother trowelability and improved surface straightness, with reduced micro-cracking. Durability aspects in interior environments can improve due to lower permeability and less curl risk, depending on the system and finish. Tailor LWA types and mixing to your interior project for best results.
Shrinkage, cracking risk, and dimensional stability
Internal curing with lightweight aggregate (LWA) helps control shrinkage in thin slabs and countertops. Here’s how:
Plastic and early drying shrinkage are reduced as LWA releases moisture during curing, keeping the paste hydrated longer.
This lowered shrinkage risk minimizes microcracking during the critical early curing period. Less cracking means better dimensional stability in your interior slabs.
Surface finish, polishing response, and long-term performance
Stabilized internal moisture from LWA improves finishing ease on thin slabs and countertops:
1. Trowelability is enhanced due to the reduced risk of surface crazing or checking during finishing.
2. Polishing response is improved as well. Less microcracking means fewer defects show up during polishing or sealing, giving you a smoother finish that lasts longer.
3. Long-term wear and appearance are affected positively. With reduced curling/warping risk and potentially better abrasion resistance when paired with sealers, your interior slabs maintain their initial quality over time.
Types of Lightweight Aggregates and Selection Criteria
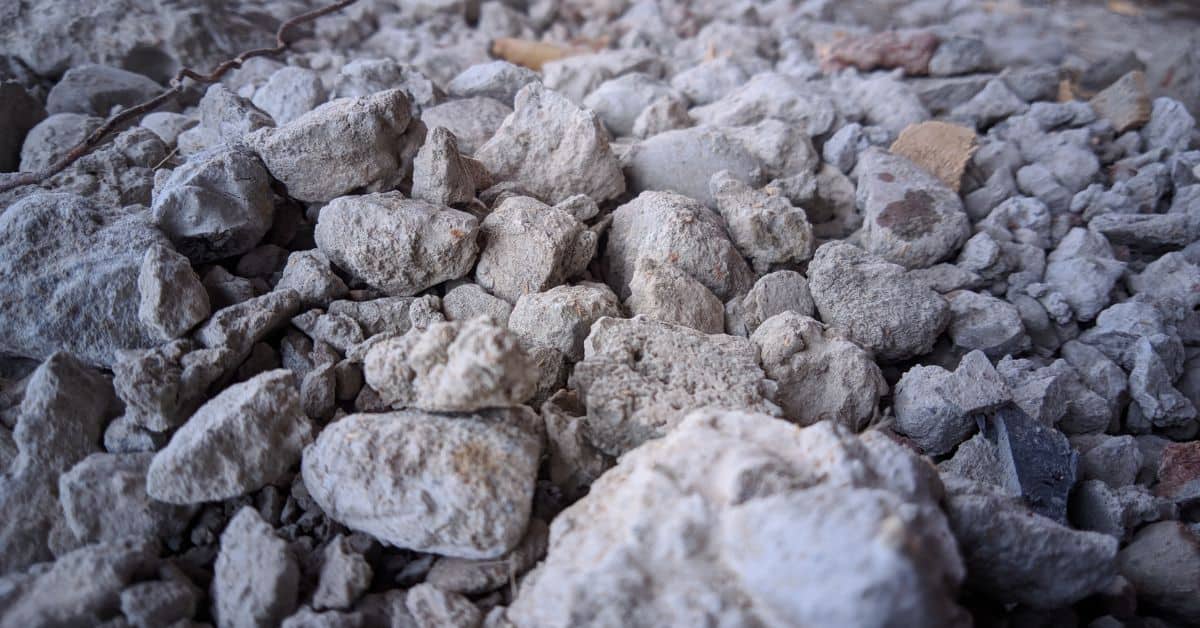
Common LWA families include expanded clay or shale, manufactured lightweight aggregates, perlite or vermiculite, and aerated concrete aggregates. Each has distinct absorption, porosity, and strength profiles. These traits drive how they behave in thin slabs and countertops.
When selecting, check absorption rate, capillary absorption, and particle size distribution for compatibility with thin elements. Consider the impact on workability and surface finish, plus supplier data on batch consistency and curing performance to guide your choice.
Common LWA materials (expanded shale/clay/slate, pumice, perlite)
The choice of lightweight aggregate (LWA) significantly impacts your concrete’s performance and finish. Here are common options:
- Expanded Shale/Clay/Slate: Lightweight, good absorption capacity. Look for high water demand in mix design. Avoid too fine gradations to prevent bleeding.
- Pumice: Very lightweight, low absorption. Ideal for thin slabs and countertops. Check for consistent particle size distribution.
- Perlite: Lightweight, high absorption. Great for internal curing but can cause initial mix instability. Pre-wetting helps.
Material specs and standards explained
Understand these key properties from product datasheets to ensure the right LWA for your project:
- Absorption Method: Check how absorption is measured (e.g., ASTM C127). High absorption aids internal curing.
- Apparent Density: Lower density means lighter concrete. Check against slab thickness requirements.
- Particle Size Distribution: Ensure gradations suit your mix design and finish needs. Too fine can cause segregation, too coarse may affect surface smoothness.
Mix Design and Mixing Techniques for LWA Internal Curing
Proportion LWA in the mix to achieve the desired paste demand and strength for thin elements. Higher LWA content can reduce slump, so plan mix adjustments accordingly. Keep within the project’s performance targets and finish requirements.
Account for absorbed moisture in a moisture budget to maintain the intended water-cement ratio. Outline SSD preparation steps to minimize water loss during batching and transport, and specify the mixing sequence to ensure even distribution of LWA.
Proportioning, Water Management, and Adjustments
Lightweight aggregate (LWA) should make up around 20-40% of your mix volume. This range helps balance shrinkage reduction with strength and finish quality. More LWA means less paste demand, but also lower overall strength in thin slabs.
LWA absorbs water. To maintain intended water-to-cement ratio (w/cm), you’ll need to account for this absorbed moisture. A good starting point is adding about 10-20% extra water to your mix, but confirm with trial mixes and supplier guidance.
Once you’ve got your LWA dosage figured out, adjust other mix components like cement and fine aggregates accordingly. Remember, LWA reduces slump, so you might need more water or superplasticizers for desired workability.
Mixing Sequence, Equipment, and Quality Tips
Proper mixing is crucial to prevent LWA segregation and maintain a consistent internal curing effect. Here’s a suggested sequence:
- Add coarse aggregates first. This provides a base for other materials and helps distribute heat evenly.
- Add fine aggregates next. They’ll fill gaps between the coarse aggregates, creating a stable foundation for the LWA.
- Wet the LWA before adding. Pre-wetting prevents water loss during mixing. Let it sit for about 30 minutes to reach saturated-surface-dry (SSD) condition.
- Add cement and superplasticizers. These should be added after aggregates, ensuring even distribution throughout the mix.
- Gradually add water. Start with a small amount, then gradually increase as needed. This helps maintain desired workability.
- Mix for at least 5-10 minutes. This ensures all materials are well-combined and LWA is evenly distributed.
- Use a high-shear mixer if available. These can help achieve better homogeneity, especially with delicate LWA particles. Rentals typically cost around $200-$400 per day, depending on your location.
Admixtures, Curing Procedures, and Timelines
Identify compatible chemical admixtures and note any potential incompatibilities with LWA internal curing. Common options include superplasticizers, set accelerators, and curing aids. Be aware of washout risks and unitwise compatibility.
Outline a practical workflow for dosing and integration with LWA, including slurry or pre-soaked LWA steps and hydration water management. Include tailored curing methods for thin slabs and countertops and practical milestones for progress checks.
Compatible admixtures and interaction notes
When using lightweight aggregate (LWA) for internal curing, it’s crucial to choose compatible chemical admixtures. Here are some tips:
Superplasticizers: These help reduce water demand and improve workability. Most are compatible with LWA, but check with suppliers to ensure they won’t cause washout.
Shrinkage-reducing admixtures: These can enhance the benefits of LWA internal curing. However, some may interact with other admixtures or cause delayed setting. Consult your mix designer for compatibility.
Retarders and accelerators should also be checked for compatibility with LWA and concrete chemistry to avoid unexpected results.
External curing versus combined internal curing and recommended timelines
Internal curing alone won’t cut it. You need a combination of internal and external curing for thin slabs and countertops.
Initial Set (0-6 hours): Keep the surface moist with a wet burlap or plastic sheet to prevent rapid evaporation. No membrane curing yet.
First 24-72 hours: Apply membrane curing compounds to maintain humidity and control temperature. Follow manufacturer’s instructions for application and removal.
Finish Phase (1 week onwards): Remove forms, apply edge cure if needed, and continue with membrane curing or wet curing as per project requirements. Always follow project-specific guidance for optimal results.
Application, Finishing, Tools, and Visual Checkpoints
Define where LWA internal curing is most effective in thin slabs and countertops, and note typical thickness ranges and mixer considerations. Include guidance on water-to-cement ratio targets and admixture compatibility. Ensure the plan aligns with finish requirements.
Provide a step-by-step workflow for placement, consolidation, and finishing to minimize segregation and voids. Include a tools list and visual QA checkpoints to verify proper curing and surface quality during the job.
Placing, consolidation, and finishing best practices
Before you start placing your LWA concrete, review this checklist to ensure a smooth process.
- Check mix design: Ensure water-to-cement ratio is within 0.45-0.55 and slump target is around 6 inches for thin sections.
- Pre-wet forms: Lightly mist forms to prevent rapid absorption of mix water.
- Distribute LWA evenly: Ensure even distribution in the mixer and during placement to avoid segregation.
- Place from one side: Place concrete from one side to minimize segregation and ensure uniform curing benefits.
- Vibrate/rod gently: Use low-frequency vibration or gentle rodding to consolidate thin sections without introducing excessive air voids.
- Avoid over-vibration: Excessive vibration can lead to segregation and loss of LWA benefits.
- Finish on time: Finish within 30-60 minutes after placement to prevent surface drying and cracking.
- Remove forms promptly: Remove forms once concrete has set but before it gains full strength to avoid stress cracks.
Quick rule: Timing is crucial in thin sections. Finish early, remove forms on time, and cure properly to prevent cracking.
Tools and materials checklist
Before starting your project, ensure you have the right tools and materials for a successful outcome.
- Concrete mixer: A powerful, portable mixer to handle LWA concrete.
- Trowels (hand & bull float): For finishing and consolidating thin sections.
- Screeds: Straight edge screeds for leveling and consolidating.
- Moisture meter: To monitor concrete’s moisture content during curing.
- Curing blankets or permeable membranes: For proper curing to preserve internal curing benefits.
- LWA-specific aggregates: Pre-measured LWA for easy addition to your mix.
- Grinding/polishing equipment: For achieving a smooth, polished finish on countertops.
- Sealer: To protect the concrete surface and preserve internal curing benefits.
Quick rule: Ensure all tools are compatible with thin-section concrete work and polishing steps to avoid damage or subpar results.
Visual checkpoints and inspection during finishing
Regularly inspect your concrete during and after finishing to ensure proper curing and prevent issues.
- Check bleed patterns: Uniform bleeding indicates even LWA distribution. Irregular patterns may suggest segregation.
- Monitor surface smoothness: A consistently smooth surface suggests proper consolidation and finishing.
- Look for early cracks: Hairline cracks can indicate improper curing, excessive shrinkage, or stress from form removal.
- Inspect edges and joints: Ensure they are properly consolidated and finished to prevent cracking.
- Check moisture content: Use a moisture meter to ensure concrete is not drying too quickly or staying wet too long.
Quick rule: Regular inspections help catch issues early. Address any problems promptly to avoid costly repairs and maintain the integrity of your thin slab or countertop.
Safety, Common Mistakes, and Troubleshooting
Cover safety for handling LWA and admixtures, including PPE and dust control. Address respirable silica considerations and local guidelines. Ensure safe mixing and pouring practices to avoid slurry hazards.
Highlight frequent mistakes such as improper moisture conditioning, incorrect grading, or mis-timed curing. Provide practical troubleshooting steps for issues like cracking, curling, or poor surface finish, with recommended adjustments to water, moisture, or curing regimen.
Safety precautions and handling guidance
Always wear appropriate PPE, including gloves, safety glasses, and a dust mask when handling lightweight aggregate (LWA) and admixtures. Consult product safety data sheets for specific requirements.
Keep LWA dry during storage to prevent premature hydration. Moisture can cause LWA to absorb water, leading to potential segregation issues in the mix.
Use wet cutting or water sprays to control dust when processing or placing LWA. This helps minimize respirable silica exposure.
When mixing and pouring, follow safe practices to prevent exposure to slurry hazards. Keep work areas clean and free of debris to maintain a safe working environment.
Common mistakes, warning signs, and corrective actions
To avoid quality issues with internal curing using LWA, steer clear of these common pitfalls:
- Over- or under-wetting LWA: Incorrect moisture content can lead to segregation or insufficient water for hydration. Always verify LWA moisture state before use.
- Poor distribution of LWA in the mix: Inadequate mixing may result in non-uniform distribution, compromising internal curing efficacy. Ensure thorough mixing and homogenization.
- Ignoring admixture interactions: Some admixtures can react with LWA, affecting mix properties. Conduct trial mixes to check compatibility before large-scale production.
- Neglecting cover and edge detailing in thin slabs: Inadequate protection can cause excessive drying and increased shrinkage. Always provide proper cover and edge curing.
Regularly inspect your work for any signs of these common mistakes, such as cracking patterns or curling. Address issues promptly to prevent further deterioration.
Cost, Planning Considerations, and Maintenance
Discuss upfront material costs for LWA and how they compare to traditional moisture curing. Include potential labor and equipment needs and note how shrinkage reduction may influence lifecycle performance. Avoid exact price figures and rely on project-specific checks.
Outline planning factors for sourcing, mix design options, and compatibility with finishes and sealers. Include maintenance and inspection recommendations to monitor long-term performance of thin slabs and countertops.
Cost comparison and budgeting tips
Lightweight aggregate (LWA) for internal curing might seem pricier upfront, but consider the long-term benefits. LWA reduces shrinkage, extending service life and minimizing repairs.
Material cost: LWA is typically 10-20% more expensive than traditional aggregates, but it’s worth it in thin slabs and countertops where shrinkage can cause issues.
Labor and equipment: No extra labor needed for mixing. Equipment remains the same, just adjust settings for LWA’s lower density. Trial mixes may add some initial cost.
ROI: Reduced cracking, warping, and repair costs make LWA a smart investment. Get project-specific quotes from suppliers to evaluate your ROI.
Inspection, maintenance, and lifecycle expectations
Regular checks ensure your thin slabs and countertops stay in tip-top shape. Here’s a simple inspection and maintenance checklist:
- Visual check (monthly): Look for cracks, chips, or delamination. Catch issues early to prevent bigger problems.
- Moisture content (quarterly): Use a moisture meter to ensure slab stays within acceptable range (12-18% for most sealers).
- Sealer condition (annually): Inspect sealer/coating. If it’s peeling or worn, consider recoating.
- Ventilation (as needed): Ensure proper ventilation to prevent moisture buildup and mold growth.
- Humidity control (seasonally): Monitor and adjust humidity levels as seasons change to keep slab happy.
- Shrinkage measurement (annually): Measure slab dimensions to track any shrinkage. If it’s excessive, consider additional internal curing or repairs.
- Surface finish (biannually): Check for signs of wear or damage. Touch up as needed.
- Repair/retrofit (as needed): Address any issues promptly to prevent further damage and maintain warranty coverage.
Quick rule: Inspect regularly, address issues promptly, and follow manufacturer guidelines for sealers and maintenance to maximize your slab’s lifespan.
Conclusion
Internal curing with lightweight aggregate gives you a more stable slab that finishes better and lasts longer. Stay focused on safe handling, proper mix design, and disciplined curing to keep shrinkage low without risking cracks or delamination.
To move forward, check that your slab specs match the LWA you plan to use, pick an appropriate lightweight aggregate and proportion it correctly in the mix, follow the recommended mixing technique and internal curing procedure, apply the curing plan consistently, and perform quick visual checks and tests in a small area before full deployment. Keep notes on materials, ratios, timing, and any observations, and verify readiness with a simple, repeatable checklist you can follow for every pour.
Two common mistakes to avoid are using the wrong aggregate type or gradation for your mix, and skipping a proper curing protocol or applying curing measures inconsistently. Keep safety at the top: wear the right PPE, keep the work area ventilated, and never guess on mix timing or water content. Never rush curing or skip stepwise checks, and always test a small area first to confirm finish quality before scaling up.
If your project is large, or if you’re unsure about mix design, aggregate selection, or curing timelines, consider bringing in a pro. When in doubt, pause, reassess, and call in help rather than risking cracks, surface pits, or weak bonding. Stay deliberate, stay safe, and you’ll get durable, level results that resist shrinkage and look right.
FAQ
What are practical methods for curing concrete with lightweight aggregate internal curing in thin slabs?
Keep the surface protected from rapid drying. Use plastic, curing blankets, or fog/mist dampening as advised by the product labels. For internal curing, ensure the mix and placement allow moisture to stay available to the slab during early strength gain.
What products exist for curing and sealing that work well with lightweight aggregates?
Look for curing compounds and sealers labeled for concrete and compatible with LWA mixes. Read the labels to confirm they won’t interfere with the internal curing mechanism. If in doubt, check the manufacturer instructions or local guidelines.
How do lightweight aggregates help reduce shrinkage in thin slabs and countertops?
Lightweight aggregates act as internal moisture reservoirs, helping to supply moisture as the paste cures. This can lower internal stress from shrinkage in thin sections. Always verify the specific product and mix design guidance from the supplier.
What application techniques work best for thin slabs and countertops with internal curing?
Finish while the slab is still workable, but avoid overworking the surface. Implement a controlled curing plan with limited direct drafts and proper edge forms. If unsure, follow your mix designer’s timing and finishing recommendations and consult product labels.