
Introduction
Sand float texture repair is fixing small areas of worn or uneven concrete finish using a sponge or rubber float to rework the surface until it blends; choose based on the texture you need and how wet the slab is. A sponge float gives a softer, more open texture and is gentler on edges, while a rubber float tends to compact and smooth; check the product label and test a small patch to match the existing finish. Time the repair to the concrete’s set—too early and you’ll tear the surface, too late and it won’t bond well—so watch the slab, feel the paste, and follow manufacturer instructions.
This is a hands-on job that’s about feel, not fancy tools: keep tools clean, use fresh water for sponges, and work in small areas so you can match the surrounding texture. If you’re unsure about compatibility with sealers, overlays, or additives, check the product labels and local rules before proceeding.
Key takeaways
- Assess sand float texture before repair; identify damage causes and remedy priority.
- Sponge vs rubber: choose based on desired texture and curing conditions.
- Don’t overwork; timing matters between initial set and final finishing.
- Inspect tools for nicks and edge wear to avoid texture inconsistencies.
- Keep moisture and ambient conditions in check to prevent curing cracks.
- Wear eye protection and gloves; clean up spills promptly to minimize hazards.
Table of Contents
- Introduction
- Key takeaways
- Understanding Sand Float Textures and Common Damage Causes
- Sponge Float Vs Rubber Float: Tool Comparison
- When to Repair Vs When to Refinish
- Tools and Materials Checklist
- Step-by-Step Repair with a Sponge Float
- Step-by-Step Repair with a Rubber Float
- Timing Tricks and Environmental Factors
- Troubleshooting and Long-Term Maintenance
- Conclusion
- FAQ
Understanding Sand Float Textures and Common Damage Causes
A sand float finish is a concrete surface texture created by working fine aggregate into the top layer with a hand or bull float that has sand embedded or by using a sanded topping coat. It produces a slightly rough, non-slip surface with visible sand granules and a matt look that differs from broom or steel-troweled finishes.
Common damage comes from impact, abrasion, freeze–thaw cycles, chemical exposure, poor initial finishing, or traffic wear; identifying the likely cause helps you choose repair materials and methods. If a material spec or performance characteristic matters for your repair, check the product label or technical data sheet before proceeding.
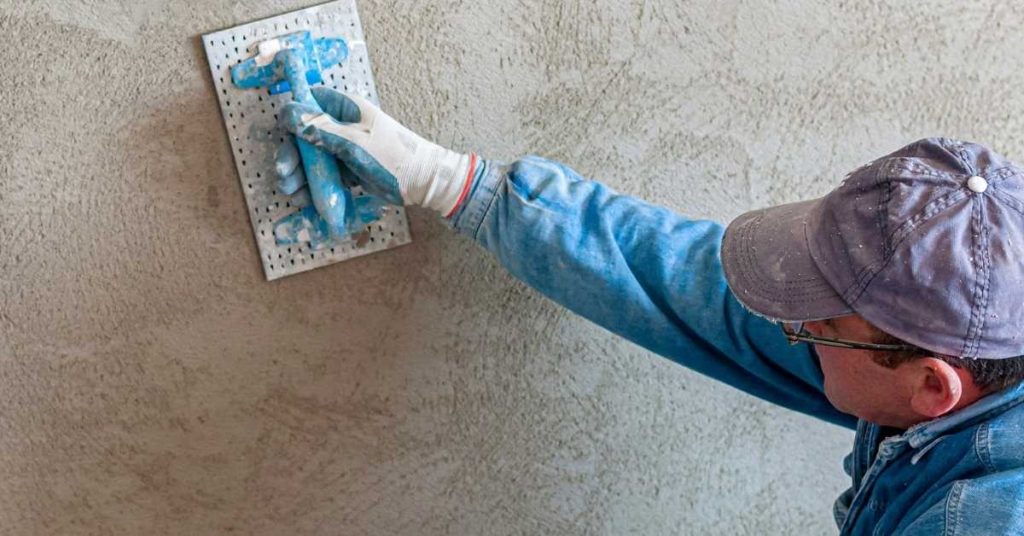
What is a sand float finish?
A sand float finish is a textured wall and ceiling surface that’s created using a special float tool with embedded sand. It’s also known as orange peel texture due to its resemblance to the skin of an orange.
The typical composition includes joint compound, water, and fine sand grains. This mixture is applied to the substrate using a trowel or hopper, then floated onto the surface with the special tool.
You’ll commonly find this finish in residential homes, particularly on ceilings and sometimes on walls. It’s popular for hiding minor imperfections and reducing echo in large rooms.
Typical damage types and why they occur
Sand float finishes can suffer from several types of damage over time. The most common are:
Chips and Gouges: These often result from impact, like moving heavy furniture or accidentally hitting the wall with a tool. Poor initial application can also lead to weak spots that chip off easily.
Delamination: This occurs when the textured layer separates from the underlying substrate. It’s usually caused by moisture problems, such as leaks or high humidity, which weaken the bond between the two layers.
Uneven Texture: Inconsistent texture can be due to improper application, inadequate sand mixture, or substrate movement, like settling of the building structure.
Sponge Float Vs Rubber Float: Tool Comparison
A sponge float (porous, foam-backed or cellulose) compresses and stamps texture, allowing you to lift and blend sand particles gently, while a rubber float spreads and compacts repair mortar more aggressively for denser finishes. Each tool produces different surface relief and sheen, so tool choice affects how closely you can match the original sand float look.
Consider control, ease of feathering, and the amount of pressure each tool requires when selecting between them, and review manufacturer recommendations for use on repairs or toppings. If a product requires specific tooling or sequence, follow the manufacturer instructions or the product data sheet.
How Sponge Floats Work
A sponge float is a lightweight, porous tool made from synthetic or natural materials. It works by absorbing and distributing the top layer of cement paste on your concrete surface.
The pores in the sponge allow for even distribution, creating a textured finish with small, uniform pits. This texture helps to hide minor imperfections and gives the surface a non-slip grip.
Sponge floats are ideal for repairing small areas or touch-ups where you need precise control over the texture. They’re also great for creating consistent patterns on new concrete pours.
How Rubber Floats Work
A rubber float is a dense, smooth tool made from natural or synthetic rubber. It works by applying pressure and smoothing out the top layer of cement paste on your concrete surface.
The dense nature of the rubber allows for a more aggressive application, making it ideal for larger repairs or areas with heavy foot traffic. Rubber floats can also be used to create a smooth, uniform finish when desired.
Rubber floats are best suited for repairing large areas where you need to blend in new material with existing concrete. They’re also useful for creating a smooth, even surface on new pours.
Pros and Cons Comparison
Choosing between a sponge float and a rubber float depends on your specific repair needs. Here’s a quick comparison:
Pros
- Sponge Float: Lightweight, easy to control for precise texture; creates non-slip grip.
- Rubber Float: Dense, aggressive application for large repairs; can create smooth, uniform finish.
Cons
- Sponge Float: Can be less durable; may require more frequent replacement; not ideal for large areas or heavy traffic.
- Rubber Float: Heavier and more difficult to control; can leave marks if not used properly; requires more effort to clean.
In most cases, you’ll want to use a combination of both floats. Start with the rubber float for large repairs or blending, then switch to the sponge float for final texturing and touch-ups.
When to Repair Vs When to Refinish
Localized patch repairs suit isolated chips, small spalls, or surface delamination where surrounding texture and color match remains acceptable; these keep costs and disruption down. A full skim or refinish is warranted when damage is extensive, texture is inconsistent across a slab, or aesthetic uniformity is required across a visible area.
Assess the extent of cracking, depth of loss, and overall visual continuity before deciding, and factor in how adjoining trades and coatings will be affected. If unsure about compatibility or long-term performance, check product literature or consult a pro for scope guidance.
Visual checkpoints for repairability
Before you start any concrete repair work, use this checklist to assess if the damage can be patched or if larger intervention is needed. This will help you avoid expensive rework and ensure a lasting fix.
- Crack width: Measure cracks. If they’re less than 1/4″ wide, patching may work. Wider cracks usually require more extensive repair.
- Crack pattern: Check if cracks are random or form patterns (like map cracking). Patterns often indicate underlying issues that need addressing before patching.
- Surface delamination: If flaking or peeling is present, the concrete’s surface may be too damaged for a simple patch. Check for deep scaling as well.
- Concrete color variation: Patches should match the surrounding concrete. If there are significant color differences, you might need to use a stain or integral color to achieve a good match.
- Area size of damage: Small areas (less than 1 sq ft) can usually be patched. Larger areas may require full-depth repair or replacement.
- Moisture content: Check for signs of moisture, like efflorescence or dampness. High moisture can cause patch failure and may indicate a need for waterproofing before patching.
- Structural integrity: Gently push on the damaged area. If it feels spongy or moves, there might be underlying structural issues that need professional assessment before repair.
- Edge condition: Inspect the edges of the damage. Sharp, well-defined edges usually indicate a good patch candidate. Irregular, crumbling edges may require more extensive repair.
Quick rule: If you’re unsure about any aspect after checking these points, consult with a local concrete professional or check manufacturer instructions for your specific product. It’s better to be safe and ensure lasting repairs than to cut corners and face rework.
Structural vs Cosmetic Damage: How to Decide
Alright, listen up. Before you start slapping on new concrete or calling in the pros, you need to know what you’re dealing with. It’s like checking under the hood of a car before you tinker.
First off, cosmetic damage is just that – it’s surface stuff. Cracks, chips, maybe some discoloration. It ain’t pretty, but it’s not gonna bring down your whole slab. If you’ve done a visual check and found nothing major, then refinish away.
Now, structural damage, that’s the serious stuff. We’re talking cracks that run deep, sloping or uneven surfaces, or chunks missing from your slab. Before you decide to repair, check base compaction. If it’s poor, you might be looking at a bigger issue than just surface cracks.
Here’s the thing: if you’re not sure what you’re looking at, don’t guess. Get an expert opinion. It could save you time, money, and a lot of headaches down the line.
Tools and Materials Checklist
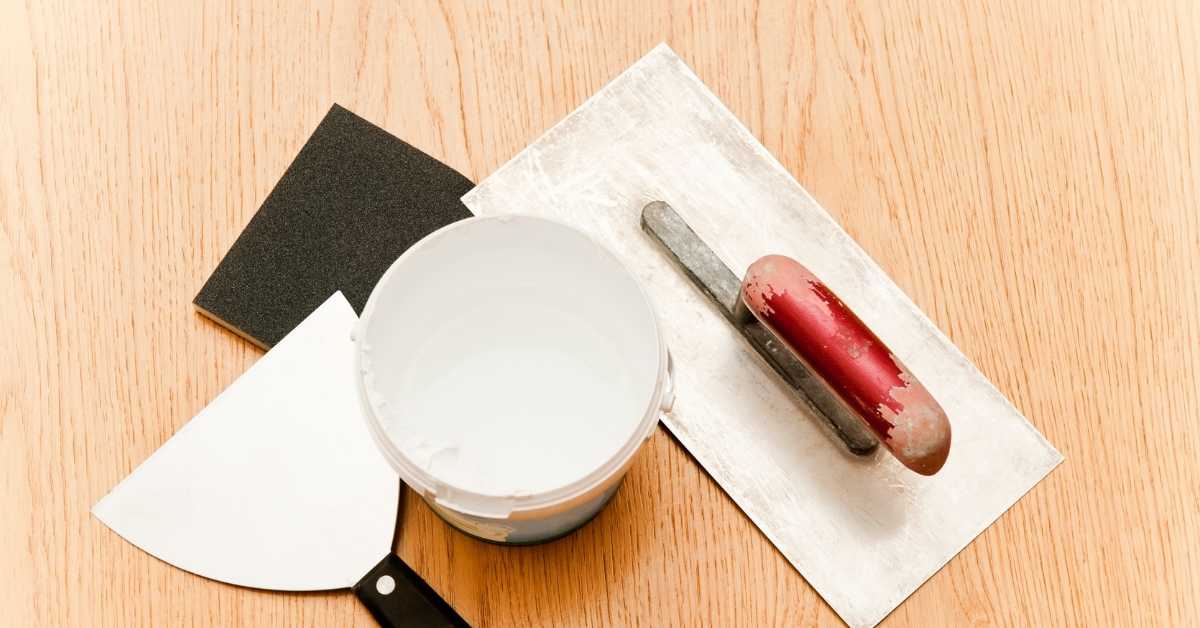
Prioritize basics first: mixed repair mortar or patching product rated for horizontal wear, a sponge float, a rubber float, mixing tools, margin trowel, and a brush or broom to rework texture. Add safety gear, bond primer if specified, and small containers for mixing small batches to prevent waste.
Include optional items that make blending easier, such as a spray bottle for dampening the substrate, a rubbing stone or fine rasp for feathering edges, and a colorant or sand to match texture if needed. Always read product labels and technical data sheets for recommended ancillary materials and substrate prep requirements.
Essential tools
Before you start any concrete repair job, make sure you have all the essential tools and safety gear. This checklist will help you ensure you’re prepared.
- Tape measure: To accurately measure areas for repair and to check if your materials are the right size.
- Chalk line: For marking out repair areas precisely.
- Hammer: For chipping away damaged concrete. Check it’s not too heavy or light for the job at hand.
- Cold chisel: For removing large pieces of damaged concrete. Ensure it’s in good condition and the right size for your needs.
- Wire brush: To clean the repair area. Check bristles are firm but not too stiff to damage the surface.
- Concrete trowel (hand float): For spreading and smoothing the repair material. Check it’s the right size for your job.
- Gloves: To protect hands from concrete, sharp edges, and chemicals. Ensure they fit well and provide adequate protection.
- Safety glasses: To protect eyes from debris and splashes. Check they fit well and offer good visibility.
- Ear protection: For when using power tools like a jackhammer. Check it’s comfortable and blocks out enough noise.
- Dust mask/respirator: To protect from concrete dust. Check it fits well and provides adequate protection according to manufacturer instructions.
Quick rule: Always check your tools before starting work. A broken tool can cause delays, injuries, or poor quality repairs.
Materials and mix basics
Before you start any concrete repair job, use this checklist to ensure you have the right materials and understand how to use them. This will help you avoid common mistakes that can lead to costly rework.
- Patching Compound: Check product label for intended use (fill, level, or structural). Ensure it’s compatible with your existing concrete.
- Setting-Type vs Drying-Type Products: Verify which type you’re using. Setting-type products cure quickly and can be opened to traffic sooner. Drying-type products take longer but are usually cheaper.
- Bonding Primer: Check if one is required for your repair product. If so, ensure it’s compatible with both the existing concrete and the patching compound.
- Concrete Mix: For new pours or large repairs, check local codes for required strength (e.g., 3000 psi). Ensure you’re using the right mix design (e.g., sand, gravel, cement ratio).
- Water: Check water quality. Hard water can cause efflorescence and affect concrete curing. Use clean, soft water if possible.
- Aggregates: Ensure gravel size is appropriate for the repair (e.g., smaller aggregates for thin repairs).
- Curing Compound: Check product label for application method and required coverage. Some products need to be applied immediately after pouring, others can wait until the concrete has set.
- Protective Gear: Check you have safety glasses, gloves, and other PPE needed for handling chemicals and working with concrete.
Quick rule: Always check manufacturer instructions before using any product. They know their stuff better than anyone else.
Step-by-Step Repair with a Sponge Float
Prepare by removing loose material, cleaning the patch area of dust and contaminants, and dampening the substrate to the condition recommended by your patch product. Mix small batches of repair material to a workable consistency per the product instructions and apply with a margin trowel, pressing to fill voids.
While the repair is still plastic, use the sponge float to lift and texture the surface, tapping and rotating to recreate sand granules and blend edges into the existing slab. Let the layer reach the cure stage specified by the manufacturer before light finishing passes or exposing to foot traffic.
Step-by-Step Repair Process
Follow these practical steps to repair your sand float texture using a sponge float. Safety first, then prep, main work, and cleanup.
- Safety first: Wear gloves, goggles, and a dust mask. Tape off the area with painter’s tape.
- Remove loose material: Use a chisel or scraper to remove any loose concrete from the damaged area.
- Prepare patch material: Mix your concrete repair material according to the package instructions. Keep it consistent for best results.
- Apply patch material: Using a trowel, apply the mixed material to the damaged area, filling it completely.
- Float and texture: Lightly press the sponge float into the wet patch at a 45-degree angle. Lift and repeat to create the sand float texture. Check for consistency with surrounding texture.
- Let it cure: Follow the manufacturer’s instructions for curing time. Keep the area moist during this period.
- Final check and cleanup: Once cured, inspect your work. Remove tape and clean up any debris.
Prep and Surface Cleaning
Before applying patch material, ensure the surface is clean and ready for adhesion. This step is crucial for a successful repair.
Start by removing any loose material from the damaged area using a chisel or scraper. Be careful not to damage the surrounding texture.
Feather edges: Use a razor knife or sandpaper to create a feathered edge around the damaged area. This helps blend the repair into the surrounding texture.
Ensure the surface is clean and free of dust, dirt, or debris. A quick wipe with a damp cloth can help achieve this. Now your surface is ready for patch material application.
Application Technique and Texture Matching
Applying the patch material correctly and recreating the sand float texture are key to a successful repair. Here’s how:
Using a trowel, apply the mixed patch material to the prepared surface, filling the damaged area completely.
Float and texture: Lightly press the sponge float into the wet patch at a 45-degree angle. Apply even pressure across the entire surface of the float. Lift and repeat, following the original texture’s pattern as closely as possible.
Adjust your pressure and angle to match the surrounding texture. Be consistent for best results. If you’re struggling, step back and compare your work to the existing texture.
Blending and Feathering Edges
Feathering the repair into the surrounding texture ensures a seamless finish after painting. Here’s how to do it:
As you float and texture the patch, gradually reduce pressure at the edges to create a smooth transition between the repair and the existing texture.
Blending: Use a damp sponge or cloth to lightly dab the edges of the patch. This helps blend the repair into the surrounding texture and removes any excess material.
After the patch has cured, use a fine-grit sandpaper to lightly sand the edges, ensuring they are smooth and well-blended. Vacuum up any dust and your repair should be invisible after painting.
Step-by-Step Repair with a Rubber Float
Clean and prepare the area, remove debris, and dampen as directed by the repair product; compact the patch material solidly into the void with a trowel to eliminate air pockets. Apply the repair material slightly proud if you need to re-establish texture depth, and strike off to approximate level with adjoining concrete.
Use the rubber float to press and smooth the material, working from the center outward and feathering edges to blend; the rubber float will compress the sand and can produce a tighter surface than a sponge. Allow the material to reach the handling strength given on the product label before attempting texture blending or exposure to traffic.
Step-by-Step Repair Process
Follow these practical steps to achieve a smooth, consistent repair using a rubber float.
- Preparation and safety checks: Inspect the area, wear gloves and goggles, ensure good ventilation. Why? Safety first, clear view of work area.
- Mix concrete: Follow your mix’s instructions. Why? Correct consistency ensures a strong bond.
- Apply initial layer: Spread mixed concrete over the damaged area using a trowel or squeegee. Why? Even coverage for a solid base.
- Float application: Work the rubber float in smooth, steady strokes, applying even pressure. Why? Creates a consistent texture, helps remove air bubbles.
- Let it set: Allow the concrete to cure according to your mix’s instructions before final touches. Why? Prevents damage during finishing.
- Light tooling and touch-ups: Use a light trowel or brush for fine adjustments after setting. Why? Smooths out any minor imperfections.
- Final inspection: Check for level, smoothness, and consistency before painting or sealing. Why? Ensures a professional-looking finish.
Prep and surface cleaning
Proper preparation is key to a successful repair with a rubber float. Start by ensuring the area is clean, dry, and free of any loose material.
Note: Unlike sponge floats, rubber floats can’t absorb moisture, so ensure the surface is bone-dry before starting.
Remove any paint or sealant from the repair area using a scraper or wire brush. If the damage is structural, make sure to reinforce it before proceeding.
Application technique and texture matching
The key to replicating sand float texture with a rubber float lies in your application technique. Use long, steady strokes for large, flat areas.
Tip: For smaller areas or edges, use a dabbing motion to apply pressure evenly and avoid leaving marks.
Work the float in one direction, applying consistent pressure to create a uniform texture. Remember, less is more – too much pressure can cause the rubber to leave visible marks.
Finishing touches and smoothing
Once your repair has set and you’ve performed initial tooling, it’s time for final touches before painting or sealing.
Tip: Use a damp sponge to lightly dab the repaired area. This helps smooth out any minor imperfections and prepares the surface for painting.
Inspect your work closely, looking for any missed spots or inconsistencies. Make sure the repair blends seamlessly with the surrounding concrete before moving on to the next step in your project.
Timing Tricks and Environmental Factors
Temperature, humidity, and wind affect set time and workability—schedule repairs when conditions match the product’s recommended range and avoid direct sun or wind that can dry the patch too fast. Coordinate with other trades so heavy traffic, curing coverings, or coatings won’t interfere during the critical curing window outlined by the product manufacturer.
Use cold or warm weather strategies the product suggests, such as adjusting mix temperature, using accelerators/retarders only if they are allowed by the product instructions, and planning curing time accordingly. If you don’t know the correct cure conditions for your material, check the technical data sheet or label before starting work.
Optimal timing during project (sequence tips)
Timing is key when it comes to texture repairs. You don’t want to do all the work, only to have other trades mess up your fresh concrete.
Wait until painting and trim installation are done. Paint can stick to wet concrete, ruining both surfaces. Trim might get in the way or get damaged during repair work.
HVAC work should be done after your repairs. Ductwork and vents can clog with concrete dust if you do it the other way around.
Weather and temperature considerations
Mother Nature plays a big role in how your repair turns out. You want to work when conditions are just right.
Humidity’s your enemy here. Too much, and the concrete won’t cure properly. Keep humidity below 70%. Check forecasts before you start.
Temperature matters too. It should be between 50°F to 90°F for best results. Both hot and cold can mess with curing times and strength development.
Cure times and when to let traffic resume
Patience is a virtue when it comes to concrete. You can’t rush Mother Nature, no matter how much you want your floor back.
Check the manufacturer’s recommendations. They’ll tell you how long to wait before sanding or walking on the repaired area. It’s usually 24-72 hours for light traffic and up to a week for heavy use.
Remember, it takes time for concrete to reach its full strength. Don’t rush. Let it cure properly before you put too much weight or stress on it.
Troubleshooting and Long-Term Maintenance
Common mistakes include feathered edges that curl, color or texture mismatch, and patch shrinkage—address these by ensuring proper substrate prep, correct mix consistency, and appropriate finishing technique for the chosen float. If a patch shows early failure, identify whether the cause was poor bond, incorrect cure, or incompatible materials before reworking.
For maintenance, keep the surface clean of abrasive debris and chemicals, inspect periodically for new spalls, and touch up small areas before damage grows; follow any maintenance guidance on the product data sheet. When in doubt about a repair method or long-term performance, refer to manufacturer instructions or consult a qualified contractor for persistent issues.
Common repair mistakes and fixes
Avoid these common pitfalls to achieve a lasting, consistent sand float texture.
- Visible seams: Ensure proper feathering at edges. Don’t stop mid-job; blend in new material with old.
- Poor adhesion: Clean surface thoroughly before applying. Use appropriate primer if needed.
- Texture mismatch: Match texture by practicing on scrap pieces first. Keep float speed consistent.
- Inconsistent curing: Maintain even temperature and humidity during cure time to prevent patchiness.
Regularly inspect your work for these issues, and address them promptly to maintain a uniform finish.
Maintenance schedule and preventive care
Preventive maintenance is key to keeping your sand float texture looking fresh. Inspect your surfaces regularly for any signs of wear or damage.
Every 6 months: Check for cracks, chips, or discoloration. Clean the surface gently with mild detergent and water.
Annually: Inspect edges and corners where texture may wear off first. Touch up as needed using the same technique used during initial application.
Promptly address any issues to prevent them from becoming larger, more costly repairs down the line.
Conclusion
Paragraph 1: The key move now is to pick the right texture repair approach and commit to safe, controlled steps so the surface stays durable and looks right. Do not rush; a precise patch done right lasts longer and avoids costly rework.
Paragraph 2: Start by testing a small, inconspicuous patch to compare sponge and rubber results, then set up your tools and safety gear, check the ambient conditions, and only proceed if the test matches the desired texture. Decide on repair or refinish based on real results from that test, then work in short, even strokes, keep the surface slightly damp, don’t overwork the mix, wipe excess off the float as you go, and let each section breathe and cure before moving on. If you see uneven spots, address them immediately in a fresh pass rather than piling on material. stick to small areas first, test before full repair, and safety first.
Paragraph 3: Common mistakes to avoid include using the wrong float for the texture, overworking the patch or letting it dry too fast, and skipping environmental checks like humidity and temperature. Don’t hurry through steps or mix heavily to cover up a flaw, and never apply new material over a failed patch without feathering and checking edges. Always wear eye protection and gloves, keep the work area clean, and verify that the patch matches surrounding texture before moving on.
Paragraph 4: If the substrate shows signs of structural damage, if repairs keep failing to take hold, or if you’re unsure about moisture intrusion or cure timing, call a professional instead of pushing on alone. When in doubt, pause and reassess, then approach the next attempt with the plan you tested in a small area and confidence to proceed. You’ve got this—consistent, careful steps lead to a solid, lasting finish.
FAQ
When should I switch from a sponge float to a rubber float during texture repair?
Use a sponge for quick texture changes and softer edges. Move to a rubber float when you need more control and a flatter finish.
What environmental factors should I consider to avoid texture damage?
Wind, humidity, and temperature can affect drying and texture. Plan repairs for calmer conditions and follow the product instructions for cure times.
How can I tell if the texture repair is too smooth or too rough after finishing?
Compare with the surrounding surface and adjust with light passes or a different tool if needed. If in doubt, test on a small area and review manufacturer guidance or local rules before finalizing.
What are the safest signs I’m ready to finish and seal after a sand float repair?
Look for a uniform texture and no visible ridges or divots. Follow product label directions for sealing or coatings and adhere to local surroundings and site practices.