

Introduction
Measuring concrete cover accurately means checking how far the rebar or embedded metal sits from the surface, instead of guessing and hoping it’s close enough. In practice, small errors in this measurement can lead to long-term problems like spalling or cracking under load and weather. For DIY work, treat cover as a real detail you verify, not a rough guess.
Tools like a simple gauge or a caliper can help, but the key is to use what’s specified by the manufacturer or local rules and to follow the project’s instructions. When in doubt, check the product label, structural guidance, and any applicable local requirements, and measure at multiple points to confirm consistency. If you’re unsure about requirements, ask for clear guidance from the hardware retailer or a qualified pro before proceeding.
Key takeaways
- Accurate cover measurements prevent premature spalls and corrosion; confirm per project specs.
- Use field-ready gauges and a calibrated ruler; align with steel bar centerlines.
- Inconsistent readings stem from formwork gaps, paint, dirty surfaces; wear PPE and log.
- Maintain QAQC logs, note deviations, and reference local standards for measurements.
- Tools for measuring cover include gauges, magnets, and depth probes; verify calibration.
- Regular maintenance and long-term planning reduce future spalls through proper curing and detailing.
Table of Contents
- Introduction
- Key takeaways
- Why Accurate Concrete Cover Matters
- How Spalling Develops: Mechanisms and Progression
- Consequences of “Close Enough” Measurements
- Field Tools and Instruments for Measuring Cover
- Common Field Mistakes and How to Avoid Them
- Safety, QA/QC, and Compliance During Measurements
- Practical Checklists, Visual Checkpoints, and Case Examples
- Long-Term Maintenance to Prevent Future Problems
- Conclusion
- FAQ
Why Accurate Concrete Cover Matters
Concrete cover is the distance between the outer surface and the reinforcing steel. It acts as a shield against moisture, chlorides, and carbonation to slow corrosion and deterioration. Aiming for “close enough” is not acceptable when durability hangs on precision.
In practice, proper cover supports longer service life and reduces cracking and spalling risks in harsh environments. Field measurement accuracy matters beyond code minimums, because real-world variance can drive early damage. Use simple, repeatable methods and document start and finish readings to build a trustworthy record.
Durability and corrosion protection
The concrete cover’s job is to protect the steel reinforcement from harmful elements. It’s not just about meeting code minimums; precision matters.
Chloride ingress, a major cause of rebar corrosion, is slowed down by sufficient cover. Chlorides in de-icing salts or seawater can’t reach the steel as quickly, extending the service life of your structure.
Carbonation, another culprit, also takes longer to penetrate deep covers. When concrete carbonates, it loses its alkalinity, exposing the steel to corrosion. More cover means more time before this happens.
Structural performance and service life implications
Inadequate concrete cover can lead to a shorter service life for your structure. Here’s why:
Corrosion starts earlier, leading to cracking and spalling of the concrete. This reduces the cross-sectional area of the reinforcement, weakening the structure over time.
Premature maintenance becomes necessary due to these distresses. Repairs are costly and disruptive, eating into your budget and schedule.
In harsh environments like coastal areas or regions with freeze-thaw cycles, the consequences are even more severe. Accurate cover measurement is crucial to mitigate these risks.
How Spalling Develops: Mechanisms and Progression
Inadequate cover invites moisture and aggressive ions to migrate toward the steel, and rust growth creates internal pressure that cracks the concrete. This micro-cracking begins near the rebar and expands as corrosion continues. Over time, the pressure concentrates at the steel-concrete interface and initiates delamination.
As cycles of freezing and thawing combine with ongoing chemical reactions, visible spalls emerge. Field signs like rust halos and surface scaling point to deeper issues, and the idea of a perfect, uniform cover fails under real service conditions. Measuring actual cover helps link depth to observed damage and guides corrective action.
Rebar corrosion: chemistry and expansion stresses
The story starts with moisture. When it reaches the rebar, it meets oxygen, creating ideal conditions for corrosion.
Corrosion is a chemical reaction. It turns iron in the rebar into rust (iron oxide). Rust takes up more space than the original iron – about six times as much.
This expansion generates tensile stresses in the concrete. It’s like having an invisible jackhammer inside your concrete, slowly chipping away at its strength.
Crack initiation, propagation, and delamination
The first sign of trouble are microcracks. They start near the rebar, where the rust is pushing against the concrete.
These microcracks link up over time, creating planes of weakness. The concrete starts to peel away from the rebar – a process called delamination.
Now, we’ve got a problem. The concrete’s no longer protecting the rebar. It’s like a ship with a hole in its hull – it’s only a matter of time before it sinks.
Consequences of “Close Enough” Measurements
Small variances in cover depth can translate into faster distress and higher repair needs. Perceptible effects include accelerated corrosion, increased permeability, and shortened service life when readings drift from actual conditions. Always verify against the actual site readings instead of relying on estimates.
In critical zones, insufficient cover magnifies cracking and damage in high-stress areas. Concrete owners face higher maintenance costs and more frequent patching when measurements are not precise. Document readings carefully and communicate findings to the crew for immediate remediation.
Performance and safety risks
Underestimating concrete cover depth can lead to immediate and latent risks. Insufficient cover exposes reinforcement bars to corrosion, weakening the structure’s integrity.
Corrosion causes rebar to expand, leading to cracks and spalls. These can compromise safety, as pieces may break off and fall.
Delamination, where concrete separates from the steel, further weakens the structure. It starts small but grows over time, accelerating deterioration.
Freeze-thaw damage is also more likely with insufficient cover. Water seeps in, freezes, and thaws, causing cracks to widen and deepen.
Financial lifecycle impacts
Small measurement errors can have big financial consequences over a structure’s life. Insufficient cover leads to early repairs, as spalls and cracks appear sooner than expected.
More frequent patching is needed, driving up maintenance costs. Each repair is a chance for mistakes, leading to further deterioration.
Preventable spalls and canopy or slab deterioration can shorten the structure’s service life. This means early replacement, with all its associated costs.
The total lifecycle cost increases when cover measurements are ‘close enough’ but not accurate.
Contractual and liability exposure
Cover that doesn’t meet specified requirements can lead to disputes. If a structure fails an inspection due to insufficient cover, it’s a nonconformance claim waiting to happen.
Regulatory issues may arise if the structure is deemed unsafe due to inadequate cover. This could result in fines or even closure of the site.
Liability is also a concern. If someone is injured because of a spall caused by insufficient cover, you could be held responsible.
To avoid these issues, always ensure cover meets specified requirements and document it thoroughly.
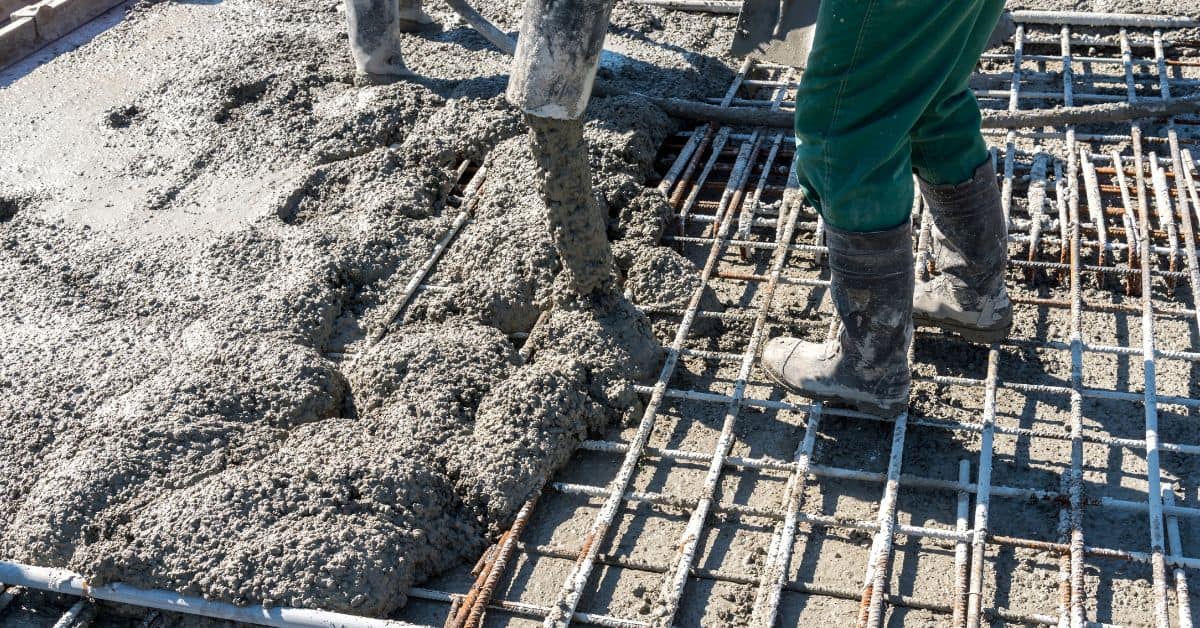
Field Tools and Instruments for Measuring Cover
Common tools include traditional tapes and calipers, plus non-destructive devices like magnetic covermeters, ultrasonic testers, and GPR. Each tool has a role: some measure depth to rebar, others cover thickness, and some provide both readings. Always note what your tool actually measures on the label or manual.
Use non-destructive methods as a first pass, and reserve destructive verification when needed to confirm readings. Plan readings with multiple readings per member and document environmental factors that affect results. Calibrate and test tools before use to ensure repeatable results.
Cover meters and rebar locators
Electronic cover meters are handy tools for measuring concrete cover. They work by inducing a magnetic field into the concrete, which is then detected by a receiver probe. The time it takes for the signal to travel from transmitter to receiver tells us the depth of the rebar.
Verify the meter’s range and accuracy before use. Some models can measure both cover thickness and rebar depth. Place the probes perpendicular to the surface, applying even pressure. Recalibrate if readings seem off.
Rebar locators work similarly but focus on finding reinforcement. They’re useful when rebar layout is unknown or congested. Use them to map out rebar locations before measuring cover.
Ground-penetrating radar (GPR) and advanced scanning
GPR is a non-destructive method that uses electromagnetic waves to image subsurface features. It’s great for mapping reinforcement layout and cover distribution over large areas.
GPR adds value when you need to understand the bigger picture – like where rebar is sparse or congested, or if there are voids in the concrete. But it’s not as accurate as single-point tools for precise cover measurements.
Note: GPR signals can be tricky to interpret. Always corroborate findings with other methods when possible.
Advanced scanning techniques like electrical resistance tomography (ERT) and ultrasonic pulse echo (UPE) are also available but less common due to their complexity and cost.
Simple verification methods: probes and cores
Sometimes, you need to confirm non-destructive readings with destructive methods. Drilling cores or using probe devices can provide physical evidence of rebar depth and cover thickness.
Drill cores give the most accurate measurements but require more time and effort. They’re useful when readings are inconsistent or critical structures are at stake.
Probe devices, like those used in the ‘window’ method, can also verify readings without drilling. However, they may not be as precise as cores.
Remember: Destructive methods should be a last resort due to their invasive nature. Always plan your coring or probing locations carefully to minimize damage and maximize information gained.
Common Field Mistakes and How to Avoid Them
Common errors include skipping calibration, reading from the wrong side of the cover gauge, and neglecting edge effects. Corrective actions involve rechecking with a calibrated tool and marking the actual surface and rebar positions. Develop a consistent workflow to minimize these mistakes.
Distinguish between cover depth and rebar position with clear markers before reading. Establish a standard sequence for cleaning, moisture control, and tool selection, and document every reading with operator initials and date. If errors arise, retake readings or use a secondary method for verification.
Instrument misuse and calibration lapses
Using uncalibrated tools is a common mistake. Always check your cover meter or ruler before use.
Probe orientation matters. Hold it perpendicular to the surface for accurate readings.
Compensate for rough surfaces by cleaning and leveling them first. This ensures your probe sits flat and gives reliable results.
Sampling bias and inadequate coverage mapping
Avoid taking readings only where it’s easy or convenient. This can lead to a false sense of security about your structure’s cover.
Spread out your readings. Cover all areas, especially those hard to reach or hidden from view.
Take multiple readings at each location. This helps account for any localized variations in concrete thickness.
Environmental and workmanship influences
Surface finish can affect your readings. A rough surface may give false high readings, while a smooth one might hide low cover areas.
Segregation in concrete can cause variations in cover thickness. Make sure to take readings across these areas.
Embedded items like pipes or reinforcement can interfere with your measurements. Be aware of their locations and adjust your readings accordingly.
Safety, QA/QC, and Compliance During Measurements
Prioritize PPE, controlled site access, and incident reporting for measuring activities. Be aware of dust, tool vibration, and curing agents that can affect health and footing. Establish emergency procedures and a safe work zone for each measurement session.
Calibrate instruments and document setup details like date, lot, and serial numbers. Implement a standardized protocol with start/finish points and defined measurement intervals. Keep digital or paper logs and require supervisor sign-off for critical readings.
Personal and site safety precautions
Safety’s our top priority. Here’s what you need to know before measuring concrete cover.
PPE: Wear a hard hat, safety glasses, steel-toed boots, and gloves. If there’s a risk of falling, use a harness.
Site access controls: Ensure the area is clear of traffic, and no one’s working nearby. Mark off the zone if needed.
Emergency procedures: Know the site’s emergency plan, including first aid and evacuation points. Keep your phone handy for quick contact with the main office or supervisor.
QA/QC procedures and traceability
Quality assurance is key to accurate results. Here’s how to maintain it:
Calibration logs: Before each session, verify your tools’ accuracy. Document calibration dates and lot numbers.
Operator certifications: Ensure everyone handling equipment is trained and certified. Keep records on file.
Peer checks: Have another team member double-check measurements to confirm consistency. If discrepancies arise, investigate and resolve promptly.
Using standards and specifications effectively
Before you start measuring, consult these documents to ensure accurate results:
- Contract documents: Check required cover depths and testing methods. Skipping this can lead to non-compliance.
- Structural drawings: Verify rebar locations and sizes. Incorrect data here can cause inaccurate measurements.
- Relevant codes: Follow national or international standards for concrete cover, like ASTM C457 or Eurocode 2. Ignoring these can result in inadequate protection against corrosion.
- Rebar spacing: Ensure it matches the design. Wide spacings can lead to insufficient cover.
- Concrete mix design: Check for appropriate cement content and aggregates. Low-quality concrete can cause early spalling.
- Curing procedures: Confirm they follow best practices. Inadequate curing can weaken the concrete’s surface.
- Weather conditions: Account for temperature and humidity during testing. Extreme conditions can affect results.
- Equipment limitations: Understand your tools’ capabilities. Using them outside their range can lead to inaccurate readings.
Quick rule: Always consult these documents before starting work. It saves time and ensures accurate measurements.
Practical Checklists, Visual Checkpoints, and Case Examples
Prepare essential pre-visit checks such as site access, weather windows, and safety gear readiness. Use visual clues like crack patterns and staining to spot early spalling, and color-code observations for quick interpretation. Bring ready-to-use checklists for field use.
Include quick methods to judge whether cover is enough or deficient, with clear action thresholds and escalation steps. Share brief case examples that show how timely cues saved structures and minimized damage, plus templates like pocket checklists and SOPs to standardize work.
Tools and materials checklist for a field visit
Before heading to the site, ensure you have all necessary tools and materials. This checklist helps minimize delays and maximize accuracy.
- Covermeter: Calibrated and ready for use. Without it, you can’t measure cover accurately.
- Rebar locator: Functional with fresh batteries. You’ll need it to find rebar before measuring.
- Tape measure: Long enough for your needs. It’s crucial for verifying readings and marking spots.
- Chalk or paint pen: For marking measured points. Without it, you might lose track of where you’ve measured.
- Hard hat and safety glasses: Always wear PPE on site. Safety first!
- Steel-toed boots: Protect your feet from falling objects. Don’t forget them at home.
- Gloves and ear protection: Essential for safety during measurements. Protect yourself from hazards.
- Documentation templates: Pre-filled forms for easy recording. They save time and ensure consistency in data collection.
- Backup items: Extra batteries, tools, or supplies. You never know when you might need a spare.
Quick rule: Always double-check your gear before leaving for the site to avoid delays and ensure accurate measurements.
Visual inspection checklist and red flags
Before measuring, inspect the structure visually. Early signs can help you focus your efforts and prevent major issues.
- Hairline cracks: Long, thin cracks may indicate cover problems or corrosion. Check for width consistency; varying widths could signal deeper issues.
- Rust staining: Brown or red stains often mean rebar corrosion. Look for patterns that might suggest cover shortfalls.
- Blow-out areas: Bulging or cracking concrete may hide severe corrosion. Investigate these spots immediately to prevent spalls.
- Laitance exposure: Exposed, weak concrete layer might indicate inadequate cover. Check for other signs of poor cover in the area.
- Noticeable carbonation: White or gray powdery substance on surfaces can signal corrosion. Look for pH changes that might confirm ongoing corrosion.
Quick rule: If you spot any red flags, prioritize those areas for measurement to prevent further damage.
Short case studies and mitigation takeaways
Learn from others’ experiences to improve your own approach. Here are a few examples:
- Case 1 – Parking garage spalls: Inadequate cover led to severe corrosion and eventual spalling. Takeaway: Regular visual inspections can catch early signs of trouble.
- Case 2 – Bridge deck failures: Poor workmanship resulted in insufficient cover, leading to rapid deterioration. Takeaway: Thoroughly inspect work during construction to ensure proper cover.
- Case 3 – Successful remediation: Timely visual cues led to targeted measurements and repairs before spalls occurred. Takeaway: Quick action based on early signs can prevent major damage and costly repairs.
Quick rule: Always document lessons learned from each project to improve future inspections and measurements.
Long-Term Maintenance to Prevent Future Problems
Outline indicators of aging cover such as cracking, spalling progression, and exposed reinforcement, with clear triggers for repairs or professional assessment. Establish a practical inspection rhythm and keep simple logs to track changes and trends over time. Use these notes to guide proactive interventions.
When early warnings appear, follow quick response steps like protective measures and moisture control, and know when to pause use and call a professional. Compare repair options and sequencing, and plan preventive design measures that maintain cover integrity during future maintenance cycles.
Establishing a Routine Inspection Schedule and Early Warning Indicators
Regular inspections are key to catching concrete cover issues early. Here’s your checklist:
- Quarterly in high-wear areas, biannually elsewhere. Mark these dates on your calendar.
- Cracks. Even hairline cracks can lead to bigger problems if ignored.
- Rust stains or exposed rebar. These are signs of corrosion. Don’t wait, act fast.
- Moisture ingress. Check for dampness, especially around edges and corners.
- Efflorescence. White powdery deposits can indicate moisture issues.
- Spalling progression. Flaking or crumbling concrete needs immediate attention.
- Rebar exposure. Exposed rebar is a serious issue that requires professional help.
- Document findings. Keep a simple log with photos, measurements, and dates to spot trends early.
Quick rule: If you notice any of these issues progressing or worsening between inspections, don’t wait for the next scheduled check. Act immediately.
Routine Maintenance Tasks to Protect Concrete Cover (Sealing, Crack Repair, Rebar Protection)
Seal the surface. Use a protective sealer every 2-5 years to prevent moisture ingress. Follow manufacturer’s instructions for application and safety precautions.
Repair cracks promptly. Small cracks can become big problems if left untreated. Clean the crack, apply an epoxy or urethane injection, and allow it to cure according to the manufacturer’s guidelines.
Protect rebar. If you notice exposed rebar, clean it thoroughly, apply a corrosion inhibitor, and cover it with a protective coating or wrap. Always wear appropriate safety gear when working with chemicals.
Regular maintenance is key to preventing long-term spalls. Stay on top of these tasks to maintain your concrete’s integrity over time.
Conclusion
Getting the concrete cover right isn’t optional. It protects the rebar, keeps concrete durable, and prevents visible damage that costs money and waits to fix. If you skip the careful measurement, you’re inviting long-term spalls and bigger repairs later.
First, confirm your measurement method matches the project requirements, then scan the field for problem spots, measure with the chosen tool in a steady area, record numbers with date and location, compare against the design or code tolerance, and act on any gaps by tightening forms, adding protective covers, or planning a follow-up check. Do this in a steady sequence and test a small area first to build confidence before you scale up.
Avoid guessing, poor lighting, rushed work, or skipping safety gear. Always wear eye and hand protection, keep a clear work zone, and verify one measurement at a time so you don’t overwrite results. If a section looks wrong or you’re unsure about the tool you’re using, pause and recheck, or stop and call a pro—accuracy here saves money and keeps the structure safe.
If the project moves into unknowns, scheduling a professional review is wise, especially when you’re near compliance limits or dealing with confined spaces, complex forms, or irregular splices. Stay safe, stay precise, and your concrete will perform as it should for years to come.
FAQ
Why is accurate concrete cover measurement critical for long-term durability?
Small errors in cover can hide deeper problems. If cover is too thin in spots, moisture and chemicals get in and spalling can start over time. Measure carefully and double-check high-stress areas to avoid hidden issues.
What are the common causes of spalling that relate to cover measurements?
Spalling often starts where cover is thinner than intended, or where reinforcement is poorly protected from moisture. Poor curing, improper compaction, or edge exposure in high-traffic areas also accelerates the problem.
What tools should I use to measure concrete cover in the field?
Use a reliable measuring tool that can reach through any protective coating. Calibrated gauges or measuring sticks with clear markings, and a depth probe that can slide past surface coatings, are typical. Always follow the tool maker’s instructions and verify accuracy on a test spot.
How do I verify that my cover measurements meet standard expectations without citing codes?
Check the product label, datasheet, or manufacturer instructions for their recommended cover. If you’re unsure, compare to what’s typical for similar reinforced sections in your project and confirm with local rules or the structural engineer involved. When in doubt, double-check with the material supplier and follow their guidance.