

Introduction
Touch-up paint that won’t blend is when a fresh patch stands out from the surrounding finish. This article covers practical ways to feather edges, match sheen, and reset the surrounding area so repairs look seamless. We’ll keep it simple and hands-on, using tools and steps you can try at home.
Start with small tests on inconspicuous spots to see how the new paint blends. Check the label and manufacturer instructions for prep, drying times, and compatible finishes, and adjust sheen by using the same type of paint and sheen. If a full reset is needed, plan a light scuff, repaint a larger area, and feather properly.
Key takeaways
- Quick diagnostic tips: check old finish compatibility, fiber sheen, and patch uniformity.
- Tools and materials checklist: gather brushes, rollers, sanding pads, tray, masking tape, cleaner.
- Prep: clean, degloss, light scuff; wear respirator when sanding to protect.
- Feathering methods: load brush properly, short strokes, feathered edges to hide seams.
- Sheen matching: evaluate gloss level and texture; adjust with additive or glazing technique.
- Reset options: when to sand back, blend panel, or repaint; stop once even.
Table of Contents
- Introduction
- Key takeaways
- Quick Diagnostic: Why Touch-up Paint Refuses to Blend
- Tools and Materials Checklist
- Prep Work That Actually Helps Blending
- Feathering Methods for Better Optical Blending
- Sheen Matching and Surface Texture Control
- Reset Options: When to Sand Back, Blend Panel, or Repaint
- Visual Checkpoints and Quality Tests Before Declaring “Done”
- Common Mistakes, Troubleshooting, and Quick Fixes
- Conclusion
- FAQ
Quick Diagnostic: Why Touch-up Paint Refuses to Blend
Different root causes show up in plain sight on the job. Color mismatch looks off under normal light and across panels. A sheen that doesn’t match signals a surface or finish issue you didn’t catch at application time.
Poor surface prep tends to reveal itself as roughness, dust specks, or flaking edges that grab the eye. Clearcoat differences can create a visible line where the touch-up ends. Use visual cues to decide which fix to tackle first and confirm with the product label or manufacturer instructions when in doubt.
Color vs. Sheen vs. Texture Problems
First, let’s figure out what’s causing your touch-up paint to stand out – is it the color, sheen, or texture?
Grab a flashlight and inspect the area in different lighting conditions. Hold your phone’s flash at various angles too.
Color mismatch will be obvious under any light. It’ll look like a splotch of a different hue.
Sheen issues are trickier. Check for glossy or matte patches that don’t match the surrounding area. These could indicate you’ve used the wrong sheen.
Texture problems show up as rough, bumpy, or uneven spots. Run your fingers over the surface. If it feels different from the rest, you might have a texture mismatch.
Surface and Substrate Issues (Old Paint, Contamination)
Sometimes, the problem lies beneath the surface – literally. Old paint or contaminants can prevent your touch-up from blending.
First, wipe the area with a damp cloth. If it comes away dirty or leaves behind residue, you’ve found your culprit. Grease, wax, or other contaminants might be present.
Next, check for oxidized paint. This happens when old paint is exposed to air and moisture over time. It’ll feel chalky or powdery to the touch.
Lastly, look out for porous surfaces. These soak up paint like a sponge, making it hard for your touch-up to blend evenly.
Scope of Damage: Chip, Scratch, or Full Panel
Before you start fixing, you need to know how much area you’re dealing with – is it a small blemish, surface-level issue, or does the entire panel need attention?
For chips, the damage is localized. You’ll see a small, raised edge where the paint has flaked off.
With scratches, the damage is still surface-level but might be longer or more widespread than a chip.
If the entire panel looks different, you’re dealing with a full-panel issue. This could mean the original paint job was flawed, or there’s been significant wear and tear over time.
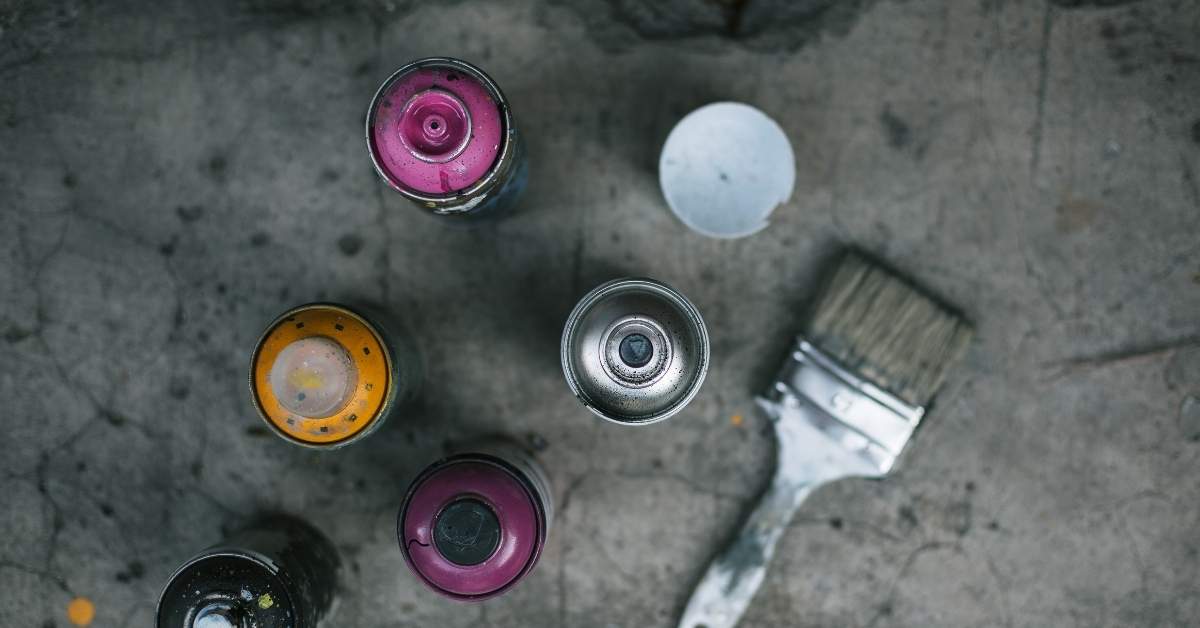
Tools and Materials Checklist
Gather a sane set of basics you can trust to work together. Cleaners, fine sanding pads, a blending solvent, and touch-up brushes are essential. Have spray options and masking materials handy for clean edges and control.
Check the labels on each item for compatibility with your base and top coats, and note any flash times or cure windows. If something isn’t clear, consult the manufacturer instructions or product data sheets before proceeding.
Paint and color-matching tools
Before you start, gather these tools to ensure a perfect match.
- Touch-up pens: OEM or custom-made. Check the tip size for small touch-ups.
- Aerosol basecoat: For larger areas. Ensure it’s compatible with your existing paint.
- Color code finder: Use a color meter or app to record your wall’s exact color code.
- Paint mixing guide: If custom-mixing, get a guide from the store to match sheen and undertones.
- Small paint cans: For mixing small amounts of custom colors.
- Color test strips: To compare and fine-tune your match before painting.
- White and black tint: For adjusting color intensity or undertones.
- Clear coat (optional): If you’re touching up a glossy surface, use a clear coat to protect the area.
Quick rule: Always test your touch-up paint on a small, hidden area first. Lighting and color perception can trick the eye.
Abrasion and finishing tools
Prep your surface with these tools to ensure smooth blending.
- Coarse sandpaper (60-80 grit): For heavy scratches or old paint. Sand lightly, following the grain.
- Medium sandpaper (120-150 grit): For most touch-ups. Remove dust between each grit.
- Fine sandpaper (220-320 grit): For final smoothing before painting. Wipe off dust with a damp cloth.
- Polishing compound (light, medium, heavy): For buffing out minor scratches or swirl marks. Start with the lightest compound and work up if needed.
- Steel wool (0000 grade): For fine sanding and polishing. Use with a light touch to avoid damaging the surface.
- Tack cloth: To remove dust from the surface before painting.
- Paintbrush or roller: For applying touch-up paint. Choose the right size for your job.
- Blending solvent: To thin paint and help it blend with the existing color. Check compatibility with your paint type.
Quick rule: Always sand in the direction of the grain to avoid damaging the surface.
Safety and workspace setup
Create a safe, clean environment for your touch-up job.
- Ventilation: Ensure the area is well-ventilated to avoid fume buildup. Use fans or open windows.
- Personal Protective Equipment (PPE): Wear gloves, safety glasses, and a respirator for sanding tasks.
- Temperature/humidity control: Paint dries best in temperatures between 65-85°F (18-29°C) with low humidity. Adjust your workspace if needed.
- Clean, dust-free area: Remove clutter and cover nearby surfaces to keep them clean.
- Drop cloths: Protect the floor from paint drips and spills.
- Hazards and storage notes: Check product labels for warnings about flammability, toxicity, or proper storage. Follow these guidelines.
- First aid kit: Have one nearby in case of accidents.
- Proper lighting: Ensure your workspace is well-lit to see what you’re doing clearly.
Quick rule: Always follow manufacturer instructions for handling and disposing of paint and chemicals.
Prep Work That Actually Helps Blending
Start with a thorough cleaning to remove oils, waxes, and dust. Decontaminate the surface as you would any repair area, then inspect for any obvious flaking or rough spots. Feather-sand the edge area to create a gentle transition, and consider a compatible primer if the surface is very absorbent or stained.
Complete each step before applying paint. Rushing prep leaves a surface that fights the new coat and defeats blending attempts. If you’re unsure about a primer option, verify compatibility on the product label or with the manufacturer instructions.
Cleaning and decontamination
Before you start, remove any wax, oils, or dirt from the surface. These contaminants can prevent paint from adhering properly and lead to poor blending.
Use a suitable cleaner for your surface type – there are specific cleaners for different materials like wood, metal, or plaster. Always test in an inconspicuous area first to ensure it doesn’t damage the surface.
Tip: Wipe the surface with water after cleaning. If the water beads up and doesn’t spread evenly, there are still contaminants present – keep cleaning until water spreads smoothly.
Feather-sanding technique and visual checkpoints
Start feather-sanding once you’ve cleaned the surface. This helps create a smooth transition from the existing paint to your touch-up.
- Start coarse: Use 120-grit sandpaper around the repair area, working outwards in a circular motion. This removes any raised edges and prepares for finer sanding.
- Progressively finer: Move to 150-grit, then 220-grit, sanding with the grain of the surface. This creates a smooth, progressive edge.
- Check for dust: Wipe off any sanding dust with a damp cloth after each grit. Dust can cause visible imperfections in your touch-up.
- Inspect visually: The edge should look smooth and even to the naked eye, with no harsh lines or abrupt changes in texture. If you see any issues, keep sanding until it’s smooth.
- Avoid over-sanding: Be careful not to sand too much, as this can remove too much paint and create a visible edge.
Quick rule: The goal is a smooth, progressive edge that blends seamlessly with the existing paint. If you rush or skip steps, you’ll end up with a visible repair.
When and how to use primer or surfacer
A primer or surfacer can be your best friend when it comes to blending touch-ups. It helps with adhesion, filling minor imperfections, and ensuring a consistent sheen.
Use primer: If you’re painting over a new surface, bare wood, or an existing color that’s significantly different from your touch-up color. Also, use it if the existing paint is damaged or peeling – primer helps create a smooth base for your touch-up.
Choose wisely: Select a primer that’s compatible with both your surface type and your topcoat. Ask at your local hardware store if you’re unsure. Some primers are designed to seal stains, while others promote adhesion or fill minor imperfections.
Consider sheen: Primer can affect the final sheen of your touch-up. If you want a perfect match, use a primer with the same sheen as your existing paint. For example, if your walls are eggshell, use an eggshell primer.
Feathering Methods for Better Optical Blending
Brush blending is handy for small chips or edges where control matters. A light, consistent stroke helps disguise the repair without building up thickness. For larger spots, a pen or small nib can place color with precision and less liquid spread.
Spray blending offers a smoother overall look but requires ventilation and masking discipline. Dry feathering relies on thin coats and blending into the surrounding finish, useful when you want minimal solvent exposure. Match the method to the chip size and surface texture, and confirm any technique details on the product instructions.
Brush/Pen Touch-Up Feathering
Feathering with a brush or pen is ideal for small chips and scratches. The key here is patience and thin coats.
Start by dipping your brush or pen in a small amount of paint. You want just enough to barely coat the tip.
Less is more. Apply the paint in layers, building up the edges gradually. This helps blend the touch-up with the existing paint.
Let each coat level before applying the next. It might take a few thin coats, but it’s worth the wait to avoid visible lines or globs of paint.
Spray Feathering and Blend Limits
Spray blending is great for larger areas. It can extend your repair area, but it’s a bit trickier to control.
Start by setting your sprayer to a fine mist. This helps create a soft edge that blends with the existing paint.
Move your sprayer in steady, even passes. Overlap each pass slightly to ensure full coverage. But be careful not to overspray, which can leave visible lines or a haze on surrounding areas.
Remember, spray blending has its limits. It’s best for chips and scratches up to about 1/4 inch wide. Anything larger might need a different approach.
Wet-On-Wet vs. Wet-On-Dry Approaches
When it comes to applying basecoat and clearcoat, you have two options: wet-on-wet or wet-on-dry.
Wet-on-wet involves applying the clearcoat directly onto the still-wet basecoat. This can create a smooth, glossy finish but it requires precise timing and control.
Wet-on-dry, on the other hand, involves letting the basecoat dry first before applying the clearcoat. This gives you more time to work with but can sometimes lead to visible lines or a less smooth finish.
The best approach depends on your specific situation. Wet-on-wet is great for small touch-ups where precision is key. Wet-on-dry is better for larger areas or when you need more time to blend.
Sheen Matching and Surface Texture Control
Sheen mismatches are often more noticeable than color shifts. Variations in gloss come from clearcoat thickness, cure, and polishing history. Plan to assess gloss level before finalizing the touch-up so you can target the right step.
Polishing and leveling the surface can change how light reflects off the repair. Use a compatible clear or topcoat and follow its guidelines for curing and final polish. If unsure about sheen compatibility, read the product label or manufacturer instructions for guidance.
Assessing and matching gloss visually
Matching sheen is crucial for a seamless touch-up. Gloss mismatch is often more visible than color shift, especially under different lighting conditions.
To assess gloss levels, hold your paint card at an angle to the light source. Rotate it slightly to compare reflection with the existing surface. If it’s too shiny or dull, adjust accordingly.
For a shinier match, consider polishing. For a duller match, recoat with a lower sheen paint.
Polishing and de-glossing as tools
Polishing compounds and de-glossing agents are handy for adjusting gloss levels. Use them wisely to avoid damaging edges or over-polishing.
- Polishing Compounds: Raise gloss, used with a buffer. Start slow, work up to higher speeds. Rentable orbital buffers start around $50/day.
- De-glossing Agents: Reduce gloss, applied by hand or spray. Test first to avoid dulling too much. Expect to pay $10-$20 per bottle.
- Buffing Pads: Choose the right pad for your task – wool, foam, or microfiber. Replacement pads around $5 each.
- Polishing Creams: Some compounds come with creams for easier application. Expect to pay extra, around $10-$20 per cream.
- Avoid Over-polishing: Be gentle on edges and corners. Too much polishing can damage the paint film.
Recreating OEM texture (orange peel and metallics)
Metallic effects and orange peel texture greatly influence how a touch-up looks. Matching these can make or break your repair.
Orange Peel: This textured finish is common in factory paint jobs. Recreate it by lightly sanding with 2000-grit wet/dry paper, then polish gently.
Metallic Effects: Matching metallic flake can be tricky. Use a spray gun for best results. Professional spray equipment rentals start around $150/day.
If you’re unsure, consider hiring a professional to ensure the best match possible.
Reset Options: When to Sand Back, Blend Panel, or Repaint
Decide in advance whether the goal is a subtle blend or a near-invisible repair. If the result won’t meet the objective with a local reset, plan a broader repair area. Sand back only as far as needed to remove the fault and reset the surface with proper prep.
Blending adjacent panels can work when the surrounding finish is uniform and conditions are favorable. A full panel repaint is a bigger effort but sometimes the most reliable path to a seamless look. Always verify with the product labels and local rules when deciding on the extent of work.
Local reset (resand and recoat) workflow
When touch-ups don’t blend, it’s time for a local reset. Here’s how:
Step 1: Lightly sand the failed area with 220-grit paper to remove old paint. Wipe clean.
Step 2: Apply a thin coat of primer or surfacer, let it dry, then lightly sand again and wipe clean.
Step 3: Paint the area with matching color, using your preferred feathering method from earlier. Let it dry, then apply clearcoat if needed.
Panel blending workflow
Blending into adjacent panels can hide transitions, but it’s not always easy. Here’s how to approach it:
Mask off the edges of your touch-up area using painter’s tape.
Use a brush or spray gun to apply paint beyond the masked edge, gradually reducing pressure or coverage as you move into the adjacent panel.
Note: Blending has limits. If the adjacent panel is significantly different in color or sheen, it might not blend well, even with expert technique.
When full-panel or pro paint is the right call
Sometimes, DIY fixes just won’t cut it. Here are signs to call in a pro:
Persistent sheen or color mismatch. If you can’t match the existing finish exactly, it’s time for professional help.
Large damaged area. If the touch-up is bigger than a dinner plate, consider full-panel repainting by a pro.
Metallic or pearlescent finishes. These are tricky to match and apply correctly. Leave them to the pros.
Visual Checkpoints and Quality Tests Before Declaring “Done”
Use angle checks to catch glare differences that aren’t visible straight on. Compare wet and dry appearances and make sure edges feel smooth to the touch. Tape adhesion tests can help confirm you didn’t lift or peel a repair when masking edges.
Look for consistent color, texture, and sheen across the repaired area and adjacent surfaces. If something seems off, recheck the prep, application, and cure steps against manufacturer instructions. Don’t rush the final assessment—verify with a reliable reference if possible.
Lighting and viewing angles to use
Before declaring your touch-up paint job done, check it under different lighting conditions to ensure a consistent finish.
- Natural light: Check the repair in direct sunlight and shaded areas. This helps reveal any missed spots or inconsistencies in sheen.
- Directional light: Use a flashlight or work lamp to cast directional light on the repair. This can help you spot any imperfections that might not be visible under natural light.
- Viewing angles: Inspect the repair from various angles, including directly above, below, and at eye level. Each angle can reveal different issues.
- Wet vs. dry comparison: Compare the repaired area to an adjacent untouched section of the surface while it’s still wet, then again after it dries. This helps ensure proper color matching and sheen consistency.
- Angle checks (45° and 90°): Hold a mirror or use a camera at these angles to check for any missed spots or inconsistencies in the repair.
- Check under artificial light: Inspect the repair under incandescent, fluorescent, and LED lights. Different lighting types can reveal different issues.
- View from a distance: Step back and view the repair from 10-15 feet away to check for overall consistency with the surrounding area.
- Close-up inspection: Inspect the repair up close using a magnifying glass or loupe to ensure no missed spots or imperfections remain.
Quick rule: The more angles and lighting conditions you check, the better you can ensure your touch-up job is consistent and complete.
Tactile and adhesion checks
After completing a touch-up paint job, perform simple feel tests to ensure texture continuity and confirm the repair’s adhesion with a non-destructive tape pull test.
- Edge feel: Run your fingers along the edges of the repaired area. The texture should feel consistent and smooth, with no raised or sunken areas.
- Texture continuity: Compare the texture of the repaired area to the surrounding surface by gently rubbing them both. They should feel identical.
- Tape adhesion test (non-destructive): Press a piece of painter’s tape firmly onto the repaired area, then pull it off quickly at a 45° angle. If the paint doesn’t peel off with the tape, the adhesion is good.
- Check for tackiness: Gently touch the repaired area to ensure it’s not still sticky or tacky. This indicates that the paint hasn’t fully cured.
- Feel for any inconsistencies: Run your fingers over the repair, feeling for any lumps, bumps, or rough spots that might indicate missed areas or improper sanding.
Quick rule: If it feels wrong, it probably is. Trust your touch to help identify any issues with your touch-up paint job.
Time-based checks (cure and re-evaluate)
After completing a touch-up paint job, allow time for the repair to fully cure before making any final judgments or performing additional work.
- Wait 24 hours: Allow the repaired area to dry undisturbed for at least 24 hours before handling it or subjecting it to normal wear and tear.
- Re-evaluate after 7 days: Check the repair again after a week. This allows any remaining solvents in the paint to evaporate, giving you a more accurate assessment of the final finish.
- Wait 30 days for full cure: Allow at least 30 days before subjecting the repaired area to heavy use or exposure to harsh conditions. This ensures the paint has fully cured and is at its most durable.
- Check for color shift: As the paint cures, it may experience a slight change in color. Re-evaluate the repair after it’s fully cured to ensure the color match remains consistent.
- Feel for hardness: After 24 hours, gently touch the repaired area again. It should feel harder and less tacky than when you first applied the paint.
Quick rule: Patience is key with touch-up paint jobs. Allowing sufficient time for curing ensures a durable, long-lasting repair.
Common Mistakes, Troubleshooting, and Quick Fixes
A common error is applying too much paint in one pass, which creates ridges or pooling. Edge prep skipped or rushed leads to peel or mismatch at the boundary. Wrong clearcoat choice can ruin sheen and depth on the repair.
When a fix isn’t working, start with the simplest change: reassess prep, adjust masking, or switch to a compatible blending method. Use targeted, small adjustments rather than overhauling the entire area. If you’re unsure about any product interaction, check the label or manufacturer guidance for safe troubleshooting steps.
Fixes for color but wrong sheen
If you’ve got the right color but the wrong sheen, don’t panic. You’ve got options.
Increase Sheen: Use a polishing compound to buff up your gloss. This works best on flat or satin finishes.
Reduce Gloss: For too much shine, use a scuff pad or chemical deglosser to knock it down a notch. Be careful not to remove too much paint.
Clear Coat: Apply a matching clear coat to even out the sheen. This works well if you’ve got a high-gloss issue on part of your surface.
Fixes for visible edges and lines
Visible edges or lines can happen due to improper edge prep. Here’s how to fix it:
Sanding: Lightly sand the area with fine-grit sandpaper (600-800 grit) to soften the edges. Be careful not to sand through to the primer.
Re-apply your feathering or blending technique, ensuring you’re working from the center outwards to avoid creating new lines.
Remember, patience is key. It’s better to build up thin coats than to try and fix it all at once.
Dealing with metallic fleck or pearl misalignment
Metallic paints can be tricky. The orientation and buildup of the metallic flakes can affect their appearance.
Re-spray: If you’ve got severe misalignment, your best bet might be to have a pro re-spray the area. They’ve got the tools and experience to get it right.
If you’re determined to DIY, try lightly sanding (600-800 grit) and reapplying thin coats, ensuring you’re working from the center outwards to avoid creating new issues.
Remember, metallic paints take practice. Don’t be afraid to ask for help if you need it.
Conclusion
Finish faster and without redoing work by sticking to practical steps that protect the surface and your wallet. The goal is a seamless look that lasts, not a quick patch that falls apart after a week.
Start by confirming the area is clean and dry, then check the existing sheen and texture. Move through a simple flow: pick a feathering method, apply thin coats one edge at a time, wipe away excess, allow proper dry times, and test in a small area under good light. Re-check with your light at eye level and be willing to rework the edge if it still unreadable in the reflection.
Common mistakes to avoid are over-wetting the surface or the rag, skipping essential prep, and mismatching the sheen or texture. Always wear proper ventilation and a mask, ventilate the room, test on a hidden spot first, and never sand or repaint when the coating is not fully dry. If you see constant peeling, a classic color mismatch, or the finish won’t stay put after a light rub, back up and re-evaluate before proceeding.
If the spot still won’t blend after careful feathering and matching, it may be time to sand back, use a blend panel, or repaint the area entirely. When in doubt, don’t push beyond what feels stable and safe for the surface. Safety first, and stay disciplined with the test-and-wait steps, and you’ll end with a durable, professional-looking result.
FAQ
Why does my touch-up still stand out after painting over it?
That edge is usually from a difference in thickness or brush stroke. Check if the patch dried too fast or if you overspread the color into glossy areas. Rework the area with a light touch and use the feathering technique on the border while the paint is still workable.
How can I feather a touch-up without leaving a visible line?
Lay the fresh paint slightly into the surrounding dried area, then use a dry, clean brush or a slightly damp rag to blend the edge. Work in small, even passes and avoid heavy layers. Don’t rush—thin coats blend better than one thick coat.
When should I reset the spot—sand back, blend panel, or repaint entirely?
If you can’t get a seamless blend after a couple attempts, sand the area lightly and recoat with a fresh pass that matches the surrounding sheen. If the texture or color is far off, repaint the spot or panel to ensure even appearance. Always test a small area first before committing to the whole patch.
How do I match sheen and surface texture on a repaired spot?
Compare the repaired area to a nearby clean section under similar light. Use the same type of finish and, if needed, adjust with a glaze or topcoat to approach the surrounding sheen. If the texture differs, consider light texturing or a light final pass to better blend with the wall.