
Introduction
Tackling concrete stain blotchiness requires careful planning and timing. From surface preparation to application, each step plays a crucial role in achieving an even finish.
To help you stay on track, we’ve created this comprehensive timeline guide. Follow these steps to ensure consistent color absorption and avoid unsightly blotches.
Concrete Stain Blotchiness Timeline: Step-by-Step Guide
Mastering the timing of each step is key to preventing blotchy concrete stains. Here’s a detailed timeline to help you achieve an even, professional-looking finish:
- Week 1-2: Surface Preparation
- Inspect and clean the surface (1 day)
- Repair cracks or damage (2-3 days)
- Etch the surface to normalize porosity (1 day, plus drying time)
- Apply a bonding primer (1 day, plus drying time)
- Week 3: Stain Application
- Test stain colors on a small area (1 day, plus drying time)
- Apply the chosen stain in thin, even passes (2-3 days, plus drying/curing time between coats)
- Week 4: Sealing and Final Touches
- Apply a compatible sealer (1 day, plus drying/curing time)
- Inspect the work for any touch-ups (1 day)
By following this timeline, you’ll ensure that each step is given adequate time and attention, resulting in an even, beautiful concrete stain finish.
Key takeaways
The timing of surface preparation significantly impacts the overall project schedule. Rushing through these initial steps can lead to increased porosity variations, making it more challenging to achieve an even stain application later on.
- Porosity drives stain absorption; test panels and adjust steps accordingly.
- Uneven porosity causes blotchiness; plan surface prep to normalize absorption.
- Use compatible stains and sealers; mismatch worsens blotching and color shift.
- Sand or grind high-porosity spots evenly; follow safety and dust-control practices.
- Apply stain in thin, even passes; work from dry to damp edges.
- Consult product labels and local codes for porosity-related guidance and limits.
Table of Contents
- Introduction
- Key takeaways
- How Porosity Affects Stain Absorption and Blotchiness
- Common Causes of Blotchy Concrete Stains
- Types of Stains, Sealers, and Their Interaction with Porosity
- Surface Preparation: Steps to Normalize Porosity Before Staining
- Techniques to Even Out Stain Color During Application
- Products and Materials That Correct or Prevent Blotchiness
- Cost, Time, and Project Planning Guide
- Safety, Common Mistakes to Avoid, and Long-Term Maintenance
- Conclusion
- FAQ
How Porosity Affects Stain Absorption and Blotchiness
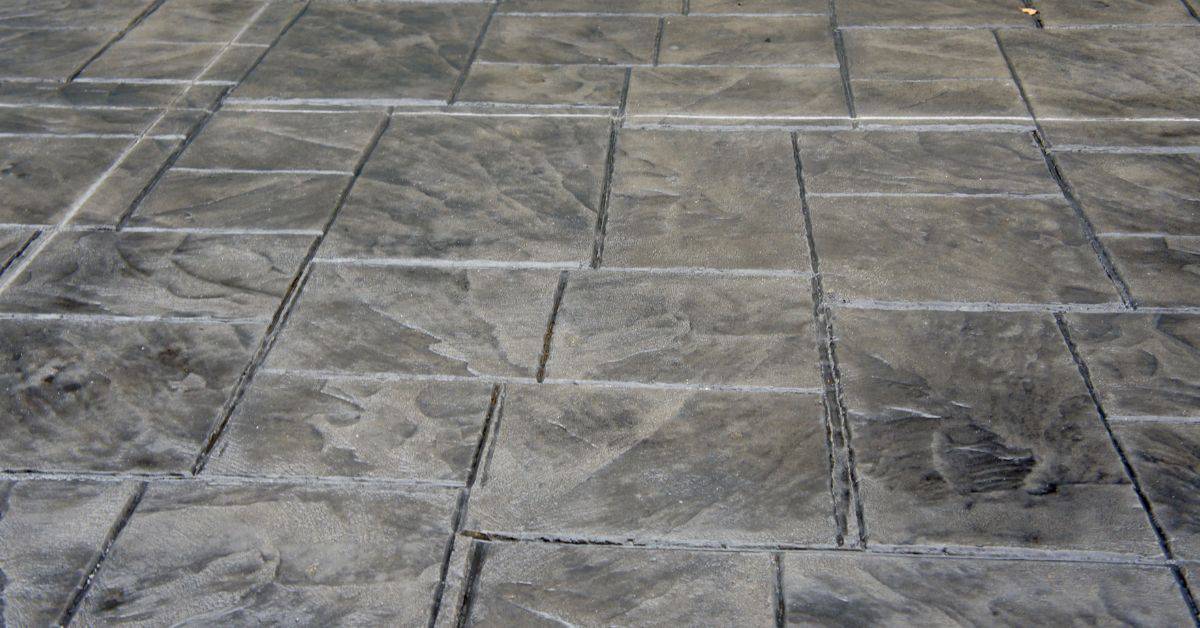
Porosity in concrete is the network of voids and capillaries within the top layer and the body beneath it; surface pores control immediate wetting while subsurface capillaries govern how stain migrates after application. Differences in pore size distribution and connectivity mean some spots act like sponges and others hardly absorb, so identical stain passes can pull different amounts of dye from edge to center.
Capillary action makes liquids travel faster through larger, connected pores and slower through fine, tortuous ones, producing streaks, halos, or picture-frame effects where saturation differs. Check moisture with simple tests and confirm product behavior on a small patch or consult the product data sheet, then plan conditioning (pre-wet, conditioner, or penetrating primer) or sealing to even absorption before full staining.
What is concrete porosity?
Concrete porosity refers to the tiny holes or voids within concrete. These pores can be at the surface (macro) or deep inside (micro, capillary). Pore size distribution varies across slabs, affecting stain uptake.
Surface porosity is the top layer’s openness, while subsurface porosity involves internal capillaries that draw liquids in.
Key: Smaller pores absorb more slowly than larger ones due to increased surface tension and friction.
How porosity creates blotches
Porosity causes blotchiness as stain absorbs differently across a slab. Areas with more pores absorb more stain, appearing darker, while denser areas stay lighter.
This uneven uptake leads to mottled patterns. For instance, edges may have smaller pores and absorb less stain than the center, creating a ‘picture-frame’ effect.
Why it matters: Even identical applications can look different due to varying pore sizes and distributions.
Visual checkpoints to assess porosity
When to use this checklist: Before staining, ensure your slab is uniform in absorption potential.
- Spot water test: Sprinkle water on the surface. Watch how quickly it’s absorbed or beads up.
- Absorbency observation: Press a damp cloth onto the concrete. Check if it leaves an imprint or feels dry quickly.
- Small test stains: Apply stain in small, inconspicuous areas to see how it absorbs and dries.
- Efflorescence check: Look for white salt deposits, indicating moisture movement.
- Curing compound residue: Check if any remains, which can alter absorption.
- Edge vs. center comparison: Inspect these areas for differences in porosity and potential blotch patterns.
- Existing stains or discoloration: Note these as they may indicate variable porosity.
- Moisture meter reading: Measure moisture content to ensure it’s within acceptable limits (12-18% for staining).
Quick rule: If you spot significant differences, consider slab-wide conditioning or sealing before full application.
Common Causes of Blotchy Concrete Stains
Blotchiness usually traces back to four root groups: surface contamination (oil, dust, old sealers), curing and finishing variation (timing, temperature, trowel work), substrate heterogeneity (different mix areas, patches, aggregate exposure), and moisture dynamics (rising or trapped moisture, puddling). Each shows different signatures—greasy dark spots, light dusty patches, abrupt color shifts at patched joins, or darker edges where moisture pooled—so look closely to isolate which family is dominant.
Diagnosis is the priority: do visual mapping, moisture checks (meter or plastic-sheet test), residue or pH tests for cleaners/oils, and test patches in representative areas before choosing a fix. Surface prep matters—removing sealers or curing compounds often changes uptake dramatically—so fix the root cause (neutralize contaminants, manage moisture, grind or patch where needed) rather than chasing symptoms with repeated stain coats.
Surface contaminants and efflorescence
Blotchiness often starts at the surface. Contaminants like oils, dirt, or curing compounds can block stain penetration or redirect it, creating uneven absorption.
Efflorescence, a white salt deposit, is another common culprit. It forms when water-soluble salts rise to the surface and evaporate, leaving behind a powdery residue that prevents even staining.
To identify these issues, perform a visual inspection. Look for discoloration, residue, or any obvious contaminants. For efflorescence, rub the surface gently with a damp cloth. If it leaves a white mark, you’ve got efflorescence.
Variation in aggregate, finishing, and curing
Different aggregates can absorb stain at varying rates, leading to blotchiness. Larger aggregates or those with rough textures may take up more stain, creating darker spots.
Finishing techniques also play a role. Trowel finishes that leave deeper grooves or ridges can hold more stain, causing variation in color.
Inconsistent curing is another culprit. Concrete cured at different temperatures or moisture levels can have varying porosities, leading to uneven staining. For instance, concrete cured too fast may have a denser surface that resists stain, while areas cured slower might absorb more.
Moisture and temperature effects during application
Trapped moisture can push stain upwards as it evaporates, creating light spots or blotches. Conversely, rising damp can carry stain downwards, leaving darker patches.
Temperature and humidity at application time also matter. If it’s too hot, the stain may dry too fast, leading to uneven absorption. Too cold, and the stain might not penetrate well enough.
Before staining, use a moisture meter or plastic sheet test to check for moisture. Apply stain on a cool, dry day with moderate humidity for best results.
Types of Stains, Sealers, and Their Interaction with Porosity
Main product categories act differently: penetrating stains soak into pores, waterborne and solvent stains vary in penetration depth, tinted sealers sit closer to the surface, and cementitious coatings form a new surface layer. On a porous slab a penetrating stain will accentuate pore-driven contrast, whereas a dense surface may resist penetration and leave a film-like appearance from tinting sealers or coatings.
Compatibility is critical—water- and solvent-based systems interact differently with existing coatings, pH, or lime; confirm with the manufacturer instructions or product label before combining products. Use porosity assessment to guide choice: penetrating products for open, consistent pores; tinted sealers or primers (tested first) where you need to mask variability; and densifiers or primers when chemical compatibility or moisture constraints are present.
Penetrating versus topical/tinted products
Penetrating stains, like acid-based or water-based stains, chemically or physically enter the pores of concrete. They change the color of the concrete itself, not just its surface.
Pros: Even penetration creates a consistent look across porous surfaces. They can enhance the natural texture and beauty of concrete.
Cons: They may not hide severe porosity variations or provide a uniform color if the substrate is too dense.
Tinted sealers and cementitious coatings
Tinted sealers and cementitious overlays sit on the surface of concrete, rather than penetrating it. They can mask porosity differences by creating a uniform layer.
Pros: They can hide severe variations in porosity. They often provide additional protection against moisture and chemicals.
Cons: They may not last as long as penetrating stains, especially on high-traffic surfaces. The texture of the concrete may be lost under a thick overlay.
Matching product to substrate porosity
The first step is assessing your concrete’s porosity. High-absorbency concrete will soak up water quickly, while dense concrete may repel it.
For high-absorbency concrete, penetrating stains are usually best. They can penetrate deep into the pores for even coloration.
For medium porosity or dense concrete, consider topical products like tinted sealers or cementitious overlays. They can provide a more uniform look and hide variations in porosity.
Surface Preparation: Steps to Normalize Porosity Before Staining
Start by mapping porosity with blot or water-drop tests to find spongey and tight zones, then remove contaminants—oils, dust, old sealers, and efflorescence—that block or reroute stain absorption. Depending on findings, follow with the appropriate mechanical profile (grinding, shot blasting) or a controlled etch to open closed pores and create a uniform surface texture.
After profiling, condition the slab to a consistent moisture state—either fully dry per product instructions or pre-wet if a conditioning step is recommended—and run a small test patch to verify absorption and color. Plan the sequence so cleaners, neutralizers, conditioners, and stains do not cancel each other out; when in doubt, check product technical data sheets and retest after each prep step.
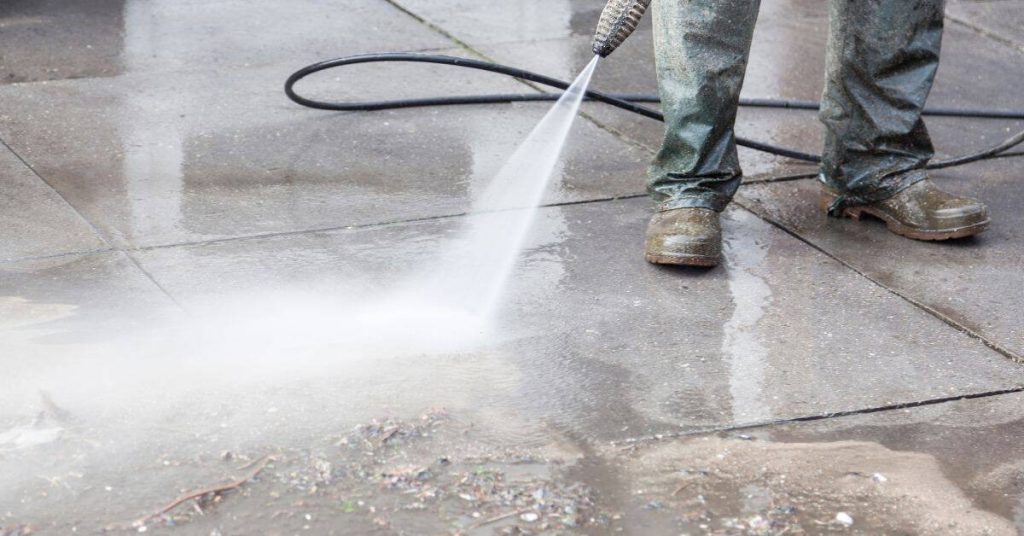
Cleaning and contaminant removal
Before you start staining, your concrete needs a clean slate. Here’s how to remove contaminants:
Degreasing: Use a degreaser to remove oils and grease. Follow the product instructions and safety data sheets.
Salt removal: Efflorescence – those white salts – need to go. Use an efflorescence remover or muriatic acid (carefully).
Coating removal: If there’s a sealer, curing compound, or other coating, strip it off using the appropriate remover.
Using conditioners, pre-stain primers, and densifiers
These products help even out absorption. Here’s when to use them:
Conditioners: Apply a compatible conditioner if your slab has inconsistent moisture or humidity. It helps equalize absorption.
Pre-stain primers: Use these base coats to seal the surface and create a uniform appearance before staining. They’re great for new concrete.
Densifiers: These fill closed pores, reducing water penetration and creating a more even surface. Ideal for older, porous slabs.
Test patch protocol and moisture verification
Before you stain the whole area, test first. Here’s how:
Representative test patches: Apply your chosen cleaner, etcher, conditioner, and stain in a small, hidden area. Let it dry according to product instructions.
Moisture check: Use a moisture meter to ensure the slab is ready (usually 4-6% MC for most stains). Wait at least 24 hours after cleaning/etching before testing.
Observation: Check your test patch after 72 hours. If it looks even and no blotchiness, you’re good to go. If not, re-evaluate your preparation steps.
Techniques to Even Out Stain Color During Application
Set a clear uniformity goal and work methodically with tools matched to the stain type—brushes or rollers for thicker stains, sprayers for large areas or fine-mist products—and select applicators that allow you to control volume into high- and low-porosity zones. Use planned passes and sequencing so you can maintain wet edges and provide immediate blending where porosity shifts, and consider pre-wetting or damp-mopping porous spots to slow their uptake when necessary.
Feathering, back-brushing, and cross-hatching smooth transitions at patch lines or edge zones; keep a consistent workflow to avoid lap marks and stop-and-start streaks. If blotches appear, use light reworking while the stain is still workable or follow remedial steps from the product instructions (touch-up coats, light sanding, or compatible sealers) after testing on a discrete area.
Application methods: sprayer, roller, brush, wipe
The tool you choose to apply concrete stain can greatly affect the final result. Here’s a quick rundown:
Sprayer: Great for large surfaces and even coverage. It’s fast but requires some skill to avoid over-application or missed spots.
Roller: Ideal for flat surfaces. It provides good coverage, but may leave visible roller marks on textured surfaces.
Brush: Perfect for edges and detailed work. It offers precise control but can be time-consuming for large areas.
Wipe: Useful for small touch-ups or creating unique effects. It’s labor-intensive but allows for fine-tuning.
Blending techniques and timing to avoid lap marks
Lap marks happen when the stain dries unevenly, creating visible lines. Here’s how to avoid them:
- Work in sections: Apply stain in manageable sections to keep a wet edge.
- Keep a wet edge: Overlap each pass by about 50% to ensure smooth transitions.
- Time your passes: Follow up with the next section before the previous one dries completely.
- Avoid over-application: Too much stain can cause drips and uneven absorption.
- Use back-rolling or back-brushing: Lightly work the stain into the surface to ensure even penetration.
By following these steps, you’ll minimize lap marks and achieve a more uniform color.
Correcting blotchy areas during or after application
Blotchiness can occur due to varying porosity. Here’s how to tackle it:
During application: If you notice a particularly blotchy area, spot blend by lightly brushing more stain onto the affected area. This helps even out absorption.
After application: If blotchiness appears after drying, lightly sand the area with fine-grit sandpaper and reapply a thin coat of stain. Alternatively, use a solvent refresher to reactivate the stain and even it out.
When to stop: If blotchiness persists despite your efforts, it might be best to stop and recondition the surface. This could involve cleaning, applying a primer or conditioner, and retrying the staining process.
Products and Materials That Correct or Prevent Blotchiness
Useful product classes include pre-stain base coats and primers, pore fillers and leveling primers, neutralizers and efflorescence removers, densifiers, and compatible sealers—each plays a role: primers and pore fillers reduce differential uptake, neutralizers remove residues that repel stain, and densifiers can reduce deep capillary action. Choose products based on pore size, moisture condition, and whether you want penetration or a surface film; always test compatibility with your chosen stain on a small area first.
Sequence matters: prepare and clean, apply neutralizer or remover if needed, then primer or pore filler, followed by stain and final sealer if required, checking cure guidance on labels between steps. Watch for pitfalls—over-application that traps moisture, incompatible chemistries that alter color, or sealers that prevent later penetration—and document each test so you can scale results predictably across the whole slab.
Pre-stain base coats and pore fillers
Before staining, apply pre-stain base coats to even out porosity. These seal the surface, preventing over-penetration of stain into deeper pores.
Pore fillers, on the other hand, fill in smaller pores and improve overall surface uniformity. Both help reduce blotchiness by making the concrete’s surface more consistent.
Test for color lock and adhesion before applying to your entire project. Use a small area to ensure the chosen base coat or filler works well with your stain and substrate.
Neutralizers, efflorescence removers, and adhesion promoters
Sometimes, you need to treat your concrete surface with chemicals before staining. Efflorescence removers eliminate salts that can cause discoloration or weaken bond strength.
Neutralizers balance the pH of the concrete, ensuring better stain adhesion. While not directly addressing blotchiness, they prepare the surface for even staining.
Adhesion promoters improve bonding between the concrete and your chosen stain or sealer. Always test these products on a small area first to ensure compatibility with your specific substrate and stain.
Sealers and topcoats: breathable vs film-forming
Breathable sealers allow moisture to escape while preventing stain penetration. They’re great for exterior surfaces prone to moisture buildup, helping prevent blotchiness caused by trapped moisture.
Film-forming sealers create a barrier over the entire surface. They provide excellent protection against stains and wear but can trap moisture if not applied correctly, leading to future blotchiness or peeling.
Choose a sealer compatible with your stain type (penetrating or topical). Always test on a small area first to ensure it doesn’t alter the intended final appearance. Consider long-term color stability when selecting your topcoat.
Cost, Time, and Project Planning Guide
Estimate cost and schedule from the scope of repairs, porosity variation, and the level of surface prep required—cleaning, grinding, or etching all add time and potential rental or labor costs. Decide early whether you’ll DIY or hire pros; factor in tool rentals, skill needs for profiling or patching, and the likelihood of multiple test patches and coats to dial in color and blotch control.
Use product coverage figures and a small test patch to calculate real-world coverage and number of coats needed, then build a timeline that sequences prep, staining, drying/curing, and sealing with weather buffers. Include contingencies for unexpected substrate issues, rework if blotches persist, and permit or disposal fees where applicable, and keep a running log of test outcomes to refine your final budget and schedule.
Estimating materials and labor needs
The right materials and labor can make or break your concrete stain job. Here’s how to estimate what you need:
- Concrete Stain: Check label for coverage (sq ft/gal). Add 10-20% for waste.
- Sealer: Same as stain, but consider multiple coats. Use test patches to confirm.
- Prep Products: Cleaners, primers, densifiers – follow package instructions for usage.
- Tools: Rent or buy based on job size and complexity. Consider brushes, rollers, sprayers, grinders.
- Labor: Get quotes from pros. DIY? Factor in time and skill level.
Timeline: prep, curing, and recoat windows
Planning your timeline ensures a successful stain job. Here’s what to expect:
Preparation takes 1-2 days (cleaning, grinding, etching). Allow 24-48 hours for drying.
Staining typically requires multiple coats with 24-hour cure times between. Test patches help determine exact timing.
Sealing follows staining, usually after 7-14 days to allow full cure of the stain. Follow product instructions for recoat windows.
When to hire a pro vs DIY
Knowing when to DIY or hire a pro depends on several factors:
Slab Size: Large slabs may require pros for efficiency and consistency.
Substrate Complexity: If your concrete has complex issues (cracks, efflorescence), consider hiring a pro.
Risk Tolerance & Warranty Needs: Pros offer peace of mind with warranties. DIY is riskier but cheaper.
Safety, Common Mistakes to Avoid, and Long-Term Maintenance
Prioritize safety: use appropriate PPE, ensure ventilation, and read each product’s SDS and manufacturer guidance before mixing or applying anything. Common mistakes that cause blotchiness include skipping prep or moisture testing, using incompatible sealers, overworking edges until they dry, and applying in unsuitable environmental conditions—test patches and proper sequencing prevent many of these errors.
For long-term color stability, follow a simple maintenance routine—regular cleaning with compatible cleaners, scheduled reseals or topcoats, and documenting product batches and application dates for future touch-ups. Always consult SDS and product instructions for storage, disposal, and recoat windows, and adjust maintenance intervals based on exposure and wear observed during routine inspections.
Safety precautions and PPE
Your safety is paramount. Always use appropriate personal protective equipment (PPE). This includes:
Gloves: Protect your hands from harsh chemicals.
Eye protection: Wear safety glasses or goggles to shield your eyes from splashes and dust.
Respirator: If needed, use a respirator to protect against harmful fumes. Ensure good ventilation in the work area.
Common mistakes that lead to blotchy results
To avoid blotchiness, steer clear of these common pitfalls:
- Skipping test patches: Always perform a patch test before staining the entire surface.
- Inadequate cleaning: Ensure the concrete is clean and free from contaminants before application.
- Incorrect tool choice: Use the right tools for your stain type (sprayer, roller, brush, wipe).
- Rushing cure times: Allow sufficient time for the stain to cure as per manufacturer’s guidelines.
- Mismatched products: Ensure all products used are compatible with each other and the concrete substrate.
Addressing these issues will help you achieve an even, consistent color.
Maintenance and inspection schedule to keep color even
Regular maintenance is key to preserving your concrete stain’s even appearance. Use this checklist:
- Monthly cleaning: Clean the surface using a mild detergent and water to remove dirt and debris.
- Annual inspection: Check for any signs of wear, fading, or damage.
- Touch-ups: Address any minor issues promptly to prevent them from worsening.
- Sealer reapplication: Reapply sealer every 2-5 years, depending on product guidance and traffic levels.
- Product refreshment: If necessary, apply a refresher product to maintain color vibrancy.
- Temperature monitoring: Keep an eye on temperature changes that could affect the stain’s longevity.
- Humidity check: Monitor humidity levels to prevent moisture-related issues.
- UV exposure: Protect exterior surfaces from prolonged UV exposure, which can fade color.
Quick rule: Regular maintenance and prompt attention to any issues will help keep your concrete stain looking even and vibrant long-term.
Conclusion
Stain results hinge on controlling porosity from start to finish, so plan for safety, patience, and a steady approach to avoid costly rework and ugly blotches.
Start by evaluating porosity, clean and repair as needed, test the chosen stain on a small area, pick a compatible sealer, and apply in even batches with consistent pressure and cure times. Keep the work area controlled, work in natural light, and recheck porosity after any prep step before rolling on color.
Common mistakes to avoid are skipping surface prep or patching, skipping a stain test, using a sealer that doesn’t match the porosity, and ignoring weather or ventilation. Always wear proper PPE, ventilate, and follow manufacturer guidance; don’t rush the cure or apply in extreme heat, cold, or humidity, and never seal a damp surface.
If the slab is large, has unknown porosity, or you keep seeing blotches despite your best prep, consider a professional for an assessment or targeted correction. Stay deliberate, stay safe, and you’ll end up with a durable, even finish you can be proud of.
FAQ
What causes blotchy stain on porous concrete?
Porosity variance, micro-cracks, and uneven moisture can pull stain in different directions. If the surface isn’t uniform, the stain will grab more in some spots and less in others. Check the surface for texture gaps, dust, or old coatings that may trap or repel color.
How does porosity show up after staining, and why is it hard to fix later?
High spots soak in more color; low spots stay light. Once the stain dries, the pattern is set and hard to even out without re-sanding or recoating. Plan your prep and application to prevent this from happening in the first place.
What steps can I take before staining to improve porosity and reduce blotching?
Don’t skip surface cleaning and allow dust or curing release agents to stay. Use the right mechanical prep or a compatible pre treatment to even the surface texture. Test a small patch first to see how the surface accepts color.
What products or methods are recommended to treat blotchy stains if it happens?
Focus on uniform penetration; use compatible sealers or stains across the whole area if you recoat. Follow the manufacturer’s guidance for coverage and drying times, and test patches to confirm how the surface will look before proceeding.