
Introduction
Concrete salt finish patching is a way to match the coarse, pocked texture of an existing salt finish by embedding and removing salt or an aggregate substitute so the repair blends in. This job is hands-on: you clean and profile the old concrete, feather the repair edges, and match the mix and timing so the texture reads the same. Check product labels and manufacturer instructions for setting times and recommended mixes.
Mixing small batches and practicing the embed-and-brush timing on scrap lets you dial in the look before touching the repair. Work in thin lifts, keep the surrounding area damp but not wet, and avoid hard edges so the patch fades into the original surface instead of sitting like an island. If you aren’t sure about a product or substrate condition, consult the material label or a professional for specifics.
Key takeaways
- Assess salt finish texture and typical failure patterns to guide patching strategy.
- Thorough surface cleaning and loose material removal prior to any patching.
- Use compatible patch material and mix with recommended additives per label guidelines.
- Emulate salt finish texture by layering and feathering patches to blend edges.
- Cure under controlled moisture and temperature conditions per manufacturer instructions.
- Monitor color and sheen during curing; test blend on inconspicuous area first.
- Safety: wear PPE, ventilation, and follow slip-resistance checks after patching.
Table of Contents
- Introduction
- Key takeaways
- Understanding the Salt Finish and Typical Failure Modes
- Planning the Repair Before You Touch the Surface
- Tools and Materials Checklist
- Surface Preparation for an Invisible Repair
- Mixing and Applying the Patch Material
- Techniques to Recreate the Salt Finish Texture
- Curing, Color Matching, and Final Touches
- Troubleshooting Common Problems, Prevention, and Safety
- Conclusion
- FAQ
Understanding the Salt Finish and Typical Failure Modes
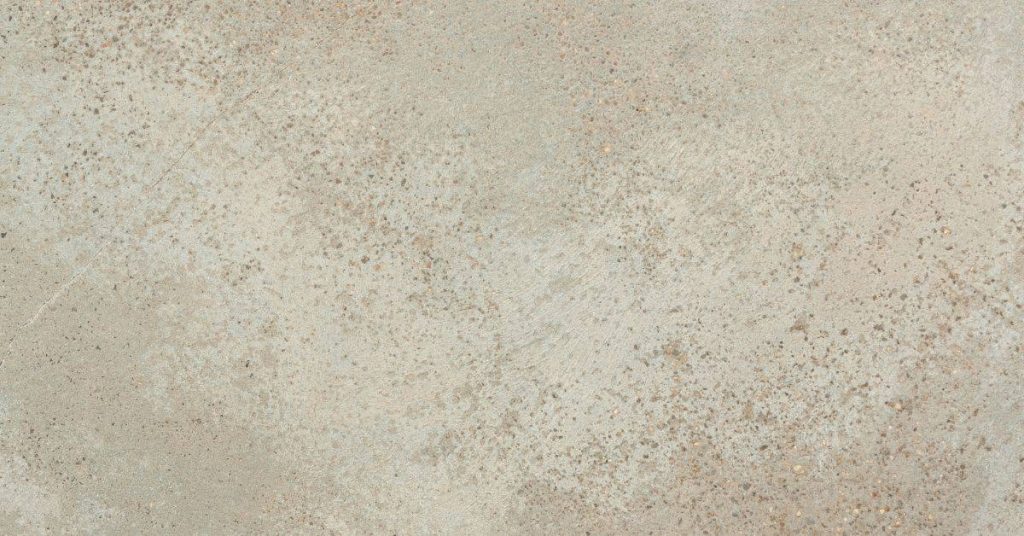
The salt finish is a surface treatment where the top paste is removed to reveal a coarse, pitted texture that reads like fine granules and micro‑pits with a slight sheen in worn areas. It’s created by brooming or using exposed‑aggregate techniques and by selectively rinsing or washing away cement paste; visual cues of a true salt finish include uniform grain, shallow relief, and tiny pits rather than large exposed stones.
Common failure modes that drive repairs include chemical attack from deicing salts that break down paste, freeze/thaw microcracking, surface abrasion from traffic, and efflorescence that pushes salts to the surface. Check product data sheets or labels and perform simple moisture and salt‑leach tests to diagnose cause and decide whether sealing, deeper repair, or texture matching is needed before patching.
What a proper salt finish should look like
A true salt-finished concrete has a unique, coarse texture. It’s not smooth but rather slightly irregular with micro-pits and small voids.
The surface should have a slight sheen, almost like tiny grains of salt glistening under light. This is due to the exposed aggregate and the way it was finished – usually by brooming or troweling.
Color variation is normal in salt finishes. It comes from the different sizes and types of aggregates used in the mix. The finish depth can vary too, affecting how patches blend in.
Typical damage patterns to identify
Flaking is one of the first signs of trouble. Small pieces of concrete start peeling off, leaving behind a rough, powdery surface.
Pitting happens when tiny holes form on the surface due to salt leaching or other chemical reactions. Isolated high spots, or ‘islands’, are areas where the finish is thicker than surrounding surfaces.
Efflorescence appears as a white, powdery deposit on the surface, often indicating that salts are being pushed upwards by moisture. Substrate delamination occurs when the concrete starts to peel away from its base due to poor bonding or excessive stress.
Planning the Repair Before You Touch the Surface
Start by mapping every crack, chip, and worn island and categorize each by movement, exposure, and visibility so you can sequence work from critical, high‑traffic spots to peripheral areas. Use those categories to decide if localized repairs will blend or if a full resurfacing is the better long‑term option, and confirm criteria against manufacturer instructions for your chosen patch product.
Inspect substrate soundness and moisture with tapping, moisture tests, and checks for efflorescence or prior coatings; those results determine compatible mortars and any required mitigation. Prepare a materials and process plan that lists patch mortars, bonding agents, curing measures, PPE, and a simple repair log to document treatments and test patches for future reference.
Visual mapping and scope assessment
Before you start patching, get a clear picture of your concrete’s condition. Grab a camera or your smartphone to document every crack, chip, or patched area.
Take photos from different angles and distances. Mark each issue on the surface with chalk or tape for easy reference later.
Look at your pictures together. Determine if damage is isolated or widespread. This helps you create a repair plan that avoids inconsistent texture islands – no one wants obvious patches!
Estimating materials, time, and skill level
Choosing the right material is crucial for a successful salt finish patch. The wrong one can cause cracking, staining, or weak bonds.
- Patch Mortar: Look for a high-quality, fast-setting mortar designed for concrete repairs. Check its compressive strength and bond strength ratings to ensure it matches your substrate’s condition.
- Sealer: Choose a sealer that complements your chosen patch mortar. It should provide the desired texture and protect against moisture and de-icing salts.
- Overlay Mix: For resurfacing, pick an overlay mix with good adhesion properties and suitable compressive strength for your application.
- Testing Samples: Before committing to a large quantity, test small samples of your chosen materials. This helps you fine-tune your approach and avoid costly mistakes.
- Time Allocation: Plan your time wisely. Consider curing times, ventilation needs, and joint/edge preparation. Don’t rush; quality takes time.
- Skill Level: Be honest about your skill level. Some repairs may require professional help if they’re too complex or involve structural issues.
Tools and Materials Checklist
Gather core hand tools: margin and finishing trowels, brick chisel or cold chisel, hammer, steel wire brush, stiff broom, spray bottle, and a float; for larger or faster work, add an angle grinder with a diamond cup or a small mortar mixer. Match patch materials to the substrate: compatible patch mortar, bonding agent, texture aids (stiff brushes, salt‑like granules or approved release media), and curing/evaporation control products—verify compatibility on the product label or technical data sheet.
Plan for sealers or color enhancers and test on scrap to confirm whether color is applied before or after patching. Include PPE, ventilation, surface‑profiling equipment, and a budget split between DIY entry‑level kits and professional‑grade mixes so you can choose based on patch size and expected longevity.
Essential tools
Before you start, make sure you have the right tools for the job. Here’s a checklist to help you.
- Trowels (hand & margin): For applying and spreading patch material; skipping may lead to inconsistent patch thickness.
- Float: To smooth out and level the patch; helps achieve a uniform finish.
- Brick chisel & hammer: For removing damaged concrete and profiling the surface for better adhesion.
- Steel brush: To clean and prepare the surface, removing dust and loose particles.
- Stiff broom or brush (for texture): To mimic salt finish texture; using a soft brush may result in an unsatisfying finish.
- Angle grinder with diamond cup wheel (optional): For larger patches, it speeds up surface preparation and profiling.
- Vibration or racking tool (optional): To compact and level patch material for stronger repairs.
- Gloss roller & spray bottle: For applying sealers and curing agents; skipping may cause premature deterioration of the patch.
Quick rule: Having the right tools ensures a smooth, textured finish that blends with your existing concrete.
Patch materials and additives
Choose the right patch materials to ensure compatibility and longevity. Here’s what you need:
- Cementitious patch or polymer-modified mortar: For filling voids and repairing damaged areas; using incompatible materials may result in poor adhesion.
- Bonding agent: To improve adhesion between the patch and existing concrete; skipping may cause delamination over time.
- Retarder (optional): To control setting time, especially in hot or humid conditions; not using one might lead to rapid curing and weak patches.
- Pigments (optional): To match the color of your existing concrete; skipping may result in visible patch areas.
- Salt-like granules or textured-release method: To recreate the salt finish texture; using inappropriate materials may not achieve the desired look.
- Curing/evaporation control product: To protect the patch from moisture loss and ensure proper curing; skipping may cause cracking and reduced strength.
Quick rule: Always follow manufacturer guidelines for mixing and application to achieve optimal results.
Surface Preparation for an Invisible Repair
Remove salts, efflorescence, and contaminants by brushing, vacuuming, light pressure washing, or targeted poultices until no loose residue remains; verify cleanliness by visual inspection and a simple wipe test and consult product instructions for any chemical cleaners. Knock out unsound concrete and feather clean edges back to solid material using chisels or grinders; use tapping or probing to find hollow or delaminated areas and remove until you reach a firm substrate.
Create a mechanical micro‑profile to help the patch key in—roughen the surface enough to match surrounding texture without undermining edges and avoid over‑saturation that closes pores. Finish with a dust‑free, dry surface or the surface condition required by your patch product, and run a moisture check and touch test as a final visual readiness checkpoint.
Cleaning and salt/efflorescence removal
Start by brushing off loose material with a stiff-bristle broom. Then, use a vacuum to remove any remaining dust.
For salts and efflorescence: Apply a poultice made of water, muriatic acid (1 part), and hydrated lime (3 parts). Let it sit for 24 hours before scrubbing with a stiff brush. Rinse thoroughly with clean water and let dry.
To verify no active salt migration remains, perform a simple test: apply a small amount of clear silicone caulk to the surface. If it turns white or cloudy after 15 minutes, salts are still migrating.
Edge preparation and substrate soundness
Use a chisel to undercut or feather the edges of the repair zone. This removes damaged material and creates a smooth transition.
Tap around the edge with a hammer and cold chisel. If it sounds hollow, remove more material until it’s solid.
Check for hairline movement or hidden voids by pressing on the surface. If it feels spongy or gives way, remove more material until you reach sound concrete.
Priming and bonding procedures
Before applying any patch material, use a bonding slurry or primer to improve adhesion. These products create a chemical bond between the old concrete and new patch material.
For bonding slurries: Mix according to package instructions and apply with a stiff-bristle brush. Let it sit for 10-30 minutes before applying the patch material.
For primers: Apply with a paintbrush or roller, following the manufacturer’s instructions. Allow it to dry as specified before patching.

Mixing and Applying the Patch Material
Follow a controlled mixing workflow: blend dry components first, add water or liquid modifiers slowly, and use mechanical mixing where possible to avoid air pockets and ensure uniform color and texture across batches. Refer to manufacturer instructions for additive choices and workable consistency; do small trial mixes to dial in slump and open time so the mix will accept the texture tools you plan to use.
Apply in manageable patches, matching tool choice and timing to the surrounding finish—trowel, sponge, brush, or stipple while the material is in the correct state for texture transfer. Use feathering and overlapping passes to minimize seams, run small test patches to confirm appearance, and address common issues (dry skin, dark spots, separation) with corrective steps indicated by the product guidance.
Mixing for workability and strength
The key to a successful patch is getting the mix right. Follow your concrete mix’s manufacturer directions closely.
Consistency is crucial. It should flow like thick cake batter, not too runny or dry. Check by dropping a handful onto the surface – it should spread slightly but hold its shape.
Moisture and temperature matter. Mix on a cool day if possible. Keep water at room temp to avoid shocking the mix. If it’s hot, use a retarder to extend working time.
Application methods for a salt finish
Replicating a salt finish needs careful application. Here are four techniques:
Trowel: Use a square trowel to spread the mix, working it into the surface’s texture. Keep it level and smooth.
Float: After initial spreading, use a magnesium or wood float to create the salt finish’s unique texture. Work quickly and firmly in small sections.
Spray: For larger areas, consider using a sprayer to apply the mix. It helps maintain consistency and reduces air voids.
Tamping: Use a tamper to press the mix into any deep voids or cracks, ensuring good adhesion and strength.
Layering and feathering to avoid islands
Building thin layers and feathering edges helps patches blend with the existing concrete. Avoid these common mistakes:
- Thick layers: Thicker isn’t better. Thin layers allow for better control and easier blending.
- Sharp edges: Feathering edges gradually reduces demarcation. Use a trowel to blend the patch into the existing surface.
- Island-like patches: Work in small, manageable sections. Overlapping passes helps create a seamless look.
- Inconsistent texture: Match the surrounding finish by varying pressure and technique as you apply each layer.
Remember, patience is key. Building up thin layers allows for better control and a more natural-looking repair.
Techniques to Recreate the Salt Finish Texture
Set clear texture targets—grain size, pore frequency, and surface porosity—and use small test panels to compare outcomes before committing to larger areas. Create controlled voids by adjusting mix consistency, using aggregate or texturing aids, and timing your tooling so voids form and hold similarly to the existing finish.
Use hand tools (stiff broom, brush, sponge) and light tooling to imitate surrounding relief, working within the correct timing window for the patch material to avoid high or low spots. Document each test parameter and outcome, then select the combination that best matches the salt finish and follow a consistent edge‑to‑center workflow to avoid visible islands.
Texture tools and mimicry methods
The right tools help you mimic the salt finish texture. Here’s what to use:
- Salt application: Use a salt applicator or spreader to create the granular look. Key is even distribution.
- Aggregate scattering: Sprinkle aggregates by hand or with a spreader for varied texture. Size and gradation matter.
- Stiff brushes: Use stiff-bristled brooms to mimic natural wear. Work in one direction.
- Broom strokes: Vary stroke length and pressure for random texture. Rentable tools available.
- Texture pads/skins: Specialty tools create unique patterns. Around $20-$50 each.
Blending strategies and visual checkpoints
Use this checklist when patching to ensure a seamless finish:
- Depth match: Check with a level or straight edge. Inconsistencies show.
- Pattern direction: Match existing pattern using reference photos. Wrong direction stands out.
- Void frequency: Count voids per square foot. Too many or too few look odd.
- Color match: Check under different lighting. Flashlight helps spot discrepancies.
- Edge blending: Feather edges to avoid harsh lines. Use a soft brush for fine tuning.
- Texture consistency: Check for uniform texture across the patch. Inconsistencies are obvious.
- Moisture content: Ensure consistent moisture throughout. Too wet or dry affects texture.
- Curing conditions: Monitor temperature and humidity during curing. Changes affect finish.
- Edge-to-center workflow: Start at edges, work towards center for even texture.
Quick rule: Regular checks prevent obvious patches.
Timing and environmental control to prevent islands
Proper timing and environment control help avoid isolated texture ‘islands’:
Finishing moves: Time troweling, brushing, and stamping right. Too early or late creates inconsistencies.
Evaporation rates: Control water loss. Too fast leaves voids; too slow delays curing.
Ambient conditions: Monitor temperature and humidity. Changes affect texture development. Ideal range: 50-90°F (10-32°C), 40-70% RH.
Curing, Color Matching, and Final Touches
Protect the patch during initial set with the curing method recommended for your product—moisture retention, curing compounds, or shading—to maintain texture and prevent rapid evaporation that causes surface defects. Timing and environmental control matter; follow product guidance for when to remove protection and whether additional curing steps are needed to preserve the salt finish.
Test color matching on scrap patches and layer colorants or toners in small passes until you reach a compatible patina with the surrounding concrete. Finish edges by feathering and light tooling, select an appropriate sealer after tests confirm compatibility, and watch for early failure signals so you can correct uneven texture, islands, or color mismatches before final curing completes.
Curing best practices
Protecting your fresh patch during the curing process is crucial to maintain its texture and prevent cracking. Here are some moisture-conserving methods:
Moisture Retention: Keep a damp cloth or plastic sheet over the patch for the first 72 hours to retain moisture.
Avoid Rapid Drying: Shield the patch from direct sunlight and strong winds. If possible, cure it in a humid environment or use a curing compound to slow down evaporation.
Temperature Control: Protect the patch from freezing temperatures. If you live in a cold climate, consider heating the area during the curing process.
Color matching and visual aging
Matching the color of your patch to the existing concrete is an ongoing process that involves pre-testing and planning for future changes:
Pre-Testing: Always test pigments, wash coats, or reactive stains on a scrap piece before applying them to the patch. This helps you achieve the desired color and prevents costly mistakes.
Consider the surrounding concrete’s patina: Concrete naturally ages and changes color over time. When choosing your patch material and color, plan for this change by selecting a product that will age similarly to the existing concrete.
Use multiple layers or toning techniques to mimic the aging process. This can help your patch blend in with the surrounding concrete as it ages.
Sealing and long-term maintenance
Applying a sealer is crucial to protect your patch and prolong its lifespan:
Timing: Apply the sealer after the concrete has cured for at least 28 days. This allows the concrete to fully set and prevents the sealer from interfering with the curing process.
Sealer Selection: Choose a sealer that complements your patch’s color and texture. Some sealers can darken or alter the appearance of the concrete, so it’s important to test them on a small area first.
Maintenance: Regularly inspect your patch for signs of wear or damage. If you notice any cracks or chips, address them promptly to prevent further deterioration. Reseal the patch every 2-3 years to maintain its protection and appearance.
Troubleshooting Common Problems, Prevention, and Safety
For adhesion failure, re‑profile and clean the substrate, verify moisture levels, and use the correct bonding agent specified by the patch manufacturer; for color mismatches, test stains or pigments on scrap patches and check sealer interactions before large‑scale application. Address visible islands by retexturing feathered edges and confirming sealant application didn’t build spots—if needed, remove and reapply localized areas following the original substrate prep steps.
Keep prevention simple: manage salts and moisture, use compatible products, and maintain consistent curing and sealing schedules to reduce repeat damage. Always use PPE (eye protection, chemical‑resistant gloves, respirator for dust/vapors), follow product safety data sheets, ensure ventilation when working with additives or sealers, and document remedial steps in a repair log for future reference.
Quick fixes for common issues
Flaking patches, adhesion loss, and contrast lines can happen. Here’s how to fix them:
Flaking Patches: Remove loose material, clean the area, and reapply patch. If it keeps happening, reprofile or remove and redo.
Adhesion Loss: If patch pulls off easily, remove it, clean the surface, and apply a bonding agent before repatching.
Contrast Lines: If you see lines where old and new meet, feather the edges of your patch to blend them. If it’s still visible, sand lightly and touch up with a compatible sealer or colorant.
Preventive measures to avoid future salt damage
Avoid these mistakes to prevent future issues:
- Improper Drainage: Ensure water drains away from the concrete. Standing water can cause damage.
- Inadequate Sealing: Seal your concrete properly to protect it from salt and other contaminants.
- Using Corrosive Salts: Opt for non-corrosive alternatives like sand or gravel for traction in winter.
- Neglecting Regular Maintenance: Inspect and maintain your concrete regularly to catch issues early.
By following these preventive measures, you’ll minimize future salt-related damage.
Safety and environmental considerations
Working with concrete chemicals requires safety precautions. Here’s what to do:
PPE: Wear eye protection, chemical-resistant gloves, long sleeves, and a respirator or suitable mask for particulates/vapors.
Ventilation: Ensure proper ventilation when working with chemicals. Keep windows open or use fans if necessary.
Runoff Control: Contain runoff to prevent environmental contamination. Follow local regulations and product safety data sheets for disposal.
First Aid: Always have a first-aid kit on hand. Rinse skin and eye exposure immediately with water, and seek medical attention if needed.
Conclusion
Patched patches will hold up best when you respect the salt finish mindset: test, prep, and cure with care so the texture and color stay durable and safe for everyday use. This work isn’t glamorous, but done right it hides the repair and keeps the surface from peeling or cracking again.
First, test a small patch area, follow the patch material guidelines exactly, roughen and feather the repair edge, apply in thin layers, cure properly, then compare color under different lighting before you do the full pass. Work in clean, ventilated conditions, wear eye protection and a dust mask, and keep your tools dry and organized so you don’t introduce new texture or errors.
Common mistakes to avoid are overworking the patch, using the wrong mix or too-thick layers, skipping proper surface prep, neglecting cure time, and rushing color matching. Safety rules are simple: test first, follow the manufacturer’s directions, work in small sections, and don’t seal or paint over until the texture and color feel settled and dry.
If the repair would require major color shifts, structural work, or you’re unsure about the finish under load, call a professional. When you can see the texture and color match through the patch and the surface feels solid, you’re ready to finish. Stay steady, stay careful, and you’ll have a clean, lasting patch without obvious islands.
FAQ
How should I prep the surface to patch without making the patch obvious?
Clean the area thoroughly and remove all loose material. Lightly roughen the surrounding concrete to help the patch grab. Dampen the surface before patching and use a compatible patch material for best blend.
What should I mix into the patch material to get a salt-finish look?
Use the patch material as directed by the manufacturer and consider a texture additive or a compatible topping to mimic the salt look. Don’t guess—check the product label for approved additives and mix instructions. Test a small sample first to compare texture with the surrounding surface.
How do I apply the patch to recreate the salt finish texture without obvious islands?
Apply in thin passes and work quickly to keep the texture cohesive with the existing surface. Use a texture tool or stiff brush to create random grainy patterns, then lightly sweep to blend edges. Avoid thick patches that stand out; aim for a continuous, low relief across the repaired area.
What about drying and curing to prevent cracks and color mismatch?
Follow the patch material’s curing guidance on timing and protection. Keep the area free from direct sun and drafts during initial set if possible, and inspect color matching as it brands and dries. If color or texture shifts, plan a controlled touch-up rather than a full re-patch.