
Table of Contents
- Introduction
- Understanding Mortar Color Consistency
- Product Overviews for Mortar Color Matching
- Selecting the Right Sand for Color Matching
- Application Instructions and Safety Data
- Tools and Accessories for Mortar Application
- Common Mistakes in Mortar Color Matching
- Detailed Cost Analysis of Mortar Options
- Maintaining the Appearance and Integrity of Your Mortar Over Time
- Planning and Preparation Tips for DIY Mortar Projects
- Conclusion
- FAQ
Introduction
To match mortar color on old work, carefully select sand that closely resembles the original in both color and texture. This article will guide you through the process of identifying the right sand and provide tips on achieving a seamless blend with existing mortar for a cohesive appearance.
Understanding Mortar Color Consistency
Maintaining mortar color consistency is crucial for both the aesthetic and structural integrity of masonry projects. Factors such as the type of sand, brand of cement, and water content can significantly affect the final color of the mortar. Additionally, environmental conditions like humidity and temperature during curing play a vital role in achieving uniform color.
Matching the color of new mortar with existing structures enhances the visual appeal and ensures a seamless blend. Testing and adjusting the mortar color before full application can prevent mismatches and costly rework. Considering the effects of time and weathering on existing mortar helps in formulating new mixes that remain consistent over time.
Factors Affecting Color Consistency
Mortar color consistency can be tricky, but understanding the main factors helps. First, look at the type of sand you use. Different sands have different colors and textures, which can change the final look of your mortar. Always use sand from the same source for the entire project to keep things uniform.
Next, pay attention to your mixing ratios. Even small variations in the amount of water or cement can lead to noticeable color differences. Stick to the same proportions every time you mix a batch. Consistency is key here, so measure carefully and avoid eyeballing it.
Environmental conditions like temperature and humidity can also affect drying times and color. Try to work in similar weather conditions throughout the project. If that’s not possible, be prepared for some variation and adjust your expectations accordingly.
Importance of Consistent Color in Restoration Projects
When you’re tackling a restoration project, keeping the mortar color consistent is crucial for preserving historical accuracy. Imagine walking up to a beautifully restored building only to notice mismatched mortar joints. It sticks out like a sore thumb and can ruin the entire aesthetic. Your goal should be to match the original look as closely as possible, which means paying attention to color consistency.
Start by sourcing materials that match the original mortar. This isn’t just about color; it’s about texture and composition too. Even small variations can lead to big differences once the mortar is set and dried. Always test a small patch before committing to a full application. This way, you can adjust your mix if needed, avoiding costly mistakes.
Don’t underestimate the impact of environmental factors on color consistency. Humidity, temperature, and even the amount of sunlight can alter how the mortar sets. Keep conditions as stable as possible during application and curing. If you’re not careful, you could end up with a patchwork effect that detracts from the building’s historical charm.

Product Overviews for Mortar Color Matching
Discover a range of products designed for mortar color matching, offering both pre-mixed and customizable solutions. These products are known for their extensive color options, ease of application, and compatibility with existing mortar surfaces.
Choosing the right mortar color matching product enhances the visual appeal and longevity of your project. Consider factors like project requirements and environmental conditions to ensure the best results, and utilize sample testing or consult experts for optimal color matching.
Pre-Blended Mortar Options
Pre-blended mortar is a smart choice for anyone looking to achieve consistent color matching in their masonry projects. These products come with the exact proportions of cement, lime, and sand already mixed, ensuring uniformity across every batch. This consistency is crucial for avoiding unsightly color variations that can occur when mixing mortar by hand.
Using pre-blended options also saves time and reduces the guesswork involved in achieving the right mix. You don’t have to worry about measuring or sourcing different components. Just open the bag, add water, and you’re ready to go. This convenience is especially valuable for DIY homeowners who might not have access to professional mixing equipment.
Be wary of trying to cut corners by mixing your own mortar if you’re not experienced. Inconsistent mixes can lead to weak joints and mismatched colors, which are a pain to fix later. Stick with pre-blended products for a reliable and professional-looking finish every time.
Customizable Mortar Solutions
When it comes to achieving the perfect look for your masonry project, customizable mortar solutions are a game-changer. These products allow you to tailor the color of your mortar to match or complement your specific project needs. Whether you’re restoring an old building or creating a new design, having the ability to customize the mortar color ensures a cohesive and polished finish.
Start by choosing a base color that closely matches your desired outcome. Many suppliers offer a range of pigments that can be mixed to achieve the exact shade you need. Be sure to test small batches before committing to a large quantity. This helps you see how the color looks when dry and in the context of your project.
Keep in mind that environmental factors like sunlight and moisture can affect the final appearance. Always consider these elements when selecting your color. It’s also wise to consult with a professional if you’re unsure about the best color match. Avoid the mistake of rushing this process; taking the time to get it right will pay off in the long run.
Selecting the Right Sand for Color Matching
Choosing the right sand is crucial for achieving a consistent mortar color that matches existing work. Identifying the original sand color used in the existing mortar is the first step, followed by testing different sand samples to find the best match.
Sand texture and grain size can significantly impact the final mortar color, making it essential to consider these factors. By sourcing sand that closely matches the original in both color and texture, you ensure a seamless blend and a professional finish.
Types of Sand and Their Impact on Color
Choosing the right sand is crucial for getting the color you want in your mortar. Natural sand can vary in color from region to region. It often has a mix of minerals that can affect the final hue. If you’re aiming for a specific color, test a small batch first. This way, you can see how the sand’s natural tint interacts with your chosen cement and additives.
Manufactured sand is another option. It’s made by crushing rocks, which gives it a more consistent color. This can be a good choice if you need uniformity in your project. However, manufactured sand might lack the subtle color variations that natural sand offers, so consider what look you’re going for.
Don’t overlook washed sand. It’s been cleaned of impurities and fine particles, which can help achieve a cleaner, brighter finish. But remember, washing can sometimes strip away the natural color variations, leaving a more neutral base. Always check a sample against your desired color to avoid surprises.
Tips for Testing Sand Color
Before you start mixing, take a small sample of the sand you’re considering and mix it with a bit of your existing mortar. Let it dry completely. This will give you a true sense of how the color will look once set. Don’t just rely on wet samples; colors can change significantly as they dry.
Always test under natural light. Artificial lighting can distort colors, leading to mismatches. Take your sample outside or near a window to get an accurate view. This simple step can save you from costly mistakes down the line.
Be wary of sand that seems too uniform in color. Natural variations are normal and often desirable. If it looks too perfect, it might contain dyes that could fade over time. Stick to natural sands that match your existing mortar’s texture and hue.
Application Instructions and Safety Data
Learn how to expertly apply mortar with our step-by-step guide, focusing on achieving the perfect color match. Discover the significance of choosing the right sand and testing a small batch before full application to ensure consistency with existing structures. Prioritize safety by following essential precautions, including the use of protective gear, to handle and mix mortar safely.
Understanding these application instructions and safety measures can significantly impact the quality and durability of your project. Consistent mortar color not only enhances the visual appeal but also maintains structural integrity. Proper cleaning of tools and the work area prevents contamination and ensures a safe working environment, making your DIY or jobsite tasks more efficient and successful.
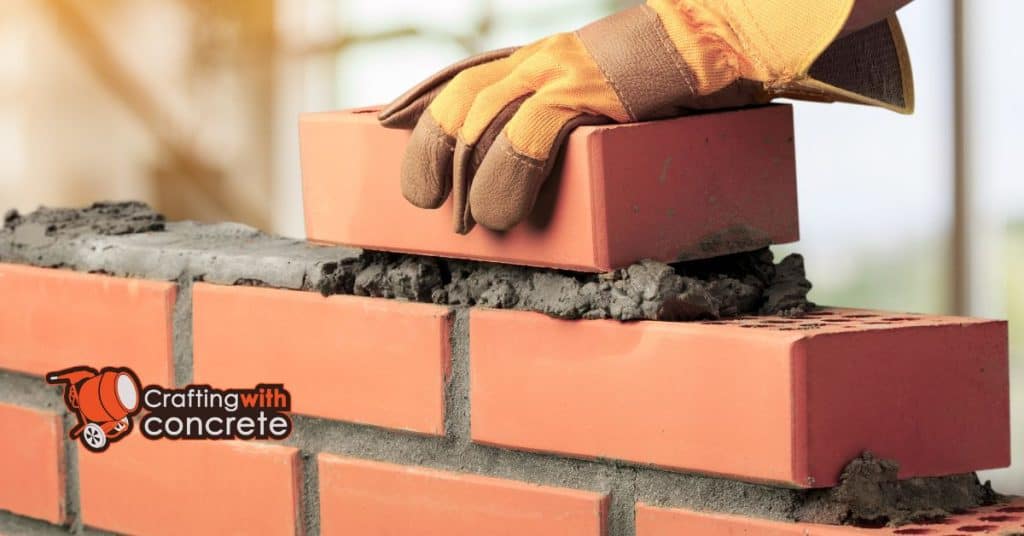
Step-by-Step Application Guide
Applying mortar correctly is key to maintaining color consistency. Follow these steps to get it right.
- Mix the mortar thoroughly until you achieve a uniform color and consistency.
- Let the mixed mortar sit for 5 minutes, then stir again before application.
- Use a trowel to apply the mortar evenly, working in small sections.
- Apply mortar consistently with the same pressure to avoid color variations.
- Clean excess mortar immediately with a damp sponge to prevent staining.
- Allow the mortar to cure undisturbed for at least 24 hours.
Common mistake: Inconsistent mixing leads to color variations. Always mix thoroughly and avoid adding extra water during application.
Safety Precautions for DIY Projects
Before you even think about mixing mortar, make sure you’re wearing the right gear. Protective eyewear and gloves are non-negotiable. Mortar can irritate your skin and eyes, so don’t skip this step. A dust mask is also a smart move, especially when you’re working with dry materials. You don’t want to be inhaling that stuff.
When mixing, pay attention to your surroundings. Keep your workspace organized and free of clutter. This isn’t just about being tidy—tripping over a stray tool while holding a heavy bucket of mortar is a recipe for disaster. Also, ensure you’re mixing in a well-ventilated area to avoid breathing in any harmful fumes.
Once you’re ready to apply the mortar, check base compaction before laying anything down. A poorly prepared base can ruin your project and waste your time. And remember, don’t rush the curing process. Let the mortar set properly to ensure a strong, lasting bond. Cutting corners here will only lead to problems down the line.
Tools and Accessories for Mortar Application
To achieve a flawless mortar application, having the right tools is crucial. Essential items include a trowel for spreading, a mixing bucket for preparing the mortar, a pointing tool for precision, a joint raker for cleaning out excess mortar, and a sponge for smoothing the finish. Each tool plays a specific role in ensuring a consistent and professional result.
Choosing high-quality tools can greatly impact the durability and appearance of your work. Safety accessories like gloves and goggles are recommended to protect against potential hazards. Proper maintenance and cleaning of these tools not only extend their lifespan but also ensure they perform optimally for future projects.
Must-Have Tools for DIY Mortar Projects
When tackling a DIY mortar project, having the right tools can make the difference between a smooth job and a frustrating mess. Here’s a list of essential tools you’ll want in your toolkit.
- Trowel: Used for spreading and shaping mortar. A good trowel will help you apply mortar evenly and with precision.
- Mortar Mixer: Essential for mixing mortar to the right consistency. A drill with a mixing paddle can work for small batches.
- Bucket: Necessary for mixing and carrying mortar. Choose a sturdy one that can handle the weight.
- Level: Ensures your work is straight and even. A level is crucial for achieving a professional finish.
- Jointing Tool: Used for finishing joints between bricks or stones. A smooth joint is not just about looks; it also helps with durability.
- Brush: Handy for cleaning excess mortar and dust off surfaces. A stiff-bristled brush works best.
- Safety Gear: Don’t skip on safety. Goggles and gloves protect you from harmful dust and sharp edges.
Pro tip: Always keep your tools clean. Dried mortar can ruin them, making your next project much harder.
Accessory Recommendations for Professional Finish
To achieve a professional finish, consider adding a few key accessories to your toolkit. Start with a high-quality pointing trowel. It’s essential for precise application and smoothing of mortar joints. A good trowel will help you avoid uneven surfaces and gaps, ensuring a clean, polished look.
Another must-have is a joint raker. This tool is perfect for cleaning out excess mortar from joints, which is crucial for both aesthetics and structural integrity. Don’t skip this step if you want your work to last. A joint raker will help maintain uniform depth and width in your mortar joints.
Lastly, consider using a mortar bag for controlled application in tight spaces or detailed work. It’s like a pastry bag for mortar, allowing you to apply material precisely where needed without making a mess. This can be a game-changer for intricate designs or repairs.

Common Mistakes in Mortar Color Matching
Matching mortar color can be tricky, but avoiding common mistakes makes it easier. Ensuring the sand type and texture match the original mortar is crucial for color consistency. Incorrect pigment ratios can lead to mismatched colors, so measuring them accurately is essential.
Understanding why these factors matter can save time and frustration on the job site. Curing conditions affect color appearance, so replicating them helps achieve the desired result. Testing small batches before full application prevents costly errors, and adjusting for weathering ensures a seamless blend with older work.
Avoiding Color Discrepancies
When matching mortar color, small mistakes can lead to big discrepancies. Here’s how to avoid them.
- Inconsistent Mixing Ratios – Stick to the same mixing ratios for every batch. Even slight variations can change the color.
- Incorrect Sand Type – Use the same sand type as the original mortar. Different sands can alter the final color.
- Varying Water Content – Keep water content consistent. Too much or too little water changes the color intensity.
- Ignoring Weather Conditions – Temperature and humidity affect drying and color. Try to work in similar conditions as the original application.
- Skipping Test Patches – Always do a test patch before full application. This helps catch any color issues early.
Double-check these points to ensure your mortar color matches perfectly. A little attention now saves a lot of hassle later.
Troubleshooting Color Matching Issues
Start by checking the mixing ratios. Even a small deviation can lead to noticeable color differences. Make sure you’re using the same proportions of sand, cement, and pigment as your original batch. Consistency is key here, so measure carefully and mix thoroughly.
Next, consider the curing conditions. Variations in temperature, humidity, or even sunlight exposure can alter how the color sets. If possible, replicate the conditions under which the original mortar was cured. If that’s not feasible, try to adjust your expectations or plan for some natural variation.
Don’t overlook the base material under your mortar. Differences in the substrate can affect how the color appears once the mortar is applied. If you’re working with a new base, test a small area first to see how it affects the final color.
If you’re still having trouble, remember that sometimes it’s a matter of perception. Wet mortar often looks different than dry mortar, so give it time to fully cure before making a final judgment. If the color still doesn’t match, consider consulting with a professional for more tailored advice.
Detailed Cost Analysis of Mortar Options
When evaluating mortar options, understanding the cost differences between pre-blended and custom mixes is crucial. Various factors such as sand type, pigment choices, and additional materials can significantly impact the overall price. Additionally, selecting the right mortar color can lead to long-term savings by reducing the need for future repairs or replacements.
For those working on DIY projects or job sites, considering bulk purchasing discounts or the extra costs of small batch customizations can make a big difference in budget planning. Hidden costs like shipping fees and the need for specific tools for mixing and application should also be factored into the decision-making process. Ultimately, a detailed cost analysis helps ensure that you choose the most economical and effective mortar solution for your needs.
Comparing Costs of Pre-Blended vs. Custom Mortar
When deciding between pre-blended and custom mortar, consider both the upfront costs and potential hidden expenses. Pre-blended mortar usually comes with a higher price tag per bag, but it saves you time and reduces the risk of mixing errors. This can be a smart choice if you’re not confident in your mixing skills or need a consistent mix for a large project.
On the other hand, custom mortar allows for flexibility in materials and can be cheaper if you source the components wisely. However, you must factor in the time and labor costs of mixing it yourself. Mistakes in mixing can lead to weak mortar, resulting in costly repairs down the line. Weigh the initial savings against the potential for future expenses.
Ultimately, the choice boils down to your project size, skill level, and budget. If you’re tackling a small DIY project, pre-blended might be worth the convenience. But for larger jobs, custom mortar could offer better value if you’re confident in your ability to mix it correctly. Always consider the long-term implications of your choice on both your wallet and the project’s durability.
Budgeting for Mortar Restoration Projects
When planning a mortar restoration project, start by assessing the scope of the work. Determine which areas need repair and how extensive the damage is. This helps in estimating the amount of mortar required and identifying any additional materials or tools you might need. Don’t underestimate the importance of a thorough inspection; it can save you from unexpected costs down the line.
Next, consider the type of mortar you will use. As discussed earlier, pre-blended options can be more convenient but might come at a higher price compared to custom mixes. Weigh the pros and cons based on your project’s specific needs and your comfort level with mixing mortar yourself. If you’re unsure, consulting with a professional can provide clarity and potentially prevent costly mistakes.
Factor in labor costs if you’re hiring help. Even if you’re doing it yourself, account for the time investment. Time is money, and a realistic timeline helps avoid rushed decisions that could lead to poor results. Always set aside a contingency budget for unexpected issues that might arise, like discovering more extensive damage once work begins. A little foresight goes a long way in keeping your project on track and within budget.
Maintaining the Appearance and Integrity of Your Mortar Over Time
Once you’ve achieved the perfect mortar color match, keeping it looking good is the next challenge. Proper maintenance ensures your mortar remains durable and visually consistent with the original work. Regular checks and timely interventions can prevent small issues from becoming costly repairs.
- Regular Inspections: Check your mortar joints every few months for signs of cracking or deterioration. Early detection allows for quick fixes before problems escalate.
- Sealant Application: Consider applying a breathable sealant to protect against moisture and staining. This helps maintain the color and prevents water damage.
- Cleaning Routine: Gently clean the mortar with a soft brush and mild detergent to remove dirt and grime. Avoid harsh chemicals that can alter the color or damage the surface.
- Weather Protection: If your mortar is exposed to harsh weather, use protective coverings during extreme conditions to minimize wear and tear.
- Repointing When Necessary: If you notice significant wear, repointing the mortar joints with a matching mix can restore both appearance and structural integrity.
- Address Vegetation Growth: Remove any plants or vines growing near the mortar. Roots can cause cracks and disrupt the mortar’s stability.
- Consult Professionals: For historical or large-scale projects, periodic professional assessments ensure that the mortar remains in top condition and any necessary repairs are done correctly.
Preventing Common Issues
Understanding potential problems helps you take proactive measures. Moisture is a common enemy of mortar, leading to efflorescence and weakening over time. Ensure proper drainage around your structure to reduce water exposure. Also, be mindful of freeze-thaw cycles that can cause expansion and contraction, leading to cracks. Address these issues promptly to maintain the longevity of your mortar work.
Planning and Preparation Tips for DIY Mortar Projects
Successfully executing a DIY mortar project starts with meticulous planning and preparation. Begin by assessing the existing mortar’s color and texture to find the best match. Gather all necessary tools and materials, including various sand types, and conduct small-scale test batches to ensure the right color combinations.
Proper planning not only ensures a seamless finish but also helps in avoiding costly mistakes. Developing a timeline that considers drying times and weather conditions is crucial for project efficiency. Additionally, implementing safety measures and using protective gear protects you from potential hazards, ensuring a smooth and safe project execution.
Project Planning Essentials
Start by evaluating the scope of your project. Know what you want to achieve and the materials you’ll need. This isn’t just about counting bags of mortar; consider tools, protective gear, and any special equipment. Be realistic about your skills and time. Overestimating what you can do leads to half-finished jobs.
Next, assess the site conditions. Check for any structural issues or moisture problems. If the base isn’t stable, fix it before you even think about mixing mortar. A solid foundation is non-negotiable. Check base compaction and ensure surfaces are clean and dry. Skipping this step is a shortcut to failure.
Before you start, plan your work schedule. Mortar has a limited working time, so know your limits. Mix only what you can use within that period. Prepare all your materials and tools in advance. This way, you won’t be scrambling for a trowel while your mortar sets. Good planning means less stress and better results.
Preparing Your Worksite for Mortar Application
Before you start mixing your mortar, make sure your worksite is ready. Begin by clearing the area of any debris, dirt, or loose materials. A clean surface is crucial for proper adhesion. If you’re working outdoors, ensure the ground is level and stable. You don’t want any surprises once the mortar is down.
Next, check base compaction. If you’re laying mortar on soil, compact it well to prevent settling. For concrete bases, inspect for cracks or uneven spots. Repair these issues before proceeding. A solid base ensures your mortar application will last.
Gather all your tools and materials in one place. Having everything at arm’s reach will save you time and prevent mistakes. Double-check your project plan to confirm you have the correct quantities and types of materials. A well-organized worksite leads to a smoother application process.

Conclusion
Matching mortar color on old work isn’t just about picking the right shade. It’s about understanding how different sands and application techniques affect the final look. Stick to the basics: get your sand right, follow the instructions, and use the right tools. Don’t cut corners, or you’ll end up with a patchy mess that stands out like a sore thumb.
Remember, preparation is key. Plan your project carefully and gather all your materials before you start. Take your time to mix and apply the mortar properly. Rushing through will only lead to mistakes that are costly to fix. Always prioritize safety by wearing the right gear and working in a well-ventilated area.
DIY mortar projects can be rewarding, but they’re not without challenges. Avoid common mistakes by doing your homework and staying patient. With the right approach, you can achieve a seamless match that blends perfectly with your existing work. Trust your instincts, but don’t hesitate to seek professional advice if you’re unsure. Your walls will thank you for it.
FAQ
Why is matching mortar color important?
Matching mortar color keeps your repairs from sticking out like a sore thumb. It helps maintain the original look and value of your property. Don’t skip this step if you want a professional finish.
Can I use any sand for mortar mix?
No, you can’t just use any sand. The sand type affects the color and texture of the mortar. Use the same sand as the original work for the best match.
What if I can’t find the exact sand?
Try to get as close as you can. Visit local suppliers and compare samples. Sometimes blending different sands can get you a closer match.
Is it okay to mix old and new mortar?
Mixing old and new mortar can lead to color inconsistencies. It’s better to remove the old mortar and start fresh for a consistent look. Cutting corners here can ruin your hard work.
How can I test the mortar color before applying it?
Mix a small batch and let it dry completely. Compare it to the existing mortar in different lighting. Adjust the mix if needed before doing the full repair.