

Table of Contents
- Introduction
- Understanding Mortar Consistency
- Essential Tools and Materials for Mixing
- Step-by-Step Guide to Mixing Small Batches
- Following Manufacturer Instructions
- Achieving Consistent Mixes
- Safety Precautions When Mixing Mortar
- Cost Considerations of Different Mortar Types
- Planning and Preparation Before Starting a Project
- Common Mistakes and Troubleshooting Tips
- Environmental Factors Affecting Mortar Setting Time
- Conclusion
- FAQ
Introduction
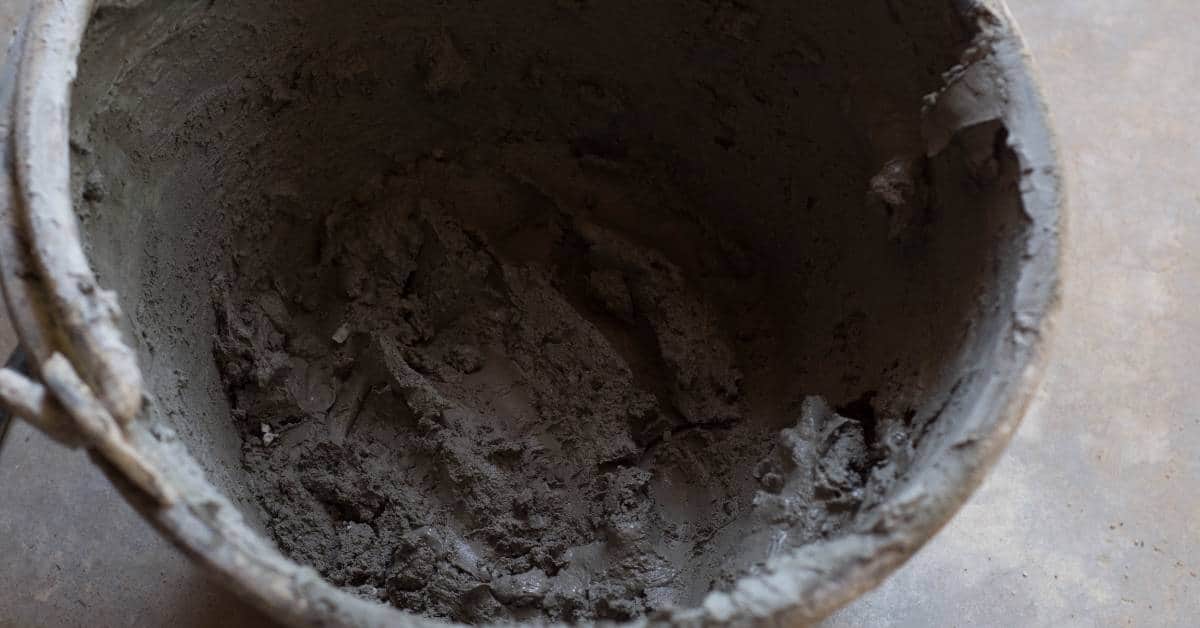
To mix small batches of mortar with consistent water content, measure the water and dry ingredients precisely and mix thoroughly until you achieve a uniform consistency. This article will guide you through the essential steps and tips to ensure your mortar mix maintains the right balance, enhancing the quality and durability of your construction projects.
Understanding Mortar Consistency
Achieving the right mortar consistency is crucial for successful construction projects. Mortar consistency refers to the mixture’s thickness and workability, which are influenced by the water-to-cement ratio and environmental conditions. Proper consistency ensures that the mortar adheres well to surfaces and provides a strong bond.
For DIY enthusiasts and professionals alike, understanding mortar consistency can prevent common mixing mistakes that compromise durability. Visual and tactile cues, such as a smooth texture and the ability to hold its shape, indicate the correct consistency. Adjusting water content carefully and avoiding excessive water can help achieve the desired results, ensuring the longevity and effectiveness of the mortar application.
The Ideal Mortar Formula
Getting the right mortar consistency is all about balance. You need a mix that’s not too wet and not too dry. The basic formula usually involves a ratio of one part cement, one part lime, and six parts sand. This combination ensures the mortar is strong yet workable. Stick to this ratio as it provides a good balance between strength and flexibility.
Why does this matter? If your mortar is too wet, it won’t hold its shape and can lead to weak joints. On the other hand, if it’s too dry, it won’t bond well with the bricks or blocks. You want a consistency that’s a bit like peanut butter. It should be thick enough to stay on your trowel but still spread easily.
Always check your mixture before you start laying bricks. A quick test is to scoop some mortar onto your trowel and hold it at a slight angle. If it stays put without sliding off, you’re good to go. Remember, taking the time to get your mortar right will save you headaches down the line.
Variations in Mortar Types
Different types of mortar can drastically change how you handle your project. If you’re using Type N mortar, expect a general-purpose mix that’s good for above-ground walls and chimneys. It’s not too hard, not too soft. But if you’re dealing with heavy loads or below-ground work, you’ll need something stronger, like Type S mortar. This type is more robust and better suited for structural applications.
When working with Type M mortar, remember it’s the heavyweight champ. It’s the strongest mix, ideal for foundations and retaining walls. But don’t use it for everything—it’s overkill for lighter projects and can be tricky to work with. For delicate work or historic buildings, Type O mortar is your friend. It’s softer and more forgiving, perfect for older structures that need a gentle touch.
Always match your mortar type to the job. Using the wrong type can lead to cracks or even structural failure. If you’re unsure, double-check with a professional or refer back to the ideal mortar formula discussed earlier. Consistency is key, but the right type of mortar makes all the difference.
Essential Tools and Materials for Mixing
Mixing small batches of mortar requires a few essential tools and materials to ensure a smooth and efficient process. You’ll need a mixing bucket, a trowel, and a drill with a mixing paddle attachment. Key materials include a quality mortar mix and water, with some popular brands offering reliable results. Don’t forget safety equipment like gloves and protective eyewear to keep yourself safe during the task.
Choosing the right size of mixing container is crucial for small batches, as it can affect the ease and consistency of your mix. Optional tools, such as a digital scale, can enhance precision and efficiency by ensuring accurate measurements. Understanding these requirements not only streamlines your workflow but also improves the quality of your finished project, making it a valuable consideration for both DIY enthusiasts and professionals on the jobsite.
Tools You’ll Need
Mixing mortar requires the right tools to ensure a consistent and workable mix. Whether you’re doing it by hand or using a mixer, having these tools on hand will make the job easier and more efficient.
- Mixing Tub: Use a sturdy tub to mix your mortar by hand. It should be large enough to hold the mixture without spilling.
- Hoe: A hoe is perfect for mixing mortar by hand. It helps blend the ingredients thoroughly and is easy to handle.
- Bucket: Essential for measuring and transporting water to your mix. Make sure it’s clean to avoid contaminating the mortar.
- Mortar Mixer: If you’re mixing large batches, a mortar mixer saves time and effort. Ensure it’s well-maintained for consistent performance.
- Drill with Paddle Attachment: For small batches, a drill with a paddle attachment can mix mortar quickly. Keep the speed low to avoid splashing.
- Measuring Tools: Accurate measurements are crucial. Use a scale or measuring cups to ensure the right proportions of sand, cement, and water.
- Shovel: Handy for transferring materials into the mixing tub or mixer. A square-point shovel works best for scooping.
Pro tip: Always clean your tools immediately after use. Dried mortar is tough to remove and can ruin your equipment.
Choosing the Right Mortar
Picking the right mortar is crucial for the success of your project. Start by considering the type of material you’re working with. Different surfaces like brick, stone, or concrete have specific mortar needs. For example, a softer brick requires a mortar that can flex slightly, while stone might need something more robust.
Next, think about the environmental conditions where the mortar will be used. If the area is exposed to harsh weather, choose a mortar that can withstand those conditions. For outdoor projects, opt for a mortar mix that offers good water resistance and durability.
Don’t overlook the structural requirements of your project. Load-bearing walls need a stronger mortar compared to a simple garden wall. Always check the manufacturer’s guidelines on the bag for compatibility with your specific project needs.
Finally, consider the workability of the mortar. Some mixes are easier to apply and finish than others. If you’re new to mixing, aim for a mortar that’s forgiving and easy to handle. Remember, the right choice can save you a lot of headaches down the line.
Step-by-Step Guide to Mixing Small Batches
Mixing small batches of mortar requires precision and the right tools to ensure a perfect blend. Start by gathering essential items such as a mixing bucket, trowel, and measuring tools. Carefully measure the water and mortar mix, adding the mix to the water gradually while stirring to prevent clumps. Continue mixing until the mortar achieves a smooth, consistent texture, then let it slake for a few minutes before giving it a final stir.
Understanding how to mix small batches of mortar is crucial for DIY enthusiasts and professionals alike, as it ensures the durability and strength of your construction projects. Properly mixed mortar enhances the bond between bricks or stones, leading to a more stable and long-lasting structure. By mastering this process, you can tackle small repairs or installations with confidence, knowing that your work will stand the test of time.
Step-by-Step Layout Process
Let’s lay out your rectangle using string lines and the 3-4-5 method to ensure perfect right angles. Follow these steps to get it right.
- Drive the first stake into the ground at one corner of your planned rectangle.
- Measure out the length of one side and place the second stake.
- Use the 3-4-5 method to create a right angle: measure 3 feet along one side, 4 feet along the adjacent side, and adjust until the diagonal is 5 feet.
- Run a string line between the first and second stakes to mark the side.
- Repeat the process for the opposite side, ensuring both sides are parallel.
- Once all sides are marked, measure the diagonals to confirm they are equal, ensuring the rectangle is square.
Common mistake: Don’t assume your initial measurements are perfect. Always double-check the diagonals to avoid a crooked layout.
Preparing Your Workspace
Start by clearing your workspace of any clutter. You need enough room to move around freely. A clean area helps prevent accidents and keeps your materials uncontaminated. Sweep away any debris and make sure the ground is level. An uneven surface can lead to inconsistent mixing.
Next, gather all your tools and materials. Keep them within arm’s reach to avoid unnecessary trips. You’ll need a mixing bucket, a trowel, and your mortar mix. Having everything ready saves time and effort. Remember, organization is key to efficiency.
Ensure you have access to water. It’s essential for mixing and cleaning up afterwards. A nearby hose or bucket of water will do the trick. Also, protect your workspace from the elements. Rain or excessive sun can ruin your mix. Set up a tarp or work under a shelter if needed.
Finally, wear the right gear. Safety goggles and gloves are non-negotiable. They protect you from dust and chemical exposure. A dust mask is also a good idea. Don’t skip this step; your safety should always come first.
Mixing Techniques for Consistency
When you’re mixing small batches, the key is to keep everything uniform. Start by measuring your materials accurately. Use the same container for each ingredient to ensure consistency. This isn’t the time for guesswork. If you skimp on this step, you’ll end up with a mix that sets unevenly or lacks strength.
Next, focus on the order of mixing. Always add your dry ingredients first, then slowly incorporate the liquid. This helps to avoid clumps and ensures everything binds together properly. Stir gently but thoroughly. Overmixing can introduce air, leading to weak spots. Check base compaction regularly to make sure your mix is settling as it should.
Finally, be mindful of the temperature and humidity. These factors can affect how your mix behaves. If it’s too hot or too cold, adjust your mix time accordingly. Keep an eye on it and don’t rush. Consistency is all about patience and precision.
Following Manufacturer Instructions
Adhering to the manufacturer’s instructions is crucial for achieving the right mortar consistency. These guidelines typically include essential details like the correct water-to-mortar ratios and specific mixing times. Straying from these directions can result in weak or improperly set mortar, compromising the integrity of your project.
Understanding and following these instructions ensures the durability and strength of your masonry work. Manufacturers often recommend specific tools or equipment for optimal mixing, which can make a significant difference in the final outcome. Additionally, being able to adjust for environmental factors, such as temperature and humidity, when mixing small batches can help maintain the quality and performance of the mortar.
Reading the Instructions
Before you start mixing, grab the mortar packaging and give it a good read. The instructions are there for a reason, and they’re not just filler. Look for the mixing ratio; it tells you how much water to add. Too much or too little, and you’ll end up with a mess. Trust me, you don’t want to wing this part.
Next, pay attention to the curing time. This tells you how long the mortar needs to set before you can start using the surface. Jumping the gun can ruin your hard work. Also, check if there are any specific temperature guidelines. Mortar behaves differently in extreme temperatures, so don’t ignore this.
If the instructions mention any special tools or techniques, don’t skip them. They’re there to help you get the best results. If something seems unclear, it’s worth doing a quick search or asking for advice. Better to be safe than sorry when it comes to following these instructions.
Achieving Consistent Mixes
Achieving consistent mixes in mortar work is all about precision and technique. Accurate measurements of both water and mortar mix are crucial to ensure uniformity across batches. Using the right tools for measuring and mixing, along with a systematic approach to ingredient addition, can significantly improve consistency.
For DIY enthusiasts and professionals alike, mastering this process can save time and resources on the job site. Avoiding common pitfalls like over-watering or under-mixing ensures a reliable mix every time. Additionally, understanding how to adjust for weather conditions can make a noticeable difference in the final outcome of your project.
Measuring Ingredients Accurately
Getting your mix right starts with measuring your ingredients accurately. If you skimp or eyeball it, you’ll end up with a weak or crumbly result. Make sure you have the right tools and materials to get it spot on every time.
- Measuring bucket: Use a sturdy bucket with clear markings for precise volume measurements.
- Digital scale: Essential for weighing materials like cement and additives to the gram.
- Water measuring jug: A jug with metric and imperial units ensures you get the water ratio right.
- Mixing container: A large, durable container helps you combine ingredients evenly without spillage.
Pro tip: Invest in a good digital scale. It’s worth every penny for the accuracy it brings to your mixes.
Fine-Tuning the Mix
If your mix isn’t coming out right, don’t panic. First, reassess your measurements. Even a small error can throw things off. Double-check your ingredient amounts against what you noted earlier. If they’re off, adjust accordingly. Remember, consistency starts with precision.
Next, consider the moisture level. If the mix is too dry, add water sparingly. A little goes a long way, so add in small increments and mix thoroughly each time. If it’s too wet, add more dry material gradually. Always aim for a mix that holds together without crumbling or slumping.
Finally, check base compaction. A poorly compacted base can cause issues with the mix setting properly. Make sure the base is solid and even before laying down your mix. If needed, compact the base again to ensure a stable foundation.
Safety Precautions When Mixing Mortar
When mixing mortar, prioritizing safety is crucial to prevent accidents and health issues. Wearing personal protective equipment (PPE) such as gloves, goggles, and masks can help protect against skin irritation and respiratory problems. Additionally, ensure the mixing area is well-ventilated to minimize the inhalation of dust and fumes.
Proper handling and storage of materials are essential to keep the worksite safe, especially around children and pets. Knowing how to lift and carry heavy bags of mortar correctly can prevent back injuries. In case of accidental contact with skin or eyes, being aware of first aid measures can mitigate potential harm.
Protective Gear
Mixing mortar can be messy and dangerous if you’re not properly protected. Wearing the right gear keeps you safe from dust, debris, and potential injuries.
- Safety Goggles Protect your eyes from dust and flying particles. Make sure they fit snugly and cover your eyes completely.
- Dust Mask Prevent inhalation of fine dust. Choose a mask rated for construction dust to ensure it filters effectively.
- Gloves Protect your hands from harsh chemicals and rough materials. Opt for heavy-duty rubber or leather gloves.
- Steel-Toed Boots Keep your feet safe from falling objects and provide a stable footing. Ensure they fit well and have a non-slip sole.
- Long-Sleeve Shirt and Pants Cover your skin to avoid irritation from mortar mix. Choose durable materials that can withstand wear and tear.
- Hearing Protection If you’re using loud mixing equipment, protect your ears with earplugs or earmuffs.
Pro tip: Always check your gear for wear and tear before starting. Replace any damaged items to ensure maximum protection.
Safe Mixing Practices
First things first, always read the instructions on your mortar mix. Different brands might have slightly different requirements. Stick to the recommended water-to-mix ratio. Too much water weakens the mix, while too little makes it hard to work with. If you’re unsure, err on the side of caution and start with less water—you can always add more.
When mixing, use a sturdy container or wheelbarrow. Make sure it’s on a stable surface to prevent any tipping. Use a hoe or a mixing paddle attached to a drill to combine the ingredients thoroughly. Mix until the mortar has a smooth, peanut butter-like consistency. Any lumps mean you need to keep mixing.
Keep your work area clean and organized. Spills can be slippery, and clutter can cause accidents. Have a clear path to move around, and keep your tools within reach. If you need to step away, cover your mix to prevent it from drying out too quickly.
Finally, don’t rush the process. Mixing mortar is not a race. Take your time to ensure everything is blended well. A good mix is crucial for the strength and durability of your project. Remember, cutting corners here can lead to problems down the line.

Cost Considerations of Different Mortar Types
When selecting mortar for small DIY projects, understanding the cost implications of different types is crucial. Common options like Type N, Type S, and Type M vary in price and coverage, influencing your overall budget. Key factors such as project size, potential waste, and the need for additives or special tools can also affect costs.
Choosing the right mortar type not only impacts your immediate expenses but also long-term maintenance and durability. By comparing prices and coverage, you can make informed decisions and potentially save by buying in bulk. Efficient budgeting and purchasing strategies can help ensure your project remains cost-effective while meeting your quality standards.
Budgeting for Mortar
Start by measuring the area you plan to cover. Calculate the total square footage to get a rough idea of how much mortar you’ll need. It’s better to overestimate slightly than to run short. Once you have your measurements, compare prices from different suppliers. Prices can vary, so shop around for the best deal without compromising on quality.
Consider the type of mortar that’s best for your project. Some types are more expensive than others. If you’re unsure, refer back to the earlier section on mortar types. Don’t just go for the cheapest option; choose the right type for your specific needs to avoid costly repairs later.
Always factor in additional costs like delivery fees and potential waste. It’s wise to allocate a small portion of your budget for unexpected expenses. This way, you’re not caught off guard if you need more materials or if prices fluctuate. Remember, a well-planned budget saves time and money in the long run.
Comparing Mortar Prices
When you’re comparing mortar prices, it’s crucial to focus on the type of project you’re tackling. For smaller DIY jobs, pre-mixed mortar is often the easiest and most cost-effective choice. These come in bags, ready to use, and save you time, but they can be pricier per unit than mixing your own.
If you’re working on a larger project, buying the raw materials—cement, lime, and sand—separately and mixing them yourself can be more economical. However, this requires more effort and precision. Don’t skimp on quality just to save a few bucks; a poor mix can lead to weak joints and costly repairs down the line.
Specialty mortars, like those designed for high-heat environments or specific aesthetic finishes, tend to be more expensive. Weigh the benefits against your needs carefully. For most residential projects, sticking to standard types will suffice and be more budget-friendly. Always compare prices from different suppliers and consider buying in bulk if you have a large area to cover, as this can lead to significant savings.
Planning and Preparation Before Starting a Project
Proper planning and preparation are crucial before starting any mortar mixing project. Assessing the project scope and determining the required amount of mortar can save time and resources. It’s essential to gather all necessary tools and materials, such as measuring tools, mixing containers, and protective gear, to ensure a smooth workflow.
Understanding the specific type of mortar needed and reading the manufacturer instructions can prevent costly mistakes. Preparing the workspace for a clean, organized, and safe environment enhances efficiency and safety. Additionally, considering weather conditions and their impact on mortar consistency and setting times can significantly affect the project’s success.
Project Planning Tips
Before you dive into mixing mortar, make sure you have a clear plan. Start by gathering all the materials and tools you’ll need. There’s nothing worse than realizing you’re missing something halfway through. Double-check your supply list and ensure everything is in good condition. If you’re unsure about quantities, it’s better to have a little extra than to run short.
Next, check base compaction where you’ll be applying the mortar. A solid foundation is crucial for the longevity of your project. If the base isn’t compacted properly, your work could crack or shift over time. Don’t cut corners here; take the time to do it right.
Finally, be mindful of the weather. Mortar doesn’t set well in extreme temperatures or wet conditions. Plan your project around a few days of stable weather to avoid complications. If rain is in the forecast, hold off. It’s worth waiting for the right conditions to ensure a strong, lasting finish.
Common Mistakes and Troubleshooting Tips
Mixing mortar correctly is crucial for achieving strong and durable results, but common mistakes can compromise the quality. Errors like using the wrong water-to-mortar ratio, insufficient mixing time, or contaminated tools can lead to weak or inconsistent mixtures. Recognizing and correcting these issues involves understanding the right consistency and making adjustments as needed.
Accurate measurement and proper mixing techniques are essential for ensuring the mortar sets correctly, especially in varying environmental conditions. By maintaining clean tools and adjusting for temperature and humidity, you can prevent issues that might affect the mortar’s performance. These practices not only enhance the quality of your work but also save time and resources by reducing the need for rework.
Troubleshooting Inconsistent Mixes
If your mortar mix is turning out inconsistent, the first thing to check is the water content. Too much water can make the mix sloppy, while too little can make it crumbly. Aim for a peanut butter-like consistency. Adjust by adding small amounts of water or dry mix until you get it right.
Next, make sure you’re using the right proportions of sand, cement, and lime. A common mistake is eyeballing measurements, which leads to inconsistency. Use a measuring bucket or scale for accuracy. If you’re unsure about the mix ratio, refer back to the earlier section on avoiding common errors for guidance.
Finally, check base compaction. If the base is uneven or poorly compacted, it can cause the mix to settle unevenly, leading to cracks or weak spots. Compact the base thoroughly before applying the mortar. Remember, a solid foundation is key to a consistent mix.
Environmental Factors Affecting Mortar Setting Time
Environmental conditions play a crucial role in determining the setting time of mortar. Temperature variations, whether high or low, can significantly alter the curing process. Additionally, humidity levels and wind can either speed up or delay the setting, potentially leading to uneven drying or cracking.
Understanding these factors is essential for anyone working with mortar, as they can impact the quality and durability of the final structure. By employing strategies such as using tarps or windbreaks, you can mitigate adverse effects and ensure a consistent setting time, ultimately leading to a more reliable and robust construction outcome.
Temperature and Humidity Effects
Temperature and humidity are crucial when it comes to mortar setting. If it’s too cold, the mortar might not set properly, leading to weak joints. On the other hand, high temperatures can cause the mortar to dry out too quickly, which might result in cracks. Aim to work when the temperature is between 50°F and 90°F for the best results.
Humidity levels also play a big role. High humidity can slow down the setting time, while low humidity can speed it up too much. If you’re working in a dry climate, consider lightly misting the mortar to keep it moist. In humid conditions, ensure proper ventilation to allow the mortar to set at a reasonable pace.
Always check the weather forecast before starting your project. Avoid working in extreme conditions whenever possible. If you must work in less-than-ideal weather, take precautions to protect your work. Remember, patience and preparation can save you from having to redo the job later.
Adjusting for Weather Conditions
When you’re working with mortar, the weather can be your best friend or your worst enemy. If it’s hot and dry, your mortar might set too quickly. In these conditions, add a bit more water to your mix to slow down the setting time. Keep your tools and materials shaded, and if possible, work during cooler parts of the day. Remember, don’t overwater; you want a workable consistency, not a soup.
On the flip side, if it’s cold and damp, your mortar will take longer to set. Use warm water to mix your mortar, and consider using a faster-setting mix if the temperature is really low. Cover your work with a tarp or plastic sheeting to protect it from moisture and frost. Check the weather forecast before starting; if rain or freezing temperatures are expected, it might be best to wait.
Windy conditions can dry out the surface of your mortar too quickly, leading to weak joints. In such cases, dampen the surrounding area and keep your mortar covered with wet burlap or plastic. Keep an eye on the wind and adjust your approach as needed to ensure a strong, durable finish.

Conclusion
Getting your mortar mix right is crucial for any building project. Stick to the basics: use the right tools, follow the manufacturer’s instructions, and keep your water content consistent. This isn’t the time to experiment or cut corners. A sloppy mix can lead to weak joints and future repairs.
Always plan ahead. Know your materials, and be aware of how the environment can affect your mix. Too hot or too cold, and your mortar won’t set right. Don’t rush the process. Take your time to measure, mix, and apply carefully.
Remember, safety first. Wear the right gear and handle materials with care. Mixing mortar isn’t complicated, but it demands attention and respect. Avoid common mistakes by sticking to the steps outlined, and you’ll have a solid, reliable mix every time.
FAQ
How do I measure water for a small batch of mortar?
Use a measuring jug to get the exact amount of water. Guessing leads to weak mortar. Stick to the mix ratio on the bag for best results.
Can I add more water if the mix seems dry?
No, adding extra water weakens the mortar. Mix thoroughly first. If it’s still too dry, you probably measured wrong. Start over.
How long should I mix the mortar?
Mix for about 5 minutes. It should be smooth and lump-free. Over-mixing or under-mixing can ruin the consistency.
Can I use a garden hose to add water?
Avoid using a hose. It’s too easy to add too much water. Use a jug or bucket for better control.
What happens if I use too much water?
Too much water makes the mortar weak and prone to cracking. It won’t hold up over time. Stick to the recommended water content for durability.