
Introduction
Proper prep and the right fixes prevent paint failures and ensure long-lasting results.
You’ll learn how to prepare surfaces, identify common failure types, and apply proven techniques that stand the test of time.
The guide walks through practical steps, tips, and rules of thumb you can apply to real painting projects.
Key takeaways
- Thorough surface prep prevents failures.
- Use right materials, tools for best results.
- Proper taping/masking avoids bleed and damage.
- Identify causes of common finish problems.
- Step-by-step fixes ensure lasting repairs.
- Control application technique and environment.
- Plan, schedule, maintain for long-lasting finishes.
Table of Contents
- Introduction
- Key takeaways
- Essential Surface Preparation
- Right Materials and Tools Checklist
- Painter’s Tape and Masking: Techniques That Prevent Bleed and Damage
- Common Finish Failures and What Causes Them
- Step-by-step Fixes That Last (Repair Workflows)
- Application Technique and Environmental Controls
- Preventing and Fixing Adhesion Problems
- Safety, Vocs, and Environmental Considerations
- Cost vs. Prevention: When to Invest in Quality and When to DIY
- Planning, Scheduling, and Maintenance for Long-lasting Finishes
- Conclusion
- FAQ
Essential Surface Preparation
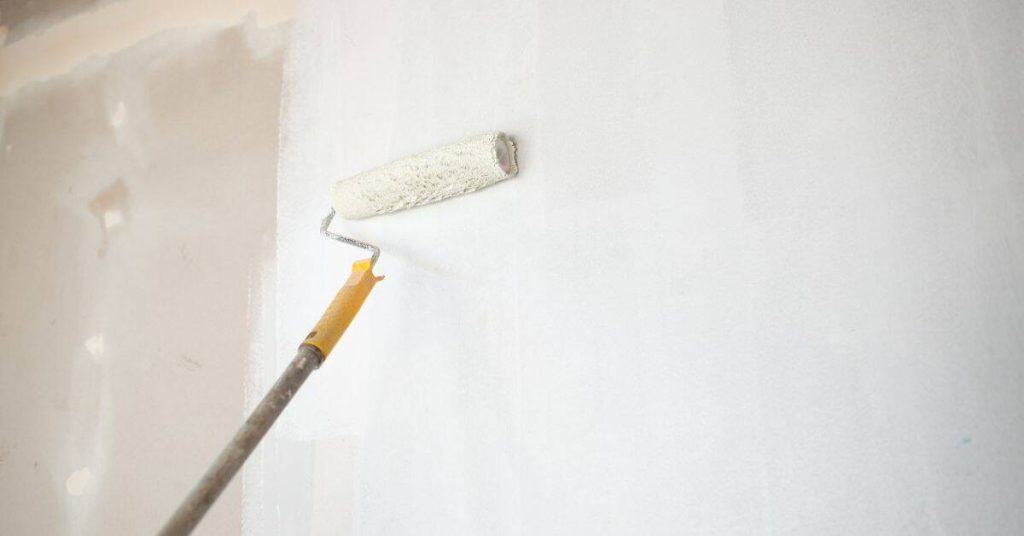
Clean and decontaminate the surface thoroughly to ensure proper paint adhesion.
Use a degreaser for oily spots and concrete cleaner for dirt and efflorescence. Ensure the area is completely dry before proceeding.
For tough contaminants like wax, use a solvent-based cleaner. Scrub vigorously until all residue is removed and rinse thoroughly to eliminate any leftover chemicals.
A clean surface means better paint adhesion and fewer issues down the line. Take your time here; it’s worth it in the long run.
Inspect for cracks, holes, and moisture issues using a flashlight and an electronic meter or hygrometer. Address these problems before painting to prevent future repairs.
Skip these steps at your own risk: peeling, uneven finish, and ongoing repairs can be costly.
Plan a practical workflow with dust control, ventilation, PPE, and a clear order: clean → profile → repairs → priming.
Document inspection results to verify compatibility with the final coating.
Cleaning and Contaminant Removal
Thoroughly clean the surface before painting to ensure proper adhesion and longevity of your paint job.
- Check for: Oily spots, dirt, efflorescence, or tough contaminants like wax.
- What you’ll see: Visible stains, discoloration, or residue on the surface.
If the surface is oily, use a degreaser. For dirt and efflorescence, apply concrete cleaner. If wax or other tough contaminants are present, use a solvent-based cleaner. Scrub vigorously until all residue is gone, then rinse thoroughly to remove any leftover chemicals.
Common mistake: Not allowing the surface to dry completely after cleaning.
Consequence: Trapped moisture can lead to peeling paint and potential mold growth.
Sanding and Feathering Old Coatings
To prep old coatings for new paint, start by sanding with medium-grit paper. This helps create a profile that allows the new coat to stick better. Avoid over-sanding as it can damage the substrate.
For feathering edges of spot repairs, use progressively finer grits until you achieve a smooth transition between old and new paint. Feathering ensures no sharp lines are visible after painting.
Maintain consistent pressure while sanding to avoid uneven surfaces. Clean off dust regularly with a tack cloth or vacuum cleaner for best results.
Fixing Substrate Issues (Rust, Mold, Drywall Damage)
What to check: Inspect surfaces for signs of rust, mold, or drywall damage before painting. Rust appears as reddish-brown flakes or powder; mold shows up as black, green, or white spots with a musty odor.
- Rust: Check metal surfaces, especially around nails and screws.
- Mold: Inspect areas prone to moisture, such as behind appliances, under sinks, or in bathrooms.
- Drywall damage: Look for holes, cracks, or other imperfections on walls and ceilings.
What to do: If rust is present, apply a rust converter. When mold is found, use a bleach solution or specialized cleaner, then scrub thoroughly and let dry completely. For drywall damage, patch holes with joint compound, sand smooth, and apply a skim coat if needed.
Common mistake: Painting over substrate issues without proper treatment can lead to premature peeling, bubbling, or further damage, resulting in costly rework.

Right Materials and Tools Checklist
Start by selecting the right paints, primers, sealers, and specialty products based on whether your concrete is interior or exterior and its exposure to moisture or chemicals. Choose acrylic, epoxy, polyurethane, or stain with a matching primer.
- Pack surface-ready primers, compatible topcoats, concrete sealers, bonding agents, cleaners, crack fillers, and finishes first.
- Add rollers, brushes, spray gear, masking tape, PPE, drop cloths, and mixing equipment to ensure you can apply the materials without issues later.
Surface prep is crucial. Clean, etch or profile surfaces correctly, remove dust, and verify primers, paints, and sealers are compatible to avoid peeling, orange peel, or fish eyes. Follow temperature and humidity guidelines, open-to-work times, layering order, coat count, and post-cure maintenance.
Choosing Primer and Paint for the Substrate
Choose a primer that matches your substrate material (concrete, wood, metal) and its condition (new, primed, painted). Follow manufacturer instructions for best results.
- Concrete: Check for moisture. If present, use a moisture-blocking primer.
- Wood: Inspect for knots or cracks. Seal these with a wood filler before priming.
- Metal: Look for rust. Remove it and apply a rust-inhibiting primer.
If the substrate is new, use a bonding primer to ensure paint adhesion. When repainting, choose a primer that matches the existing one or offers universal compatibility.
Common mistake: Using the wrong primer for the substrate can lead to poor adhesion and peeling paint.
Tools and Spray Equipment Basics
Select brushes, rollers, and spray equipment that suit your project size and surface type.
- Brushes: Inspect bristles for stiffness; soft bristles are ideal for oil-based paints, while synthetic bristles work well with latex. Check the ferrule (metal part holding bristles) for tightness and no rust.
- Rollers: Choose a roller cover with the appropriate nap length based on paint viscosity – short nap for smooth surfaces, medium for semi-smooth, long for textured or rough surfaces. Ensure the roller frame is in good condition with no loose parts.
- Spray Equipment: For airless sprayers, check the pump and motor for proper functioning; for HVLP guns, ensure the spray pattern is even and adjustable. Inspect the spray tips/nozzles for wear or clogging.
Common mistake: Using low-quality tools that lead to poor paint application, resulting in uneven coverage, drips, or brush marks.
Ensure all tools are clean and in good working condition before starting your project to avoid interruptions mid-way through. Regularly check tools during use for any signs of wear or damage.
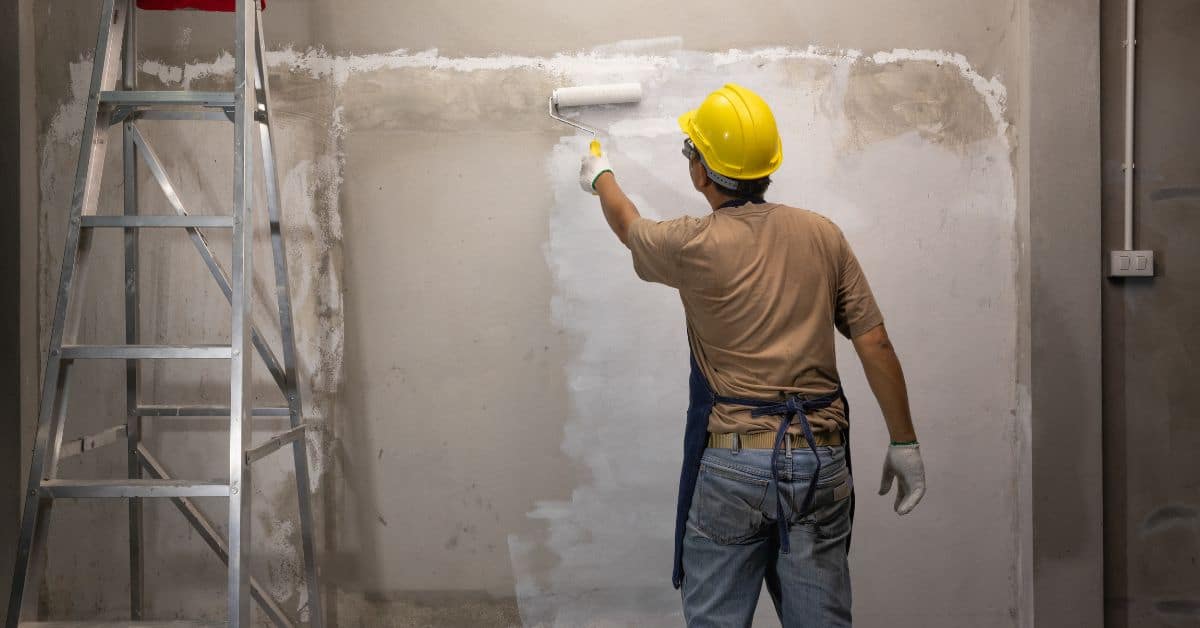
PPE and Ventilation Gear
Protect yourself from harmful chemicals by wearing the right personal protective equipment (PPE) and ensuring proper ventilation during painting.
Before you start:
- Check your respirator’s cartridge for signs of wear or damage, and replace if necessary. If it’s an N95, ensure it fits properly with a tight seal around your face.
- Inspect safety goggles for any cracks or scratches that could compromise protection.
Common mistake: Using a respirator without proper fit testing can lead to inadequate protection and potential health risks.
- Wear safety goggles or a face shield to protect your eyes from splashes and debris.
- Use nitrile gloves that are in good condition, free of holes or tears, to keep hands clean from paint and solvents.
- Don knee pads with adequate cushioning if you’ll be working in a crouched position for long periods to prevent discomfort and potential injuries.
When painting indoors:
- Open windows or use fans to create cross-ventilation, ensuring air is moving throughout the space.
- Consider using an air purifier with HEPA filters to remove airborne particles and improve indoor air quality.
When painting in enclosed spaces like bathrooms or kitchens:
- Turn on exhaust fans to remove moisture and odors from the air.
- If possible, use a portable air cleaner with HEPA filters for additional protection.
Always:
- Wear protective clothing like coveralls or old clothes that can get dirty to minimize paint stains on your regular clothing.
- Check your equipment again after a few hours of work to ensure it’s still functioning properly and providing adequate protection.
Painter’s Tape and Masking: Techniques That Prevent Bleed and Damage
Painter’s tape choices, surface prep, steady application, and timely removal are your first line of defense against bleed and peeled edges on concrete coatings, especially when you need sharp, professional lines. Use painter’s tape for clean edges on smooth concrete, surface-mask tapes for dusty or rough surfaces, and high-adhesion variants only where primed areas demand extra bite. Test small strips first to confirm bleed control and edge lift, and map painted zones with light guidelines to minimize wraparound and keep lines crisp.
Prep means concrete must be clean, dry, and free of efflorescence, dust, and residues; consider a light abrade or edge seal where needed to improve tape grip and prevent lifting during paint. Apply with steady tension, smooth from the center outward, burnish edges, and avoid stretching tape; choose tape width to match line width and masking coverage. Remove at the right moment—often while the paint is tacky or within the recommended window—and pull slowly at a shallow angle to prevent peeled edges, while keeping tools handy for quick touch ups and re-masking if needed.
Choosing the Right Tape and Masking Materials
Select tape based on the surface type and texture to ensure optimal performance.
- Check for: Strong adhesive, clean removal, and residue-free. What you’ll see: Tape sticks well, peels off easily without leaving marks.
Key decision factors:
- If painting concrete, use tape designed for concrete surfaces.
- When working on rough or dusty areas, opt for surface-mask tapes to protect the underlying surface.
- For primed surfaces, choose high-adhesion tape. Avoid using on porous or rough textures where adhesion is poor.
Common mistake: Using warped or weak stock tape. Consequence: Poor adherence leading to bleed-through issues and damaged paint job.
Application and Removal Best Practices
Apply painter’s tape with steady tension, smoothing from the center outward to ensure even adhesion. Burnish edges firmly using a putty knife or your fingers to create a tight seal against paint seepage.
Before painting:
- Check for any lifted edges; if found, press down again.
- Ensure tape is well-adhered to the surface by gently pulling on it from various angles.
- Inspect for any nicks or tears in the tape that could allow paint seepage.
During painting:
- If you notice paint bleeding under the tape, stop and address immediately to prevent further spreading.
- Monitor the paint’s drying time; if it’s taking longer than expected, adjust your approach accordingly (e.g., reduce humidity or increase ventilation).
Removal:
Wait until the paint is still slightly tacky (not completely dry) before removing the tape. Pull off slowly at a shallow angle to avoid lifting painted edges. If you notice any resistance, stop and check for any underlying issues (e.g., over-painting, insufficient drying time).
Common mistake: Removing tape too early or late can lead to lifted paint or difficulty removing the tape without damaging the surface.
Making Masking Work for Corners and Textured Surfaces
Corners can be tricky. Use a combination of tape angles and small cuts to create crisp lines without lifting edges.
For textured surfaces, apply a thin layer of edge sealer or use masking film over the texture before taping to ensure clean coverage.
In multi-coat projects, plan your masking carefully to avoid overlap issues. Remove old tape gently and reapply new tape for each coat if necessary.
Common Finish Failures and What Causes Them
Eight common finish failures top the DIY list: cracking or wrinkling, orange peel, sags or runs, fish eyes, flaking or peeling, gloss loss, and poor hiding. Each one points to a primary culprit like surface prep, substrate movement, contamination, moisture, film thickness, or incompatibility, and every issue has a straightforward repair path.
This matters because sloppy coatings waste time, money, and effort, and skipping the checklists invites repeating work. With a wall-by-wall mindset, you’ll implement cause-driven fixes such as proper sanding and patching for cracks, thorough cleaning for fish eyes, and re-priming after peeling, plus adjusting recoat windows and thinning for orange peel.
Quick-field tests like adhesion checks, moisture breach tests, visual gloss comparisons, and a compatibility check give you confidence before finishing color and sheen. Use these tools to diagnose issues early:
- Moisture Tests: Check the substrate’s moisture level using non-destructive methods such as electronic meters or hygrometers.
- Adhesion Checks: Perform pull-off tests with a handheld adhesion tester to ensure proper bond strength between layers.
- Miscibility Test: Confirm primer and topcoat compatibility by mixing small samples and observing for any adverse reactions.
By applying preventive best practices—correct surface prep, the right primers, precise film thickness, two-coat strategies when needed, and proper intercoat timing—you’ll reduce defects downstream and improve long-term durability. Quick-field tests give you confidence before finishing color and sheen.
Cracking and Wrinkling
Cracking and wrinkling can be caused by various factors such as improper surface prep, incompatible materials, or uneven drying times.
To fix these issues, sand down the cracked area until it’s smooth. Apply a thin layer of primer followed by your topcoat, ensuring each coat dries completely before applying the next one. This helps prevent further cracking and ensures better adhesion between layers.
Prevent future problems by choosing compatible paint products designed for your surface type and maintaining proper film thickness during application.
Orange Peel and Texture Problems
Orange peel texture manifests when paint doesn’t spread evenly due to improper spray gun settings or incorrect paint viscosity. High humidity conditions can exacerbate this issue.
What to check:
- Spray gun nozzle size and air pressure: Too small a nozzle or low pressure can cause large droplets, while too large a nozzle or high pressure can result in overspray.
- Paint viscosity: Thick paint won’t spread evenly. Check the manufacturer’s recommendations for ideal viscosity ranges.
Decision rule: If you notice large or small droplets, adjust your spray gun settings accordingly.
Common mistake: Not testing your setup on a small area first can lead to wasted paint and time.
To correct orange peel texture, adjust your spray equipment for better atomization—ensure the paint is finely dispersed as it leaves the nozzle. Thinning the paint slightly might help if it’s too thick. To prevent future issues, always test your setup on a small area first and adjust settings accordingly before moving to larger surfaces. Work in ideal conditions with moderate humidity levels.
Runs, Sags, and Curtains
Sagging occurs when paint is applied too thickly or too quickly, causing it to run before drying. This can also happen if the surface temperature is too low.
What to check:
- Paint consistency: If it’s too thick, thin it with water (follow manufacturer’s guidelines).
- Application speed: If you’re applying paint too quickly, slow down your spray gun or rolling technique.
- Surface temperature: Ensure the surface is within the recommended range for optimal paint adhesion (check manufacturer’s guidelines).
Common mistake: Not allowing enough drying time between coats. This can lead to sagging and other application issues.
To fix sagging, sand down the affected area using fine-grit sandpaper, then repaint with a thinner coat, ensuring each layer dries thoroughly before applying more paint. Adjust your spray gun settings for better control over application speed.
Step-by-step Fixes That Last (Repair Workflows)
This section outlines repair workflows for small spots through full refinishes, focusing on durable corrections and preventing recurrence. Start by defining the repair scope based on problem size and outlining durability outcomes for each scale. Then run through a diagnostic checklist for substrate, paint compatibility, surface profile, and moisture before repairs.
Following these workflows helps you plan every repair, choose the right product, and prevent spots from returning. With clear steps for small spots, cracks, and full refinishes, you can save time, avoid wasted materials, and get a long-lasting finish when you control moisture, adhesion, and cure conditions.
Step-by-step Repair Process
Fixing paint problems requires a systematic approach to ensure durability and prevent future issues.
Inspection: Before starting, check for these common underlying causes:
- Moisture: Look for water stains, bubbles, or peeling, indicating possible moisture intrusion.
- Substrate damage: Inspect for cracks, holes, or crumbling, suggesting structural issues.
- Previous repairs: Check if previous fixes were done correctly; they might be the cause of recurring problems.
Cleaning: Thoroughly clean the surface to ensure proper adhesion. Use water for water-based paints and solvent-based cleaners for oil-based or alkyd paints.
Preparation: Prepare the surface using appropriate tools based on the paint system and substrate type:
- Sanding: Lightly sand glossy surfaces or areas with loose paint to improve adhesion.
- Etching: Use chemical cleaners to prepare powder-coated or galvanized metal surfaces.
- Mechanical profiling: For concrete or masonry, use a brush or acid wash to open the pores and increase surface area.
Priming: Apply a primer that matches your paint system (oil-based, water-based, etc.) and allows proper adhesion. If unsure, consult the paint manufacturer’s recommendations.
Filling: For small spots, use patching compound; for cracks, fill with crack filler or epoxy putty. Ensure edges are blended smoothly to match surrounding texture and color.
Painting: Apply topcoat in thin, even layers as recommended by the manufacturer. Allow drying time between coats.
Common mistake: Rushing through the process or skipping steps can lead to premature peeling, bubbling, or other paint failures.
Final inspection: Carefully check for any imperfections and touch up as needed before the final coat dries completely.
Fixing Small Runs and Drips
Small runs and drips can be corrected by removing excess paint while it’s still wet. Use a solvent to dissolve the paint, then wipe clean.
What to check:
- Wetness of the paint: If the paint is still tacky or wet, you can remove it.
- Type of paint: Solvents work best on oil-based paints; water-based paints may require a different approach.
When to sand:
- If the runs or drips have already cured (dried completely), you’ll need to sand them down.
- For deep or wide runs, multiple light sanding sessions may be necessary.
Common mistake: Not feathering edges when sanding. This can lead to visible transitions between the repaired area and the rest of the surface.
After cleaning and priming if necessary, recoat the area ensuring the new coat matches the rest of your finish. If you’re unsure about matching colors, test a small, hidden area first.
Repairing Orange Peel and Texture Issues
To fix orange peel or texture issues, start by wet-sanding the surface to smooth out rough areas. Use fine-grit sandpaper for a finer finish.
If necessary, buff the area with a buffer to achieve an even sheen. Alternatively, strip off the old paint and reapply with proper setup for your desired texture.
Addressing Flaking, Peeling, and Delamination
To tackle flaking or peeling paint, start by scraping off loose material. Inspect the surface for any underlying issues:
- Check for moisture: If you see water stains, mold, or mildew, address the source of moisture before proceeding.
- Examine substrate damage: Look for cracks, holes, or soft spots that may require repair before painting.
- Inspect adhesion: Ensure the existing paint is well-adhered to the surface. If it’s lifting or peeling, you’ll need to remove it completely.
Once you’ve identified and addressed any underlying issues, sand the surface to create a smooth base for new paint. This step is crucial as it helps the new paint adhere better and prevents future flaking.
Common mistake: Skipping or rushing through the sanding process can lead to inadequate adhesion of the new paint, causing it to peel off prematurely.
Treat any underlying issues like moisture or substrate damage before priming the area. Apply a primer that matches your coating system for better adhesion. This step is essential as it helps the new paint bond with the surface and creates a uniform base for even coverage.
Decision rule: If you’re unsure about which primer to use, consult the manufacturer’s guidelines or seek professional advice to ensure compatibility with your chosen paint system.
Rebuild proper film thickness with additional coats of paint, ensuring even coverage and no thin spots. Inspect regularly to catch early signs of failure and address them promptly. This proactive approach helps extend the lifespan of your paint job and prevents costly repairs down the line.
Application Technique and Environmental Controls
Apply concrete coatings with the right method for the job: spray, roller, or brush. Set up your tools correctly with appropriate tip size, fluid pressure, and air volume. Use proper technique on every coat to avoid runs, uneven film, or trapped moisture that causes blisters.
Prep surfaces thoroughly and test moisture levels reliably. Choose primers or sealers that fit the concrete and the product you’re using. Conditions matter as much as technique; adjust speed, back-brushing, or cross-rolling if needed to prevent poor adhesion and coating failures. Real-time tweaks save rework by maintaining a consistent film.
Spray Gun Setup and Technique
Start by inspecting your spray gun for any clogs or damage before use.
- Check the nozzle for any signs of wear or debris.
- Ensure the fluid tip is securely attached and matches your coating’s viscosity (typically between 1.2 and 1.5 mm).
- Adjust air pressure to around 40 psi for optimal atomization.
- Inspect the trigger mechanism for proper function.
When spraying, maintain a consistent distance of about 6 inches from the surface and use steady, overlapping strokes. Overlap each pass by at least half to ensure even coverage.
Common mistake: Spraying in direct sunlight or strong winds can lead to inconsistent drying times and poor finish quality.
To maintain consistent performance, clean your spray gun regularly. If you notice any inconsistencies in spray pattern or coating application, immediately check for and remove any clogs or debris from the nozzle and fluid tip.
Temperature and Humidity Guidelines
Maintain a comfortable temperature range for painting, typically between 50°F and 90°F.
- Check the weather forecast before starting your project.
- If temperatures are below freezing or above 90°F, consider rescheduling.
- When in doubt, consult product labels for specific temperature guidelines.
Humidity should be kept under 85% for best results. High humidity can slow drying times and lead to poor adhesion.
- Use a hygrometer to monitor humidity levels in your work area.
- If humidity is high, increase ventilation with fans or open windows.
- Consider using dehumidifiers in extremely humid conditions.
In cold weather, warm up the concrete surface before starting. This helps prevent condensation from forming on the surface during application.
Common Mistake: Painting when temperatures are too low can cause the paint to freeze and not adhere properly, leading to peeling and chipping.
Wet-edge, Feathering, and Lap Marking
To avoid lap marks and visible seams, maintain a wet edge while painting by applying the coating in manageable sections that you can complete before the previous coat starts to dry.
Feathering helps blend edges seamlessly. After completing one section, use a clean brush or roller to feather out the edges into the still-wet adjacent area for a smooth transition and reduced visibility of lap marks.
To minimize lap marks on concrete surfaces, ensure you overlap your strokes by at least half their width as you move across the surface. If visible lines form, immediately blend them out with additional coats or feathering techniques to achieve a uniform finish.
Preventing and Fixing Adhesion Problems
Adhesion on concrete fails mainly from moisture, surface contamination, laitance or dust, efflorescence, porosity, and high alkali content. Address these issues with a proper surface-prep plan and test to verify bonding. Clean and degrease the surface, etch or profile it to roughness, patch cracks, and remove efflorescence and loose material before applying any coat.
Choose the right coating and primer to ensure adhesion under moisture or thermal movement. Remove failing coatings, re-profile the surface, decontaminate, apply a penetrating or bonding primer, then recoat within specified windows and cure conditions. Troubleshoot common issues like moisture pushing off film, fish eyes from contamination, or pinholes from improper mixing by revisiting surface prep, cleaner materials, and appropriate primer choices.
Testing Adhesion and Diagnosing Failures
To check adhesion, use a tape test. Peel off masking tape; if it comes up easily with paint, you have an adhesion problem. Look for bubbling or peeling edges that indicate poor bonding. Address these issues early to prevent bigger problems.
If your tape test shows weak spots, investigate surface contamination, moisture levels, and loose particles causing failures. Addressing underlying causes is crucial before applying new paint or primer.
Bonding Solutions: Primers and Adhesion Promoters
What to check: Inspect your substrate for signs of contamination, roughness, or moisture. You’ll see efflorescence (white powdery deposits) on damp surfaces, and rough areas may feel gritty or uneven.
- Concrete: Check for cracks, holes, or other defects that could compromise adhesion.
- Wood: Look for signs of rot, warping, or previous paint failures.
- Metal: Inspect for rust, grease, or old paint that needs removal.
Decision rule: If your surface is rough, contaminated, or shows signs of moisture, use an etch primer to clean and prepare it before painting. For concrete, always start with a bonding primer to seal porous surfaces and improve adhesion.
Common mistake: Skipping the priming step or using the wrong type of primer for your substrate can lead to poor adhesion, peeling paint, and reduced longevity of your finish.
Ensure your primer is compatible with your chosen coating to maximize adhesion and longevity. In cases where moisture or efflorescence remains an issue, use a penetrating sealer before applying any primer to protect against further issues while providing a clean surface for bonding.
When to Strip and Start Over
Before deciding to strip old paint completely, consider these factors:
- Widespread peeling or bubbling across large areas.
- Persistent localized problems around cracks or corners despite spot repairs.
- Consistent failure across multiple coats of paint.
- Ineffective surface prep efforts and poor adhesion.
If you notice any three or more of these issues, it’s time to strip the old paint and start over.
Common mistake: Not assessing concrete condition before stripping. Consequence: Wasted effort and time as underlying problems persist.
Safety, Vocs, and Environmental Considerations
Safety, VOCs, and environmental controls are essential on any DIY job. Plan for respirator use, ventilation, and safe handling before starting.
Choose a NIOSH-approved respirator with organic vapor cartridges and particulate filters as needed. Perform a fit test and seal check. Wear eye and skin protection; upgrade to higher protection levels if working with heavy solvents or in poorly ventilated spaces.
Know local VOC limits and SDS guidelines, compare products, and track rules to pick compliant paints and sealers. Avoid gaps in disposal, storage, and spill response that can lead to hazards later.
Respirators, Ventilation, and Safe Work Zones
Select a respirator based on the Safety Data Sheet (SDS) for your paint type. For most paints, use a combination organic vapor and particulate filter.
What to check: Inspect your respirator before each use to ensure it’s in good working condition. What you’ll see: A functioning respirator will have no visible damage or leaks.
- Check the SDS for specific respirator requirements
- Ensure the respirator fits properly and seals around your face
- Regularly replace filters as per manufacturer’s guidelines
- Store your respirator in a clean, dry place when not in use
- Perform a user seal check before each use to ensure a proper fit
Set up proper ventilation before starting. Use fans to pull air out and bring fresh air in from outside.
Common mistake: Not changing filters regularly or using damaged respirators can lead to inadequate protection, potentially causing health issues like headaches, dizziness, or nausea.
Avoid working in small, enclosed spaces without good airflow. Choose a larger room or garage for mixing paints and prep work.
Handling and Disposing of Paint and Solvents
Label containers clearly to avoid confusion. Keep flammable solvents away from heat sources or direct sunlight.
Clean up spills immediately using absorbent materials. Follow local regulations carefully when disposing of leftover paint or solvent-soaked rags.
Never pour solvents down the drain or throw them in regular trash bins. Check with your city’s environmental department for proper disposal methods.
What to check:
- Look for any signs of corrosion on containers, which may indicate they need replacement.
- Check local regulations for specific guidelines on disposing of hazardous materials in your area.
- Ensure you have the appropriate personal protective equipment (PPE) when handling solvents.
Common mistake:
Many people assume it’s safe to pour leftover paint or solvents down the drain, but this can lead to serious environmental issues and may even damage your plumbing. Always dispose of these materials responsibly.
Low-voc and Environmental Product Choices
Choose low-VOC or zero-VOC paints to minimize environmental impact, following local regulations.
What to check:
- Product labels: Look for VOC content (usually listed as g/L). Lower numbers mean lower emissions.
- SDS sheets: Check for any special handling or disposal instructions.
If the VOC level is above 50g/L, consider it high-VOC. If it’s below 10g/L, it’s low-VOC.
When to choose lower-VOC products:
- In confined spaces (garages, basements) to reduce exposure risks and keep air cleaner during the job.
- For long-term projects or occupied areas to minimize ongoing off-gassing.
Common mistake: Assuming all “eco-friendly” or “low-odor” paints are low-VOC. Always check the label.
Consequence: Increased exposure to harmful chemicals and potential health issues, especially in confined spaces.
Cost vs. Prevention: When to Invest in Quality and When to DIY
Investing in quality prep and proper materials upfront sets the tone for whether you DIY or hire, as it frames ROI by weighing upfront investments—primer, sealants, tools, moisture testing—against post-failure costs like repainting, repairs, and trip fees. Use a simple cost framework with rough ranges for prep materials, high-quality paints, specialty primers, and typical pro labor to compare scenarios.
High-value investments include thorough surface prep, moisture barriers where needed, and correct sealing. Skipping these steps often leads to peeling, blistering, and ongoing maintenance costs. Look out for failure warning signs—rising moisture, peeling or bubbling paint, damp walls—and treat them as triggers to pause DIY efforts and escalate to professional help.
Cost Breakdown: Typical Repair vs Full Refinish
Spot repairs can range from $50 to $100 for materials and labor. This is typically suitable when you notice:
- Minor chips or scratches (less than 1/4 inch wide).
- A small area of peeling paint (less than 2 square feet).
- Mild discoloration or stains.
If the damage is more extensive, consider a larger repair or full refinish. Sanding and buffing a larger area might cost around $200 to $400, but it’s crucial to check for:
- Widespread peeling or chipping.
- Significant discoloration or stains.
- Previous repairs that have failed.
A common mistake is attempting a full refinish without proper preparation. This often leads to paint not adhering well, resulting in premature failure and costly redo.
A full panel or room refinish often ranges from $500 to over $1,000 for materials and labor. This includes stripping old paint, priming, and applying multiple coats of high-quality paint. It’s typically recommended when you observe:
- Widespread damage that can’t be repaired locally.
- An outdated color or style that doesn’t match your current decor.
- Previous repairs that have failed repeatedly.
When to Hire a Pro
If you notice significant structural corrosion or rust on metal surfaces, hire a professional who can assess and treat these issues effectively before painting.
What to check:
- Flaking or bubbling paint that reveals bare metal.
- Rust that has spread over large areas (more than a few inches).
- Widespread surface pitting or holes in the metal.
When to hire:
- If you’re unsure about your ability to prep and paint the surface safely.
- When the damage is extensive, requiring specialized repair techniques.
- Before attempting to match complex colors or blends.
Common mistake: Attempting to paint over severe rust without proper treatment can lead to premature peeling and further corrosion.
Affordable Upgrades That Prevent Rework
Investing in high-quality painter’s tape can save time and money by reducing touch-ups. A good quality primer also enhances adhesion and durability of your paint job.
What to check: If the tape’s edges lift or peel, it’s not high-quality; replace with a better brand. When painting, if you notice uneven coverage or drips, consider upgrading your application method.
- Check tape’s edge seal for proper adhesion
- Observe paint flow and consistency during application
- Inspect surfaces for any remaining imperfections before painting
- Ensure primer is compatible with your chosen paint type
- Monitor paint coverage, looking for missed spots or overapplication
Common mistake: Using low-quality tape can lead to paint bleeding under the edges, ruining your finished look.
Upgrading to a High-Volume Low-Pressure (HVLP) spray gun might seem like an upfront expense, but it ensures better coverage and finish quality, reducing the likelihood of needing rework due to poor application technique.
Planning, Scheduling, and Maintenance for Long-lasting Finishes
Planning, scheduling, and maintenance keep finishes looking new and prevent problems before they start, so you lock in the right environmental windows, coat timing, cure expectations, and a practical prep sequence you can actually follow, with explicit steps and realistic buffers. Count on indoor projects in mild seasons, outdoor work with strict limits on heat, cold, or humidity, and a clear timetable for cleaning, etching or profiling, patching, priming, applying coats, and allowing cure and recoat intervals based on primer type and surface porosity, with buffer days for longer dry times when the air is damp and conditions shift.
Testing moisture levels and respecting cure times matters more than gut feeling; use a pin test or moisture meter to know when concrete is fully cured and when it can accept the next coat, and log recoat intervals to avoid adhesion failures, which saves you from redoing work later. A practical maintenance calendar for routine cleaning, inspections, touch ups, and resealing keeps color and adhesion intact, saves you money, and helps you plan reminders so you can act before small issues become big jobs that disrupt progress.
Scheduling Coats and Cure Time Charts
Timing is key in painting concrete. Wait too long, and the surface can get dirty or damaged. Rush it, and you risk poor adhesion or cracking.
For most paints, wait at least 24 hours between coats to ensure proper curing. Epoxy primers might need up to 7 days depending on thickness and temperature. Check your paint’s data sheet for exact times.
Use a pin test or moisture meter before painting to confirm the concrete is dry enough. If it’s too wet, wait until readings are consistently low. This prevents blisters and peeling later on.
Long-term Maintenance and Touch-up Tips
Maintaining your painted concrete is crucial for longevity. Regular cleaning keeps dirt from building up and damaging the finish over time.
What to check: Inspect surfaces annually for signs of wear, such as chips or cracks. What you’ll see: Small hairline cracks, minor chipping, or discoloration.
- If there are small chips (<1 inch), touch up immediately with your kit to prevent spreading.
- When you notice hairline cracks, apply a flexible filler before repainting to seal them.
- Check for any peeling or bubbling paint, which indicates moisture underneath. Address promptly to avoid further damage.
Common mistake: Using the wrong type of paint or primer for your surface can lead to premature failure and costly redoing.
Use a mild detergent and water to clean surfaces, then rinse thoroughly. Avoid harsh chemicals that can strip away protective layers or cause fading. Keep touch-up kits handy with extra paint and primer in case of small chips or scratches. Address these issues promptly before they spread.
Visual Checkpoints and Troubleshooting Checklist
Before and after painting, inspect your concrete for any signs of trouble to catch problems early.
- Check for: hairline cracks or chips in the surface before priming. If present, use a concrete filler to repair before proceeding.
- Look for: uneven patches that might need more primer or filler. When found, apply additional material to ensure even coverage and adhesion.
- Inspect corners and edges where paint tends to peel.
- Check for any existing peeling or flaking.
- Ensure these areas are properly primed and painted.
- Apply painter’s tape to protect from overspray if necessary.
Common mistake: Not cleaning tools thoroughly. Consequence: Old paint residue can mix with new paint, affecting adhesion and finish.
- Verify proper mixing ratios if using two-part epoxy systems. Incorrect mixing can lead to poor curing and reduced durability.
- Check weather forecasts before starting work; avoid painting in extreme conditions. High heat, cold, or humidity can affect paint performance.
- Look for any signs of moisture on the surface during curing. Moisture can cause bubbling, peeling, or mildew growth.
- Inspect painted areas for bubbling or cracking after 24 hours.
- If movement or shifting is noticed, stop and address it immediately.
- Repair any issues found to prevent bigger problems down the line.
Conclusion
Finish that lasts starts with solid prep, the right materials, and careful masking. Prioritize safety, avoid guesswork, and stay within proven steps to protect both the job and your home’s value.
First, clean and repair the surface, test a small area, prime where needed, and confirm the paint and sheen match the job. Then gather the right tools, mask edges and nearby surfaces, and set limits on temperature, humidity, and ventilation. Mix and apply in controlled passes, follow cure times, and inspect for adhesion issues or bleed before moving on to maintenance.
Common mistakes to avoid include rushing the prep or masking, skipping a test patch, and ignoring environmental controls or ventilation. Don’t skip safety gear, don’t apply across a surface that’s damp or dirty, and don’t push through when you’re unsure about adhesion or lead paint concerns. If any sign of failure shows up, reassess, then either redo the prep and fix or call a pro—protecting the work today saves costly repairs tomorrow.
When to call a professional is clear: large areas, lead or asbestos concerns, major water damage, or complex color and finish requirements. For most DIY projects, you can finish strong with steady planning and careful testing. Stay deliberate, stay safe, and you’ll get a durable, attractive finish that lasts.
FAQ
Why should I prep my walls before painting?
Slap paint on dirty, damaged surfaces and you’ll regret it. Prep includes cleaning, sanding, priming – don’t skip these steps.
What causes paint to peel? And how can I fix it?
Moisture and poor prep are the usual suspects. To fix: scrape off peeling paint, sand, apply primer before repainting.
Why didn’t my ceiling paint cover in one coat?
Ceilings are tricksters – they’re harder to reach and show every drip, roll mark. Expect two coats, maybe three for best results.
Can I just paint over previous dark colors with lighter shades?
Nope, you’d need a miracle or an extra day off work. Unless you like seeing ghostly dark hues through your new color, use a primer first.