
Introduction
Spray on Roof Coating: DIY Basics + Pro Tips for Better Results explains how to protect and extend the life of a roof using a spray-on coating.
The guide walks through practical steps such as assessing roof conditions, selecting the right coating, preparing the surface, and applying the coating with best-practice techniques.
You’ll learn tips for troubleshooting, avoiding common mistakes, and maintenance that helps keep results lasting.
Key takeaways
- Assess roof condition before coating and identify leaks, rust, or damage.
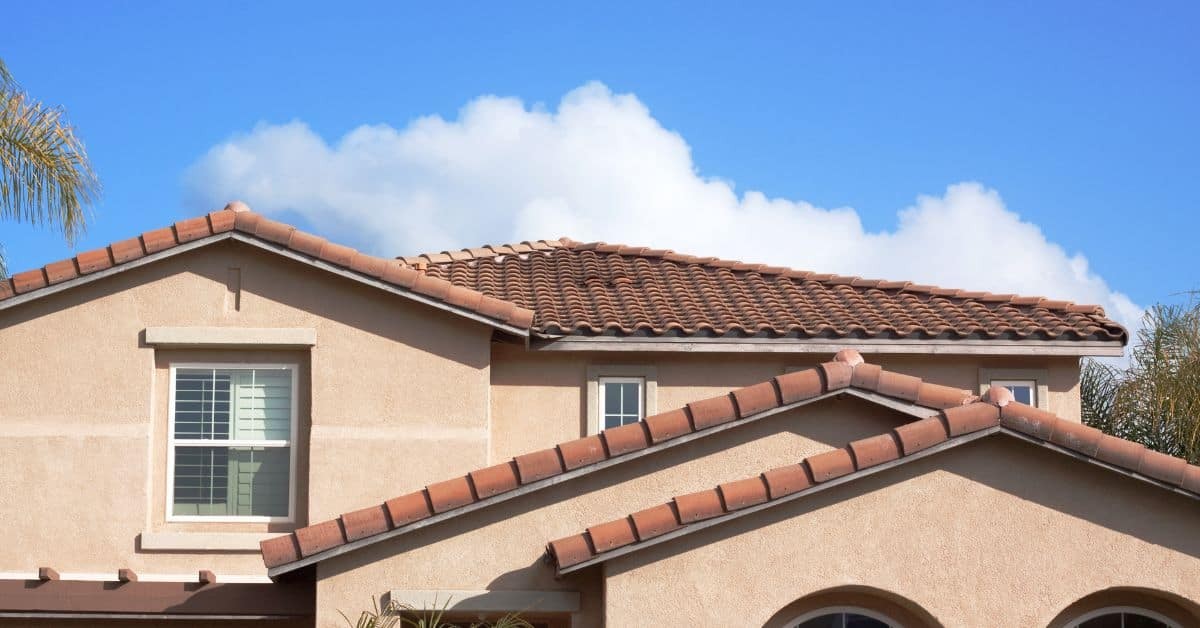
- Choose elastomeric or acrylic coatings based on climate and roof type.
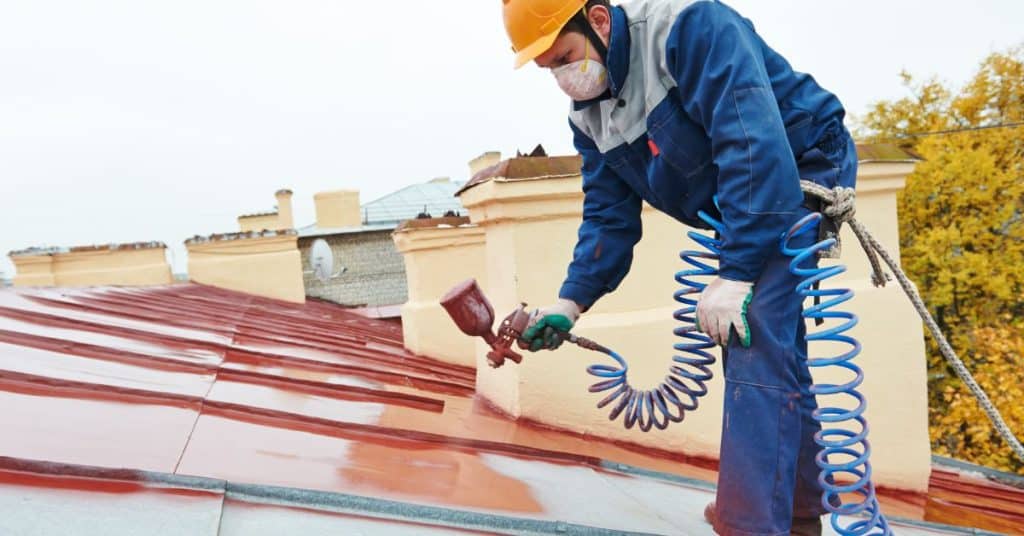
- Apply in thin, even layers using recommended spray technique and passes.
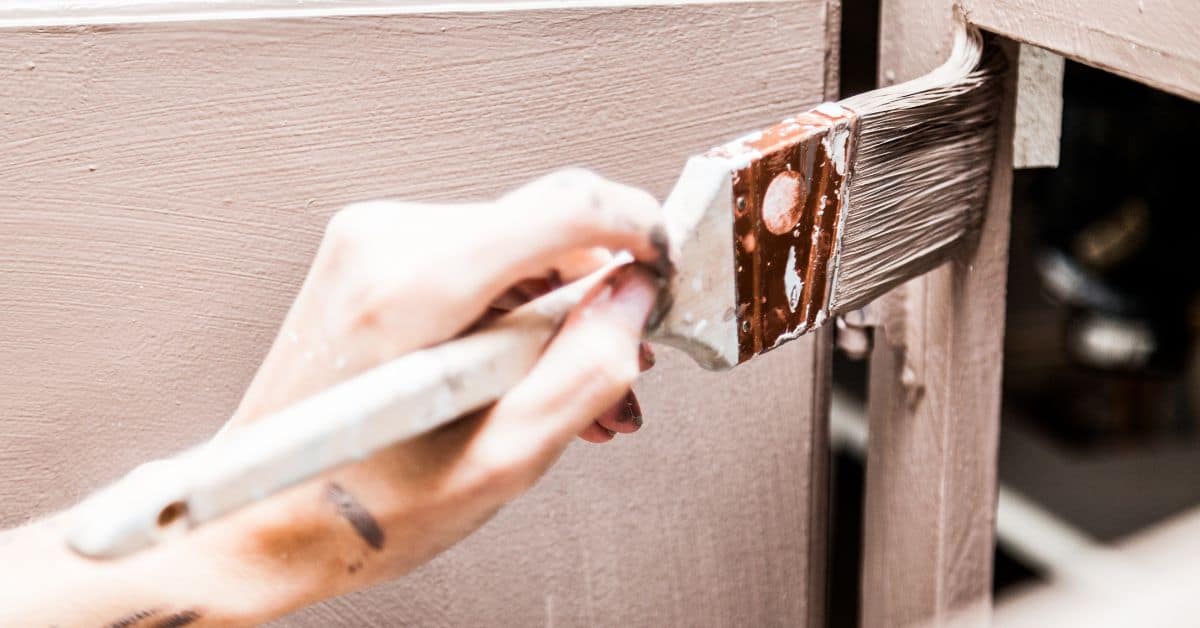
- Prepare surface by cleaning, drying, and priming according to coating specs.
- Prioritize safety with fall protection, ventilation, and proper weather window.
- Inspect after cure and schedule seasonal checks for coating integrity.
Table of Contents
- Introduction
- Key takeaways
- Types of Spray-On Roof Coatings
- Tools, Equipment, and Materials Checklist
- Planning Your Project: When to DIY vs Hire a Pro
- Preparing the Roof Surface
- Application Techniques and Pro Tips
- Safety Precautions and Compliance
- Post-Application Maintenance and Inspection
- Common DIY Mistakes and How to Avoid Them
- Conclusion
- FAQ
Types of Spray-On Roof Coatings
This section covers four spray-on roof coatings—acrylic, silicone, polyurethane, and elastomeric—with quick definitions and how they handle UV, waterproofing, and movement. Each type works best on certain substrates like concrete, metal, asphalt, or worn coatings, and each needs its own surface prep. You’ll see the basic prep steps you should do before you spray.
This matters because the wrong coating can fail early or blister and peel. Use it as a practical guide to match substrates, prep needs, and budget against performance, but always verify with the label or datasheet for cure times and compatibility, and check moisture/temperature windows on site.
Coating performance and durability
When it comes to spray-on roof coatings, the key is understanding how each type holds up over time. Acrylic coatings are known for their flexibility and UV resistance but can be less durable in extreme temperatures or heavy ponding water scenarios.
On the other hand, silicone coatings offer excellent temperature tolerance and elasticity, making them ideal for roofs with significant thermal swings. However, they may not provide as strong a barrier against UV rays over long periods without regular maintenance.
Elastomeric coatings stand out for their ability to bridge small cracks and resist ponding water due to their thick, rubber-like texture. They are highly durable but can be more expensive upfront compared to other options.
Finally, polyurethane coatings offer the best waterproofing and UV resistance but require careful application to avoid issues like blistering or chalking over time. Each type has its unique strengths and weaknesses, so choosing based on your specific roof conditions is crucial.
Environmental and regulatory considerations
Before applying any spray-on roof coating, it’s important to check local building codes and warranty requirements. Some coatings have restrictions or recommendations for certain types of roofs or climates.
VOC (volatile organic compound) levels are another critical factor. High-VOC products can be restricted in areas with strict air quality regulations. Always read the product label and consult your local environmental agency to ensure compliance.
Temperature and humidity also play a significant role in application success. Most coatings have specific moisture and temperature windows for optimal performance, typically ranging from 40°F to 90°F (4°C to 32°C) with low humidity levels. Applying outside these ranges can lead to poor adhesion or curing issues.
Lastly, consider the long-term environmental impact of your choice. Some coatings may require more frequent recoating due to UV degradation, which could add up in terms of both cost and environmental footprint over time.
Tools, Equipment, and Materials Checklist
This section covers a complete DIY-friendly checklist for tools, equipment, and materials you’ll need for roof coatings, including spray methods (airless vs HVLP), core spray rigs, hoses, fittings, and power sources, plus tips, PPE, and surface prep supplies. You’ll also see guidance on mixers, drum pumps, and the right setup and storage practices to keep things safe and ready to go. Expect notes on spray tips, rotation aids, and accessories without guessing at exact numbers.
Why it matters: a solid checklist helps you pick the right method and gear for your coating job, avoid common setup mistakes, and stay safe on the roof. Following practical, homeowner-friendly guidance keeps you moving, reduces waste, and makes cleanup and storage simpler, with clear reminders to check labels or datasheets for mixing and transfer details. If something isn’t clear, check the product instructions and your local guidelines before you proceed.
Choosing the Right Spray System and Accessories
Before you start your project, use this checklist to ensure you have the right equipment for efficient spraying.
- Pump size: Match pump capacity to coating viscosity; check manufacturer specs. Wrong pump can lead to poor coverage or damage.
- Tips/nozzles: Select tip sizes based on coating type and desired spray pattern; confirm with supplier. Incorrect tips cause uneven application.
- Hose length/diameter: Ensure hoses reach all areas without kinking; measure layout for accuracy. Short hoses limit mobility, long ones can restrict flow.
- Fittings: Verify compatibility with pump and nozzles; test connections before use. Loose fittings cause leaks or blockages.
- Power source: Ensure adequate power supply (electricity, gas); check voltage requirements. Insufficient power leads to inefficiency.
- Turbine/nozzle coverage: Confirm nozzle size matches spray pattern; test on small area first. Incorrect coverage wastes material and time.
- Tip guards: Install tip guards to prevent clogging; inspect regularly for damage. Missing guards lead to frequent cleaning stops.
- Equivalent sets: Have backup tips/nozzles for different coatings; store in labeled containers. Running out of parts delays work.
Quick rule: Always test equipment before starting the project to avoid costly mistakes.
Personal Protective Equipment and Safety Gear
Before you begin, use this checklist to ensure all necessary PPE is ready for your spray-on roof coating project.
- Respirator: Choose an air-purifying mask; check filter compatibility with coatings. Not wearing can cause respiratory issues.
- Goggles: Wear safety goggles or face shield; inspect seals before use. Missing protection causes eye irritation.
- Gloves: Use chemical-resistant gloves; confirm fit and material type. Bare hands lead to skin burns.
- Coveralls: Wear full-body coveralls; ensure no exposed skin areas. Clothing contamination leads to cleanup hassle.
- Fall protection: Use harnesses, lanyards, and anchor points; inspect equipment regularly. No fall protection risks serious injury or death.
- Hearing protection: Wear earplugs or earmuffs; check for proper fit. Loud noise causes hearing damage.
- Lint-free rags: Have plenty of lint-free cloths on hand; store in sealed containers. Dirty rags cause contamination issues.
- Spill kits: Keep spill cleanup supplies nearby; ensure kit contents are up-to-date. No cleanup leads to environmental damage.
Quick rule: Always wear full PPE before starting any work with spray-on roof coatings.
Planning Your Project: When to DIY vs Hire a Pro
DIY makes sense when you’re dealing with small, simple roof areas, uncomplicated surfaces, and windows of good weather. Start by measuring and assessing roof size, height, slope, accessibility, and any features like vents or skylights that affect coating. Then weigh the current condition—leaks, cracks, peeling coatings, moisture, and substrate integrity—and decide if repairs should come before coating.
Keep in mind warranties and manufacturer requirements, since DIY can affect coverage or require licensed applicators for certain terms. Time, cost, and your skill level matter just as much as the rooftop itself, so map out a realistic prep to finish timeline and whether you’ll need helpers or safety gear. The simple decision checklist—risk flags, permits, readiness to commit to prep, and a clear threshold for “DIY feasible” versus “Hire a pro”—is what helps you avoid costly missteps in the long run.
Cost comparison and budgeting
To decide if DIY is worth it, start by figuring out the costs. First up, tally your material expenses—this includes the coating itself, primer (if needed), and any other supplies like sealants or patch materials. Then factor in equipment rentals for spray systems and scaffolding. Don’t forget about safety gear too.
Next, get quotes from local pros to see how they stack up against your DIY budget. Remember, pro prices cover their time, expertise, and insurance. A good rule of thumb is that if the total cost of materials plus rental fees comes close to or exceeds half of what a pro would charge, it might be smarter to hire out.
Lastly, build in some buffer for unexpected expenses like extra sealant or repairs you hadn’t planned on. This way, you’re not caught off guard and can finish strong without breaking the bank.
Scheduling and weather planning
The timing of your project is crucial for success. Ideal conditions are when temperatures hover between 50°F to 90°F (10°C to 32°C) with low humidity. Avoid spraying on days forecasted to have high winds or rain.
Once you’ve picked a good window, plan for the coating’s cure time—this can range from a few hours to several days depending on the product and weather conditions. Make sure your roof is off-limits during this period so it cures properly without damage.
To handle unexpected weather changes, have a backup schedule ready. Keep an eye on forecasts leading up to your project start date and be prepared to shift gears if needed. This flexibility can save you from costly delays or ruined work.
Preparing the Roof Surface
Preparing the roof surface means inspecting for damage and confirming the structure is sound before you start. Clean out leaves, dirt, moss, and granules with care, using pressure washing or detergents as appropriate to avoid damage. Fix loose fasteners, cracks, and flashing issues, then prime the surface and mask edges, vents, and fixtures to prevent overspray.
Doing it right matters because proper prep locks in adhesion and long-term performance. If you’re unsure about repairs or primer compatibility, check the label or manufacturer instructions and follow any local safety rules, then plan a suitable weather window and give the surface time to dry before coating.
Common roof defects and repair tips
Before you start spraying, it’s crucial to inspect your roof for any signs of damage. Look out for cracks in the seams or splits along flashing areas. These can be fixed with a good sealant or roofing cement.
If you spot rust on metal parts like screws or flashing, clean it thoroughly and apply a rust-inhibiting primer before sealing. Blisters are another issue; they indicate moisture trapped under the coating. Poke them carefully to drain water, then patch with a flexible membrane.
Flashing around chimneys and vents often gets neglected but is critical for preventing leaks. Make sure it’s securely fastened and free of gaps or cracks. If you’re unsure about any repairs, consult a professional to avoid costly mistakes later on.
Remember, fixing these issues now will save you money and headaches down the road by ensuring your roof coating adheres properly and lasts longer.
Visual checkpoints before spraying
Before starting to spray, run through this quick checklist to ensure your roof is ready:
- Dry surface: Check that the roof is completely dry. Moisture can affect adhesion and lead to bubbling.
- No debris: Look for any leaves, dirt, or granules left behind after cleaning. They can cause uneven coating.
- Temperature range: Measure the surface temperature; it should be between 50°F and 90°F (10°C to 32°C) for optimal results.
- No standing water: Ensure there’s no pooling of water anywhere on the roof. This can cause issues with drying times and coating quality.
- Proper ventilation: Check that vents are clear and functioning properly, allowing air to circulate freely under the coating.
- No overspray areas: Confirm masking is in place around edges, fixtures, and other sensitive spots to prevent unwanted coverage.
Quick rule: If any of these checks fail, address them immediately before proceeding with spraying. Skipping steps can lead to poor coating performance and wasted materials.

Application Techniques and Pro Tips
Choose the right spray method and nozzle setup, and keep the pressure, tip size, and pattern consistent to prevent thin spots or heavy build. Plan your passes so you maintain even overlap and a steady travel speed, with attention to the distance from surface to avoid runs and holidays. Think in layers: define a target dry film and estimate the wet film per coat, then plan for waste and edge work as you proceed.
This matters because a DIY roof job benefits from predictable coverage and clean transitions, not guesswork. Good prep—clean, dry substrate, compatible sealants or primers, and the right temperature range—lets you spray without adhesion problems or premature failures. Following a thoughtful layering and recoat approach helps you build thickness without dulling, while staying mindful of cure windows and edge handling so corners and joints don’t look rocky or uneven.
Airless spraying best practices
To get the most out of your airless sprayer, start by setting up the right tip size and nozzle pattern. A 0.015-inch to 0.023-inch tip is typically ideal for roof coatings, but adjust based on viscosity and desired coverage. Keep the gun at a steady distance—about 8 inches from the surface—to avoid over-spray or thin spots.
Maintain a consistent speed as you move across the roof. Too fast and you’ll miss areas; too slow and you risk runs and sags. Aim for around 10 to 12 feet per minute. This ensures even coverage without compromising film thickness. If you notice orange peel or texture issues, reduce your spray pattern width slightly.
Avoid spraying in direct sunlight or windy conditions, as these can affect drying times and lead to uneven application. Always test a small area first to dial in the settings before tackling larger sections of the roof.
Troubleshooting common application problems
If you encounter bubbling, it usually means moisture or debris under the coating. Stop and clean the area thoroughly before recoating. For poor adhesion, check if your substrate is properly prepared and free of contaminants.
Fisheye spots are often caused by dirt or oil on the surface. Clean these areas with a solvent and let them dry completely before reapplying the coating. Uneven coverage can be fixed by adjusting your spray pattern width and overlap—aim for 50% to 60% overlap between passes.
Recoat timing is crucial; wait until the first coat is tack-free but still slightly wet for best adhesion. This usually takes about 24 hours, depending on temperature and humidity. For edges and transitions, feather out the coating with a brush or roller to blend it smoothly into adjacent surfaces.
Safety Precautions and Compliance
Safety starts with solid, practical controls for working at height, proper PPE, ventilation, chemical handling, equipment operation, and the right permits. You should set up ladders or scaffolds correctly, use fall-arrest systems and guardrails where required, and ensure safe access to roof surfaces. Wear the right gear: hard hats, eye and face protection, gloves, respirators or other breathing protection when needed, hearing protection, and cleanable coveralls. Keep a ventilation plan for enclosed spaces and know how to handle and store solvents or accelerants. Understand how to operate sprayers safely, manage hoses, and observe simple shutdown and clean-out steps.
This matters because small mistakes here lead to big injuries or costly cleanups. A clear plan helps you spot hazards before you start, keeps dust and fumes under control, and protects family members nearby. Permits and inspections aren’t optional in many places, and having pre-task checklists or notes ready makes inspections smoother and your work safer. Know where spill kits and eyewash or shower access are, and have a quick, practiced plan for chemical exposure or evacuations. If you’re unsure about a requirement, check the product label or datasheet, local rules, and manufacturer instructions before proceeding.
Hazard controls for chemical exposure
When dealing with roof coatings, the primary concern is protecting yourself from harmful chemicals. Always wear a respirator that’s appropriate for the solvent you’re using—check the Material Safety Data Sheet (MSDS) to find out what type of respirator is needed.
Solvents and accelerants can be volatile; handle them with care. Store these materials in well-ventilated areas, away from ignition sources. If a spill occurs, have a spill kit ready and follow the manufacturer’s instructions for cleanup. Keep an eye wash station nearby in case of accidental contact with your skin or eyes.
First aid is crucial if you get exposed to chemicals. Have a first aid kit on hand and know how to use it. If you experience any irritation, flush the affected area immediately with water and seek medical help if necessary.
Working safely on roofs
Fall protection is non-negotiable when working at height. Use a full-body harness connected to an anchor point or a guardrail system. Ladders should be set up properly with three points of contact at all times, and always have someone spot you while climbing.
Weather conditions can make roof work dangerous. Avoid working in high winds or rain; these conditions increase the risk of slips and falls. If it’s too windy or rainy, call off the job until conditions improve.
Communication is key on any jobsite. Make sure everyone knows their roles and responsibilities. Use radios to stay in touch with team members who are out of sight. Regularly check in with each other to ensure safety and efficiency.
Post-Application Maintenance and Inspection
After you finish applying the coating, establish a practical inspection cadence you can actually keep: an initial post‑application check while the surface is still curing or setting, then seasonal or annual visits to verify that it remains sound, and you should record what you see, note any touch‑ups performed, and track elapsed time since the last applied coat. During these visits, watch for peeling, cracking, blisters, chalking, color change, and perform a light adhesion check using safe touch or gentle probing, avoiding anything that could gouge or lift the film; document weather exposure, substrate condition, and any signs of moisture or substrate distress.
Cleaning should remove debris with gentle washing and soft tools, allow evaporation, and avoid high‑pressure spray or aggressive solvents unless the label permits; the aim is to clean without jeopardizing adhesion or masking defects, so follow manufacturer guidelines. For repairs, use spot patching and feathering with compatible sealants for small flaws, and set clear criteria for when to stop there versus when to plan a full recoating, which then depends on wear extent, moisture presence, substrate damage, elapsed time since application, and product curing requirements; always choose a product that matches the existing coating and follow its curing window.
Seasonal inspection checklist
Use this checklist after severe weather events and annually to catch early issues before they become major problems.
- Check for peeling: Look for coating lifting from the surface. If found, it could indicate moisture or improper application.
- Inspect for cracking: Cracks can appear due to thermal expansion and contraction. Address small cracks early to prevent water intrusion.
- Look for blisters: Bubbles in the coating may mean trapped air or moisture underneath. Ignoring them can lead to delamination.
- Evaluate chalking: A white powder on the surface suggests wear and tear. Chalking reduces UV protection, shortening the coating’s lifespan.
- Note color changes: Discoloration might indicate algae growth or chemical reactions. Prompt action can prevent further damage.
- Test adhesion: Gently scrape a corner to see if it peels easily. Poor adhesion means recoating is needed soon.
- Clean debris off: Remove leaves, twigs, and other foreign objects that may trap moisture or cause wear. Debris can lead to premature coating failure.
- Gently wash surface: Use a soft brush and mild detergent solution. Harsh cleaning methods can damage the coating.
Quick rule: Regular inspections help catch issues early, saving you time and money in repairs or recoating.
Long-term care and warranty tips
Maintain your roof coating properly to preserve warranties and ensure longevity. Follow these steps for long-term care.
- Follow manufacturer guidelines: Stick to recommended cleaning methods and products. Deviating can void warranties.
- Address minor repairs promptly: Fix small issues like cracks or blisters as soon as they appear. Delaying can lead to bigger problems.
- Monitor for algae growth: Keep an eye out for green patches, especially in shaded areas. Algae can damage the coating if left unchecked.
- Check substrate condition: Ensure the underlying roof surface is still sound and free of defects. Weak substrates compromise coating integrity.
- Evaluate wear extent: Assess how much the coating has worn down over time. Significant thinning may require recoating.
- Look for moisture presence: Moisture under the coating can cause blisters and delamination. Address it immediately to prevent further damage.
- Consider recoating criteria: If more than 50% of the surface shows wear or defects, consider a full recoat. Partial repairs may not be sufficient.
- Select compatible products: Use materials that match your existing coating type and color for seamless integration. Incompatible products can cause issues.
Quick rule: Regular maintenance and prompt action on minor issues help preserve warranties and extend the life of your roof coating.
Common DIY Mistakes and How to Avoid Them
Common DIY mistakes show up in prep, equipment setup, environmental control, and how thick the coating goes. Skipping thorough surface cleaning, failing to repair damages, using the wrong spray gear, or guessing the film thickness leads to lift, runs, or premature failure. Use a simple, repeatable routine to check porosity, moisture, and adhesion before you spray, and set clear targets from the label or datasheet rather than guessing.
This matters because you can save time and money by catching issues early and following a step by step plan for spraying, curing, and recoating. A quick pre-spray routine, steady climate and humidity control, and careful cross-checks on thickness help prevent common flaws like pinholes or sagging. If something seems off, stop, verify the manufacturer instructions, and decide whether to recoat or strip based on visible defects and test results.
Case studies: fixes and lessons learned
One common mistake is not properly cleaning the roof surface before applying the coating. A homeowner might skip this step, thinking it’s unnecessary or too time-consuming. However, failing to clean can lead to poor adhesion, causing the coating to peel off over time.
Another frequent error is using the wrong spray equipment settings. For example, if you use a nozzle that’s too small for your material viscosity, you’ll end up with clogged lines and uneven application. This happened in one case where a homeowner used a 015 tip instead of a recommended 020, resulting in inconsistent coverage.
Lessons learned from these mistakes include the importance of following manufacturer guidelines closely. Always double-check your prep work, equipment setup, and environmental conditions before starting to spray. If you encounter issues like sagging or pinholes during application, take a step back and reassess your process rather than pushing forward blindly.
Remember, taking the time upfront for thorough preparation can save you from costly repairs later on.
When to stop and call a professional
There are clear signs that indicate when it’s best to hand over your project to a pro. If you notice extensive damage such as large areas of missing shingles or significant structural issues like sagging roof decking, these are red flags.
Another critical moment is if the job involves working at heights where safety risks are high. For instance, if you’re dealing with steep slopes or lack proper fall protection equipment, it’s wise to call in a professional who has the necessary gear and training.
Structural concerns like compromised roof framing due to water damage also warrant professional intervention. These issues require specialized knowledge to assess and repair correctly without risking further damage or injury.
In summary, if you encounter any major structural problems, safety hazards, or complex repairs beyond your skill set, it’s best to stop and consult a roofing contractor who can ensure the job is done safely and effectively.
Conclusion
Take action with confidence by following solid prep, careful testing, and steady, measured spraying. The result will look better, last longer, and keep your roof from misbehaving after a few seasons.
Before you start, inspect the roof and dry it thoroughly, mask off edges and nearby surfaces, gather the right coating and applicator, test a small patch to confirm adhesion and finish, plan the weather window and apply in even coats with proper technique, then allow the coating to cure fully and inspect after cure for any touch-ups or recoat needs. Do the work in the right order and respect the material’s limits; that’s how you avoid costly mistakes and callbacks.
Common mistakes to avoid are skipping surface prep, spraying onto wet or dusty surfaces, spraying in heat, wind, or cold that’s outside the coating spec, and rushing cure time or cleanup. Always wear proper PPE, keep a tidy work area, and never pressure-spray or overspray onto adjacent surfaces. Check local rules and ventilation needs, and test first to ensure you’re not damaging shingles or flashing.
If the job feels too big, or the roof has extensive damage, complex flashing, or steep angles, call a pro before you push ahead. A professional can save you time and avoid expensive remediation. Stay focused, follow the steps, and you’ll finish with a durable, good-looking roof coating you can trust.
FAQ
What is spray on roof coating good for?
It seals leaks and adds a reflective layer to reduce heat. It’s a quick upgrade, but it’s not a miracle fix for a damaged roof. Make sure the roof is sound before applying.
Can I do this myself with basic tools?
You can, but you need proper PPE and surface prep. Read the product instructions and follow them to the letter. Don’t rush the cleanup or you’ll regret it later.
How should I prepare the roof before spraying?
Clear all debris, dry the surface, and fix obvious leaks first. Remove loose coating and treat rust if needed. A clean, dry surface helps the coating stick and last.
How long does it take to dry and cure?
Drying times vary by product and weather. Expect several hours to a full day for a coat to cure. Don’t walk on the roof or apply a second coat until it’s fully cured.